Condiments/Sauces · Vietnamese

Basic Nước Chấm {Vietnamese Dipping Sauce}

Nước Chấm | Vietnamese Dipping Sauce
Chances are, if you have had Vietnamese food, you’ve had some version of nước chấm.

Bún Thịt Nướng (Vietnamese Grilled Pork over Vermicelli Noodles)
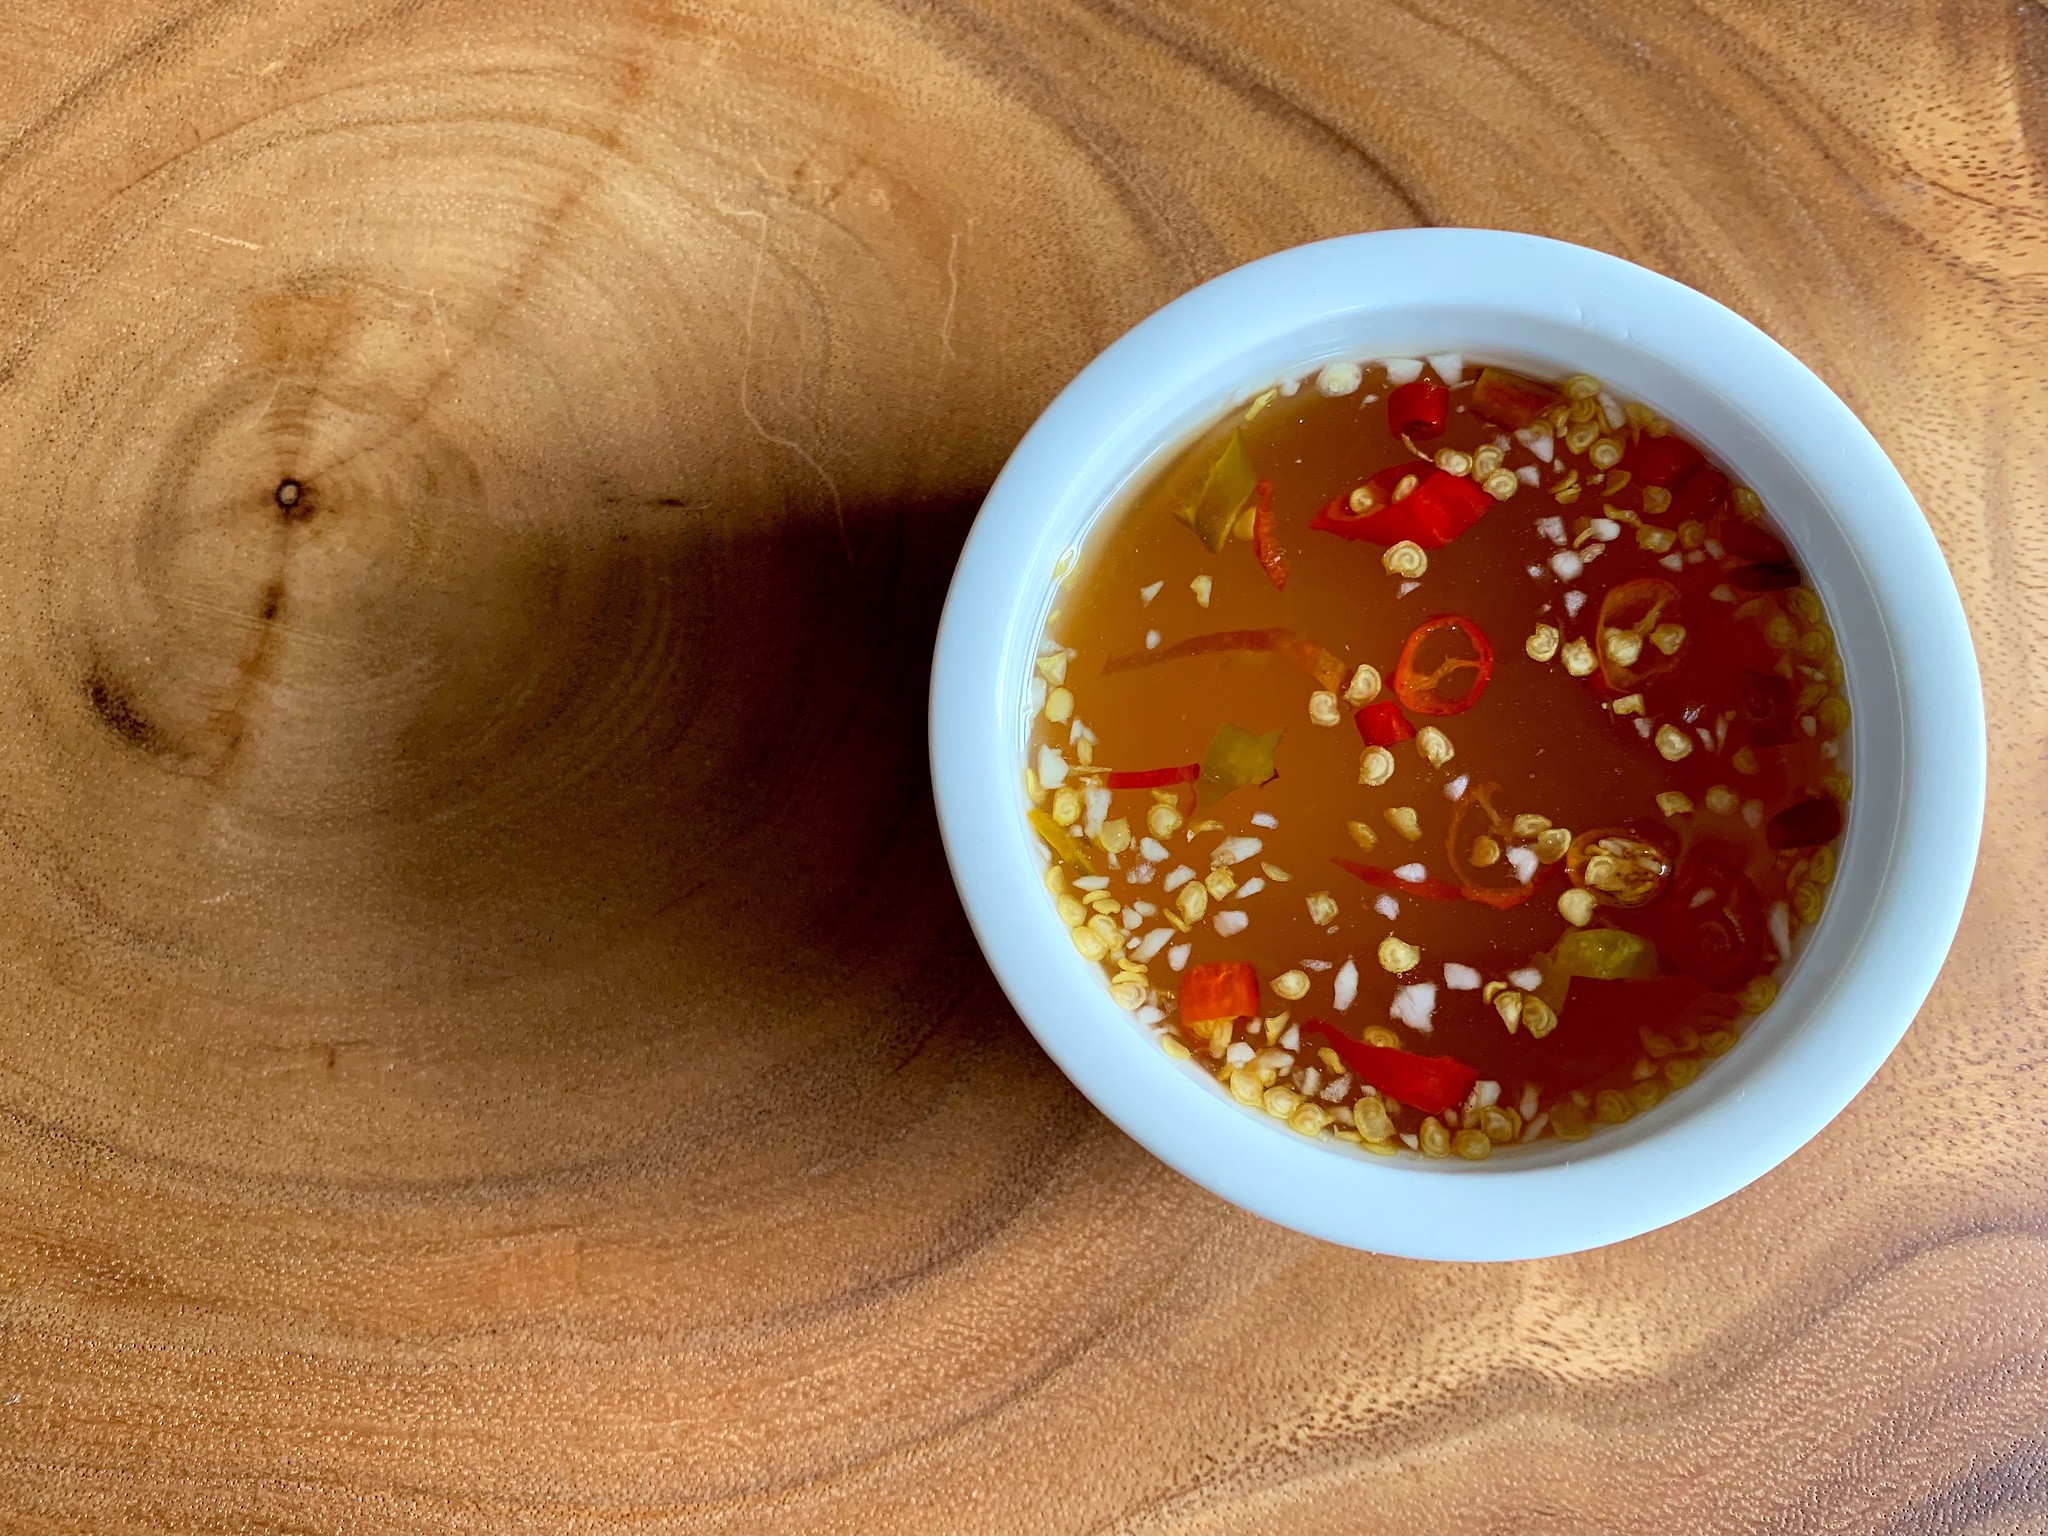
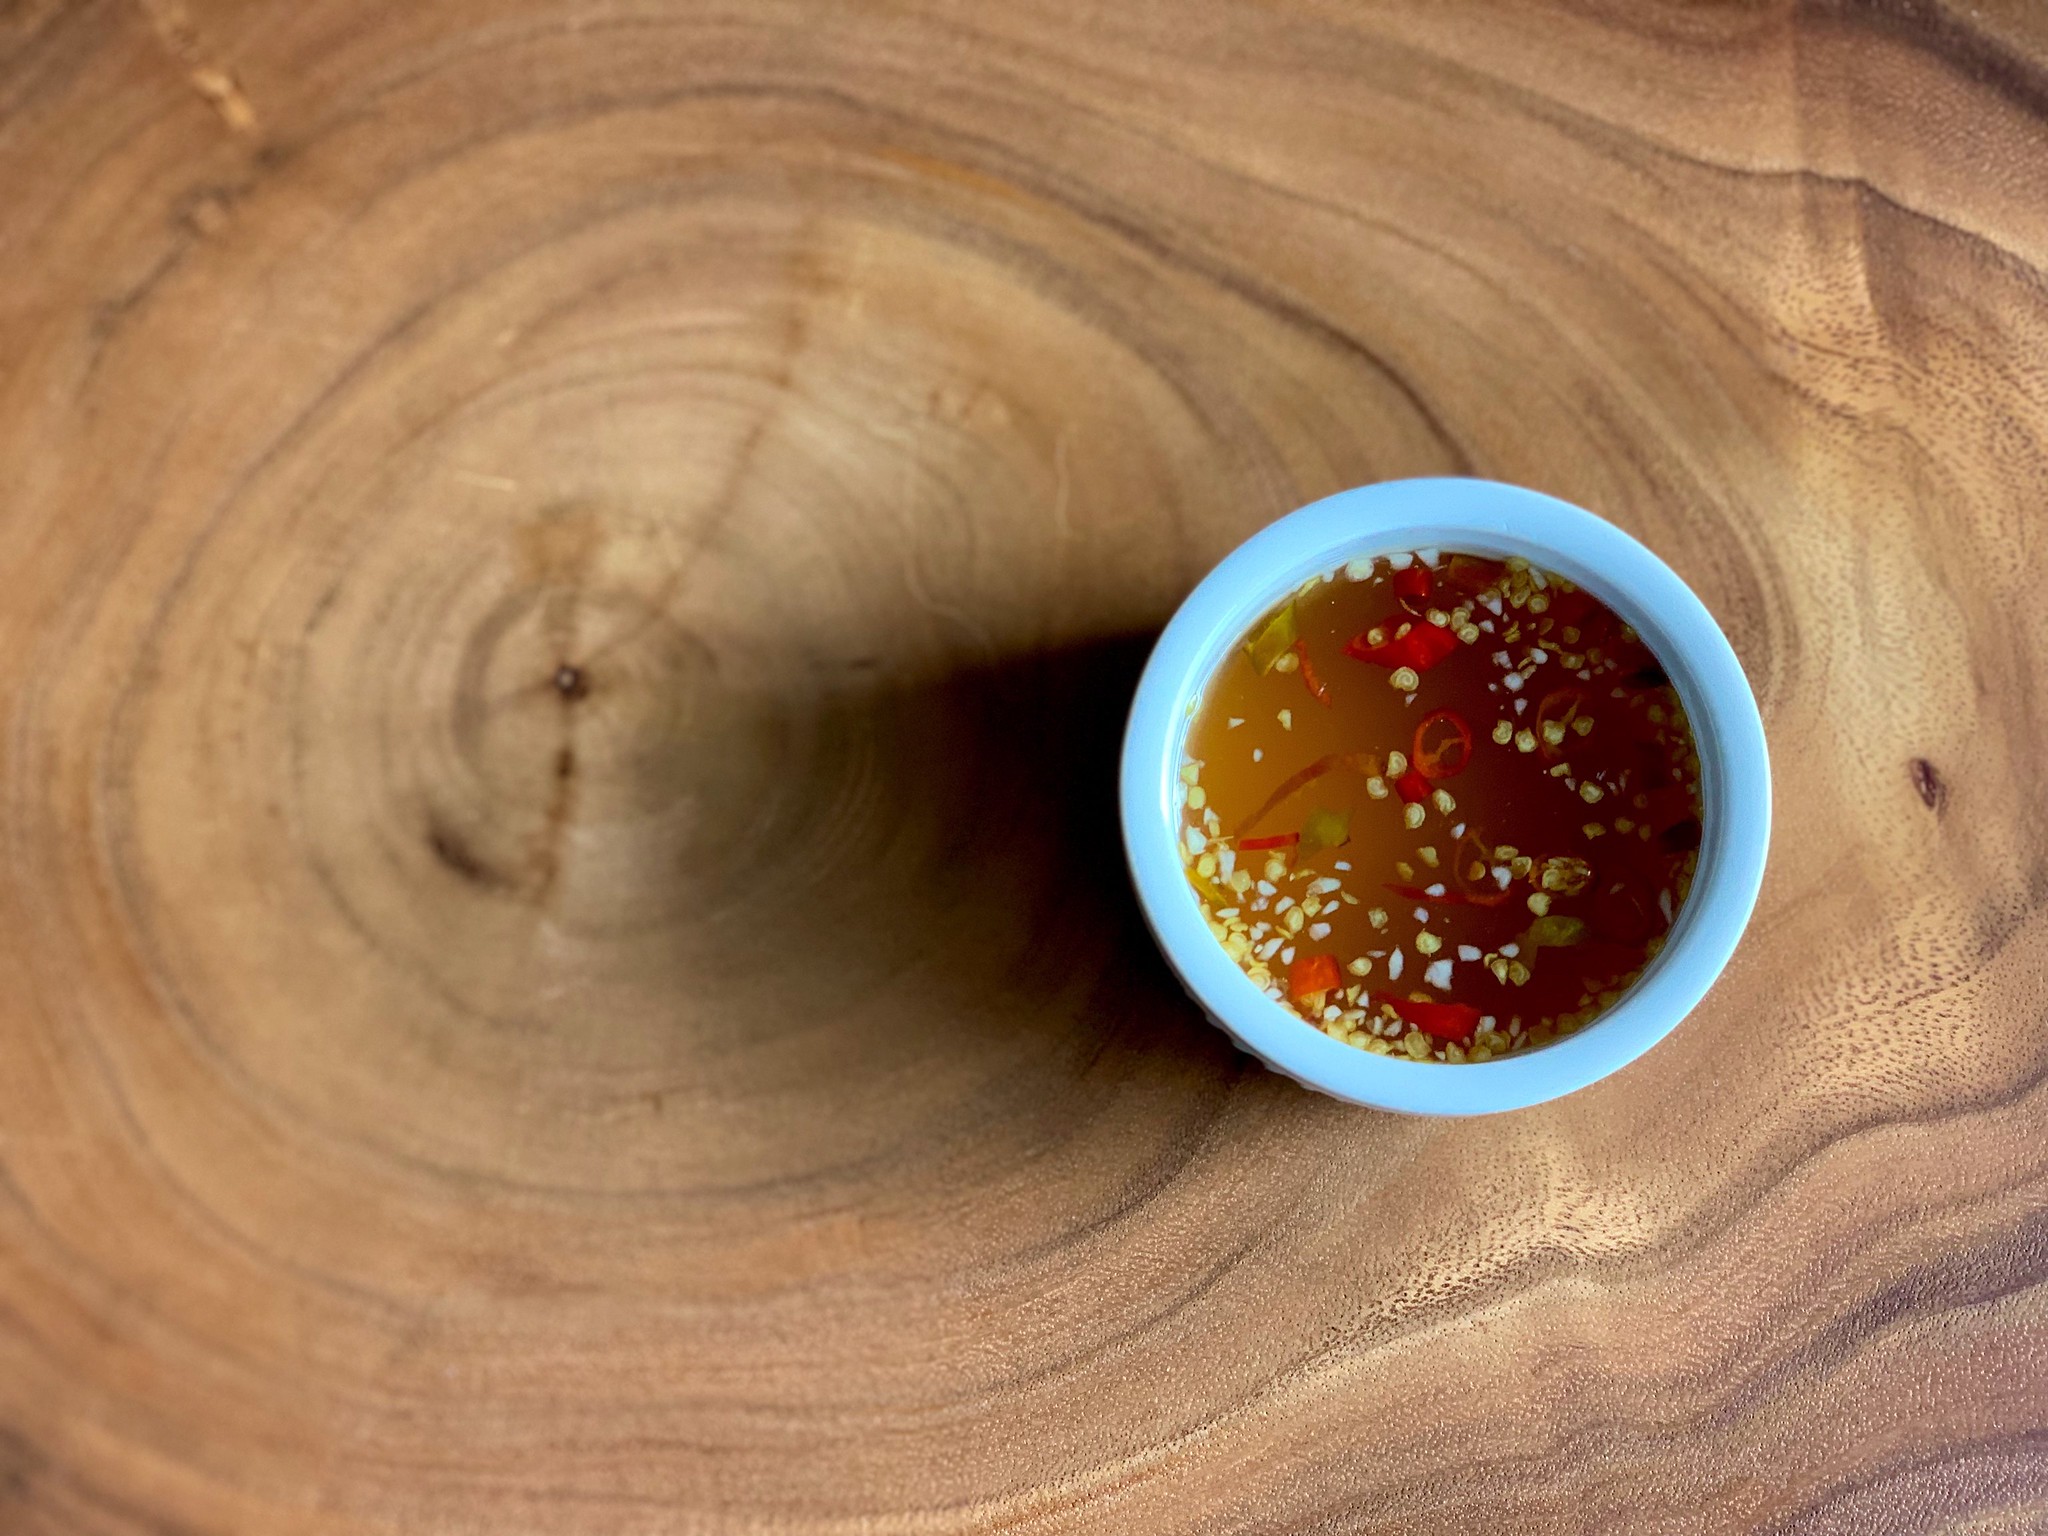
Nước Chấm (also called nước mắm pha) is a quintessential fish sauce-based dipping sauce served with a variety of traditional Vietnamese dishes. And it’s the balance of salty, sweet and acidity that makes it the perfect condiment.

Bánh Xèo (Vietnamese Sizzling Crepe)
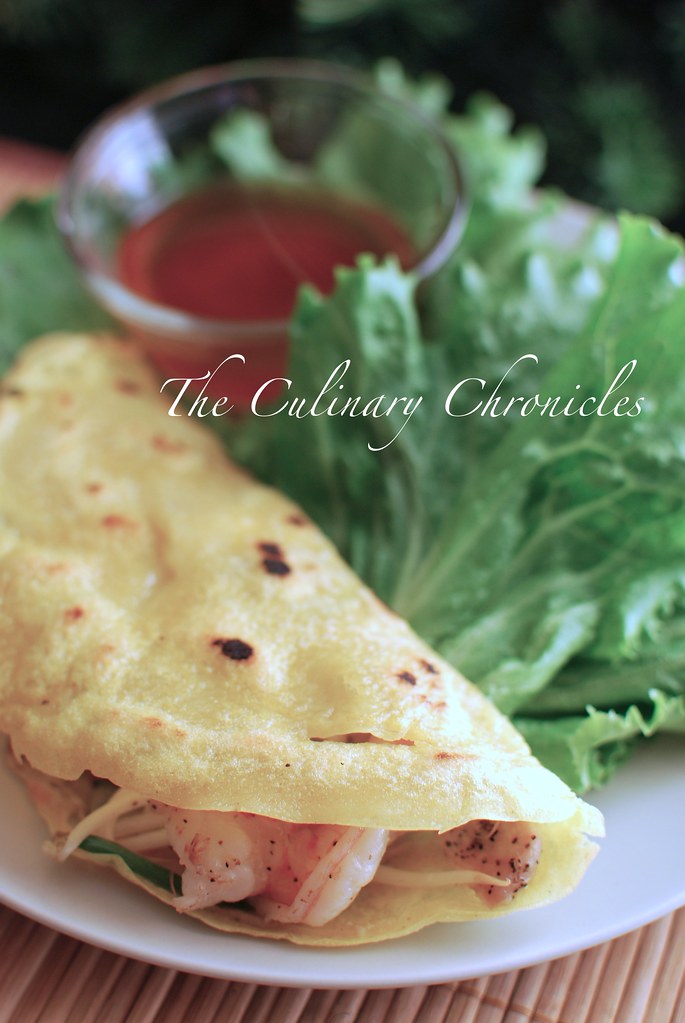
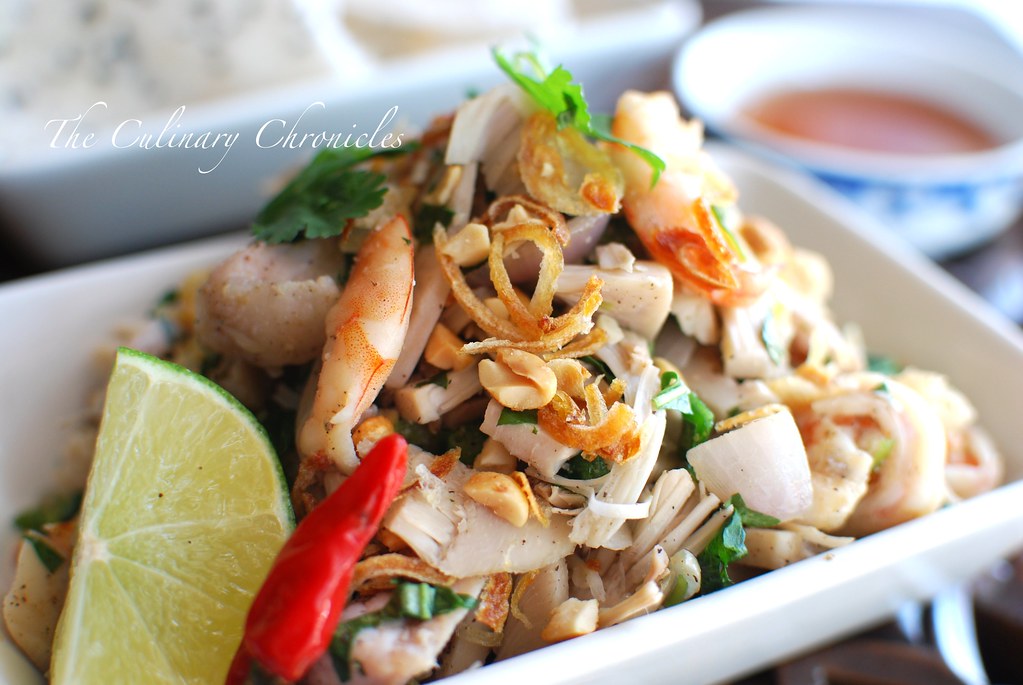
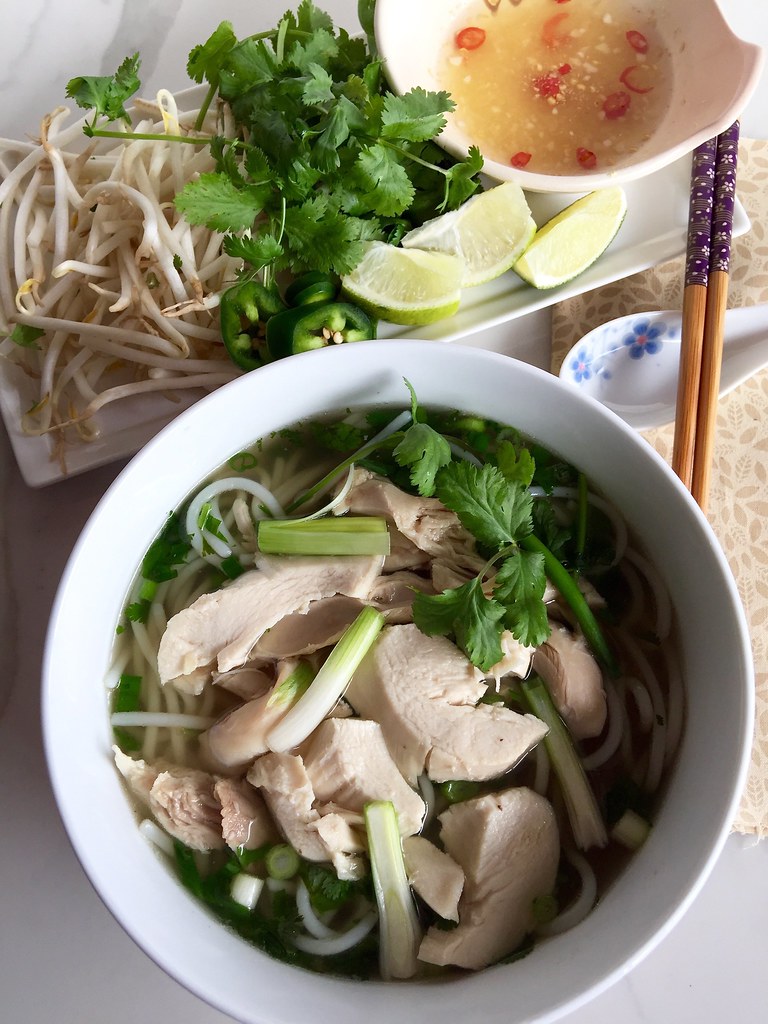
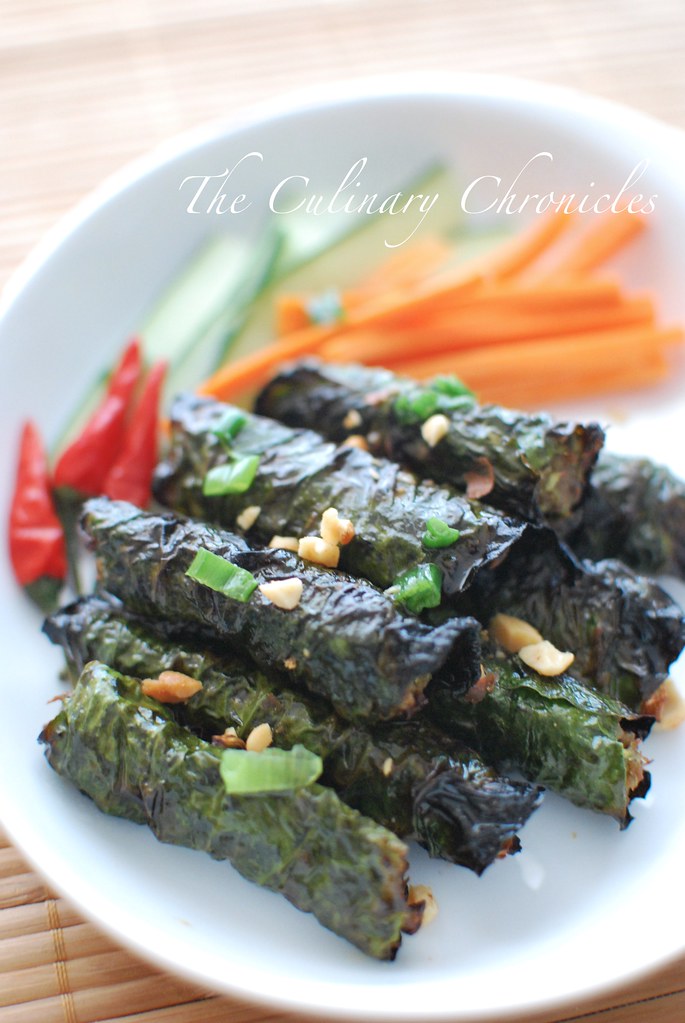
You’ll see it with anything from cơm (rice plates), bún (noodle dishes), gỏi (salads), bánh (cakes – usually savory), cuốn (rolls) or even just with proteins.

Gỏi Mít Trộn (Vietnamese Young Jackfruit Salad)
Depending on the dish, nước chấm can vary a bit but it all starts with a similar base: fish sauce, sugar, water and lime juice (or vinegar).

Chả Cá Thăng Long (Vietnamese Style Fish with Turmeric & Dill)
From there you can add things like fresh ginger and have Nước Mắm Gừng. This ginger variation is most often served with poultry or seafood.

Cơm Sườn Nướng - Vietnamese Grilled Pork Chops
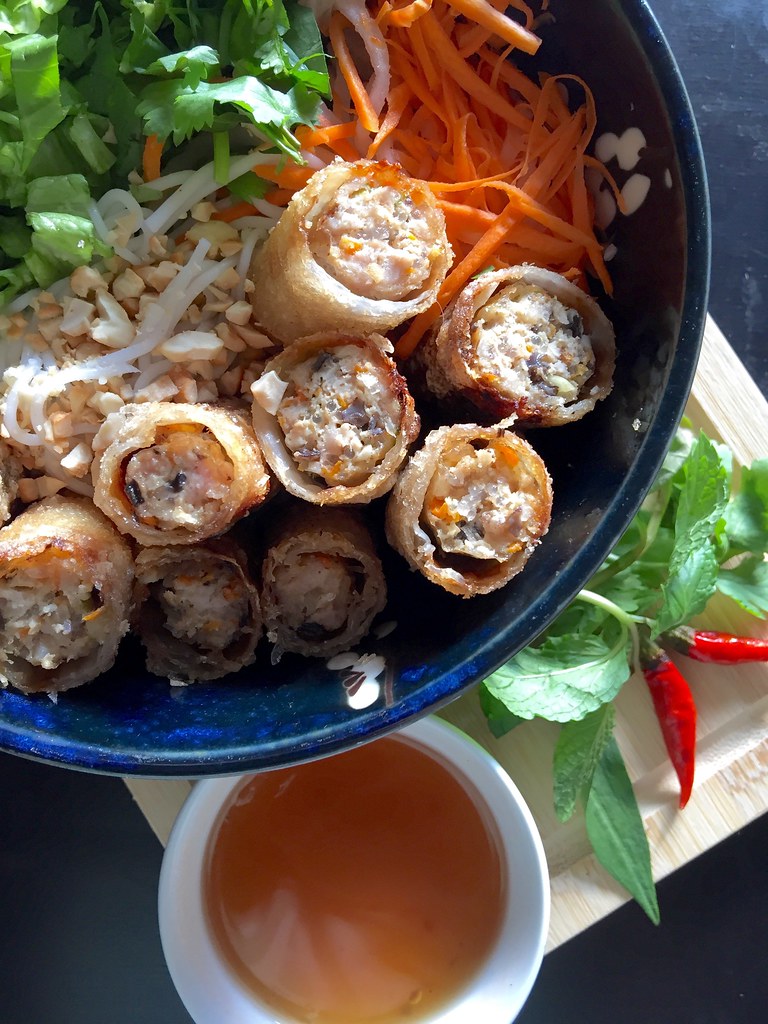
When served along rice noodle bowls, you’ll find shredded carrots and daikon in it.

Phở Gà
And in some cases, proteins are served in nước chấm as with the classic Bún Chả Hà Nội. With this dish, grilled pork and ground pork patties are served in a bowl of nước chấm that also contain fresh green papaya slices in it.

Chả Giò
Since nước chấm is such a staple, I almost always have a big batch of the standard version in my fridge ready to be doctored up if need be. And in most cases, this basic version is perfect as is.

The biggest challenge to this dipping sauce is finding the right balance between the very few ingredients it requires. Trust me, I’ve spent my early years making sauces that were either too sweet or too salty or just bland. Thankfully, I finally was able to get a good ratio down that yields reliable results.

Thịt Bò Nướng Lá Lốt (Vietnamese Grilled Beef Wrapped in Betel Leaves)
One thing to keep in mind is that depending on the brand of nước mắm (fish sauce) that you use, you will have to adjust to taste. Some brands are less filtered and are more pungent –not a bad thing, just something you have to compensate for.

Nước Chấm | Vietnamese Dipping Sauce
After you’ve whipped up a big batch, it’ll last in a sealed container in your fridge for about 3 months. It’ll probably be fine a bit longer but you may lose some of the freshness that the lime juice initially gave.

And whether you add ginger, additional herbs or just use the basic version, your palates will thank you for it!

Ăn Ngon!

_______________________________________________________
Basic Nước Chấm

Ingredients:

1 cup granulated sugar
3 cups boiling water
1 tablespoon minced garlic
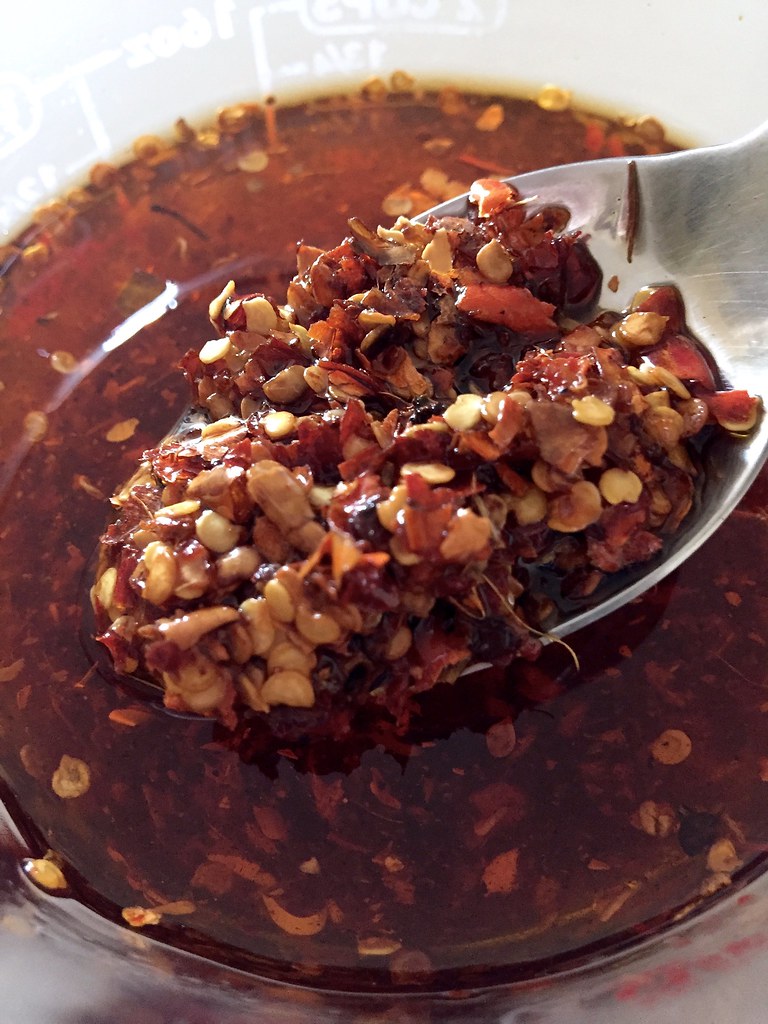
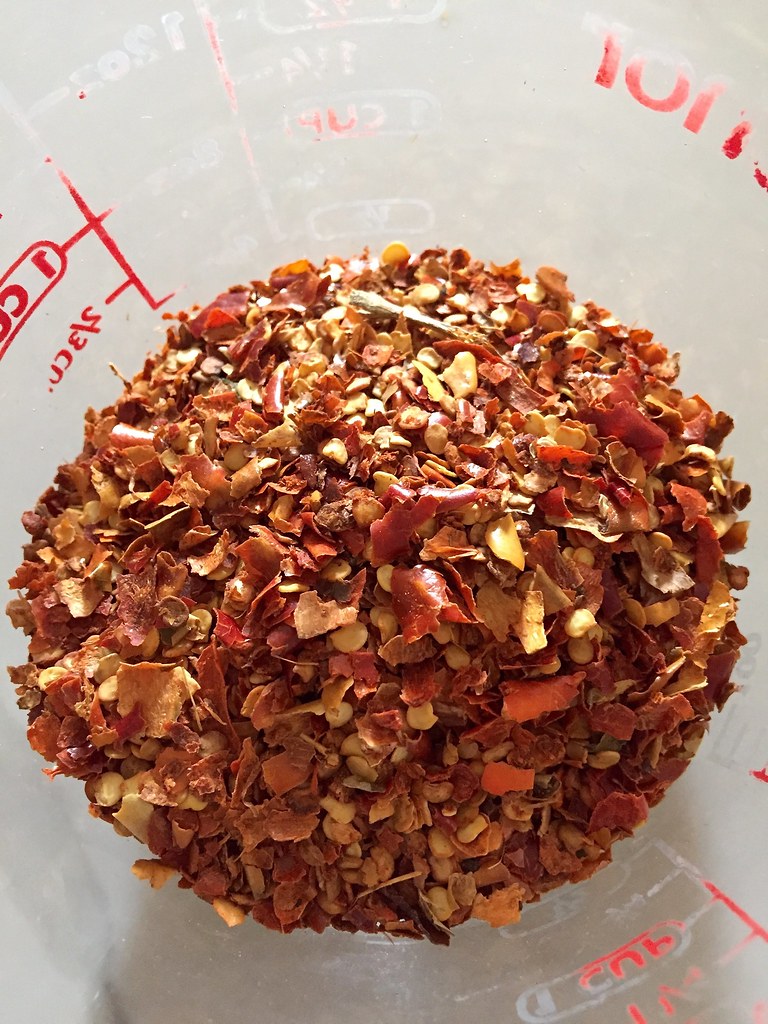
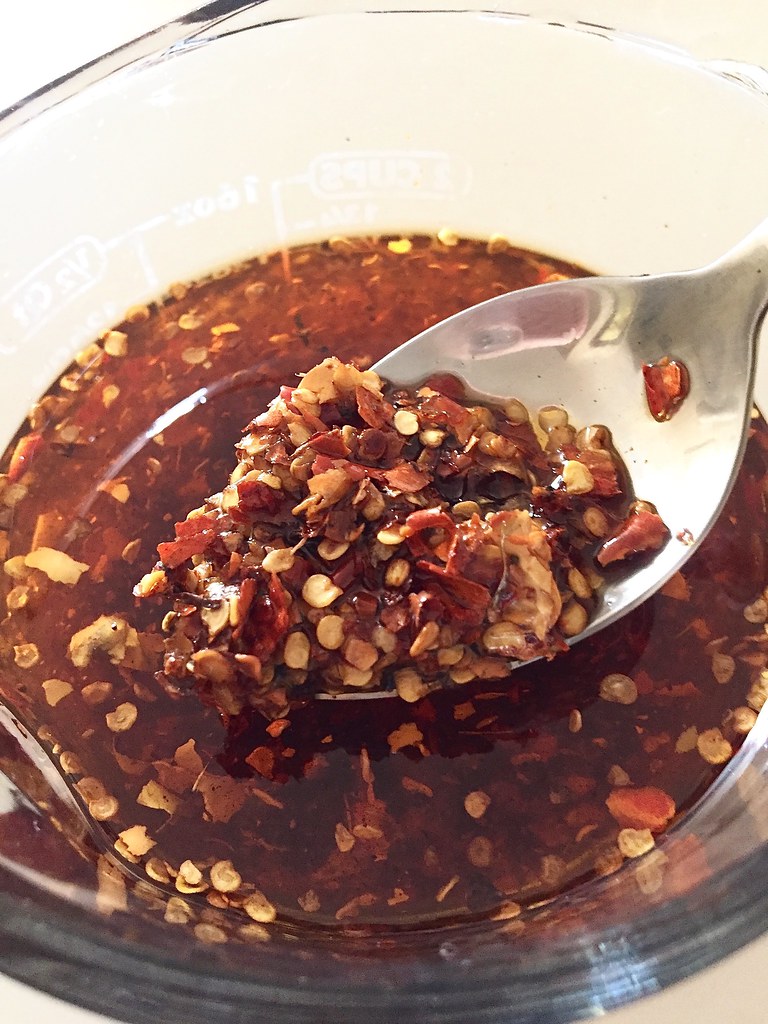
2 teaspoons minced chilies, more or less based on preference
1⁄3 – ½ cup fresh lime juice
1 cup nước mắm (fish sauce)

Place the sugar into a large bowl and slowly pour in the boiling water. Stir until the sugar has dissolved and allow to cool completely to room temperature. Add in garlic, chilies, 1⁄3 cup lime juice and nước mắm. Taste and add the rest of the lime juice if needed — this will vary depending on the type/brand of fish sauce that you use.

The nước chấm can be served as is or stored in a sealed container in the refrigerator for up to 3 months.

Fun Fact: I store my stash of nước chấm in old wine bottles that have screw caps on them. So double check next time you’re rummaging around my fridge for a glass of vino. ❤


Condiments/Sauces

Sichuan Chili Oil – A Kitchen Staple

Sichuan Chili Oil
I know…this seems a random recipe post.

But this kitchen staple plays a big part in a recipe I’ll be posting soon in honor of Tết – the Lunar New Year that will arrive on Friday.

So you’ll want to DEFINITELY stay tuned!

Sichuan Chili Oil
Chili Oil, or in this case Sichuan Chili Oil, is a regular in many Asian cuisine recipes. I use it quite often in soups, stir-frys, dumplings, or as a stand-alone condiment.

Sichuan Chili Oil
And although there are many different jars of it that you can easily buy, homemade is always better–and it’s super easy!

Sichuan Chili Oil
The core of this is the use of whole Sichuan peppercorns that can be easily found at most Asian grocery stores or online. The peppercorns are fragrant and carry a wonderful heat.

To start, the Sichuan peppercorns and dried spices are slowly heated to infuse the oil.

Sichuan Chili Oil
After about an hour, the whole shabang is poured over chili flakes and a bit of salt—and boom!

Aromatic and floral Sichuan Chili Oil!

Sichuan Chili Oil
The oil can be kept in your fridge for a year—but I doubt it’ll keep that long!

Pro Tip? Double the batch and give some away as gifts!

__________________________________________
Sichuan Chili Oil
Makes approximately 21⁄4 cups

Ingredients:

3 tablespoons Sichuan peppercorns
1 teaspoon coriander seeds
1 teaspoon whole cloves
5 whole star anise
4 dried bay leaves
1 whole cinnamon stick
2 cups vegetable oil (or something neutral in flavor)
2 whole garlic cloves, smashed
1 inch piece fresh ginger, cut into slices
1 teaspoon kosher salt
1 cup Sichuan chili flakes

In a small stainless steel* saucepan, heat the peppercorns, coriander, cloves, star anise, bay leaves, cinnamon stick and oil over medium heat.  Once the oil begins to bubble, bring the heat down to low. Allow the oil to infuse over low heat for one hour, stirring every 5-10 minutes. The aromatics should not get too dark so you’ll need to adjust the heat as needed.

After an hour, add the garlic and ginger and raise to medium-low heat. Allow it to bubble and infuse for an additional 2-3 minutes and remove from heat. Allow the oil to cool for 1-2 minutes.

Place the salt and chili flakes in a heatproof bowl and place a strainer on top. Slowly pour the infused oil through the strainer. Remove the strainer and discard the spices. Stir the oil well and allow to cool completely before transferring it to a jar or other container. The oil can be stored in refrigerator for a year.

*You’ll want to use a light bottom pan so that you can see if the oil and spice are getting too dark.

Appetizers/Small Plates · Condiments/Sauces · Vegetables/Vegetarian

Greek Zucchini Fritters {Kolokithokeftedes} with Tzatziki Sauce

June 2016 Fam Din
Kolokithokeftedes.

I know–it’s a mouthful right?

A delicious one.

They are Greek style zucchini fritters and are a perfect dish for summer. Especially if you’re lucky like me and have coworkers who regularly bring you in some of their GINORMOUS, homegrown zucchini.

June 2016 Fam Din
The fritters are filled with tons of fresh herbs, spices and of course, feta.

Mo’ Feta, Mo’ Bettah!

June 2016 Fam Din
I whipped up a batch of these golden beauties as appetizers for our most recent Mediterranean themed Family Dinner. But if you form the patties a bit larger, you could use them in Veggie Burgers or Sliders.

And of course, any leftovers would be brilliant for breakfast or brunch. Just poach up a few eggs and perch them atop a crispy zucchini fritter. Can you imagine that gorgeous yolk oozing over the golden Kolokithokeftedes?

To. Die. For.

June 2016 Fam Din
At dinner, I served them up with my favorite, cool and bright Tzatziki Sauce.

And do yourself a favor, make a double batch of Tzatziki as it stores well in the fridge for a few days. It’s great as a dip with veggies, over grilled meats or fish and as a condiment over sandwiches and burgers.

June 2016 Fam Din
Want a last tip?

The patties can also be formed ahead of time and refrigerated the day before you want to fry them up. Great time saver for casual get-togethers or dinners.

Kolokithokeftedes!!! Kolokithokeftedes!!! Kolokithokeftedes!!!

_____________________________________________________
Greek Zucchini Fritters {Kolokithokeftedes} with Tzatziki Sauce
Makes approximately 18 fritters

Ingredients:

Fritters
2-2½ pounds zucchini
kosher salt
¼ teaspoon ground cumin
½ teaspoon dried oregano
¼ teaspoon red pepper flakes
¼ teaspoon black pepper
2 sprigs fresh scallions, chopped
¼ cup chopped fresh dill, more for garnish
2 tablespoons chopped fresh mint
2 tablespoons chopped parsley
4 ounces crumbled feta
2 eggs, beaten
1 cup panko breadcrumbs, more if needed
vegetable oil

Tzatziki Sauce
2 cups Greek yogurt
½ cup sour cream
3 tablespoons minced fresh dill
2 large garlic cloves, finely minced
2 tablespoons lemon juice or red wine vinegar
1 teaspoon fresh lemon zest
2 tablespoons olive oil
1 cup finely diced English or Persian cucumbers
1 teaspoon kosher salt
½ teaspoon black pepper

Wash and trim the zucchini. Using a food processor or box grater, grate the zucchini. Place the zucchini in a colander over the sink and sprinkle salt over the squash. Toss to combine. Allow the zucchini to sit in the colander/sink for about 2 hours to allow the natural liquids to be drawn out. Every 15 minutes or so, toss and squeeze the moisture out of the squash.

While the zucchini drains, prepare the Tzatziki Sauce. Mix all the ingredients in a bowl. Taste and adjust with kosher salt and pepper as needed. Cover the bowl and refrigerate for at least one hour before use.

After the zucchini has properly drained, transfer it to a large mixing bowl. Fold in the cumin, oregano, red pepper, black pepper, scallions, dill, mint, parsley and feta. Taste and add salt if needed. Stir in the beaten eggs and panko. If the mixture seems too wet to form into patties, add additional panko. Cover and refrigerate the mixture for an hour.

Once chilled, form patties that are about 2½-3 inches in diameter. In batches, place the patties in a heavy bottom skillet that has been filled with about ½ inch vegetable oil over medium heat. Fry the patties for about 1-2 minutes on each side until golden brown. Remove and drain on a wire rack.

Garnish with fresh dill and serve warm with the Tzatziki Sauce.

Condiments/Sauces

Fresh and Easy Pico de Gallo

Pico de Gallo2
My confession….

I’ve made pico de gallo at least once a week for the past month.

I can’t help myself — I’m a woman out of control!

Pico de Gallo
Though in my defense, the tomatoes have been beautiful lately—and pico de gallo can be added to everything!

Of course they’re perfect in tacos, quesadillas, burritos, and nachos. It gives an added punch to breakfasts – omelettes, poached eggs, huevos rancheros. And I particularly love to put a few spoonfuls over grilled chicken or broiled fish.

Pico de Gallo4
After all of the pico I’ve gone through, I realized that I’ve never posted a recipe for my basic, tried and true version of it. All of the ingredients are standard items I always keep on hand but it’s just as easy to doctor it up if you’re feeling fancy.

Add some cubed mangoes for a tropical spin.

Diced watermelon to the mix just screams summer loving!

Some ripe avocado would add a creamy texture to the bright pico.

And let’s not forget the option of Fresh Corn Pico de Gallo.

Pico de Gallo3
Super easy to pull together and should definitely be a staple in your fridge — at least for the Summer!

Happy Taco Tuesday!

_____________________________________
Fresh and Easy Pico de Gallo
Makes approximately 4 cups

Ingredients:

3 cups diced tomatoes*
½ cup finely diced red onions
½ – 1 tablespoon finely minced jalapeno pepper (depending on preferred heat)
2 cloves garlic, finely minced
½ cup chopped fresh cilantro leaves
1 tablespoon fresh lime juice
1/8 teaspoon ground cumin
2-3 pinches cayenne pepper (optional)
kosher salt
black pepper

In a bowl, combine the tomatoes, onions, jalapeno, garlic, cilantro, lime juice, cumin, cayenne, ½ teaspoon kosher salt and 1/8 teaspoon black pepper. Cover with plastic wrap and refrigerate for at least 1 hour. Before serving, check for seasonings and add extra salt kosher salt or black pepper as needed.

*scoop out the seeds of the tomato and discard before dicing

Condiments/Sauces · Salads · Vegetables/Vegetarian

Tropical Summer Salad with Sesame-Ginger Dressing

Tropical Summer Salad Main

When I used to live in San Jose, I used to go to a spot called the Sonoma Chicken Coop quite often. They had a pretty extensive menu with affordable prices…and the food was consistent. I used to always rotate between their Skillet Chicken Carbonara, Rotisserie Chickens and whatever specials they were offering for the day.

Yet, despite all of that goodness–what I miss the most is their Citrus Grove Salad. Essentially, it was a big ol’ plate of mixed greens, avocados, mangos, and various citrus fruits. But MAN—was it delicious! And there wasn’t even any meat!!! Which is a big deal for this carnivorous gal.

Sesame Dressing

Since I’m no longer in the Bay Area (and because I heard that many of their locations are now closed… #SadPanda), I like to make my own variation from time to time–especially when summer fruits are wonderfully sweet like they have been as of late.

I like to use whatever leafy greens I have on hand. I used baby spinach in the pics shown here but an arugula-kale mix would be lovely. I top the greens with slices of sweet mango, avocados cucumbers, kiwis, and pink grapefruit. In addition to all of that goodness, I add some goat cheese crumbles for a bit of richness and toasted macadamia nuts for a bit of crunch. Then the whole thing gets a drizzle of a Sesame-Ginger Dressing that I shake up in a mason jar.

Tropical Summer Salad

The end results in an incredibly bright and light dish that can be served as an appetizer or even a main course. But if you’re wanting something a tad heartier, some grilled prawns, chicken, or grilled fish on top of the salad would really send things to the next level.

With that friends…Have a wonderful week and enjoy the last few weeks of summer!

________________________________________________________

Tropical Summer Salad with Sesame-Ginger Dressing
Serves 2

Ingredients:

1 tablespoon toasted sesame seeds, roughly crushed
1 tablespoon finely minced shallots
1 garlic clove, finely minced
½ inch knob ginger, finely grated
1 heaping tablespoon Dijon mustard
1 tablespoon honey or agave
2 tablespoons rice wine vinegar
½ cup extra virgin olive oil
2-3 pinches red pepper flakes
2 pinches black pepper, plus more to plate
1/8 teaspoon kosher salt
5 cups greens (spinach, arugula, romaine, kale etc.)
½ small ripe mango, peeled and sliced
½ small pink grapefruit, “supremed”
1 small kiwi, peeled and sliced
3 inch piece of cucumber, peeled and sliced
1 small avocado, peeled and sliced
3 ounces goat cheese, crumbled
¼ cup toasted macadamia nuts

Prepare the dressing. In a jar, add the sesame seeds, shallots, garlic, ginger, mustard, honey, vinegar, olive oil, red pepper flakes, pepper and salt. Secure the lid tightly on the jar and shake vigorously for a minute until the items have combined and emulsified. Taste and adjust with salt and pepper as needed. Set aside.

Divide the greens between two large plates. Top each plate with the mangos, grapefruit supremes, kiwis, cucumbers, avocados, goat cheese and nuts. Drizzle 2-3 tablespoons of the Sesame-Ginger Dressing over each plate and serve.

Appetizers/Small Plates · Condiments/Sauces · Vegetables/Vegetarian

Cilantro & Jalapeño Hummus

Cilantro & Jalapeño Hummus

A few years ago, he and I had a terrible fight….

Trader Joe and I–that is.

What can I say?

He broke my heart — the day he stopped carrying their Cilantro & Jalapeño Hummus. Herby, a bit spicy, rich and creamy. I L-O-V-E-D it and would slather it over just about everything.

Cilantro & Jalapeño Hummus

Then one day when I came in to grab a tub, it was gone. Sure, T.J. offered a three layered hummus that claimed it had my beloved Cilantro & Jalapeño Hummus inside. But once you opened the container, it barely had a dollop of the green goodness in it.

What’s a girl to do?

Cilantro & Jalapeño Hummus

It was then time to take matters into my own hands and make my own version so that I could have my fill of whenever I wanted.

I threw a little bit of this and A LOT of that into the food processor and within a couple of minutes, I had something amazing that I dare say, love even more than the original.

True story.

Cilantro & Jalapeño Hummus

Just like the original, it’s delicious over breads, to dip all kinds of goodies in, and to use as a sauce.

So T.J., I forgive you for cutting off my hummus supply and still love you for everything else you fill my kitchen with. And let’s face it, who cannot adore that you have your staff wearing Aloha gear? 🙂

Side note: T.J. is now carrying a version of Cilantro & Jalapeño Hummus but trust me when I say this–it’s not the same. I don’t know how they altered the recipe but it’s missing some of the old KA-POW the old hummus did.

_____________________________________

Cilantro & Jalapeño Hummus

Ingredients:

1- 2 bunches fresh cilantro, approximately 4-5 loosely packed cups (more to garnish)
1-2 jalapeño peppers, roughly chopped (depending on your heat preference)
4 tablespoons lemon juice
3 tablespoons extra virgin olive oil (more to garnish)
1/3 cup tahini
4 garlic cloves
1 can garbanzo beans (15 ounces), drained with juices reserved
2-4 tablespoons juices from the garbanzo beans
1 teaspoon kosher salt
¼ teaspoon black pepper
¼ teaspoon paprika (more to garnish)

Add the cilantro, jalapeñopeppers, lemon juice, olive oil and tahini into the bowl of a food processor. Pulse until the items have broken down.


Add in the garlic cloves, garbanzo beans, 2 tablespoons of the reserved garbanzo beans juices, kosher salt, black pepper, and paprika. Blend until the hummus is smooth but still thick. If needed, add in the remaining garbanzo bean juices until you reach the desired consistency. Taste and add additional kosher salt if needed.


Plate the hummus and garnish with a drizzle of additional olive oil, sprinkle of paprika, and chopped cilantro. Serve as a spread or as a dip.

Condiments/Sauces

Ch-ch-ch–Chimichurri Sauce!

Chimichurri Sauce

Happy CHIMICHURRI FRIDAY!

Ok…it’s not really Chimichurri Friday-–it’s Aloha Friday. But as far as I’m concerned, every day should have chimichurri in it.

Chimichurri Sauce

The sauce originates from Argentina and is FULL of fresh herbs, citrus and spices. It’s incredibly aromatic and bright and is perfect over grilled meats, seafood, in sammiches and as a dip.

And. I. LOVE. IT.

I’ve posted the recipe alongside other dishes before but I thought this showstopper deserved a post on its own.

Chimichurri Sauce

Chimichurri has similar flavor profiles to pesto as both contain fresh herbs and spicy garlic. But since chimichurri does not contain nuts or cheeses, it can be considered a slimmer substitute for pestos. Both as a spread or even in pastas like my Chimichurri Orzo.

Chimichurri Sauce

So this weekend, break out the grill and throw a few steaks (or chicken…or lamb chops…) and some seafood on the fire. Slather the grilled goodness with Chimichurri Sauce and show all the MOM(s) in your life how much you love them.

Have a fabulous Mother’s Day Weekend!

________________________________

Chimichurri Sauce
Makes approximately 2 cups

Ingredients:

1 large bunch fresh cilantro
1 large bunch fresh Italian parsley
6-8 sprigs fresh oregano
4 large garlic cloves
1 large serrano chili pepper*
zest of 1 lime
¼ cup fresh lime juice
1 teaspoon red wine vinegar
½ teaspoon red chili flakes*
1 teaspoon honey or agave
¾ – 1 cup olive oil, more if needed
kosher salt
black pepper

In a food processor or blender, add all of the ingredients except the olive oil, kosher salt and pepper. Pulse several times until the herbs have broken down.

Stream in the olive oil and blend until the items have fully incorporated. Sprinkle in ½ teaspoon salt and ½ teaspoon black pepper. Pulse to combine. More olive oil can be added if a smoother, loose texture is desired. Check for seasonings and add additional salt and pepper as needed. Refrigerate until ready to be used.

*Chili amounts can be adjusted based on heat level preference.

Condiments/Sauces

Pickled Red Onions

Pickled Red Onions

My seester gave me a jar of pickled onions she made and they lasted exactly 376,901 seconds.

Ok…more like a week. But nonetheless, I inhaled those pickled onions. Tart, slightly sweet with a bit of a crunch. They’re the perfect accompaniment to just about anything—

In sammies….

Over salads……

On top of barbecue…..

And my favorite, inside tacos.

Pickled Red Onions

So since I gobbled up the jar she gave me, I had to restock for Cinco de Mayo. My version is quick to make and you can easily add/remove any spice you like. Need some ideas on what to serve these purty Pickled Red Onions with for Cinco de Mayo? How about:

And yes, the bright fucsia color is all natural. Isn’t it lovely?

________________________________

Pickled Red Onions

Ingredients:

3/4 cup apple cider vinegar
1/4 cup water
2 tablespoons sugar (more if you prefer a sweeter pickle)
1/8 teaspoon coriander seeds*
1/8 teaspoon peppercorns*
1/8 teaspoon red pepper flakes
1 dried bay leaf
2 garlic cloves, smashed
2-3 pinches kosher salt
1 medium sized red onion, peeled and sliced into 1/2 circles

In a pot, add all the ingredients except the onions. Place the pot over medium heat and stir until the sugar and salt has dissolved. Stir in the onions and cook for 1 minute.

Remove the pot from the heat and allow to cool to room temperature. Place the onions with the liquids in a jar or container and refrigerate. The pickled onions are ready to be enjoyed after a few hours in the refrigerator and can be kept (in the fridge) for a few weeks.

*To release more of the spice flavors, you can use the flat side of a chef’s knife to slightly crush the coriander and peppercorns.

Condiments/Sauces

Oven-Roasted Tomato Salsa : Cinco de Mayo Countdown Begins!

Oven-Roasted Tomato Salsa

Alrighty Folks, it’s time to get organized because Cinco de Mayo is exactly one week away!

What have y’all got planned? Is the menu set yet?

Because if not–you’re in luck!

Oven-Roasted Tomato Salsa

For the next week I’ll be posting muy delicioso menu ideas to ensure that your Cinco de Mayo festivities will be filled with good eats and thirst quenching cocktails.

To start off a fiesta, you’ve got to have chips and dips. I recommend dunking your crispy tortilla chips into a Roasted Poblano Guacamole, Fresh Corn Pico de Gallo, or this mouth-watering Oven-Roasted Tomato Salsa.

Oven-Roasted Tomato Salsa

Because this gal is ALL about salsas.

I usually make my standard salsa using canned plum tomatoes. It’s super easy to whip together (thank goodness for food processors!) and I smother everything with it. Over grilled proteins (fish, chicken, beef), inside tacos and burritos and of course–with chips.

Oven-Roasted Tomato Salsa

I decided to make a small tweak to my go-to salsa recipe by swapping out the canned tomatoes with oven-roasted tomatoes. By roasting the tomatoes in the oven, it concentrates the flavor and adds a different layer to the salsa. It’s still easy to make but it does use a good amount of fresh tomatoes (they shrink through the roasting process) and you need to wait about an hour for them to get their roast on in the oven.

The salsa can be kept in the fridge for about a week and actually tastes even better the day after you make it as the flavors have time to marry. But let’s be honest, you and your peeps will gobble down this salsa so fast that I doubt it will be in the fridge that long.

And with that, let the official countdown to Cinco de Mayo begin!!!!

___________________________________

Oven-Roasted Tomato Salsa

Ingredients:

4 pounds plum tomatoes, cut in half, seeds removed
1 large jalapeno pepper, sliced in half
olive oil
kosher salt
black pepper
½ small yellow onion, quartered
2 scallions
2 large garlic cloves
1-2 small serrano chile peppers, seeds removed (depending on your preferred heat level)
1 teaspoon cumin powder
¼ teaspoon chile powder (optional)
2 pinches sugar
zest of one lime
1 tablespoon fresh lime juice
½ bunch cilantro (about 1½ cups)

Preheat the oven to 350 degrees F.

Place the tomatoes and jalapeno in a single layer, cut side up, on baking sheets. Drizzle olive oil over them and sprinkle with kosher salt and black pepper. Roast for 60-70 minutes until the tomatoes have become slightly browned and shriveled. Allow them to cool until room temperature.

Put the roasted tomatoes, jalapenos, ½ teaspoon of kosher salt and the remaining ingredients into the bowl of a food processor. Pulse until desired consistency. Taste the salsa and add more kosher salt and black pepper as needed. The flavors will intensify as the salsa flavors marry.

Pour the salsa into a container and refrigerate for a few hours before serving.


Appetizers/Small Plates · Condiments/Sauces · Side Dish · Vegetables/Vegetarian

Oven Baked Portabello Fries with Sriracha Mayo

Oven Baked Portabello Fries with Sriracha Mayo

I am a French Fry Monster.

Those crispy, delectable, fried potato-goodness are my vice. But oh–what a glorious vice it is!

Oven Baked Portabello Fries with Sriracha Mayo

But seeing how it’s probably not the best idea for me to inhale my weight in fries (though I may or may not have tried before), I’ve got to find alternatives to get my crunchy fix in.

And these Oven Baked Portabello Fries fulfill that craving quite well.

Oven Baked Portabello Fries with Sriracha Mayo

Thick portabello mushroom strips are rolled into an egg white mixture and then coated with toasted panko breadcrumbs. After a short tanning in the oven, they come out wonderfully crunchy and not the least bit mushy on the inside. And let me tell ya, these beauties are totally crisp. By toasting the panko and then baking the fries on a rather high heat, they’re able to get that wonderful crunch I love when I go to town on traditional potato fries.

Did I mention that they get dunked into a Sriracha Mayo?

You’re welcome.

ps. They’d also be fantastic wrapped up in tortillas with some Avocado-Cabbage Slaw to make some killer veggies tacos.
_____________________________________________

Oven Baked Portabello Fries with Sriracha Mayo
Serves 2

Ingredients:

Sriracha Mayo
½ cup mayonnaise
1 tablespoon Sriracha
½ teaspoon garlic salt
½ teaspoon onion powder
¼ teaspoon cayenne powder
½ teaspoon fresh lemon juice
1 teaspoon minced parsley
kosher salt
black pepper

Fries
1½ cups panko breadcrumbs
1 tablespoon vegetable oil
2 egg whites
1 tablespoon water
½ teaspoon chopped thyme leaves
1 teaspoon garlic powder
1 teaspoon onion powder
¼ teaspoon cayenne powder
2-3 dashes hot sauce
¼ teaspoon black pepper
kosher salt
cooking spray
1 large portabello mushroom cap or 2 medium sized portabellos
½ teaspoon minced parsley

Whisk the first seven ingredients for the Sriracha Mayo in a bowl. Season with kosher salt and black pepper as needed. Cover and set aside in the refrigerator.

Preheat the oven to 475˚ F.

In a large skillet, toss the panko with the oil. Toast over medium heat, stirring, until golden brown. Set the toasted panko into a dish.

In another bowl or shallow dish, whisk together the egg whites, water, thyme, garlic powder, onion powder, cayenne powder, hot sauce, black pepper and ¼ teaspoon kosher salt.

Take a wire rack and place it over a baking sheet. Lightly coat the rack with cooking spray.

Slice the mushrooms into long strips approximately 1/3 – ½ inch in width. One slice at a time, dip the mushroom into the egg white mixture and then into the breadcrumbs. Use your fingers to gently press the breadcrumbs into the mushroom slice to coat well. Lay the coated mushroom slice on the wire rack. Continue with the remaining ingredients.

Spray the tops of the mushrooms with cooking spray and bake for 20-25 minutes. Flip the mushroom fries halfway through the baking process and spray the tops with cooking spray before returning them back into the oven. The fries are done when they are golden brown. Remove them from the oven and sprinkle them with additional kosher salt and parsley. Serve hot with the Sriracha Mayo.