Breakfast/Brunch

Breakfast Risotto…Because Your Mornings Will Thank You

Breakfast Risotto
I was feeling a bit punky this week.

What’s punky?

It means that I was under the weather. Yeah…I got the saying (and likely the cooties) at the office.

But all of the sudden yesterday afternoon, I WAS BACK! Energy, spunk–and especially my appetite!!

I WAS HUNGRY!!!!!

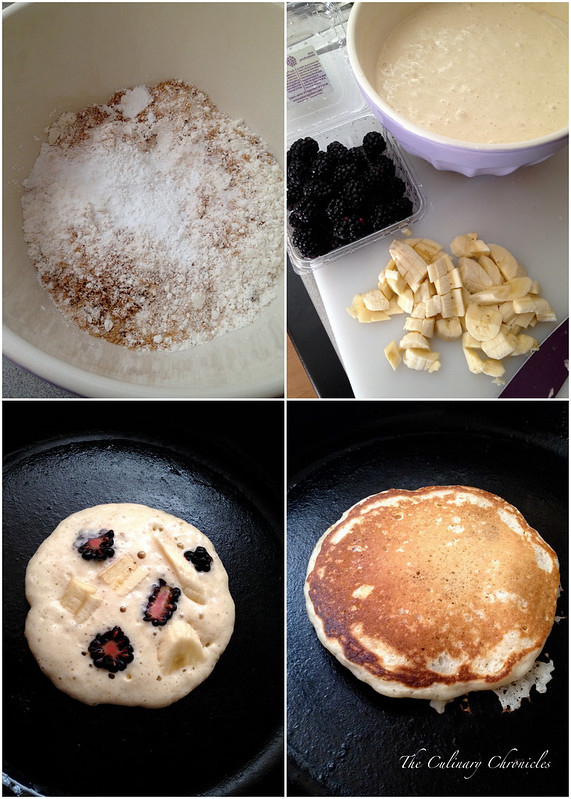
So when I got home, I did a quick inventory of what I had in the pantry and about 30 minutes later — BOOM!

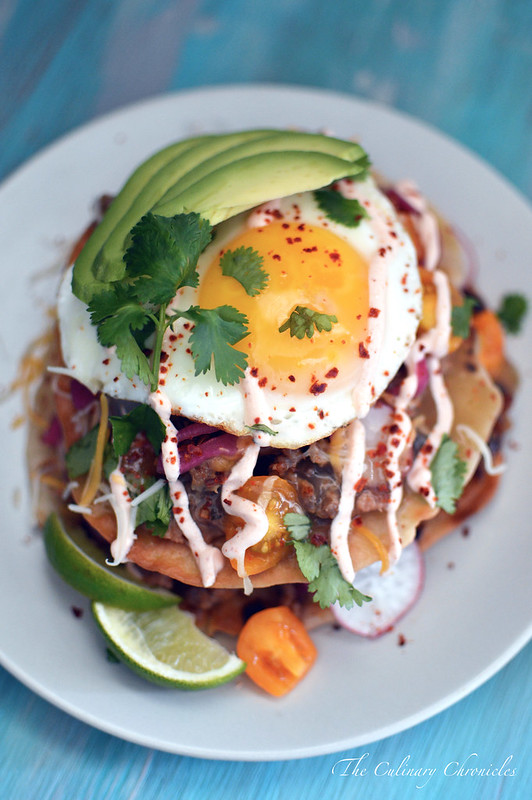
Breakfast Risotto was born!

Breakfast Risotto
I adore risottos. It’s rich, comforting and just darn tasty!

And I love breakfasts and brunch foods. Bacon and eggs, baby!

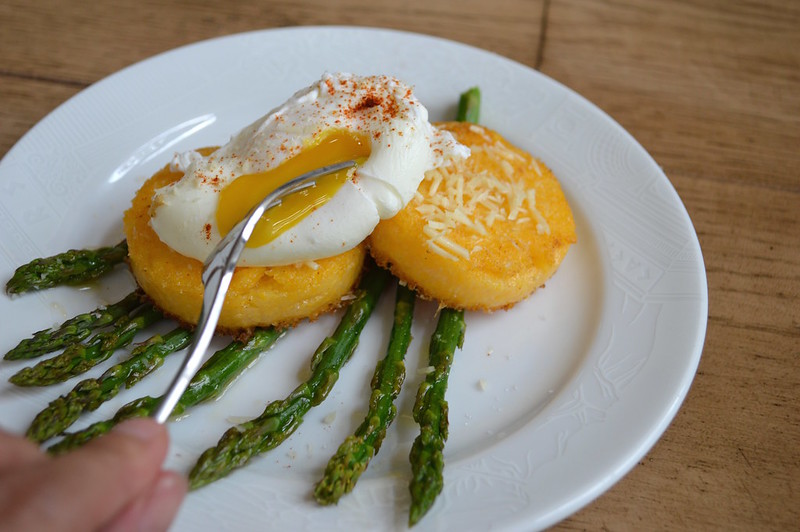
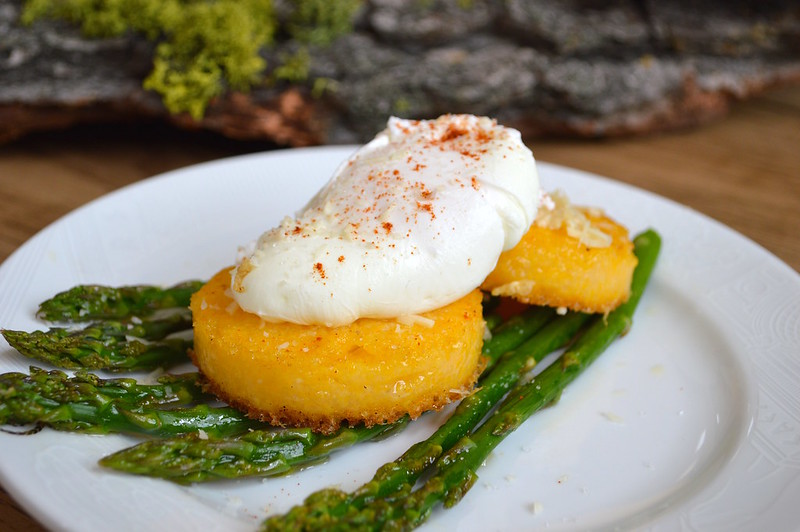
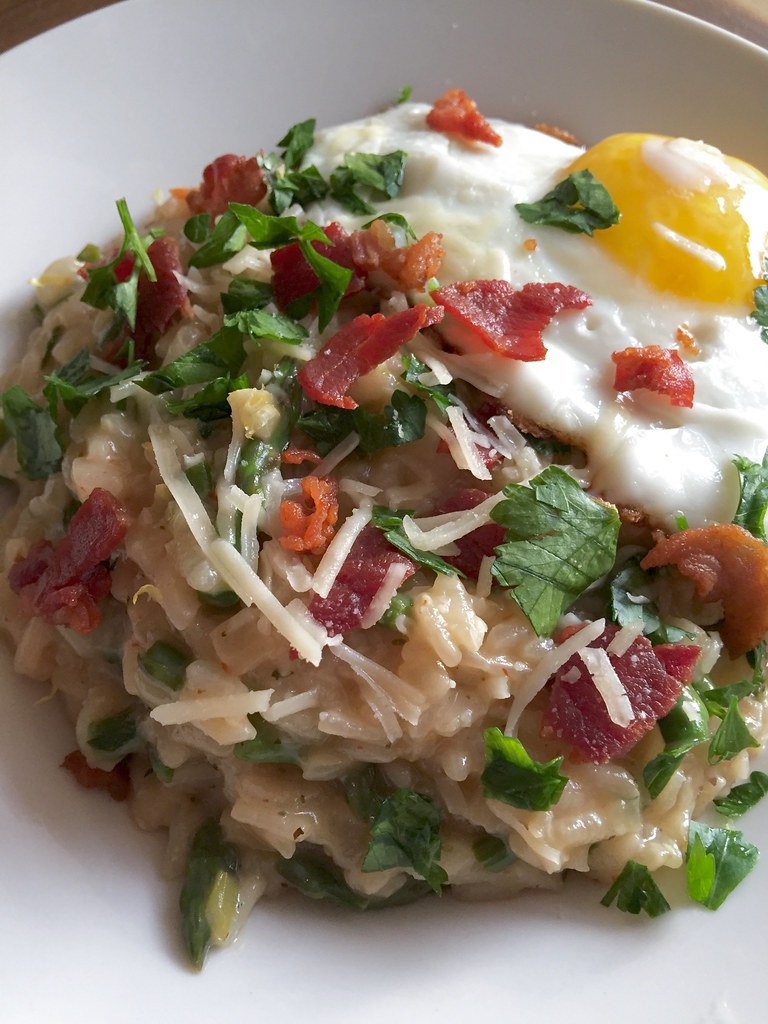
So really, it was only time that I combined the two to make this unctuous and satisfying dish. Oh! And since I had some asparagus on hand, I threw some in for some texture and brightness. Now I will say that I debated between a fried egg and a poached one. Let’s be honest, I’m a big fan of both. But in the end, I went with a crispy fried egg for some more texture—though I won’t be hurt if you go with a poached egg.

In the end, it was a winning dish! Perfect for breakfast, brunch, lunch or dinner!

And here’s to not feeling punky anymore! ❤

______________________________________________

Bacon Risotto
Serves 4

Ingredients:

4 cups chicken stock
4 slices bacon, diced
1 cup diced white onion
1 tablespoon minced garlic
¼ teaspoon red pepper flakes
½ teaspoon fresh thyme leaves
1 cup Arborio rice
½ cup white wine
1 cup chopped blanched asparagus
1 teaspoon fresh lemon zest
¾ cup grated Parmesan cheese, more to garnish
kosher salt
¼ chopped Italian parsley, more to garnish
4 fried eggs

Heat the chicken stock in a medium sized saucepan and keep warm over low heat.

In a heavy bottom pot over medium-low heat, slowly sauté the bacon until it becomes crispy and the fat has rendered down—about 5 minutes. Use a slotted spoon and transfer the bacon bits to a plate covered with paper towels. Reserve two tablespoons of bacon drippings in the pan and discard the rest. Sauté the onions over medium heat in the bacon drippings until translucent. Add the garlic, red pepper flakes, thyme leaves, rice and stir quickly until the rice is well coated and opaque—about 1 minute.  Stir in the wine and cook until the liquid is nearly all evaporated.

Ladle in 1 cup of the chicken broth into the rice. Simmer and slowly stir until the rice has absorbed the liquid. Add the remaining broth, 1 cup at a time. Continue to simmer and stir, allowing the rice to absorb each addition of broth before adding more. The risotto should be slightly firm and creamy–approximately 25-30 minutes in total.

Gently fold in the asparagus, lemon zest and Parmesan. Check for seasonings and adjust with the kosher salt. Fold in the parsley.

Spoon the risotto into dishes and top each with the reserved crispy bacon. Grate additional Parmesan cheese over each dish. Top each with a fried egg and sprinkle parsley over each dish. Serve immediately.

Breakfast/Brunch · Sponsored

Crème Brûlée French Toast – Happy National French Toast Day!

Crème Brûlée French Toast
HAPPY NATIONAL FRENCH TOAST DAY!!!

And what better way to celebrate this fun food day and the holiday season than with this decadent breakfast/brunch treat — Crème Brûlée French Toast!

Crème Brûlée French Toast
For this month, I worked with our friends over at Safest Choice® Eggs to up the ante on the traditional French Toast by mashing it up with one of my favorite desserts—-Crème Brûlée.

It all starts off with a rich custard base of eggs, cream, milk and then it’s flavored with warm spices, vanilla extract, Grand Marnier and fresh orange zest. Day old bread then soaks up the custard overnight so that it gets into every nook and cranny.

In the morning, you throw the dish into the oven until the bread becomes golden brown and puffed.  The final step is a generous sprinkle of sugar over the toast and then it’s quickly brûléed.

Crème Brûlée French Toast
The end result?

When you cut into the top layer of caramelized sugar, you get a wonderfully satisfying crunch and the center is rich and decadent. Personally, I think the brûléed sugar gives the right amount of sweetness but if you want to add a drizzle of maple syrup—go right ahead!

Scrumptious breakfast and a make-ahead wonder!

Head on over to Safest Choice® Eggs  to read my Crème Brûlée French Toast post this month and while you’re at it, click here for the recipe.

HAPPY NATIONAL FRENCH TOAST DAY!!!

Davidsons-Dozen-Blogger-Badge

Breakfast/Brunch · Sponsored

Kale, Bacon and Cheese Strata

Bacon and Kale Strata
Y’all hear that bell ringing?

That’s right– SCHOOL’S BACK IN SESSION!!!

It’s the time of year in many households where everyone is just wishing they had a few extra minutes in the morning before they dash out the door for the day.

So for this month, I worked with our friends over at Safest Choice® Eggs to create this deliciously satisfying “make the night before” dish that will fuel up your loved ones for an entire day of work, school, and any shenanigans they may find themselves in.

Bacon and Kale Strata

Breakfast Stratas are essentially a savory bread pudding. It’s the perfect way to use up all of your stale bread and any other fixings you may have tucked away in the corner of your fridge. And since the custard base needs time to soak up in all the nooks and crannies of the bread, it’s the ideal thing to prep the night before only to be thrown in the oven while you’re getting ready in the morning.

This time around, I chose to use sauteed kale and combination of cheeses to flavor the strata and of course– bacon. Because the smell of bacon is the sure fire trick to motivate people out of bed in the morning! I also tossed in some leftover diced potatoes because I like the texture and body it gives to the dish. But if you prefer to use bread only, feel free to leave it out.

Added bonus? This Kale, Bacon and Cheese Strata is such a stunner, you can definitely serve it up at a brunch gathering alongside fresh fruit, juices, coffee and mimosas. Guaranteed hit!

Head on over to Safest Choice® Eggs  to read my Strata post this month and while you’re at it, click here for the recipe.

Davidsons-Dozen-Blogger-Badge

Breakfast/Brunch · Sponsored · Vegetables/Vegetarian

Crispy Polenta Cakes with Poached Eggs & Asparagus

Polenta3
Spring has most definitely sprung!

The sun is shining, the days are getting longer, the flowers are in bloom (Aaaa-CHOO! My pollen allergies are terrible!) and everyone seems to be in a festive mood for celebrations and leisure meals. And why not? So many delicious items are coming back into season!

Polenta2
Asparagus is one of those beautiful produces that are coming back and are popping up all over at our Farmers Markets and grocery stores. And in my opinion, nothing pairs more lovely with asparagus than eggs. Eggs and Asparagus….what could be more “Spring-like” than that winning combo?!

Safe Eggs
To celebrate the comeback of my favorite season, Spring, I’m partnering with the makers of Safest Choice™ pasteurized eggs to create a quick and easy dish that would be perfect to make for breakfast or even a last minute brunch gathering and featured that winning pairing.

Polenta4

Veggies? Check!

Bright and sunny egg/protein? Check!

But what about a starch?

I’m not a gal to shy away from bread or potatoes — I’m unabashedly carbo-holic like that. Though for this dish, I thought I’d bring a little Italian slant to it by pan frying up some crispy polenta cakes by using a pre-made polenta roll.

Now before you yell at me for using a pre-made polenta, let me justify it by the following:

  1. One of my favorite stores carries a wonderful organic polenta roll that is extremely tasty and affordable.
  2. If I made the polenta myself, I would have to wait for it to cool before frying them up into crispy cakes.
  3. It’s QUICK! And who doesn’t need some short cuts every now and then?

But hey-if you prefer to make your own, I’m all over it! In fact, it would be a great opportunity to use up any leftover polenta you may have lingering in your fridge.

Polenta5
After roasting the fresh asparagus with simple S&P and lemon zest, I topped them with the crispy polenta cakes and a sprinkle of Parmesan cheese. And the pièce de résistance – a beautifully poached Safest Choice™ pasteurized egg. In my humble opinion, there are few other culinary beauties than seeing an unctuous egg yolk over a dish.

Perfection!

Poletna6
And not only is a beautiful but it’s functional. The yolk becomes a rich sauce for both the crisp polenta cakes and asparagus. I know some folks are wary of under cooked eggs but rest assured. Davidson’s Safest Choice® uses an all-natural egg pasteurization process to eliminate the risk of salmonella–all without changing that farm fresh flavor or nutrition. Plus their wonderful chicks are Hormone free, Antibiotic free, and Vegetarian-fed. You can learn more over at SafeEggs.com

Polenta

As for the next few months, I’m looking forward to all that Spring has to offer as well as fixing up more dishes fitting of the season. But in the meanwhile, you can find this quick and delectable recipe for Crispy Polenta Cakes with Poached Eggs and Asparagus here.

Davidsons-Dozen-Blogger-Badge

*DISCLOSURE: This recipe and post was created in partnership with Safest Choice™ pasteurized eggs. However, as always, all opinions are my own.*

Breakfast/Brunch

Avocado Toast with Smoked Salmon and Poached Egg

Avocado Toast
Early last Sunday morning I found myself rummaging around my seestrah‘s fridge for some breakfast inspiration. I wasn’t in the mood for a laborious dish because I was on the brink of h’angry……

And quite frankly, that’s not a pretty sight.

I ended up pulling out eggs and some leftover smoked salmon and guacamole from the night before. Yup, it was Avocado Toast time! How absolutely trendy of me.

Now usually, when I fix up some Avocado Toast, I smash up some ripe avocado and add a bit of spice. But seeing how I had some delish guac at my disposal, I opted for that route.

Avocado Toast
As for the egg, I had initially wanted to fry it up—I love the crispy edges. But this gal is a sucker for an oozy-goozy poached egg that essentially makes a sauce from itself once you break into it. So wonderfully divine, so deliciously decadent.

And before I even had a chance to take a proper pic on a camera (instead of my phone), I had gobbled it all up.

Oh well, guess I’ll have to make it again to reshoot it.

Happy Saturday! ❤

_____________________________________________

Avocado Toast with Smoked Salmon and Poached Egg
Serves 1

Ingredients:

½ ripe medium sized avocado
½ teaspoon lemon juice
kosher salt
black pepper
red pepper flakes
1 slice bread, toasted
3 ounces smoked salmon
1 tablespoon white vinegar
1 large egg
chopped cilantro to garnish

In a small bowl, mash the avocado with the lemon juice, 2-3 pinches salt, 1-2 pinches black pepper and 1-2 pinches red pepper flakes. Spread the avocado mash (or guacamole if you have it) over the toasted bread and place the smoked salmon slices on top.

Fill a pot ¾ full of water and bring to a rolling boil. Pour in the vinegar and slightly lower the heat. Crack the egg into a small bowl. Take a spoon and swirl it around quickly in the pot to make a whirlpool in the water. Slowly pour the egg into the center of the whirlpool. The movement of the whirlpool will help the egg form but you can also use a spoon to help it along. After about 2-3 minutes, use a slotted spoon to remove the egg. Gently blot it dry with a paper towel and place on top of the toast.

Sprinkle the kosher salt and black pepper over the egg. Garnish with the chopped cilantro and serve immediately.

Breakfast/Brunch · Sponsored

Huevos Rancheros …..Be EGGS-ellent

Huevos Rancheros

Brunch is my Spirit Animal.

In fact, if I had it my way, we would be allotted a few leisurely hours every day to create and enjoy brunch. Without a worry in the world….other than what delectable dishes we’d have and if there are enough mimosas….

Or Bloody Marys….

Who am I kidding–it’s your Brunch World…have both!

Huevos Rancheros

Sadly, with summer winding down, many of y’all with munchkins have either already sent them off to start a new school year or will be doing so shortly. And when that happens, daily brekkies become less elaborate and more about efficiency and time saving.

Heck–I totally get it.

I only have a fur-child and between getting her walked and my own act together before work, I can barely manage to guzzle down some coffee in the morning.

And thus, my brunch heart weeps.

Huevos Rancheros

So do yourself a favor….and your kiddos too!

Make them something a little special Monday morning to get them jumping out of bed….like Huevos Rancheros! Huevos Rancheros are easily one of my favorite dishes to have for brunch. Packed with flavor, various textures and all smothered with a beautiful runny fried egg.

Good lawd…I’m a sucker for eggs.

Wait–maybe runny eggs are my Spirit Animal?

Suddenly, EVERYTHING makes sense….

Huevos Rancheros

These Huevos Rancheros are the perfect addition to this month’s  Safest Choice™ Darling Dozen. Not only does it affirm my adoration for the remarkable egg but it is sure to have your loved ones waking up with a pep in their step.

The whole process from start to finish takes about 30 minutes since I use some short cuts like canned refried beans and store bought enchilada sauce for the Huevos Rancheros “sauce”. But if you precook the sausage and prep everything ahead of time, you can have these gorgeous Huevos Rancheros on the table in about 15 minutes. Not bad for breakfast “cooking” during the weekday.

Much thanks to our friends at Safest Choice™ and to learn more about them and their pasteurization process to eliminate salmonella, please click here.

Have an EGGS-ellent weekend!

____________________________

Huevos Rancheros
Serves 2

Ingredients:

½ cup sour cream
½ tablespoon Tapatío Hot Sauce or hot sauce of your choice
½ tablespoon fresh lime juice
¼ teaspoon garlic powder
8 ounces breakfast sausage
vegetable oil, divided
4 small corn or flour tortillas
2 large Safest Choice™ pasteurized eggs
kosher salt
8 ounces refried beans, warmed
1 cup shredded Monterey jack or Mexican blend shredded cheese
8 ounces enchilada sauce, red or green, warmed
1 cup grape tomatoes, halved
¼ cup thinly sliced radishes
½ cup chopped cilantro leaves
¼ cup pickled red onions, optional
½ small avocado, sliced
½ tablespoon gochugaru or other ground chili pepper
2 lime wedges

In a small bowl, mix together the sour cream, hot sauce, lime juice and garlic powder. Cover and refrigerate.

In a skillet, add the breakfast sausage and cook over medium heat. Use a wooden spoon to crumble the sausage and break into small pieces. Cook the sausage until browned — transfer to a plate and keep warm.

Take a paper towel to wipe out the grease left from the sausage. Return the skillet to the stove over medium heat. Add two tablespoons of vegetable oil. Fry the tortillas in the oil until both sides are crispy and brown. Add more oil when needed. Drain the crispy tortillas on plates lined with paper towels. Set aside.

Take another paper towel to wipe out the majority of the oil left and place the skillet on the stove over medium-low heat. Crack 2 Safest Choice™ pasteurized eggs in the skillet and fry until the center has set and the whites are opaque. Sprinkle each egg with salt. Transfer the fried eggs to a plate and keep warm.

Begin assembly. Place one crispy tortilla on a plate. Spread a thin layer of the warmed beans over the top. Sprinkle cheese over the beans and add a few spoons of the browned sausage over the top. Spoon some of the warmed enchilada sauce over the items and top with some tomato halves, radish slices and cilantro leaves. If you choose to, also add a few slices of pickled red onions.

Top the stack with another crispy tortillas and repeat the layering process. Once done, top the stack with a fried egg, avocado slices and drizzle some of the spiced sour cream over the mound. Top with cilantro and gochugaru (or other ground chili pepper) and serve with lime wedges.

npe_darlingdozenbadges

*DISCLOSURE: As a brand ambassador for the Safest Choice™ Darling Dozen, I was compensated for the creation of this recipe and post. However, as always, all opinions are my own.*

Breakfast/Brunch

Breakfast Tacos — Change Up Your Taco Tuesday!

Breakfast Tacos

You know what my favorite Tuesday is?

Taco Tuesday!

Seriously. It’s a legitimate kind of day. Well…at least if you’re in Southern California.

The other day while I was rummaging around my fridge checking out all of the random things I had in there, it came to me.

I love Tacos. I love Breakfast.

So why the heck have I never make Brekkie Tacos?

Two words. Brain Fart.

Oh no. Y’all are going to leave me now that I used the f-word in a food post.

Eek….. Sorry!

Breakfast Tacos

But in all seriousness gang…this is the real deal. If you’ve never made Breakfast Tacos before, get on it! And if you have been making them for years—why the heck didn’t you tell me to before?!

No recipe here but I will say that there are 4 MUSTS:

  • Tortillas –and while you’re at it…why not make these homemade Flour Tortillas? They are a game changer.
  • Taters’ –any type as long as they’re crispy and potato-licious! French fries, hashbrowns, or even these Crispy Oven Roasted Herb Potatoes would be rad.
  • Shalsha— or “salsa” if you’re not Cindy Brady. You can use some homemade Oven Roasted Tomato Salsa, that jarred salsa from New York city–or heck, just plain old hot sauce.
  • Fried Egg— the runnier the better. I’m talking crispy edges and an ooey-gooey center that makes it all seem just a bit sinful.

As for the pic’ above, I added some thinly sliced radish, diced yellow tomatoes, cucumbers, cilantro and pickled red onions. So satisfying and so quick that you won’t have any excuse to not make it today.

HAPPY TACO TUESDAY PEEPS!

Breads · Breakfast/Brunch · Desserts/Pastries

Malasadas – Portuguese Doughnuts

Malasadas

LET’S GET DOUGHNUT WASTED!!!!!!!

And why the heck not? It’s National Doughnut Day!!!

Malasadas

What’s my favorite doughnut or donut?

Easy.

It comes down to either an Old Fashioned with a Chocolate Glaze or Malasadas. Mmmm…malasadas.

Never had one? Let me break it down for you.

Malasadas

Malasadas are Portuguese doughnuts. They’re a yeast based dough with eggs, butter and milk (or half and half). Rolled in sugar, these babies should be light and fluffy…and freaking amazing.

Now of course, the go-to place for malasadas is Leonard’s Bakery in O’ahu and every time I’m on the island, I MUST pop in for a box of them. Traditionally they’re unfilled but when I’m at Leonard’s, I have to get a variety of the filled ones. I love the ones that are stuffed with haupia (a Hawaiian coconut “pudding”), custard or if I’m lucky, they have the lilikoi (passion fruit) filling as their flavor of the month.

Malasadas

Sadly, I’m not on the islands today and had to take matters into my own hands. I used the recipe below from  Leonard’s and it’s pretty easy to follow. After proofing, the dough is just lovely.

And no surprise here… they were ONOLICIOUS!

Malasadas

In full disclosure, they were not nearly as good as Leonard’s…..I may be in San Diego but the beautiful air in Hawai’i combined with the sounds of the trade winds and ocean definitely add to the flavor of island food and takes it over the top.

But hey, they sure did do the trick and I happily inhaled four of them and washed it all down with a chilled class of Pinot Grigio….keeping it classy.

Happy National Doughnut (or Donut) Day!!!

_____________________________________________________
Malasadas – Portuguese Doughnuts from Leonard’s Bakery
Makes about 1 dozen

Ingredients:

1 tablespoon active dry yeast
112 cups sugar
3 eggs
2 tablespoons unsalted butter, melted
12 cup milk
12 cup half & half
14 teaspoon kosher salt
4 cups bread flour (1 lb. 2 oz.), sifted
canola oil, for frying
Combine yeast, 1 teaspoon sugar, and 2 tablespoons water heated to 115° in a bowl; let sit until foamy, about 10 minutes; set aside. Beat eggs in the bowl of a stand mixer fitted with a paddle attachment until fluffy. Add yeast mixture, 12 cup sugar, butter, milk, half & half, and salt; mix until combined. With the motor running, slowly add flour; beat until dough is smooth. Transfer to a lightly greased bowl and cover loosely with plastic wrap; set in a warm place until doubled in size, about 112 hours.

On a lightly floured surface, roll dough into a 12″ square about 12″ thick. Using a knife, cut dough into 3″ squares; gather and reuse scraps. Place on greased parchment paper-lined baking sheets, at least 3″ apart; cover loosely with plastic wrap and set aside in a warm place until doubled in size, about 1 hour.

Place remaining sugar in a large bowl; set aside. Heat 2″ oil in a 6-qt. saucepan until a deep-fry thermometer reads 350°. Using scissors, cut the donuts out of the parchment paper, leaving about 1″ of paper around the sides of each doughnut (the paper makes it easier to transfer them to frying oil). Working in batches, place donuts in oil, paper side up, using tongs to peel off and discard paper. Cook, flipping once until puffed and golden, 2 to 3 minutes. Transfer to a baking sheet with a wire rack; let cool completely, then toss with sugar.

Repost from Saveur

Breakfast/Brunch · Sponsored · Vegetables/Vegetarian

Coddled Eggs with Pesto and Potato-Parsnip Purée

Coddled Eggs with Pesto and Potato-Parsnip Puree

We’ve officially entered “shower” season. And by that, I don’t mean April Showers but Wedding Showers and Baby Showers!

My next two months will be weekends filled with shower games, presents galore, tea sandwiches, little bite sized desserts, and sparkling cocktails (I hope!).

Coddled Eggs with Pesto and Potato-Parsnip Puree

What can I say? Love is in the air and my dear friends and loved ones have a lot to be celebrating over these next few months.

So for my latest contribution to Safest Choice™ Darling Dozen, I thought I would make something that would go well on a menu for both bridal and baby showers.

Coddled Eggs with Pesto and Potato-Parsnip Puree

I’ve always been a huge fan of choosing brunch to host parties and celebrations. It’s the perfect time of day where you can serve a variety of foods to please all palates. A few desserts, sandwiches. croissants, scones, preserves, charcuterie boards, and of course–there has to be eggs!

And these adorable coddled eggs served in mason jars will be an absolute hit at your showers.

Coddled Eggs with Pesto and Potato-Parsnip Puree

They start with a luscious, smooth layer of a potato-parsnip purée….which truthfully, are one of my faves these days. They’re a bit lighter than traditional mashed potatoes but are just as delectable.

Next, comes a layer of savory, herbaceous pesto. And c’mon now–who doesn’t love pesto? But for this particular dish, it really does add some much needed brightness to offset the rich, coddled egg and purée. You can also add some sauteed greens as well.

Finally, the whole thing is topped off with a beautiful egg. Heaven.

Coddled Eggs with Pesto and Potato-Parsnip Puree

Your guests will just love these little jars when served. The yolks are unctuous and runny — perfect to dunk toasted little soldiers into. And since Safest Choice™ uses an all-natural egg pasteurization process to eliminate the risk of salmonella, feel at ease when serving them to mamas-to-be.

Want to find out more about their pasteurization process? Click here

Coddled Eggs with Pesto and Potato-Parsnip Puree

These little cuties can be assembled hours before your parties (even the night before!) to give you even more time to spend with your guests.

Adorable? Check! Easy to assemble? Check! Delicious? Check!

Sounds like a slam dunk dish to me. Happy Shower Season, Friends! ❤

______________________________________________________________

Coddled Eggs with Pesto and Potato-Parsnip Purée
Serves 4

Ingredients:

kosher salt
½ pound russet potatoes, peeled and cut into 1 inch chunks
1 medium sized parsnip, peeled and cut into 1 inch chunks
¼ cup heated heavy cream
2 tablespoons unsalted butter, room temperature, divided
1 teaspoon garlic powder
black pepper
4 tablespoons pesto
4 large Safest Choice™ pasteurized eggs
sea salt flakes
chopped parsley
serve with soldiers or other bread of your choice

Prepare the potato-parsnip purée by bringing a medium sized pot of water to a boil. Add ½ tablespoon salt, potatoes and parsnips. Boil until they are tender—about 20 minutes. Drain the root vegetables and either run them through a food mill or ricer. Stir the hot heavy cream, 1 tablespoon butter, and garlic powder into the potato-parsnip mixture. Season with additional salt and black pepper as needed. Set aside.

Take 4 small mason jars or ramekins and use the remaining butter to grease the inside of each jar. Divide and spoon the potato-parsnip purée into the bottom of each of the jars. You can also use a small piping bag to do this. Spread one tablespoon pesto on top of each potato-parsnip purée and then carefully top each with an egg.

Fill a large pot with about 2-3 inches of water and bring to a simmer. Place a steam rack inside of the pot of water and carefully place the filled jars/ramekins on top. Cover the pot and steam the eggs for 8-10 minutes until the whites are set but the yolks are still soft. Alternatively, if using mason jars, screw on the lids of each jar and place directly into the pot to simmer for about 10-12 minutes. If the jars/ramekins that I’m using aren’t very high, I prefer to place them on top of a steam rack.

Once done, top each coddled egg with sea salt flakes and chopped parsley. Serve with soldiers or other bread of your choice.

NPE_DarlingDozenBadges

*DISCLOSURE: As a brand ambassador for the Safest Choice™ Darling Dozen, I was compensated for the creation of this recipe and post. However, as always, all opinions are my own.*

Breakfast/Brunch

Blackberry-Banana Pancakes

Blackberry-Banana Pancakes

Every day is the perfect day for pancakes.

Especially when there’s bananas and fresh blackberries involved.

And butter. And syrup.

Blackberry-Banana Pancakes

I recently caught up with some girlfriends over brunch at The Naked Cafe in Solana Beach. It was a gorgeous, sunny day overlooking the beach –definitely the perfect backdrop to a scrumptious meal.

I ended up ordering a bunch of random à la carte items but the most memorable dish were their buttermilk banana & blackberry pancakes. HOLY MOLY–they were the fluffiest things ever! And why have I never made this fruit combination before in a pancake?

Blackberry-Banana Pancakes

The situation needed to be rectified….immediately! I turned to my tried and true Blueberry Pancakes recipe from Cooks Illustrated and did a little tweaking. An extra splash of vanilla extract here and some lemon zest there –heavenly!

Blackberry-Banana Pancakes

And don’t hesitate to make a double batch! Pancakes freeze quite well –just place a piece of wax paper between each cake and throw them into resealable freezer bags. You can have a pile o’ pancakes whenever your heart desires.

Or your tummy.

But really, aren’t they the same thing? 🙂

________________________________________

Blackberry-Banana Pancakes
Makes approximately 16 pancakes

Ingredients:

2 cups all-purpose flour
3 tablespoons sugar
2 teaspoons baking powder
½ teaspoon baking soda
½ teaspoon salt
1 large egg
2 cups buttermilk
3 tablespoons unsalted butter, melted and cooled slightly
1 teaspoon vanilla extract
zest of 1 lemon
1 cup fresh blackberries, sliced
2 cups sliced bananas
vegetable oil
Serve with butter, extra fruit, and maple syrup

In a medium bowl, sift the flour, sugar, baking powder, baking soda and salt together. In a separate bowl, whisk together the egg, buttermilk milk, and melted butter. Stir in the vanilla extract and lemon zest. Add the dry ingredients to the wet and whisk gently just until combined. The batter will be quite lumpy.

Heat about 1 teaspoon of the oil in a 12-inch nonstick skillet set over medium heat. Once the oil starts shimmering, use paper towels to wipe the pan so only a thin, even coating of oil covers the bottom and sides. Use a ¼ cup measure to portion the batter and pour into the center of the pan. Top each pancake with a layer of blackberries and sliced bananas, gently pressing them into the batter. Cook on the first side until the edges are set and bubbles form on the surface, about 1-2 minutes. Use a spatula to flip the pancakes and cook for 1-2 minutes on the second side, or until golden brown and cooked through. Repeat with remaining batter, more oil to the pan if necessary. Serve pancakes with tabs of butter, additional fruit and maple syrup.

Adapted from Cooks Illustrated