Dumplings.
Potstickers.
Wontons.
Gyozas.
Mandu.
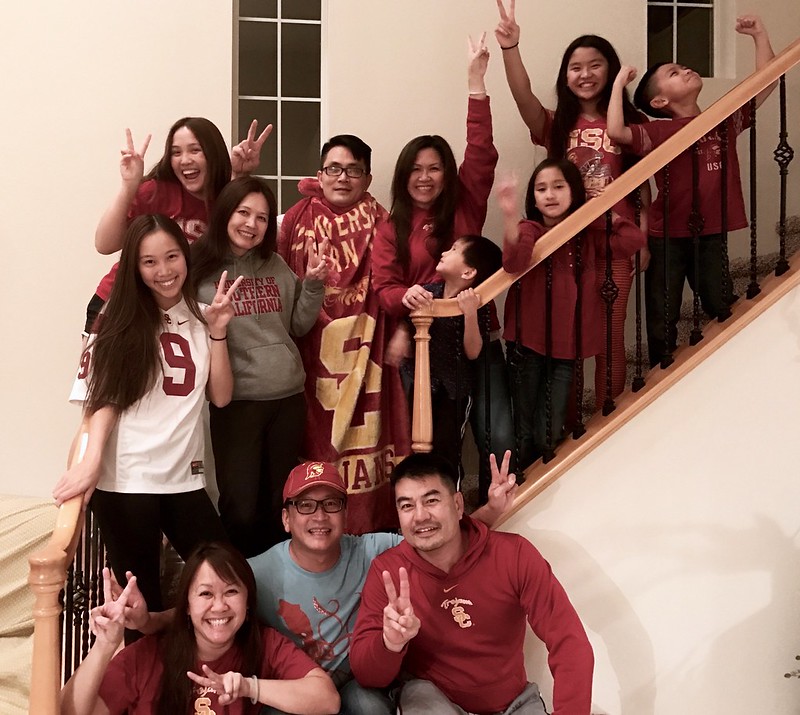
I love them all. And the Fam sure does too.
Dumplings have made their appearance at a few of our Family Dinners before and I happily oblige to make them since it gives me an excuse to make lots of extra to stash away in my freezer.
You know, for those dumpling emergencies.
We all have them….right?

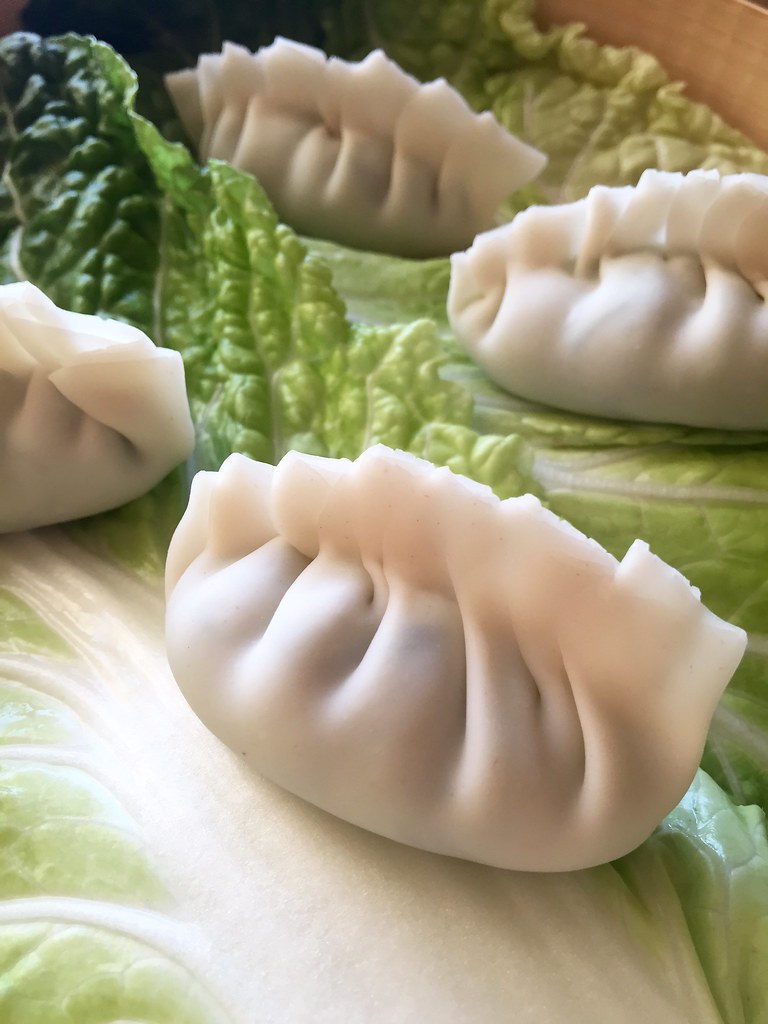
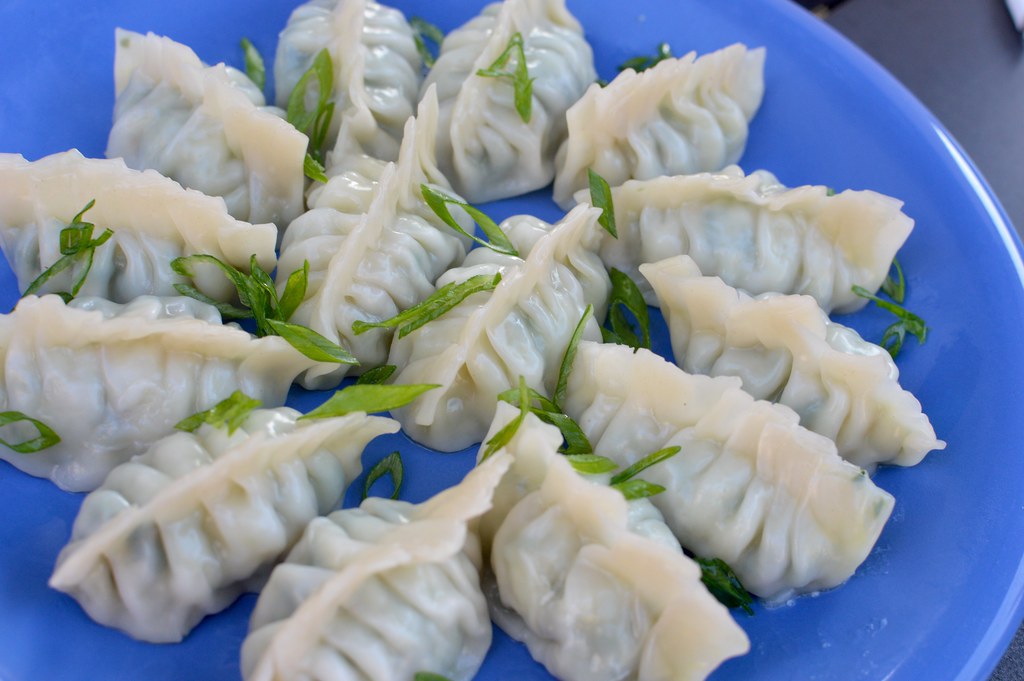
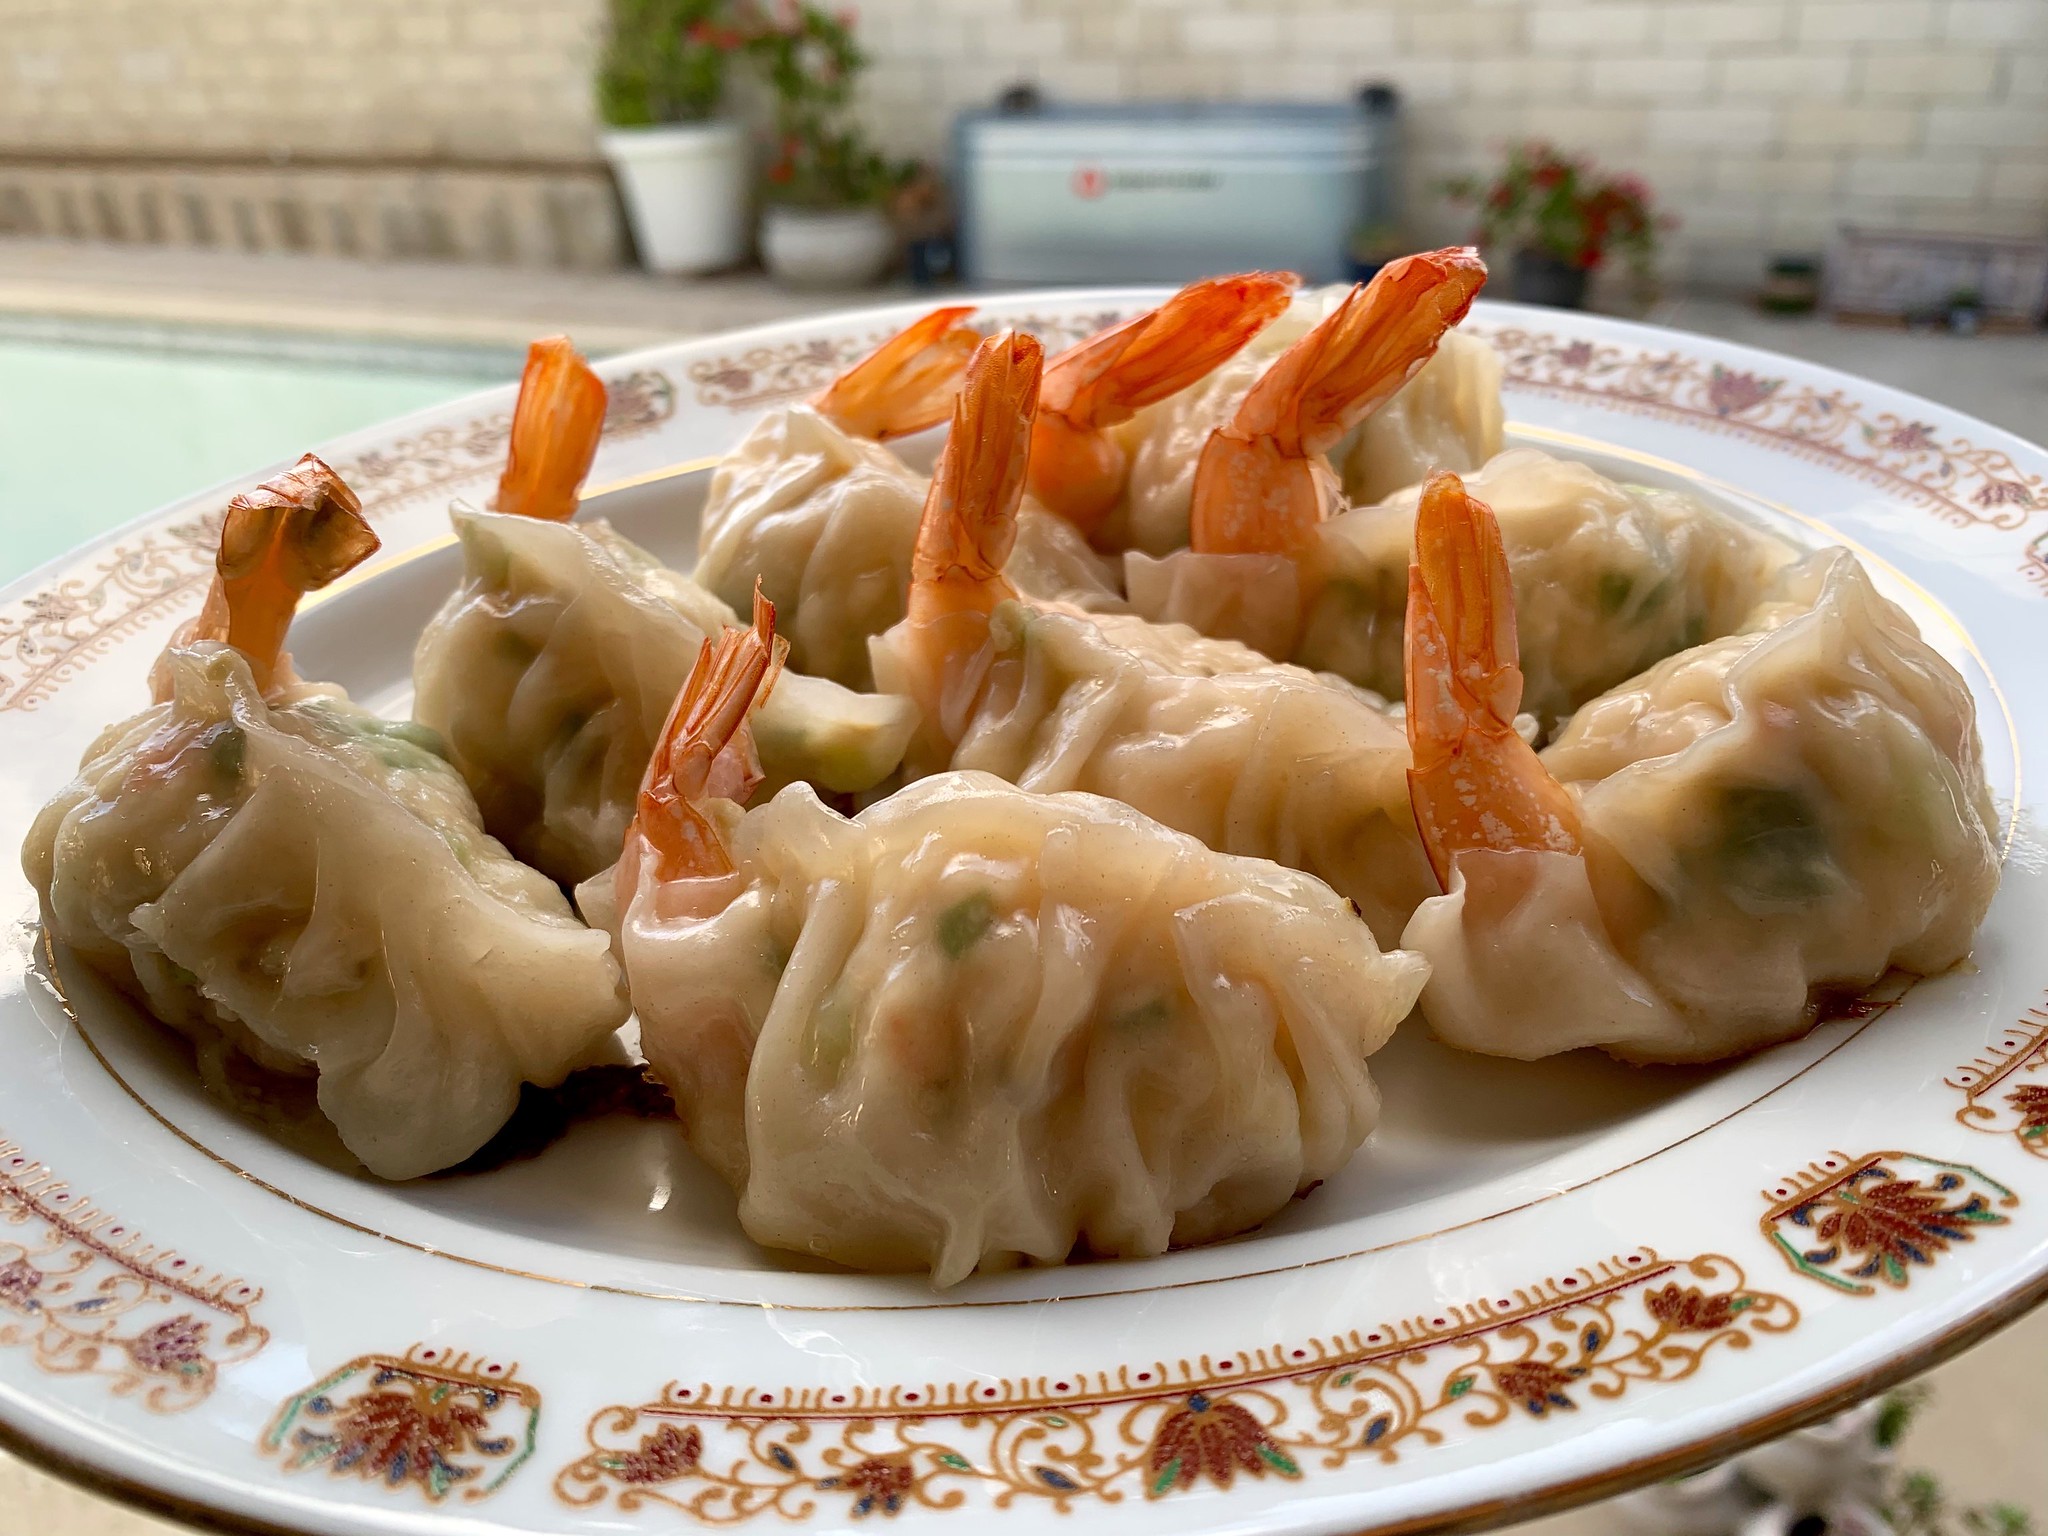
I had been scrolling through Instagram a few weeks before my birthmonth’s Fam Din when I saw a pic of the cutest little dumplings that had shrimp tails sticking straight out of them. ADORABLE! I had never seen anything like them before and knew right then….. I HAD TO MAKE THEM!

One of my favorite Korean food blogs is Maangchi. She’s hilarious and her recipes are delish. In fact, the Korea Seafood Soft Tofu Stew we make is a slight variation of hers.
I recalled that she had a recipe for Shrimp and Asian Chive Dumplings (or mandu) where she added crumbled tofu and thought I would do the same for my dumplings.
Now if you’re someone who says “EEEEWWWW….TOFU!”, let me say two things:
- Fresh tofu really has the mildest of flavor—if any! And in fact, they usually just take up the flavor profile of whichever sauce or seasonings it’s served with. As for these dumplings, it’s added solely to provide extra juiciness to the filling.
- Don’t Yuck My Yum.
That is all.
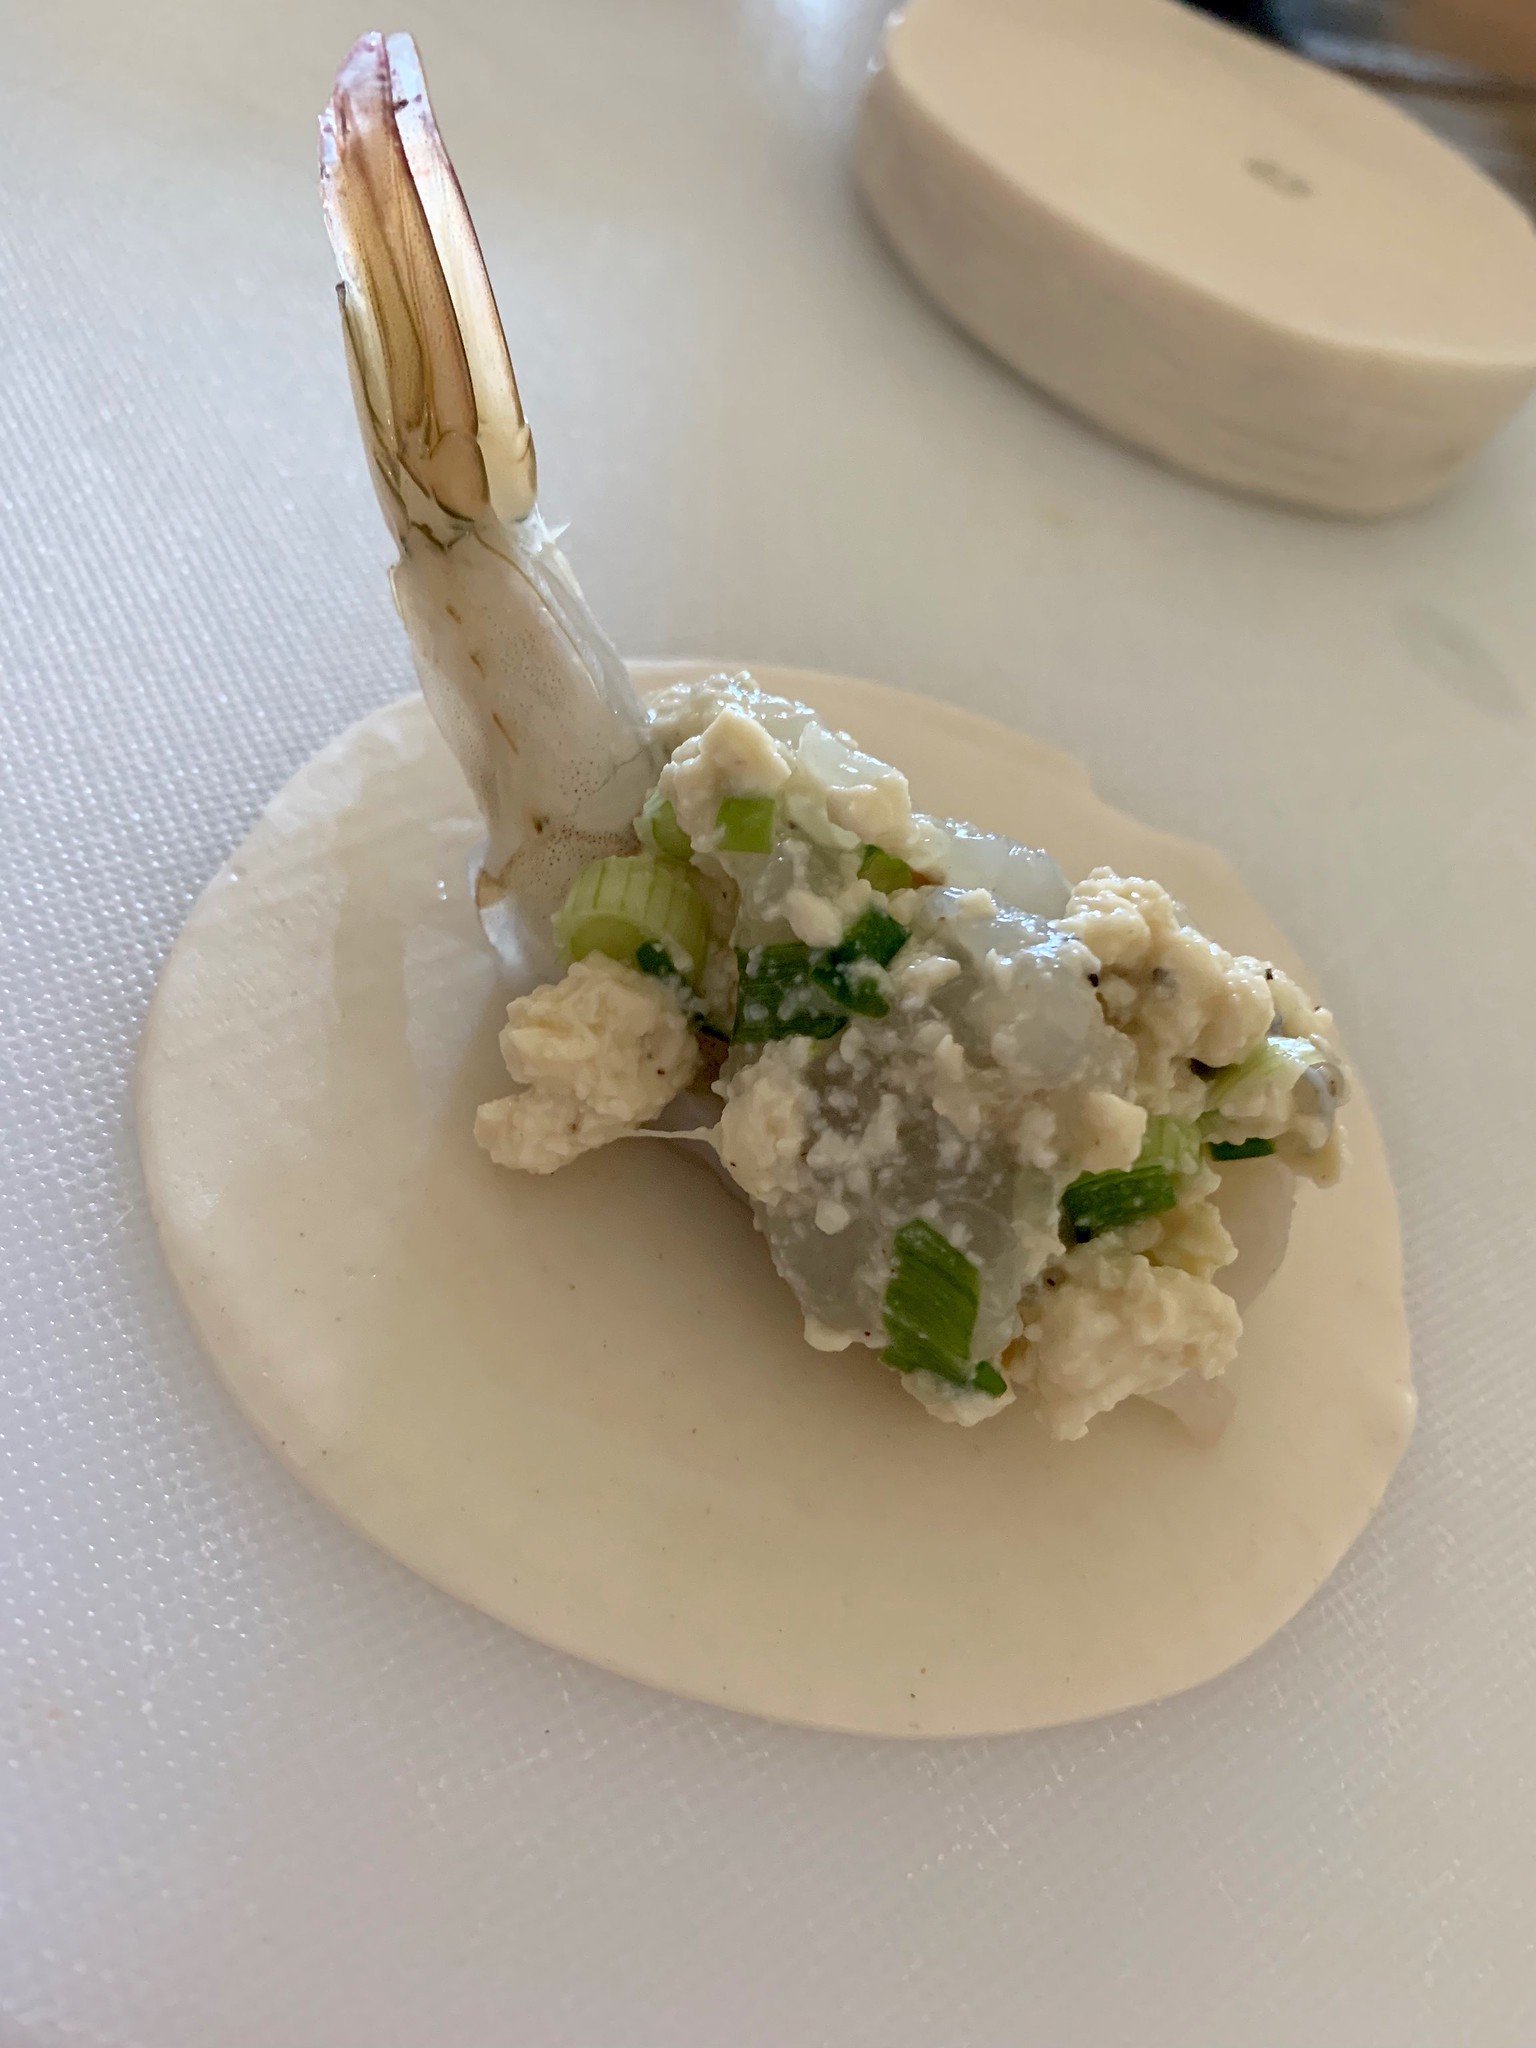
As for the rest, I kept the filling pretty simple since the majority of the dumpling “pouch” would be filled up by a whole shrimp. So in addition to the crumbled tofu, I just added just some more chopped shrimp, fish sauce and a few aromatics. Easy peasy.
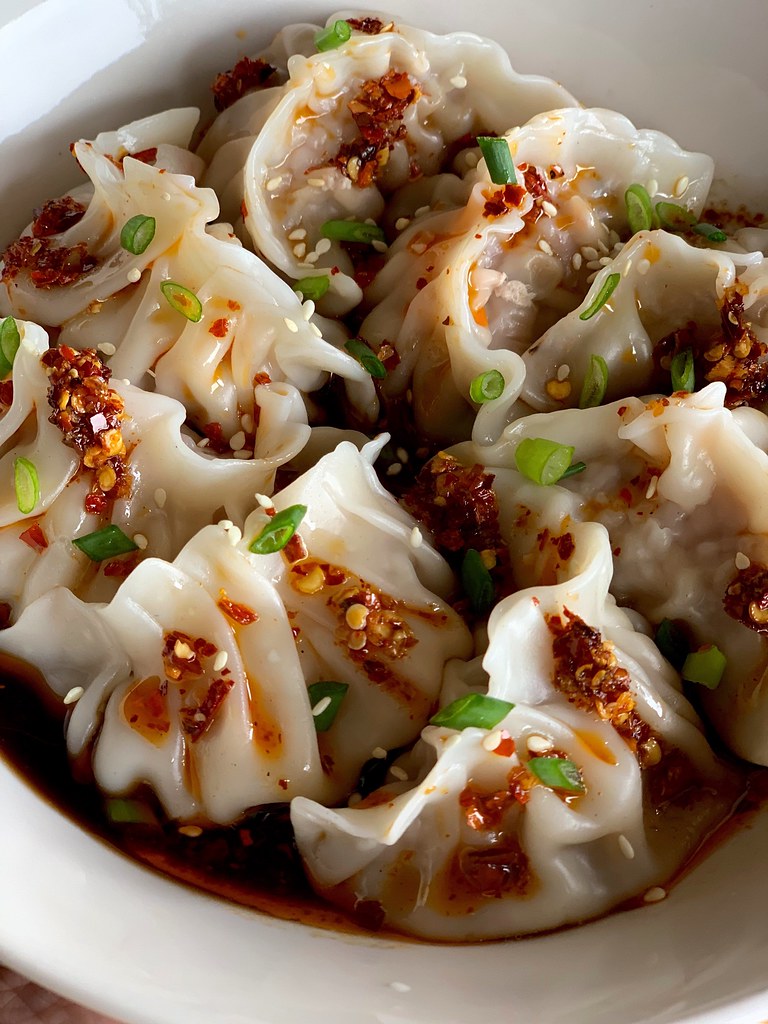
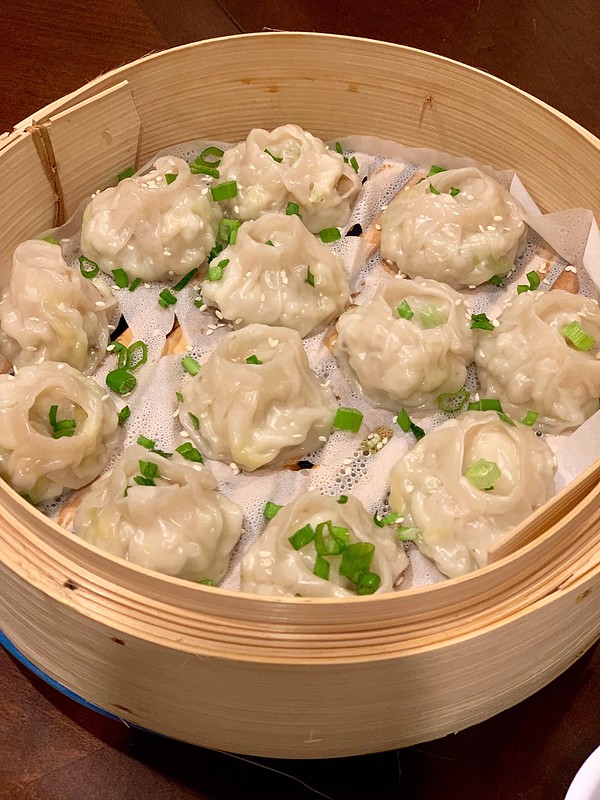
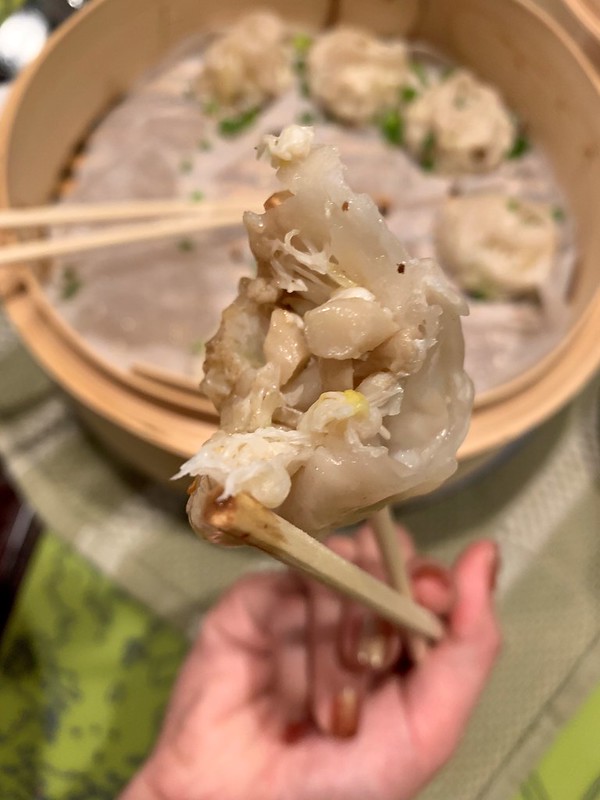
The end results were shimmy-shimmy good! There’s really something so satisfying about biting into a whole shrimp and having the rest of the filling be just so darn juicy.
I was also told that it was some of my family member’s favorite dumplings to date. And they can be a tough crowd!
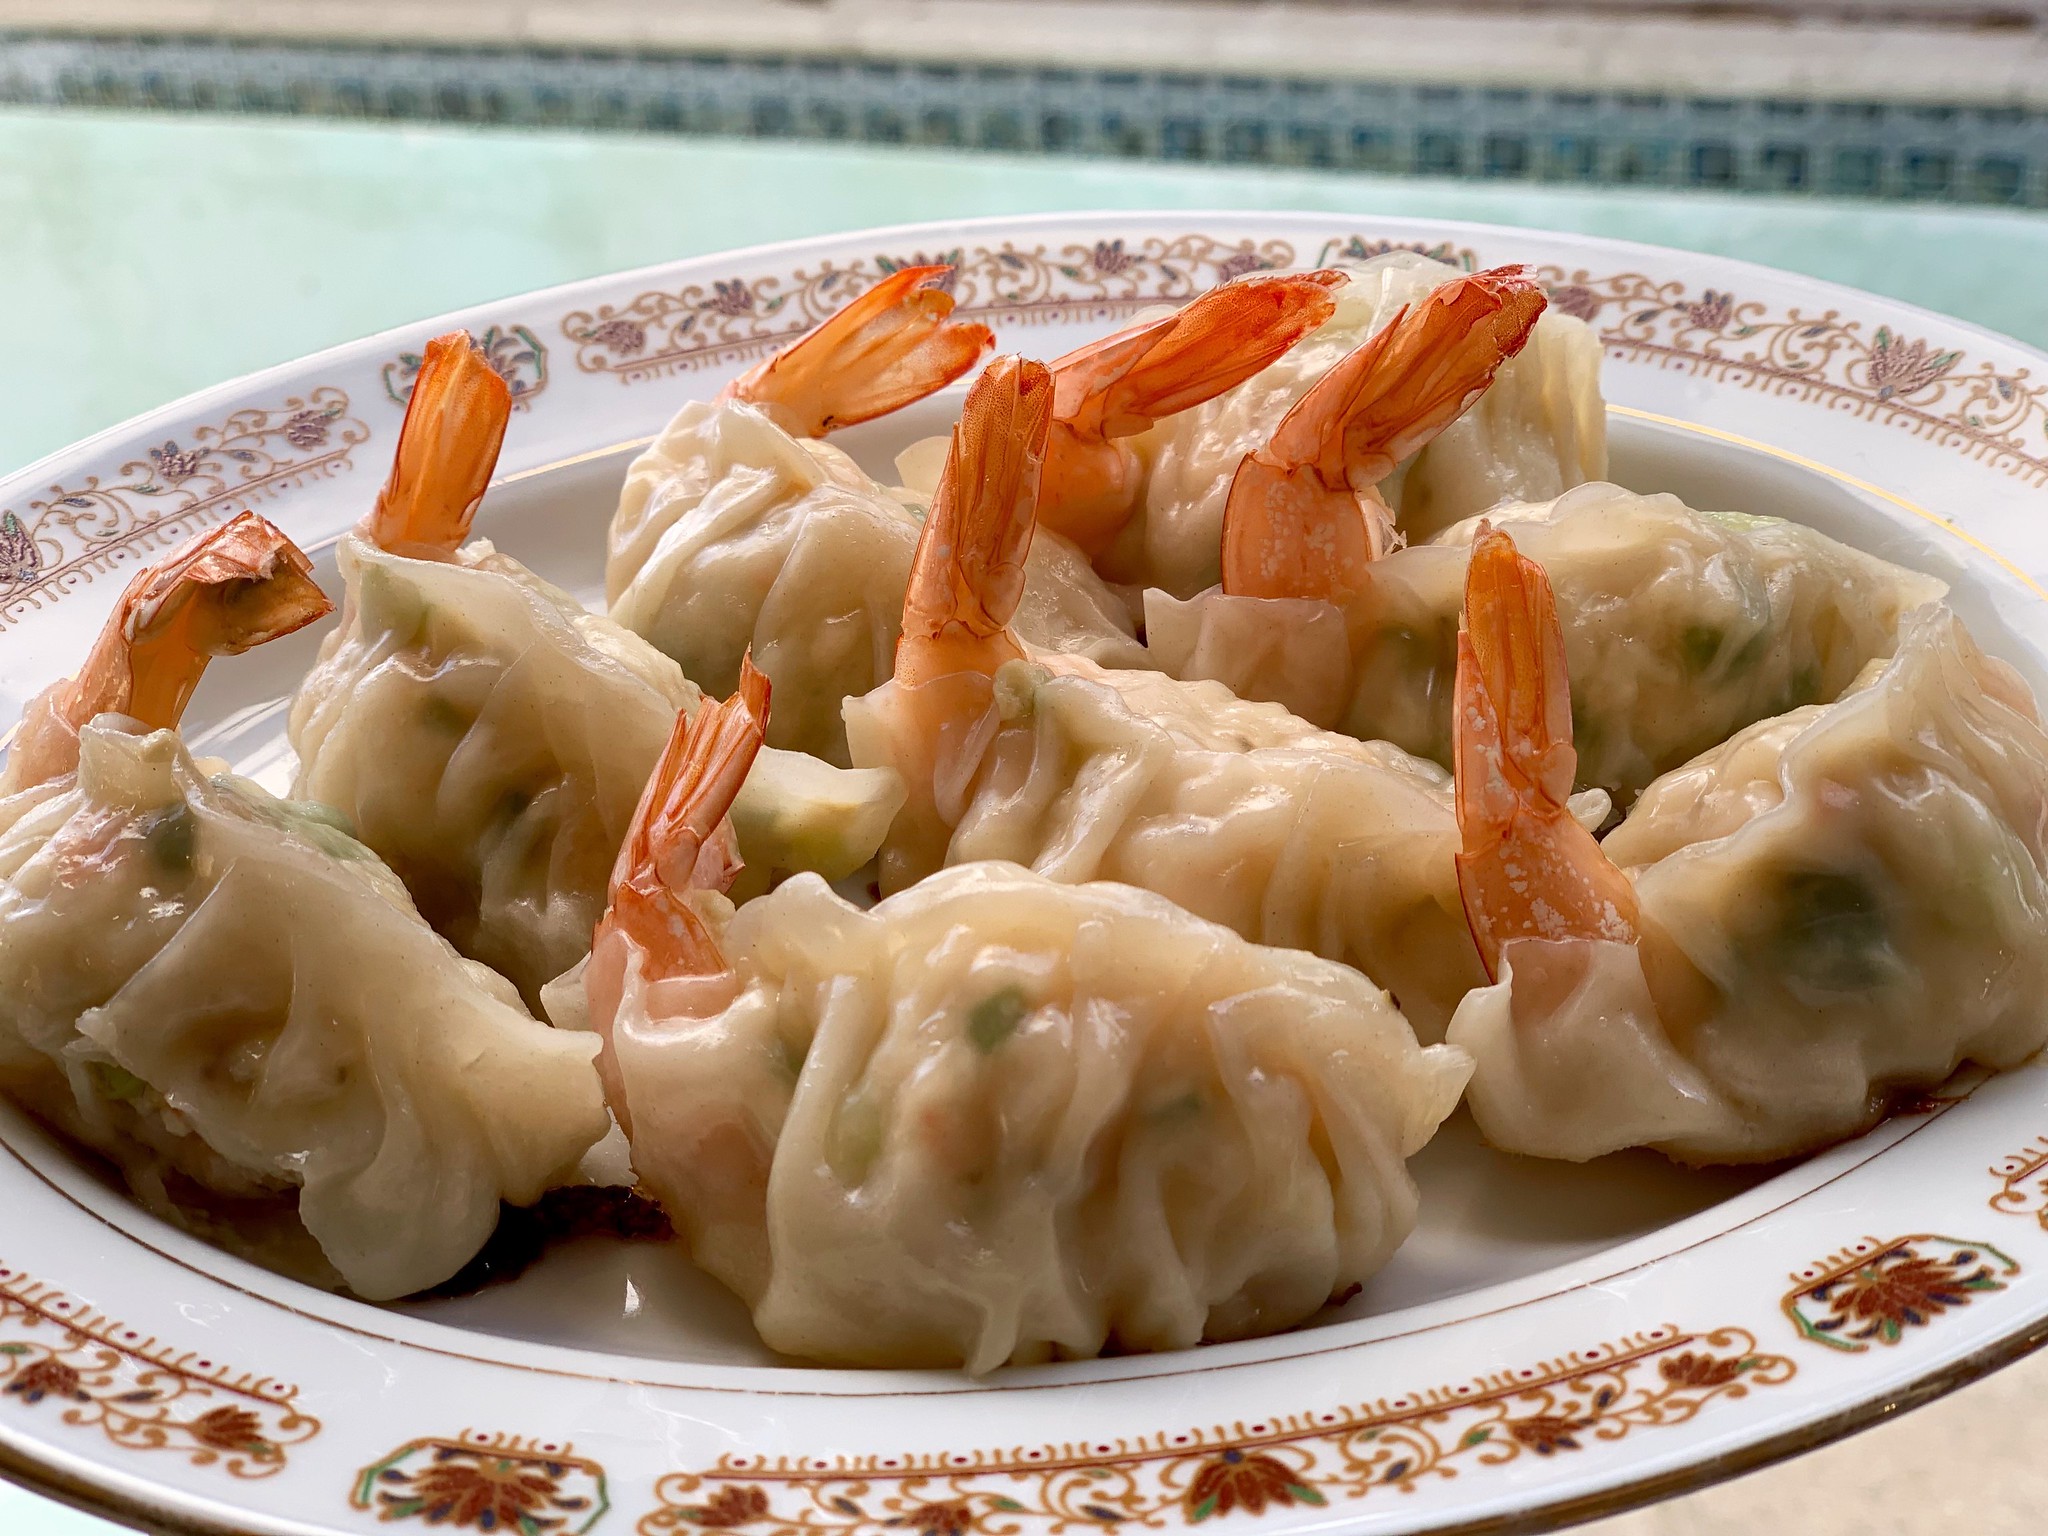
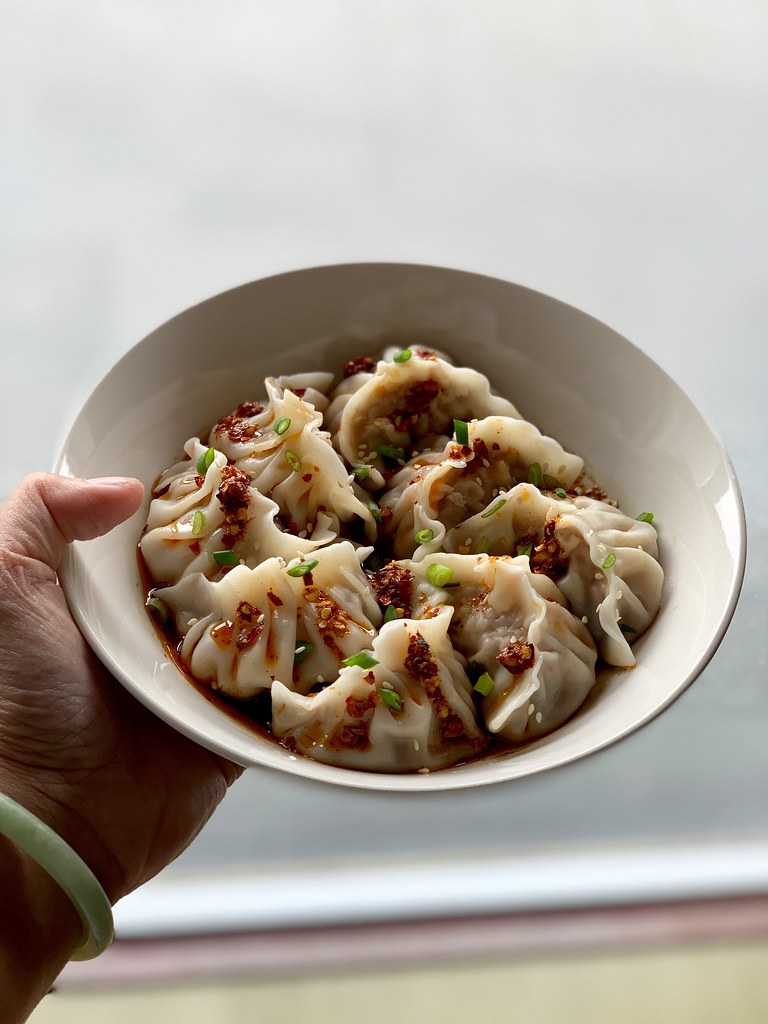
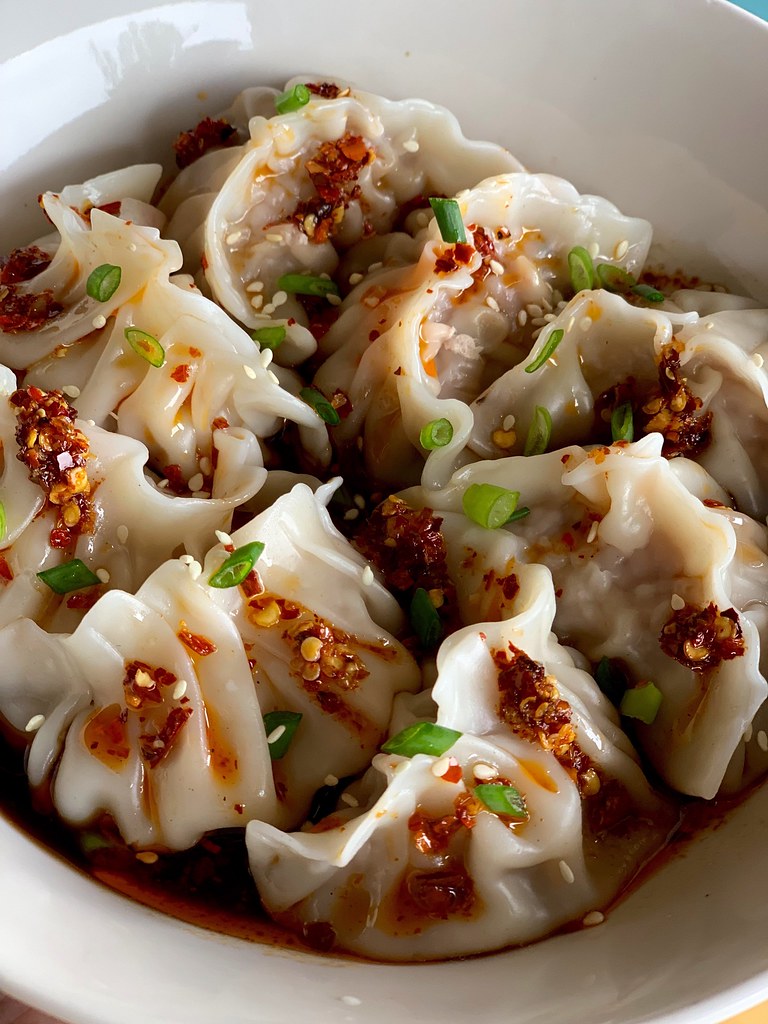
And as for the shrimp tail that proudly sticks out?
It’s not just for decor….
They became rather a handy mechanism to hold on to when picking up the dumpling to dunk into the sauce.
Functional and deliciously cute. Now that’s a killer combo.
__________________________________________________________
Shrimp and Tofu Dumplings
Makes approximately 40 dumplings
Ingredients:
Dumplings:
8 ounce block of firm tofu
40 butterflied whole shrimp, with tails intact
½ pound of shrimp, peeled and deveined
½ cup chopped scallions
½ tablespoon finely minced garlic
1 tablespoon Shaoxing wine
2 teaspoons toasted sesame oil
2 tablespoons cornstarch
1 tablespoons fish sauce sauce (more, if needed)
½ teaspoon black pepper
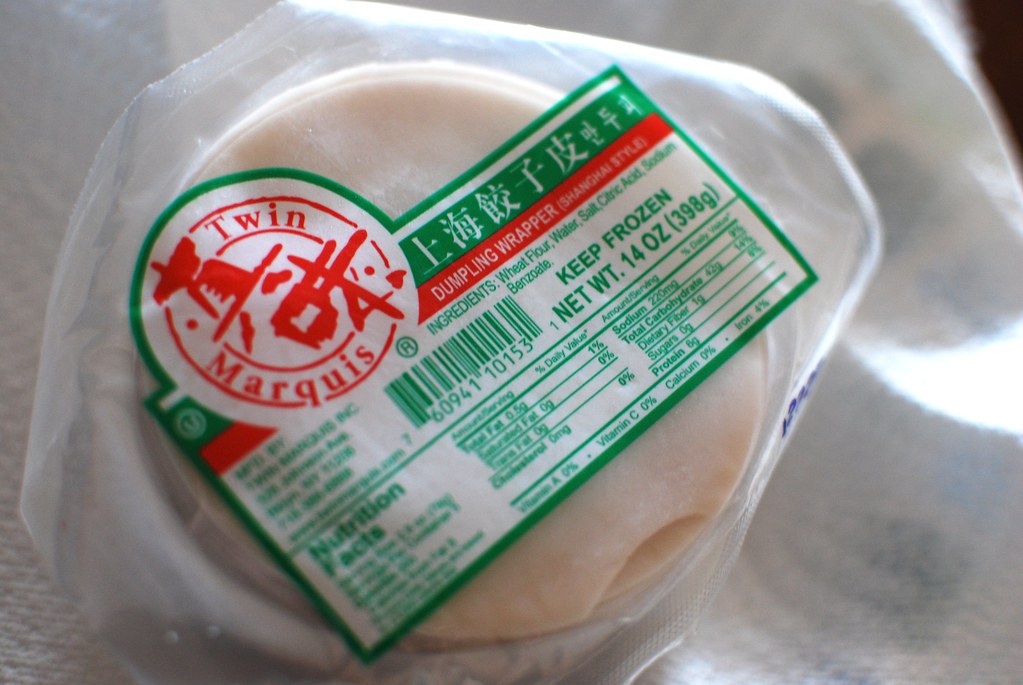
1 package dumpling wrappers (approximately 50 skins)
Dipping Sauce:
4 tablespoons soy sauce
3 tablespoons Chinkiang Black Vinegar
1 tablespoon sesame oil
½ tablespoon sugar
1 tablespoons homemade Sichuan Chili Oil (both the oil and flakes)
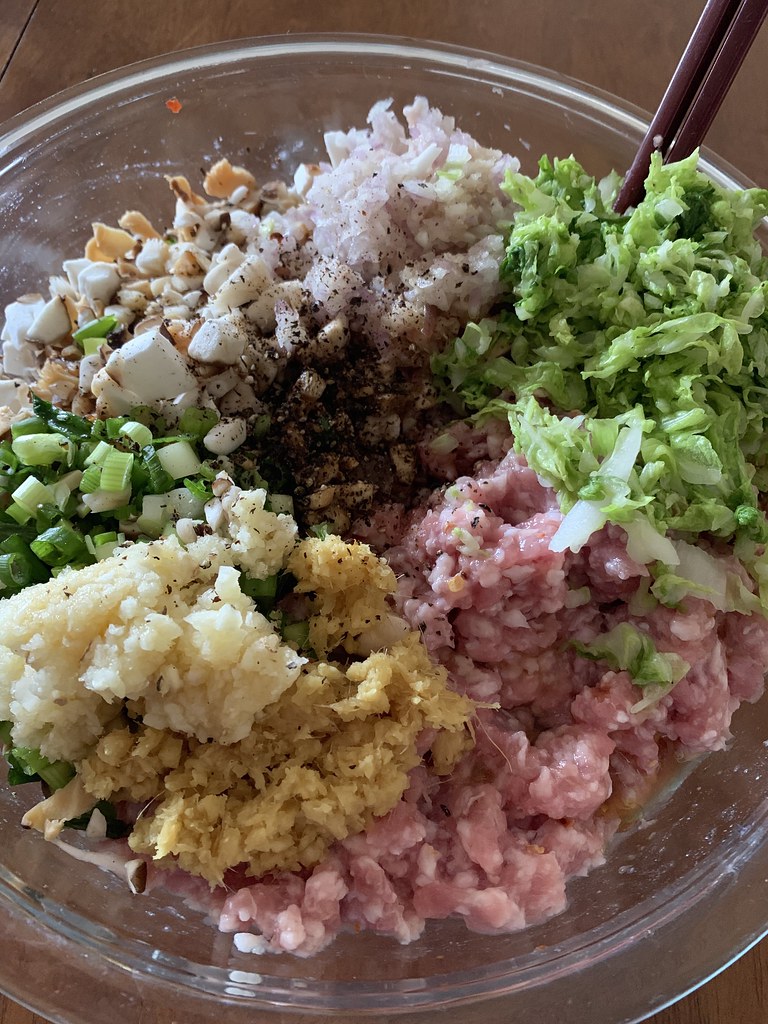
Press and drain your tofu by wrapping the block in a few sheets of paper towels and then place it on a large plate. Place another large plate on top of the tofu block and place a heavy object on top to weigh it down (e.g. a large can of veggies, a book, etc.). Allow the tofu to drain for about 15-20 minutes
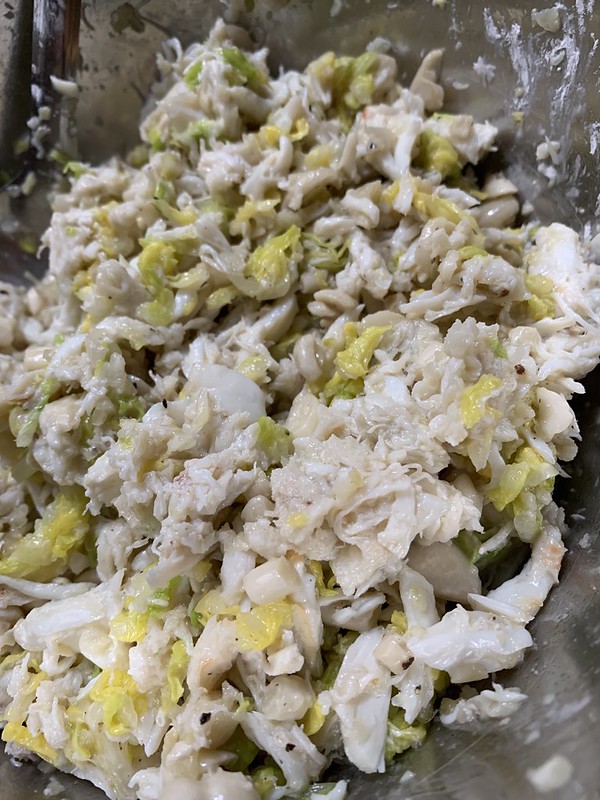
Place the ½ pound of peeled and deveined shrimp in a food process. Pulse several times until the shrimp is well chopped up but has not yet become a paste. You can also hand chop the shrimp on a large cutting board. Once done, place into a bowl.
Crumble the drained tofu into the bowl of chopped shrimp. Add in the scallions, garlic, Shaoxing wine, sesame oil, cornstarch, fish sauce and black pepper. Mix well to combine. Test the filling for seasoning by taking a small spoonful of the mixture and pan fry in a nonstick skillet for 1-2 minutes on each side. Taste and adjust the uncooked filling as needed.
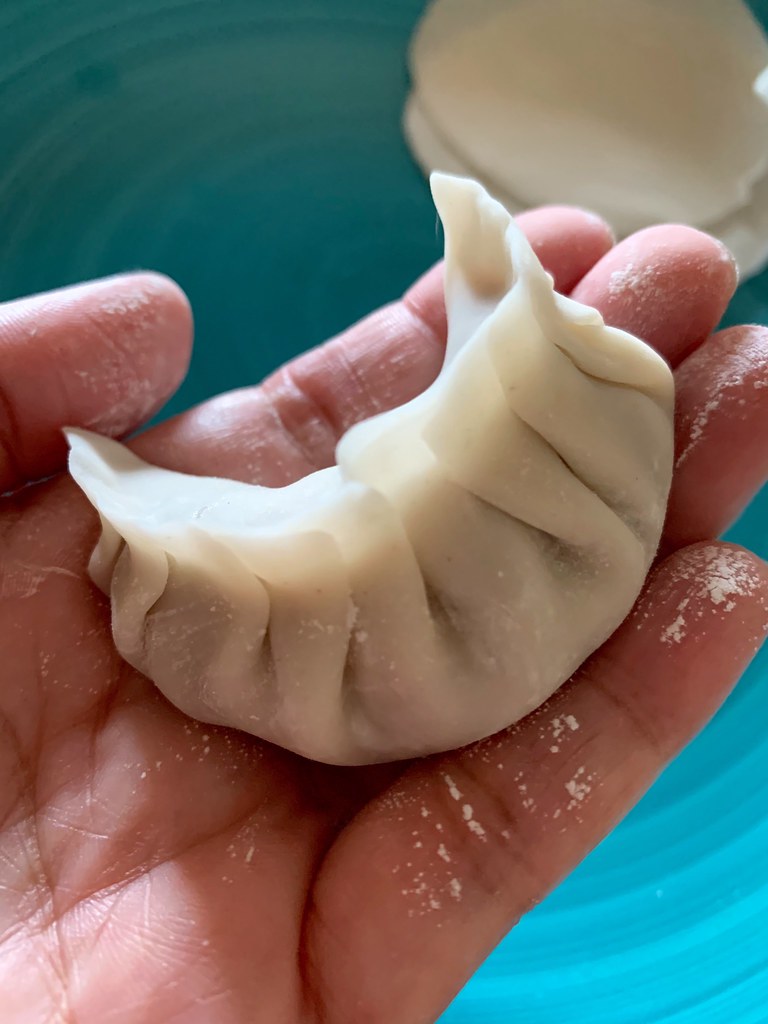
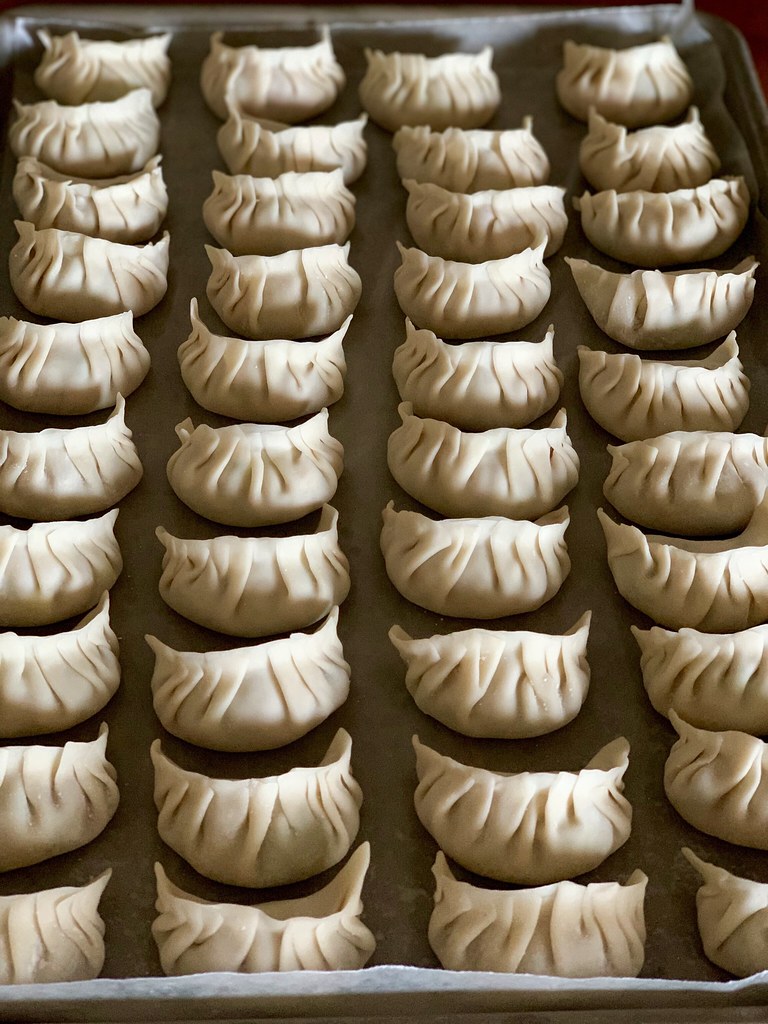
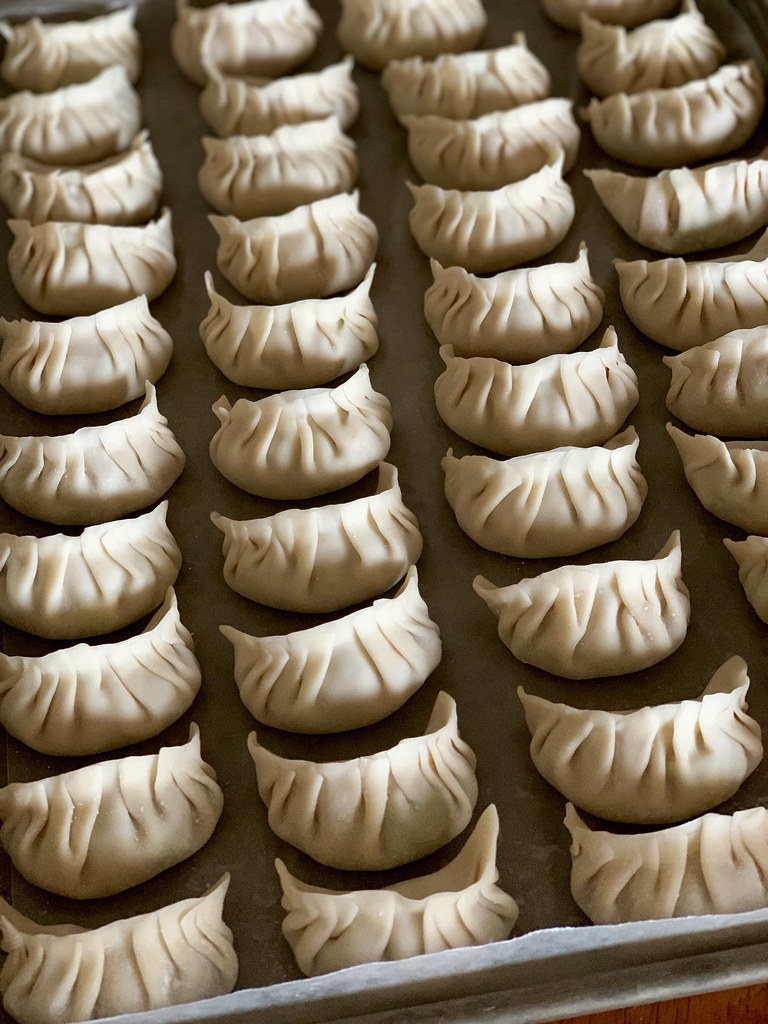
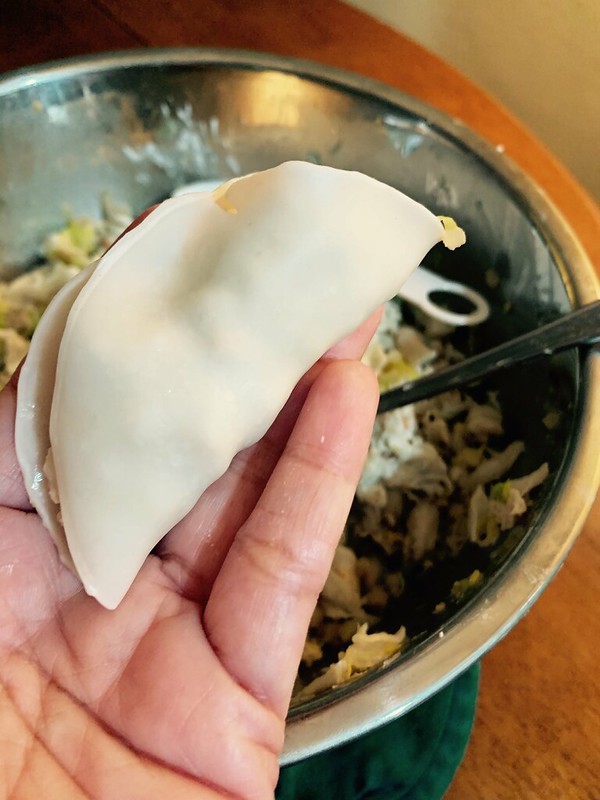
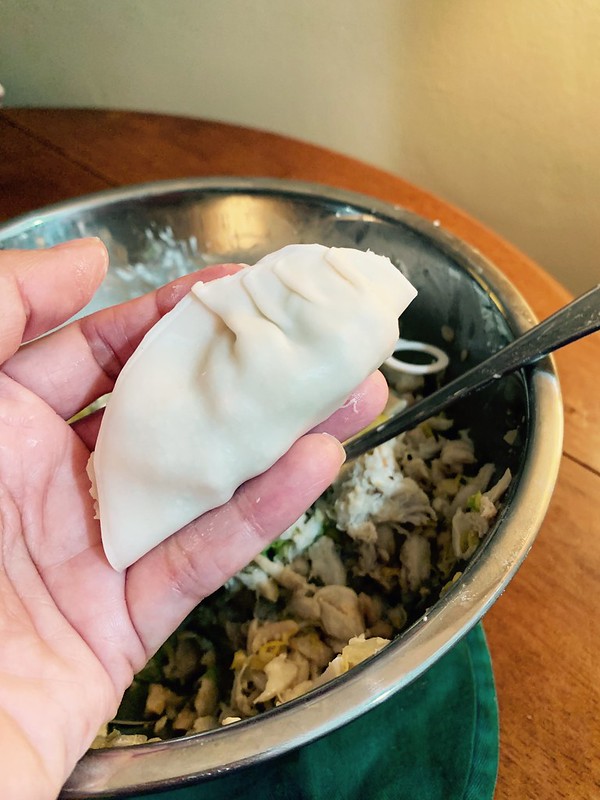
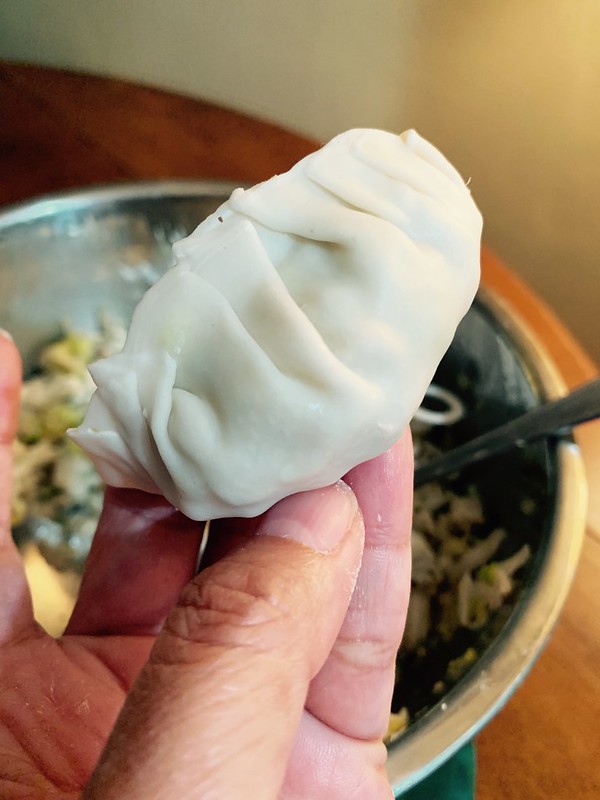
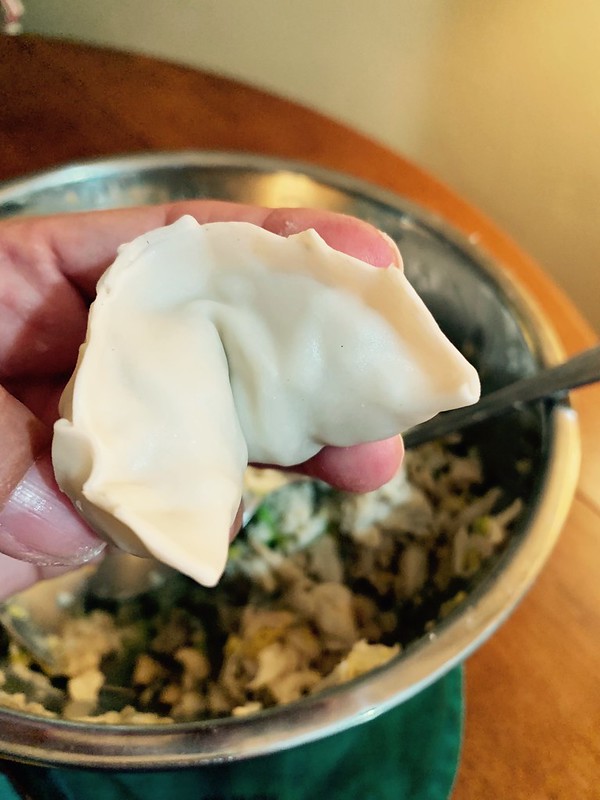
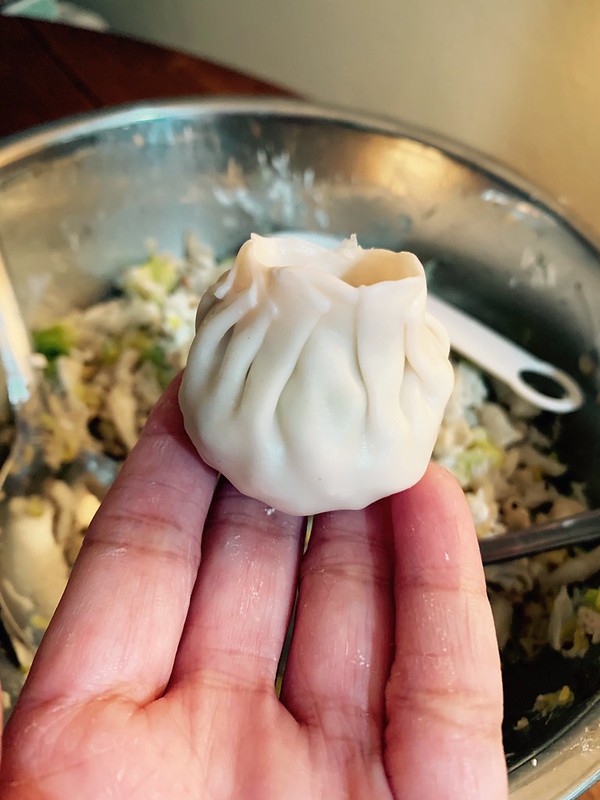
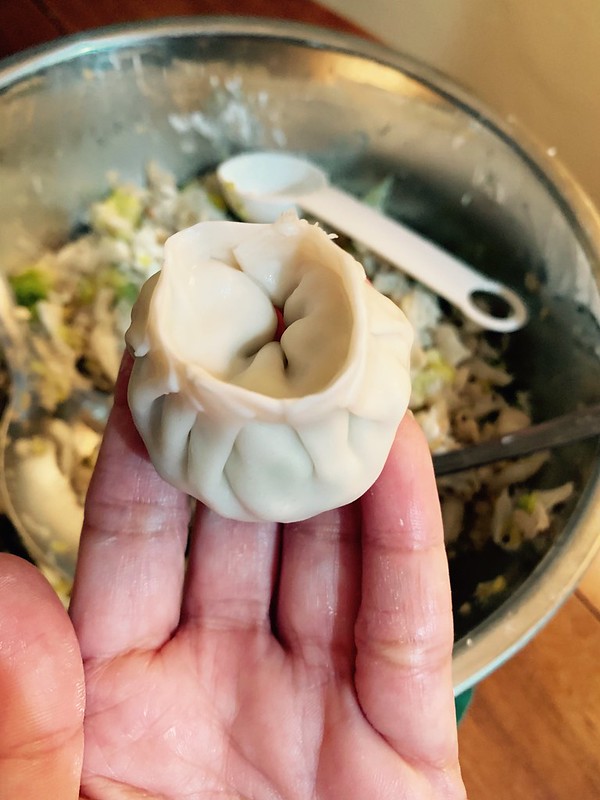
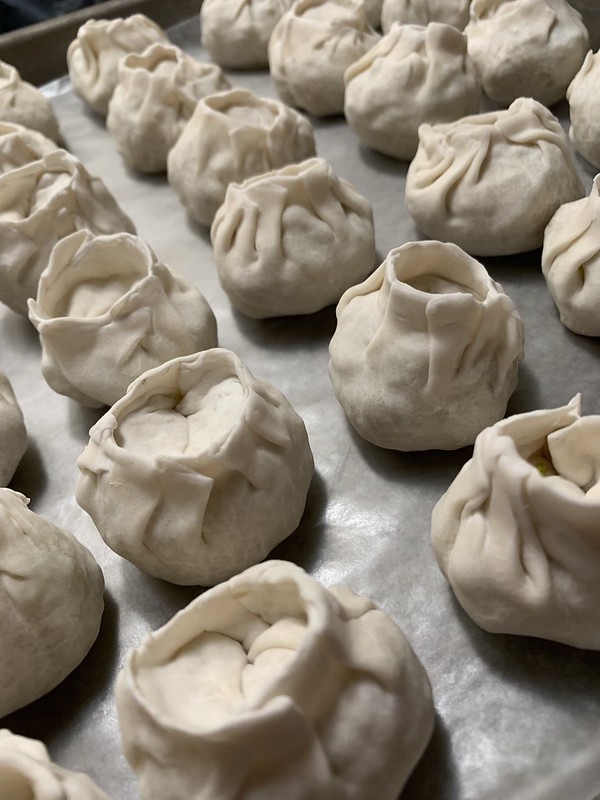
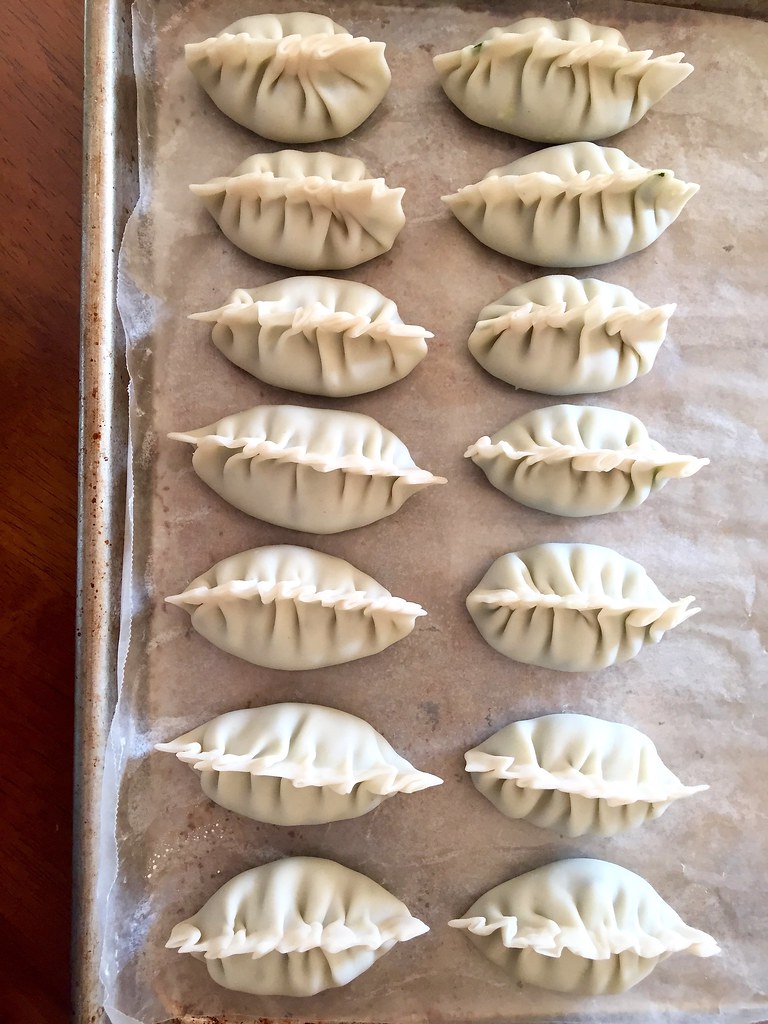
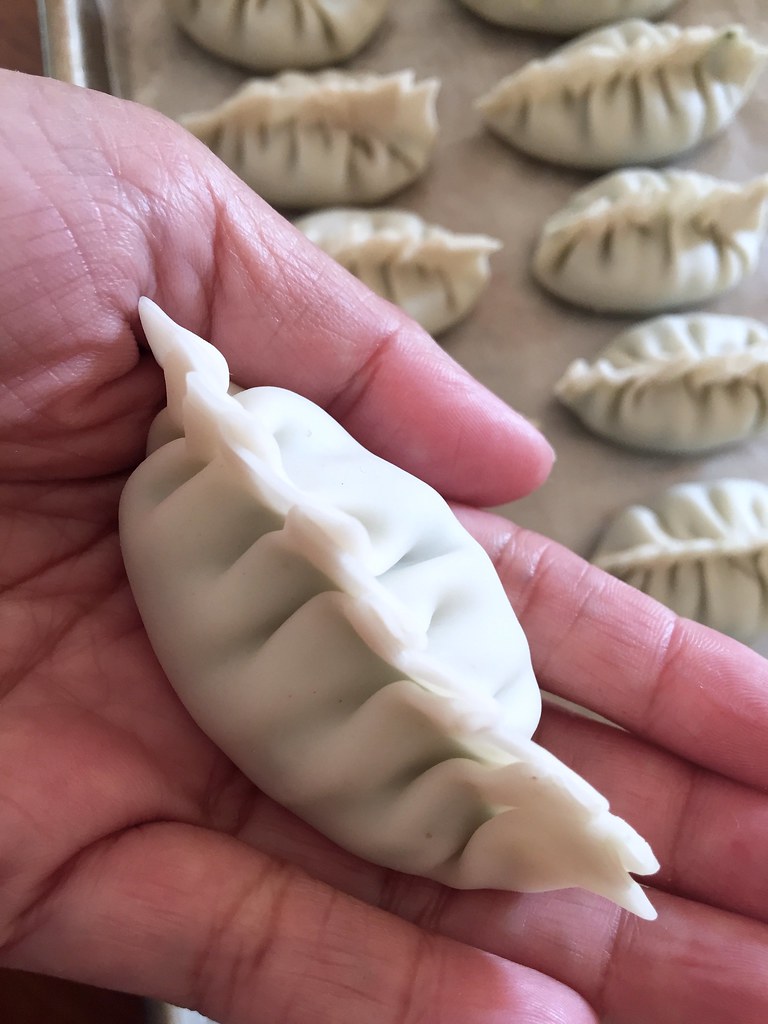
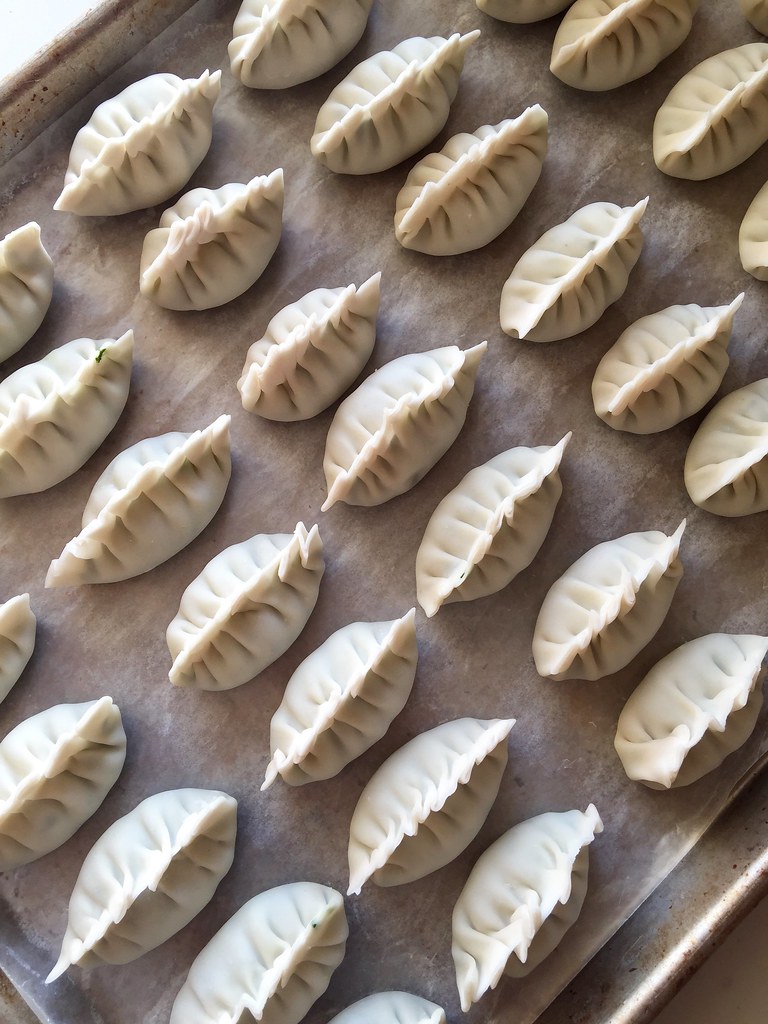
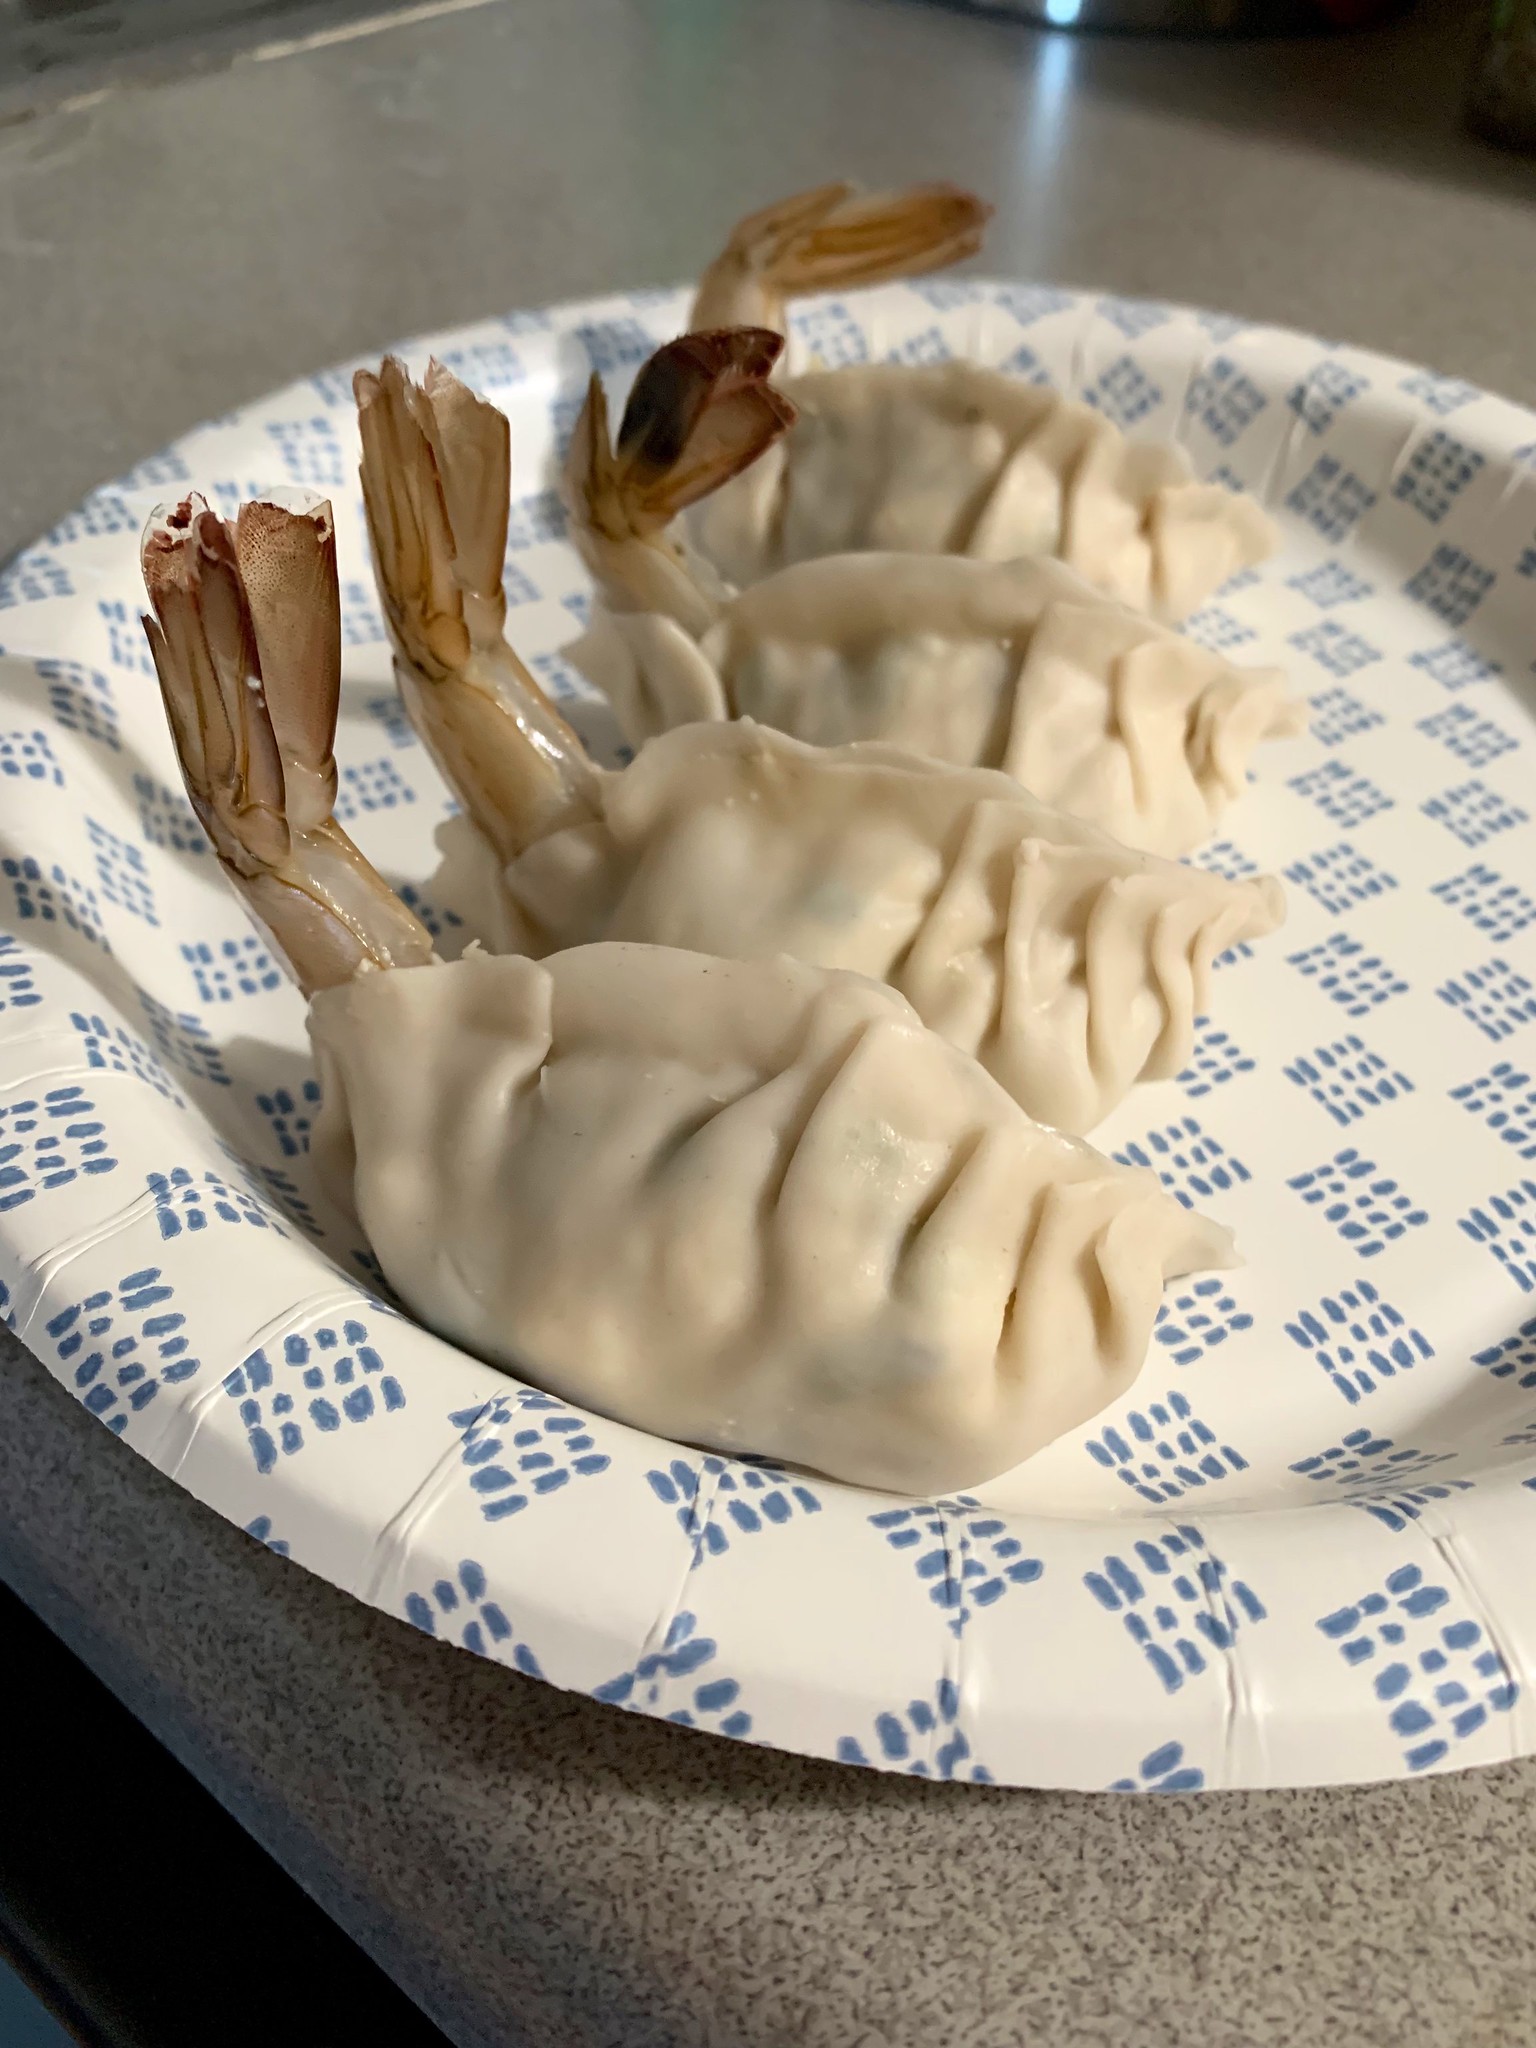
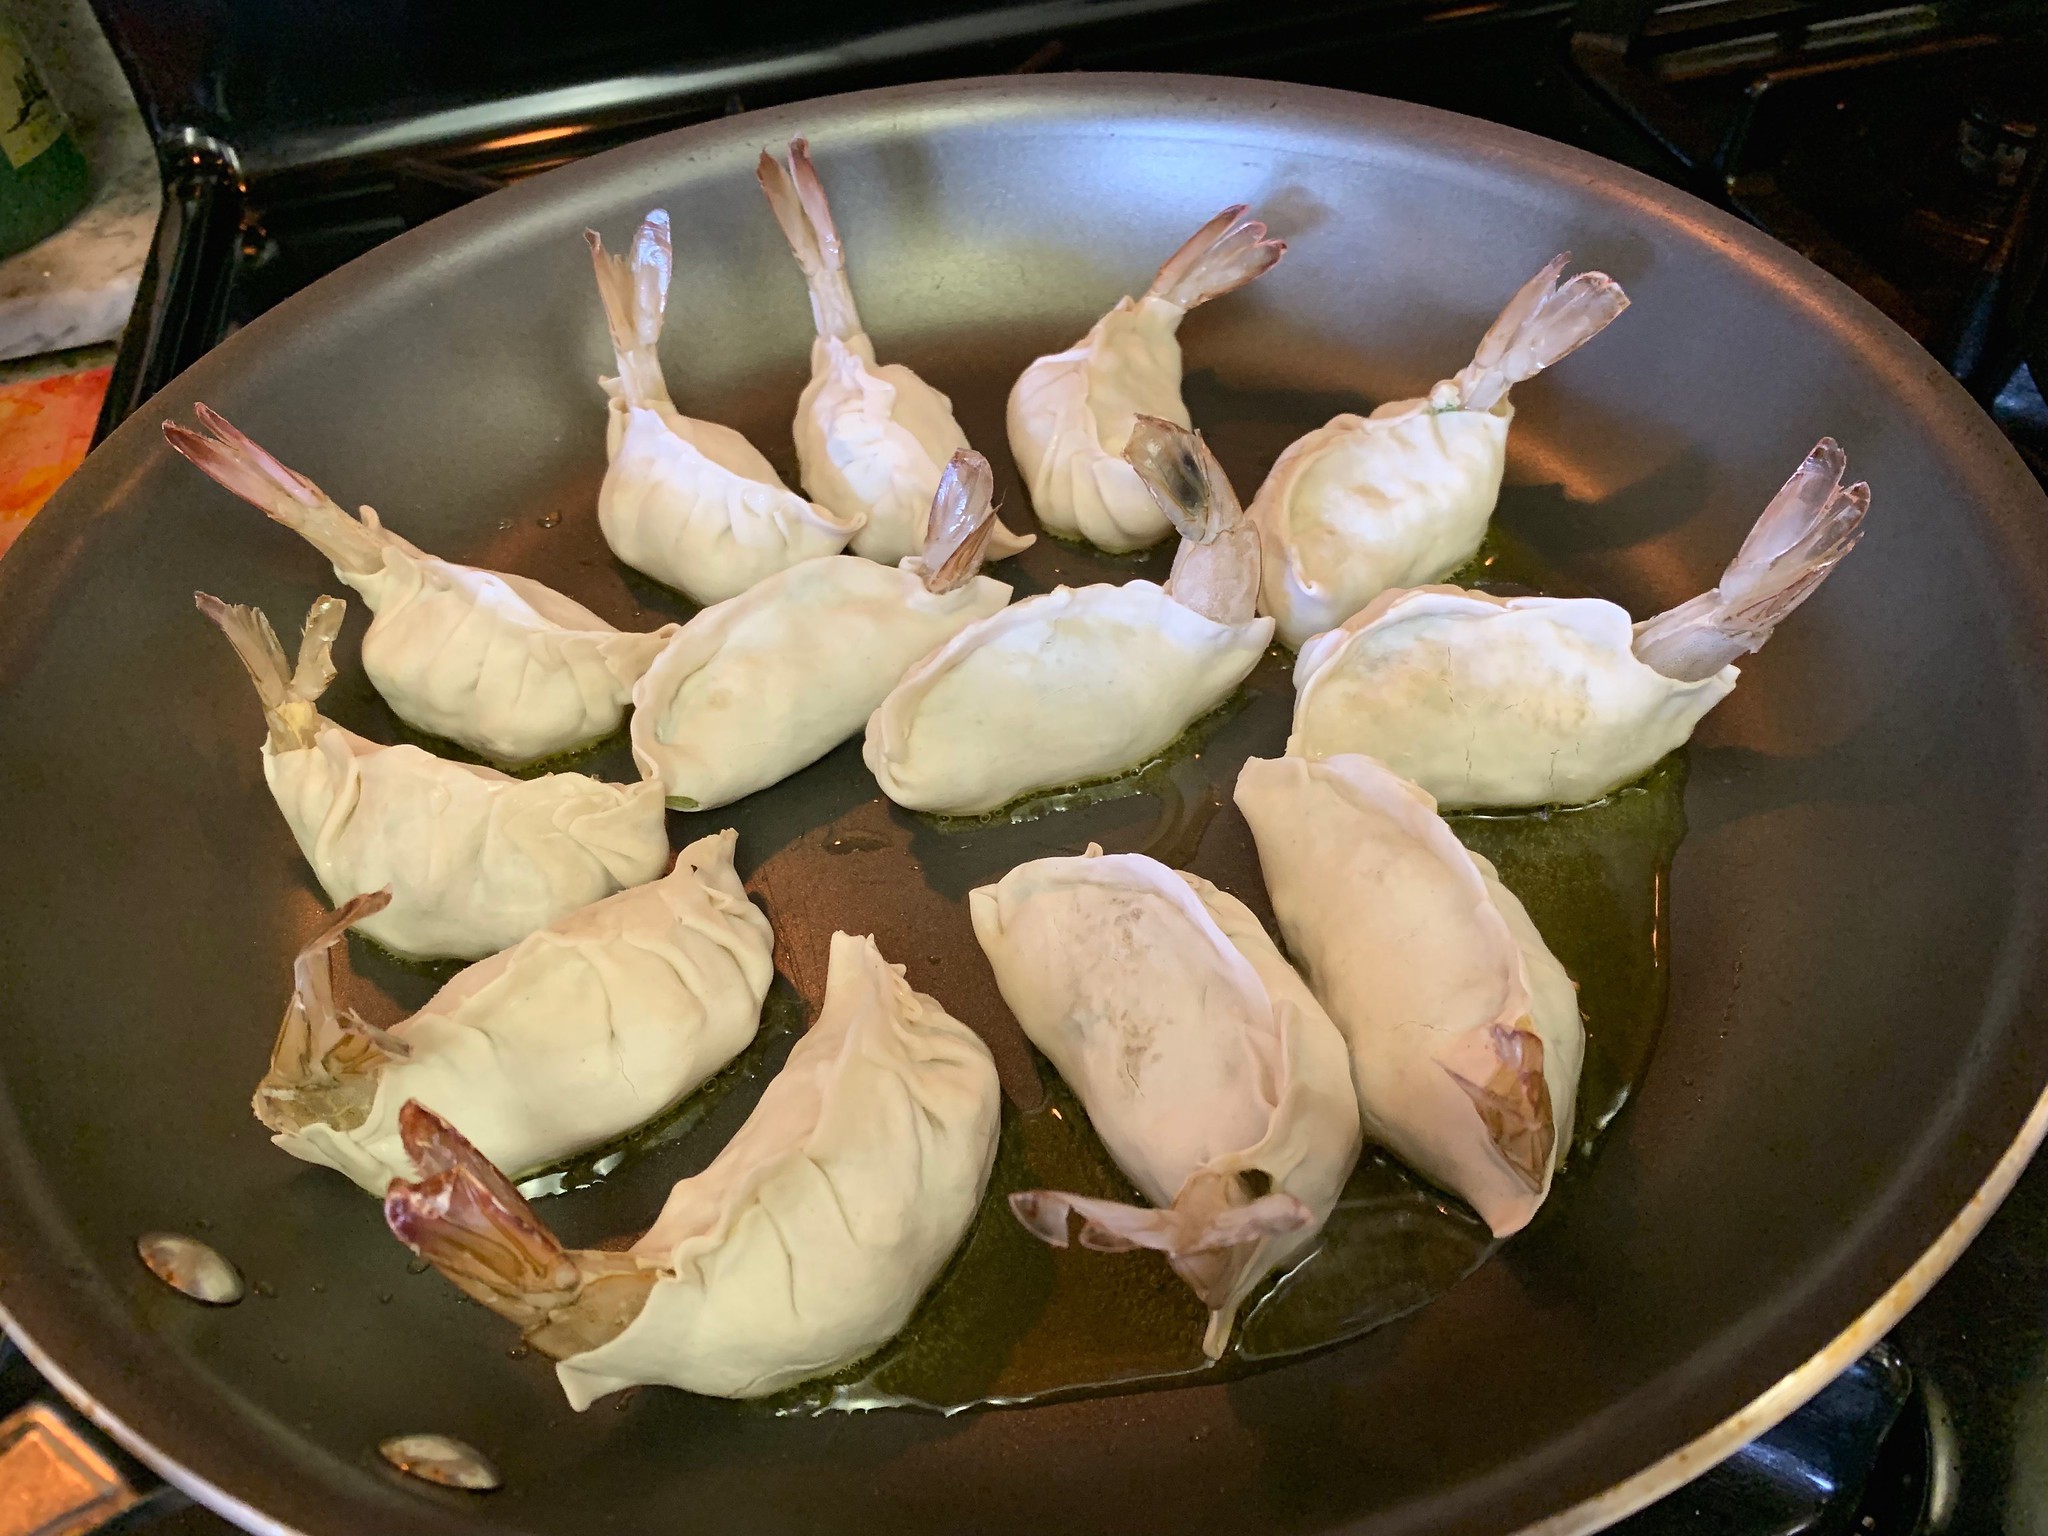
Begin assembly of the dumplings. Lay one dumpling skin on a flat surface. Dip your finger in water and moisten the edge of the wrapper. Place one of the butterflied shrimp in the center of the wrapper, cut side down so that the tail lifts up. Spoon about 1 teaspoon of the filling over the shrimp. Pick up the dumpling and fold the skin over the shrimp/filling. Begin pleating and pressing the edges together to seal around the tail. Place the filled dumpling on a baking sheet and continue until all the filling/skins have been used.
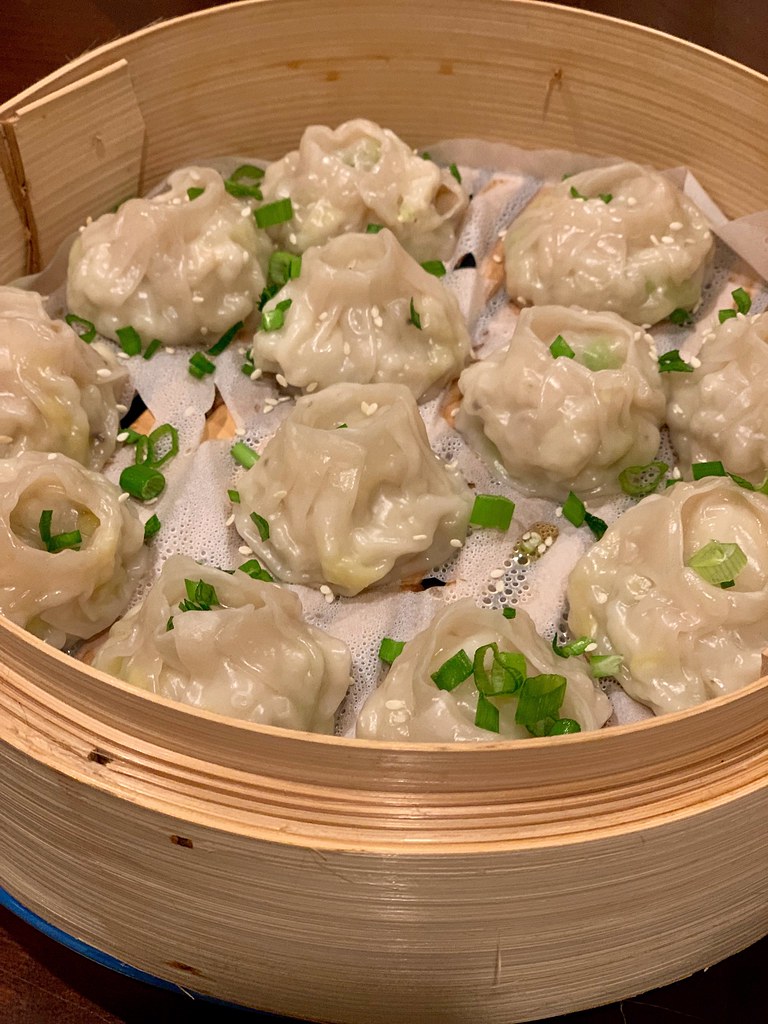
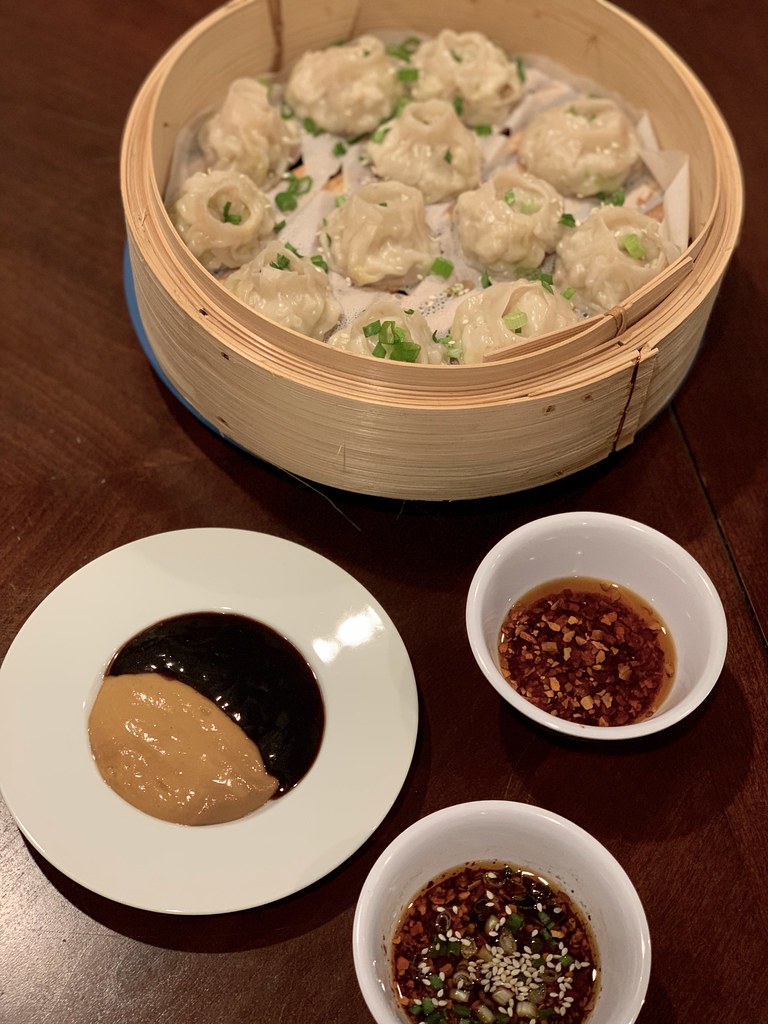
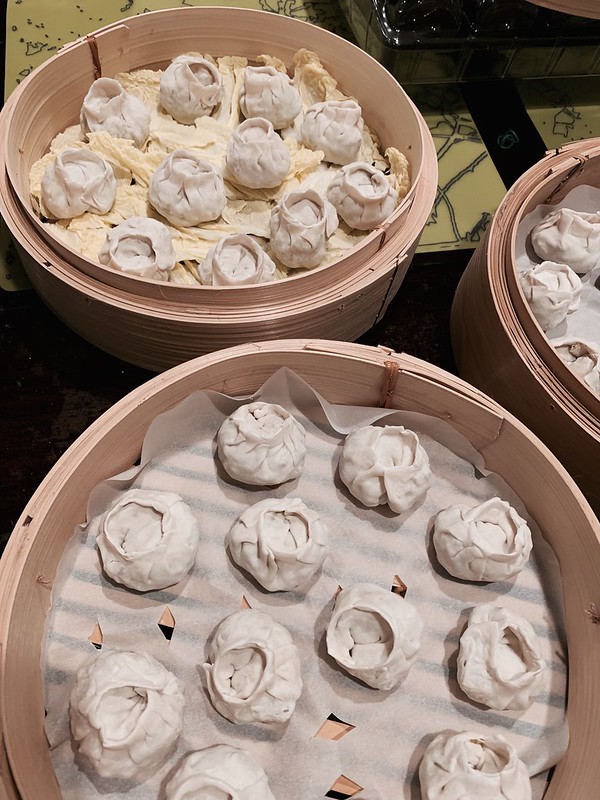
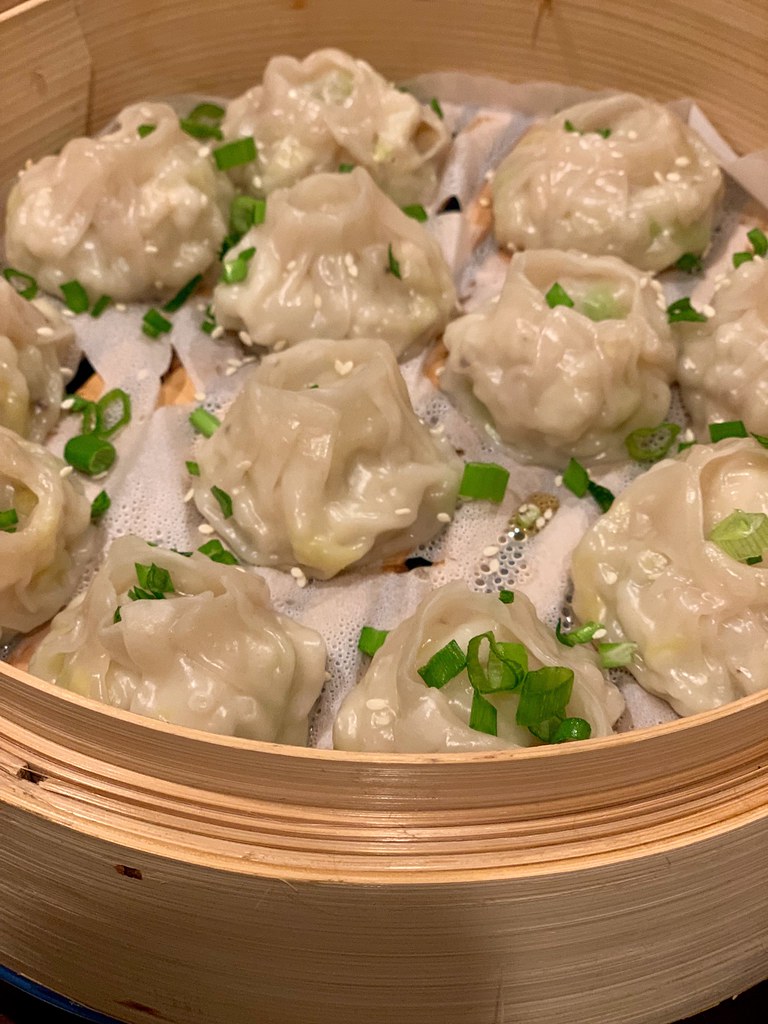
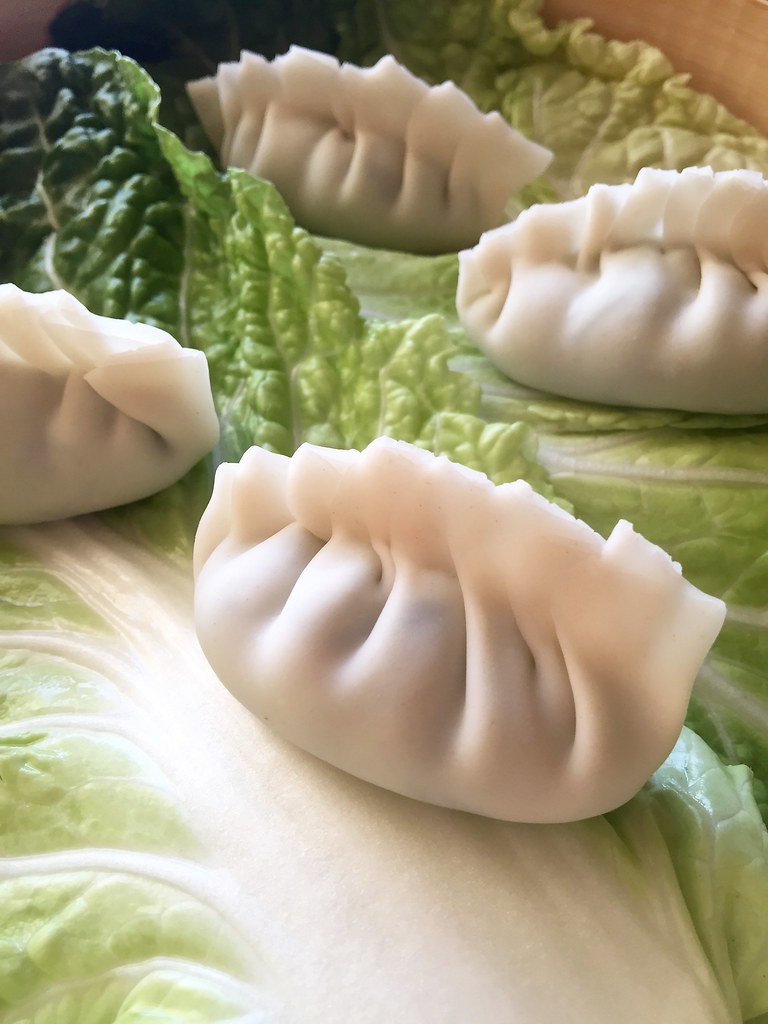
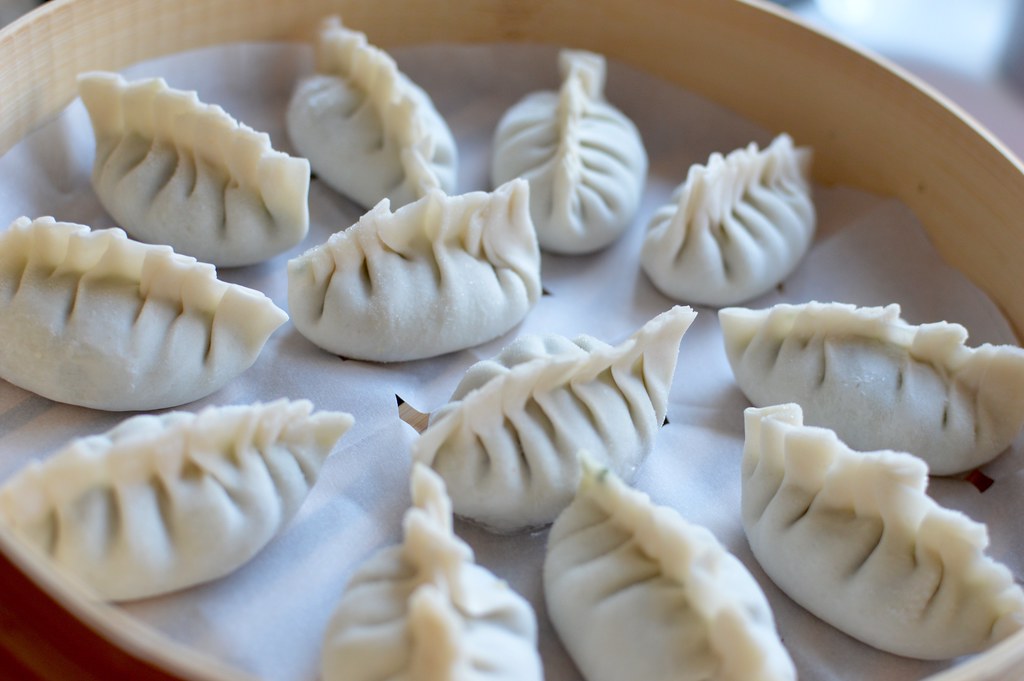
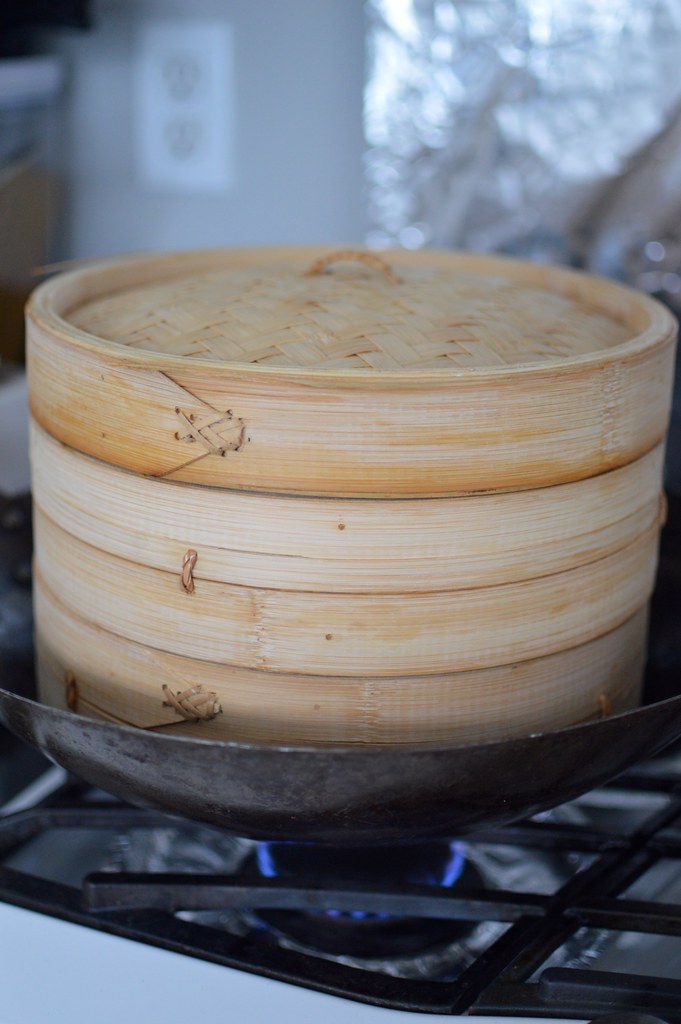
To steam: Arrange the dumplings in a steamer (lined with cabbage leaves or parchment paper) and steam for 8-10 minutes. The shrimp tails will become pink and opaque while the dumpling skins will become rather transparent. You can lightly squeeze the dumpling and feel that filling has become rather firm.
To pan-fry: Heat a large skillet to medium-high heat with 2 tablespoons of oil. Place a single layer of the dumplings in the pan. Fry the dumplings for 1-2 minutes until the bottoms are golden. Carefully pour in about 1/3 cup of water and immediately place a tight fitting lid over the skillet. Lower the heat to medium-low and allow the dumplings to steam for 4-5 minutes. Remove the lid and cook until all the water has evaporated. If you need to fry the dumplings in batches, use a paper towel to wipe the frying pan clean before repeating the above process.
While the dumplings steam/pan-fry, whisk all of the ingredients together for the dipping sauce and set aside.
Once the dumplings are steamed, transfer to a platter and serve immediately with sauce. ENJOY!
*If you would like to freeze the uncooked dumplings, place the baking sheet directly into freezer for 2-3 hours after you have assembled them. Be sure that the dumplings are in a single layer and are not touching each other. Once the dumplings are frozen, you may transfer them to a sealed container. They can be kept in the freezer for a few months and should be cooked frozen. Add 1-2 additional minutes to the cooking time when steaming.