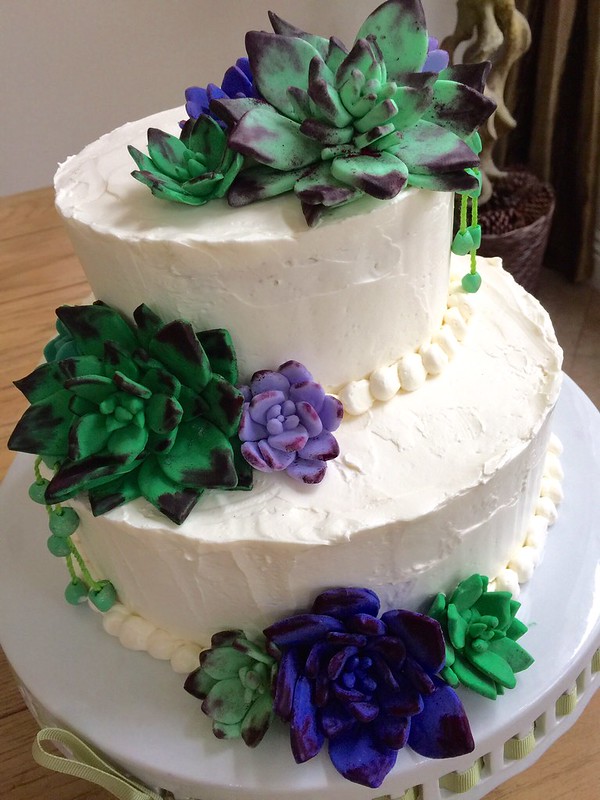
Desserts/Pastries

Cooks Illustrated Triple-Chocolate Mousse Cake

October 2017 Fam Din
We’re Chocoholics.

Every single one of us.
October 2017 Fam Din
From Ôn and Mệ (our paternal grandparents) that would give us Andes chocolates as goodies….

To our Folks…(particularly Dad these days…)

To all five Sibbies

and especially all of our Munchkins.

Triple-Chocolate Mousse Cake
Mmmm….Chocolate.

Triple-Chocolate Mousse Cake
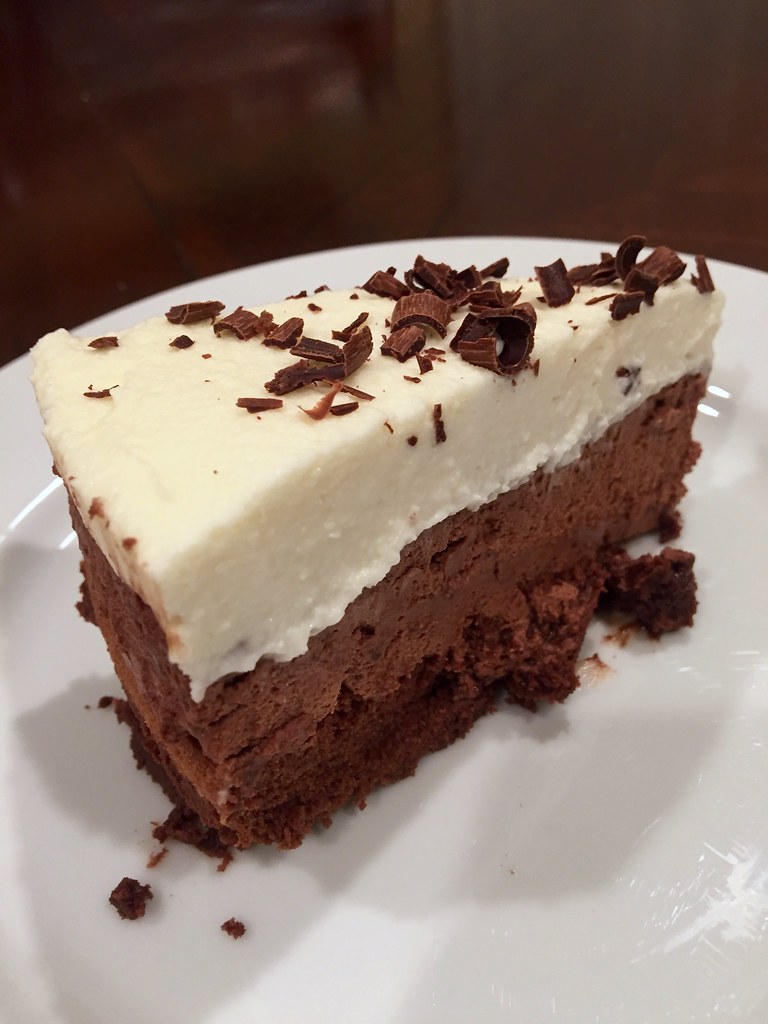
So when we discovered the Triple Chocolate Mousse Cake from Porto’s Bakery –it became a staple at our celebrations!
Triple-Chocolate Mousse Cake
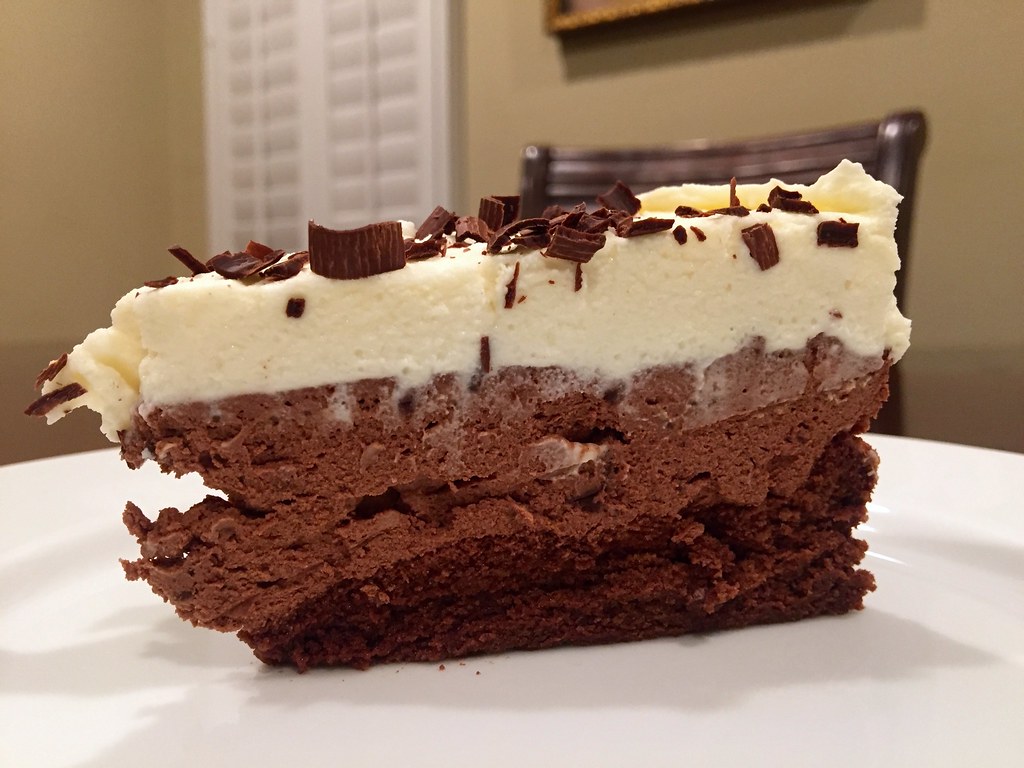
A rich chocolate cake layer base….

Topped by a chocolatey mousse layer…

Then topped with another white chocolatey mousse layer.
Triple-Chocolate Mousse Cake
Perfection.

Triple-Chocolate Mousse Cake
A while back, seester asked me to make a version of our beloved cake. Which was perfect timing because I had just stumbled across a version by Cooks Illustrated that I really wanted to try out.
October 2017 Fam Din
Their recipes are very specific and detailed….but for this recipe, not difficult at all. Just takes some time. Trust the process, it’s so worth it.

Oh–and don’t skimp out on the quality chocolate peeps. Since it’s the star of the show, indulge a bit.
October 2017 Fam Din
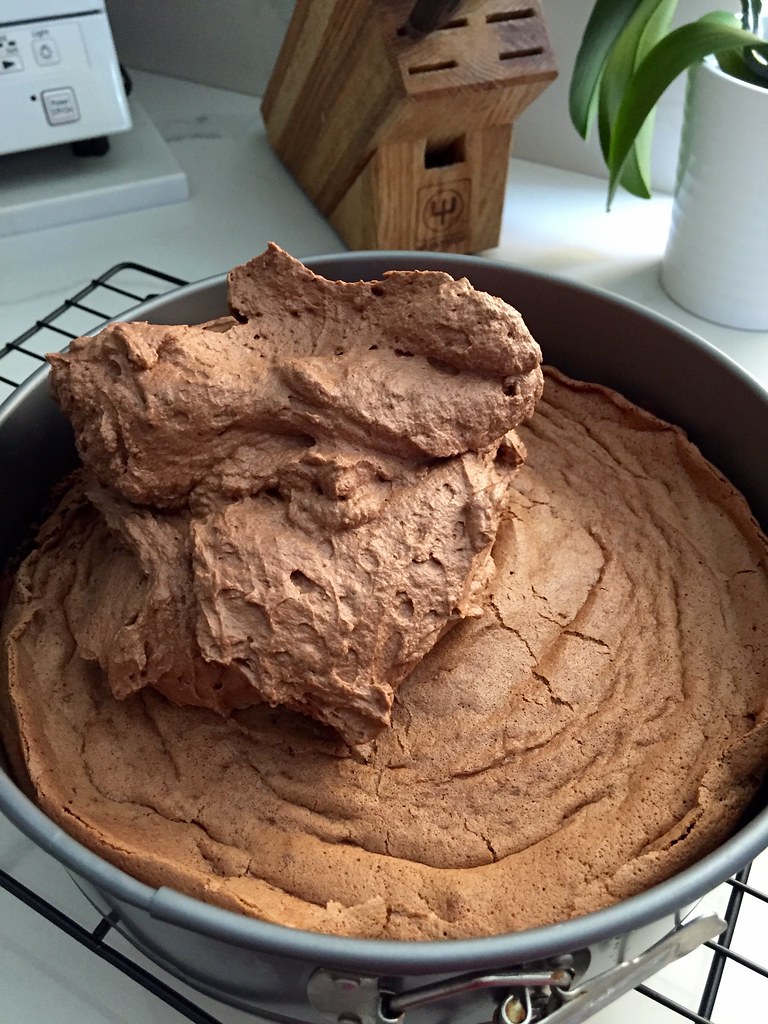
The bottom layer is a flourless chocolate cake.

Decadent and delicious.
October 2017 Fam Din
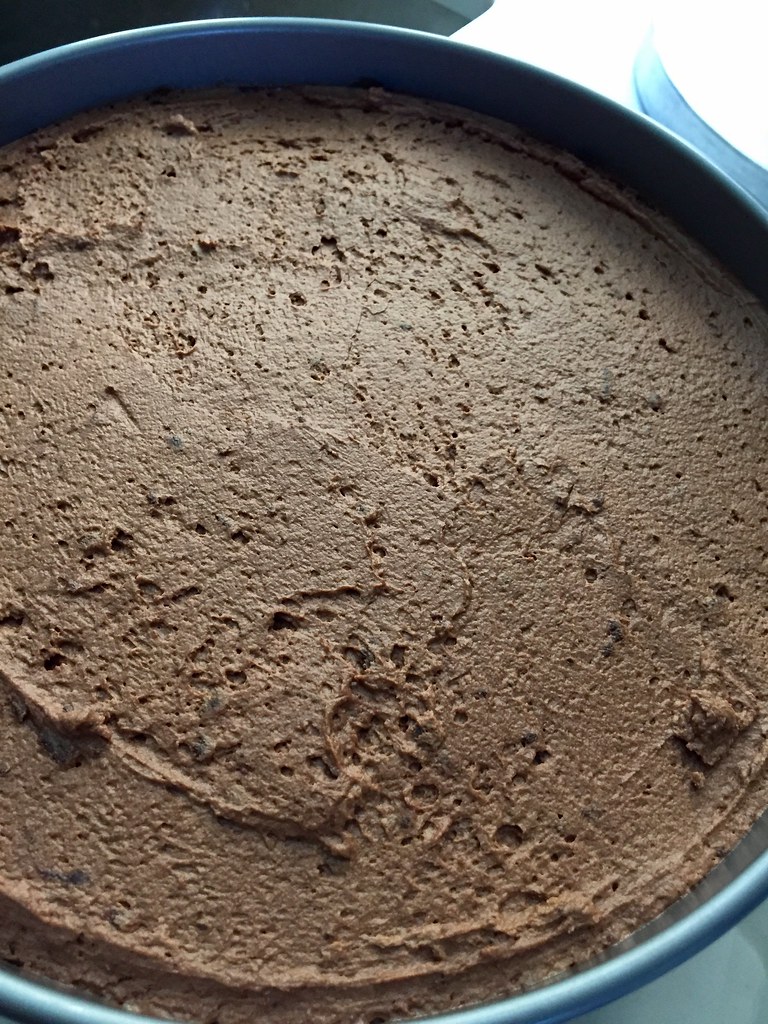
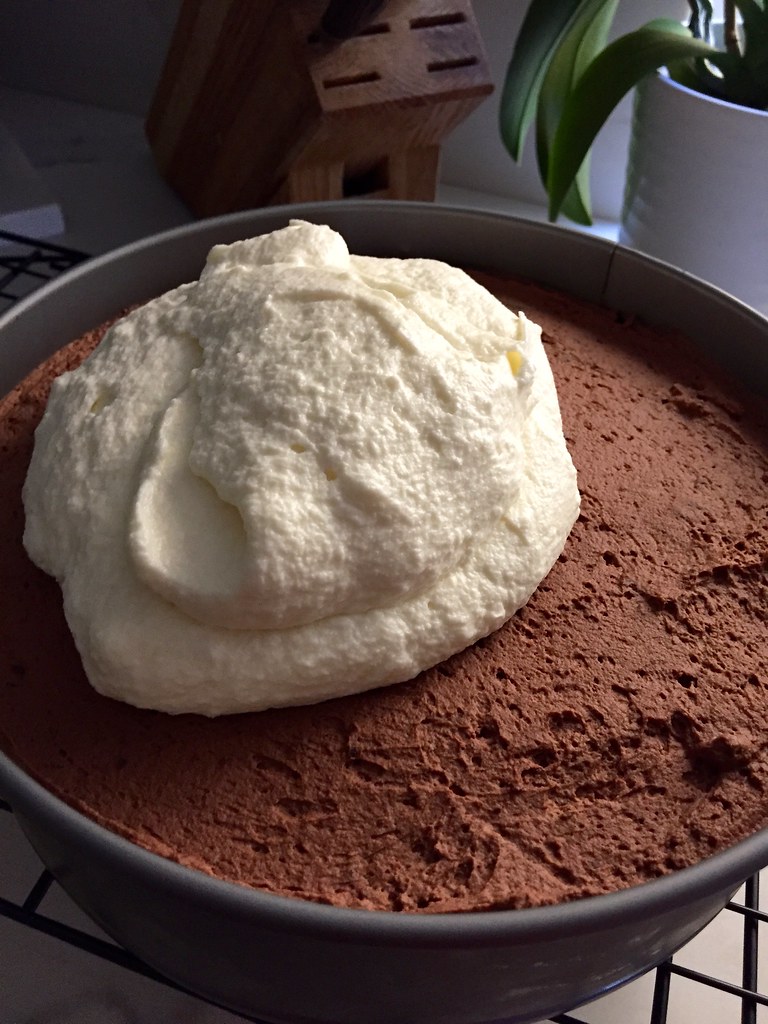
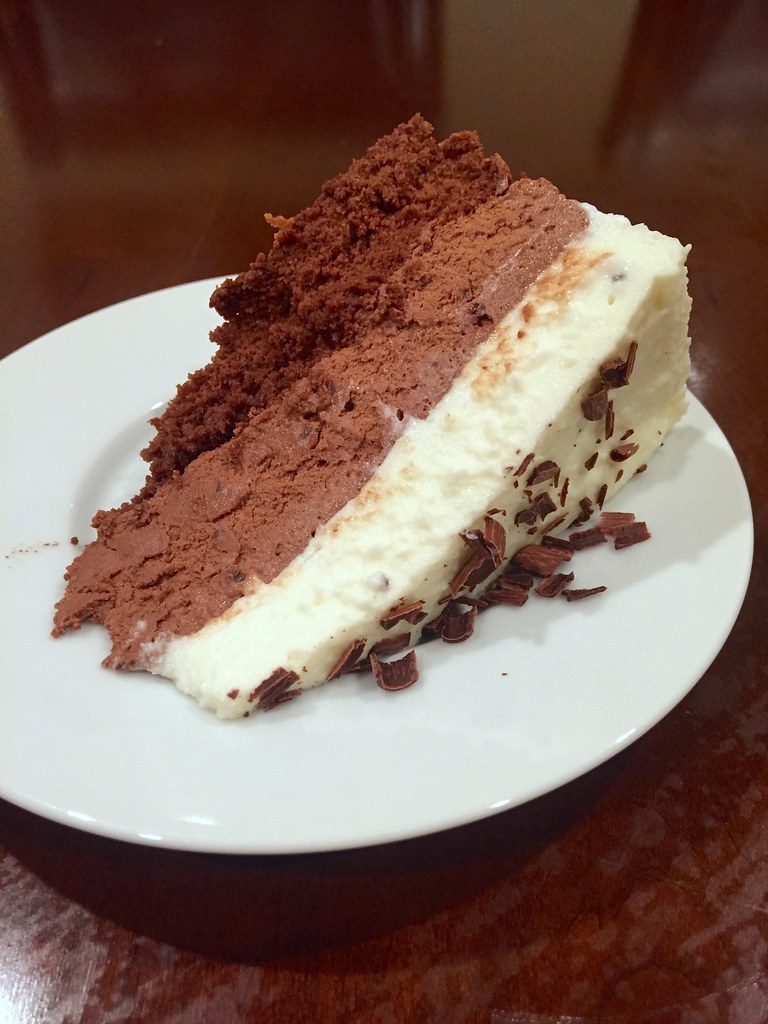
The second layer, is a rich and scrumptious bittersweet chocolate mousse.

So velvety divine.
October 2017 Fam Din
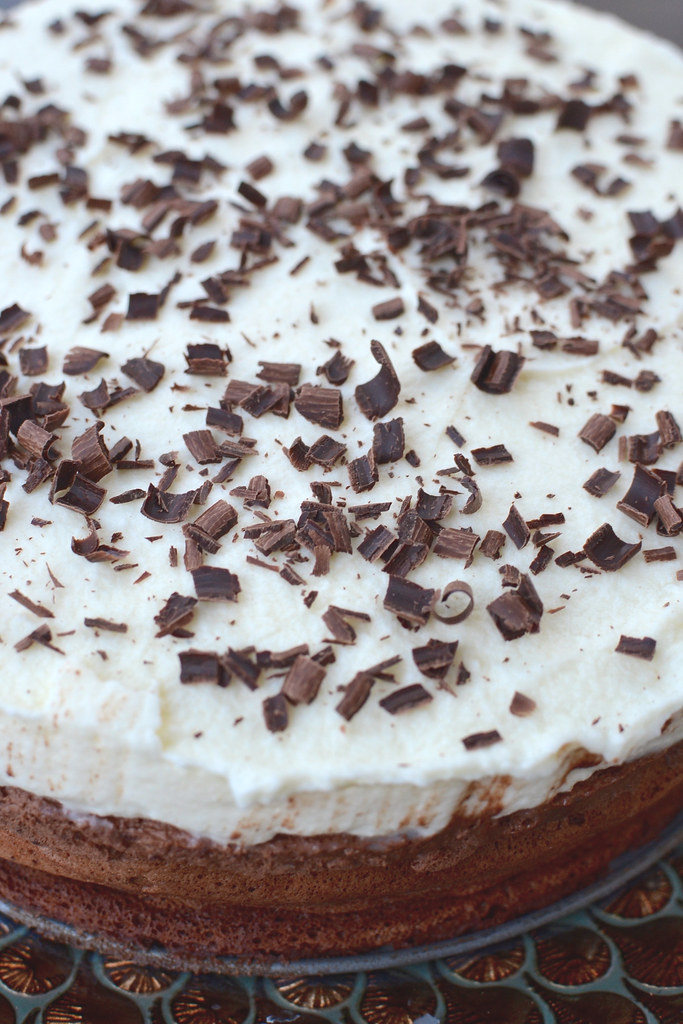
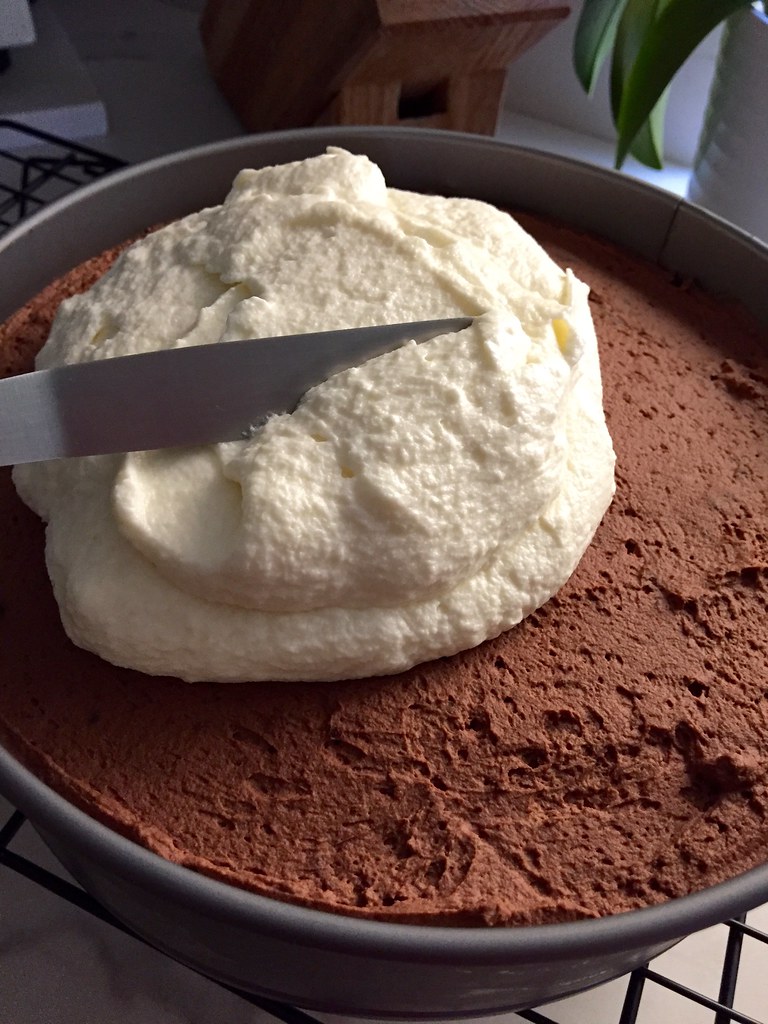
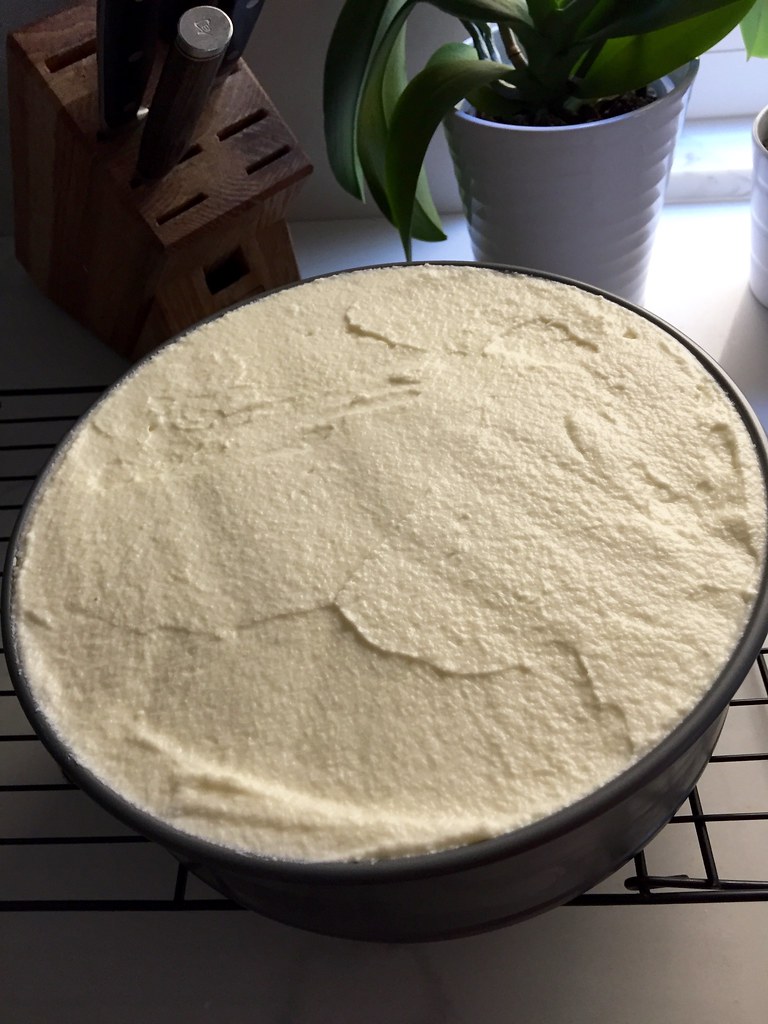
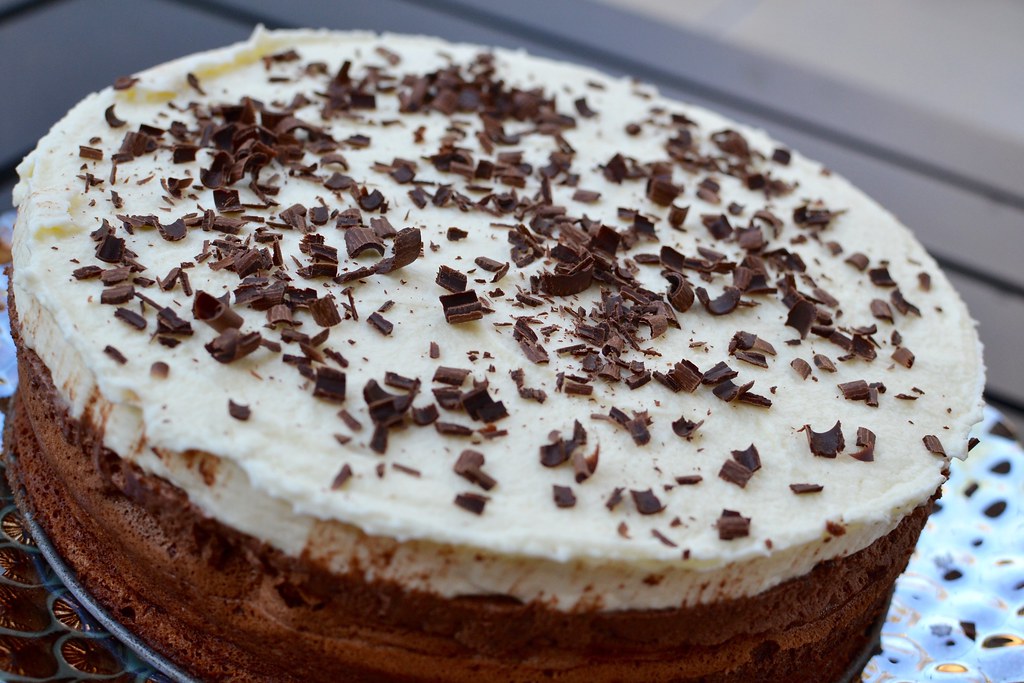
Next is the fluffy white chocolate mousse layer — airy and dreamy.

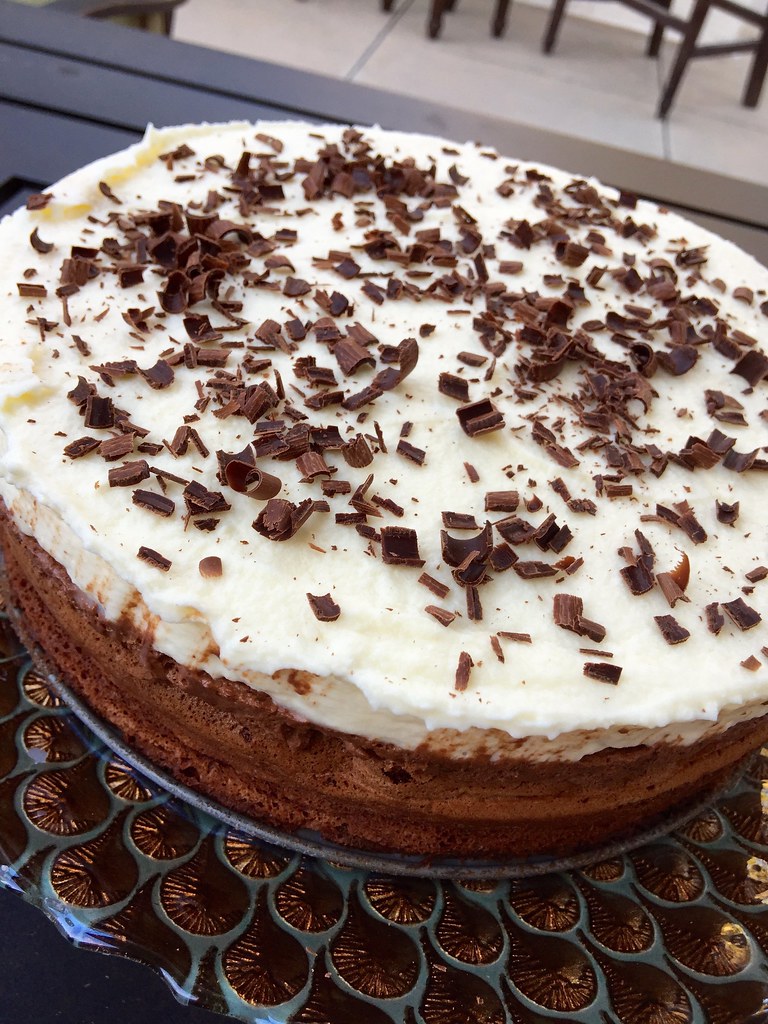
And don’t forget the chocolate shavings to garnish!
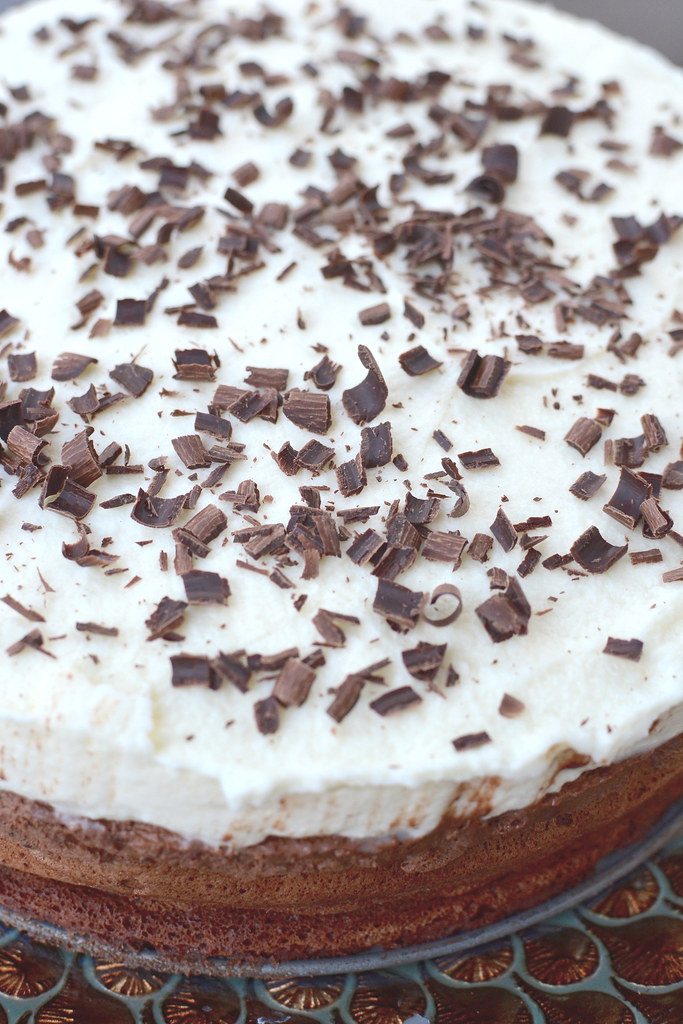
October 2017 Fam Din
And now that I’m looking at these pictures — I’m wondering why the heckI haven’t made it recently again?! Must fix that soon!

Happy Chocolate Dreams!!! ❤

___________________________________________________________________

Triple-Chocolate Mousse Cake
Serves 12-16

Ingredients:

BOTTOM LAYER
6 tablespoons (3/4 stick) unsalted butter, cut into 6 pieces, plus extra for greasing pan
7 ounces bittersweet chocolate, chopped fine
¾ teaspoon instant espresso powder
1½ teaspoons vanilla extract
4 large eggs, separated
pinch table salt
⅓ cup packed (about 2 1/2 ounces) light brown sugar, crumbled with fingers to remove lumps

MIDDLE LAYER
2 tablespoons cocoa powder, preferably Dutch-processed
5 tablespoons hot water
7 ounces bittersweet chocolate, chopped fine
1½ cups cold heavy cream
1 tablespoon granulated sugar
⅛ teaspoon table salt

TOP LAYER
¾ teaspoon powdered gelatin
1 tablespoon water
6 ounces white chocolate chips
1½ cups cold heavy cream

Shaved chocolate or cocoa powder for serving, optional

FOR THE BOTTOM LAYER:

Adjust oven rack to middle position and heat oven to 325 degrees. Butter bottom and sides of 91/2-inch springform pan. Melt butter, chocolate, and espresso powder in large heatproof bowl set over saucepan filled with 1 inch of barely simmering water, stirring occasionally until smooth. Remove from heat and cool mixture slightly, about 5 minutes. Whisk in vanilla and egg yolks; set aside.

In stand mixer fitted with whisk attachment, beat egg whites and salt at medium speed until frothy, about 30 seconds. Add half of brown sugar and beat until combined, about 15 seconds. Add remaining brown sugar and beat at high speed until soft peaks form when whisk is lifted, about 1 minute longer, scraping down sides halfway through. Using whisk, fold one-third of beaten egg whites into chocolate mixture to lighten. Using rubber spatula, fold in remaining egg whites until no white streaks remain. Carefully transfer batter to prepared springform pan, gently smoothing top with offset spatula.

Bake until cake has risen, is firm around edges, and center has just set but is still soft (center of cake will spring back after pressing gently with finger), 13 to 18 minutes. Transfer cake to wire rack to cool completely, about 1 hour. (Cake will collapse as it cools.) Do not remove cake from pan.

FOR THE MIDDLE LAYER:

Combine cocoa powder and hot water in small bowl; set aside. Melt chocolate in large heatproof bowl set over saucepan filled with 1 inch of barely simmering water, stirring occasionally until smooth. Remove from heat and cool slightly, 2 to 5 minutes.

In clean bowl of stand mixer fitted with whisk attachment, whip cream, granulated sugar, and salt at medium speed until mixture begins to thicken, about 30 seconds. Increase speed to high and whip until soft peaks form when whisk is lifted, 15 to 60 seconds.

Whisk cocoa powder mixture into melted chocolate until smooth. Using whisk, fold one-third of whipped cream into chocolate mixture to lighten. Using rubber spatula, fold in remaining whipped cream until no white streaks remain. Spoon mousse into springform pan over cooled cake and gently tap pan on counter 3 times to remove any large air bubbles; gently smooth top with offset spatula. Wipe inside edge of pan with damp cloth to remove any drips. Refrigerate cake at least 15 minutes while preparing top layer.

FOR THE TOP LAYER:

In small bowl, sprinkle gelatin over water; let stand at least 5 minutes. Place white chocolate in medium bowl. Bring ½ cup cream to simmer in small saucepan over medium-high heat. Remove from heat; add gelatin mixture and stir until fully dissolved. Pour cream mixture over white chocolate and whisk until chocolate is melted and mixture is smooth, about 30 seconds. Cool to room temperature, stirring occasionally, 5 to 8 minutes (mixture will thicken slightly).

In clean bowl of stand mixer fitted with whisk attachment, whip remaining cup cream at medium speed until it begins to thicken, about 30 seconds. Increase speed to high and whip until soft peaks form when whisk is lifted, 15 to 60 seconds. Using whisk, fold one-third of whipped cream into white chocolate mixture to lighten. Using rubber spatula, fold remaining whipped cream into white chocolate mixture until no white streaks remain. Spoon white chocolate mousse into pan over middle layer. Smooth top with offset spatula. Return cake to refrigerator and chill until set, at least 2½ hours.

TO SERVE:

If using, garnish top of cake with chocolate curls or dust with cocoa. Run thin knife between cake and side of springform pan; remove side of pan. Run cleaned knife along outside of cake to smooth sides. Cut into slices and serve.

NOTE:

This recipe requires a springform pan at least 3 inches high. It is imperative that each layer is made in sequential order. Cool the base completely before topping it with the middle layer. We recommend Ghirardelli Bittersweet Chocolate Baking Bar for the base and middle layers; our other recommended brand of chocolate, Callebaut Intense Dark L-60-40NV, may be used, but it will produce drier, slightly less sweet results. Our preferred brand of white chocolate is Guittard Choc-Au-Lait White Chips. For best results, chill the mixer bowl before whipping the heavy cream. The entire cake can be made through step 8 and refrigerated up to a day in advance; leave it out at room temperature for up to 45 minutes before releasing it from the cake pan and serving. For neater slices, use a cheese wire or dip your knife in hot water before cutting each slice.

Recipe: Cooks Illustrated. Instructional Video available here.


Desserts/Pastries · Sunday Family Dinner

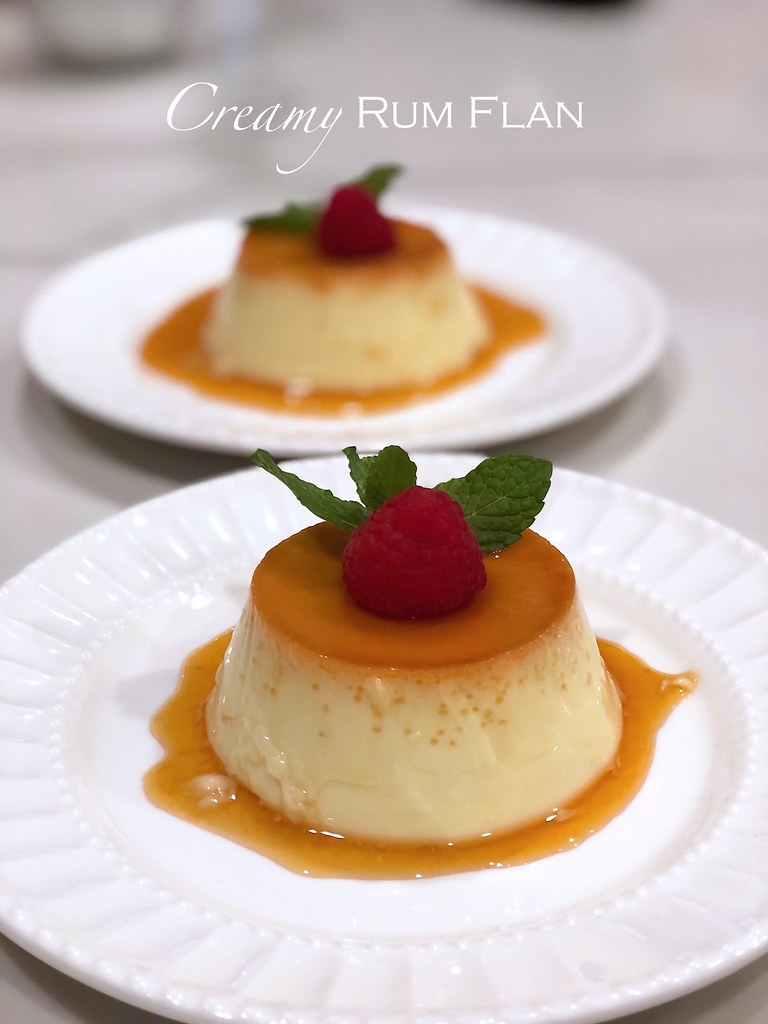
Seester’s Creamy Rum Flan

Creamy Rum Flan

WOW — who knew that you all loved flan so much?!

After I posted the Fam Din about V’s birthday flan, I got flooded with requests for the recipe! I don’t blame you, it really was quite lusciously delicious.

November 2017 Fam Din
I consulted with Big Seestrah, since the original recipe was her F.I.L.’s and she obliged saying that she had tweaked it enough to make it her own.

Now a quick forewarning for all of you Vietnamese Flan (“kem flan” or bánh flan”) aficionados. This recipe does not contain any condensed milk or coconut milk like many traditional Vietnamese versions do. And quite frankly, I think that’s one of the reasons why I like it so much since it’s not too sweet. Plus I have a theory that the consistency of both coconut milk and condensed milk make for a heavier flan that’s more likely to cause large bubbles.

I have no scientific backing on that theory…just a hunch.

November 2017 Fam Din
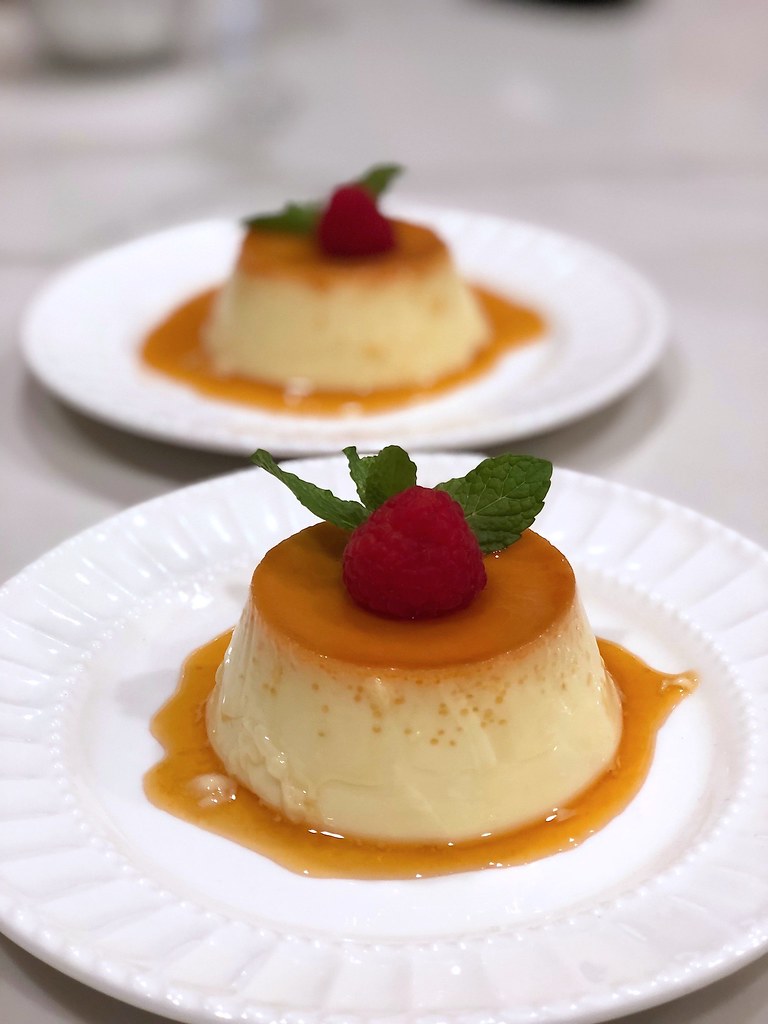
You can choose to make larger dishes of flan or individual sized ones like seester did above. Just be sure to adjust for baking time depending on the vessel. But either way, super delish.

Oh! And if you’re not a rum fan, you can sub with any booziness you’d like — or just skip it! But as for me, I say HECK YES to rum as it pairs so well with the caramel.

Thanks for sharing Seester N!!!

______________________________________
Creamy Rum Flan
Serves approximately 10

Ingredients:

2½ cups granulated sugar, divided
5 cups whole milk
5 large eggs
3 ounces dark rum*

Place 10 ramekins (4-6 ounces) or 2 baking dishes in 2 roasting pans. You’ll need the roasting pans to create a water bath later.

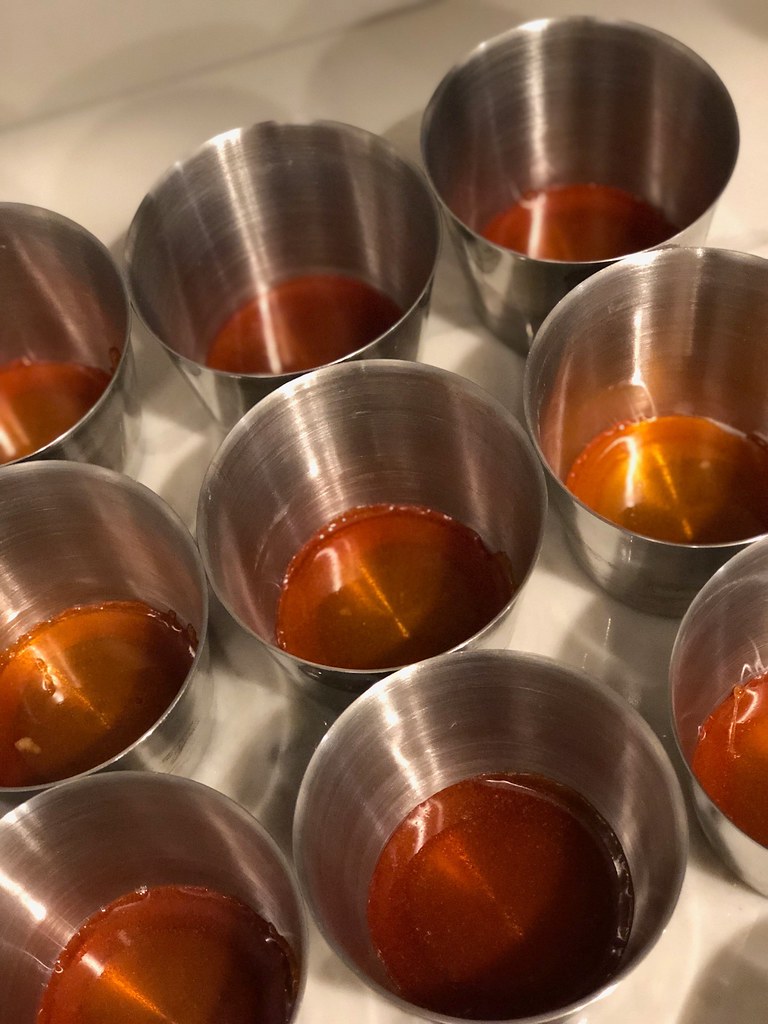
In a small, heavy bottomed pot, add in 1½ cups sugar. Over medium heat, cook the sugar until it caramelizes and becomes golden brown. Be sure to stir often. Once the sugar has reached the desired color, quickly pour the caramel into the bottoms of each ramekin/dish. Swirl each so that it completely covers the bottom of each vessel. Set aside and allow the caramel to cool.

In another pot, whisk the milk and remaining sugar over medium heat. Continue whisking until the sugar has dissolved and the liquids come to a soft boil. Remove the pot from the heat and allow to cool.

In a separate bowl, whisk the eggs and rum together until combined. Slowly whisk the milk mixture into the eggs. Pour the custard into the prepared ramekins/dish and cover with aluminum foil. Place the roasting pans in the middle rack of a preheated 380 degrees F oven. Carefully fill the roasting pans with boiling water to come halfway up the sides of each ramekin/dish.

Bake the flan for approximately 45-60 minutes or until the center has just barely set. The length of cook time will depend on the sizes of your ramekins/baking dishes. Once done, remove the flan from the water bath and allow to cool on racks until they reach room temperature. Cover each the flan with plastic wrap and refrigerate overnight.

Once you’re ready to serve, carefully run a hot pairing knife around the edge of the flan. Place a rimmed plate or serving platter on top and quickly invert. Serve with fresh berries, whipped cream, etc.

*You can add less or more rum to taste. However, if you choose to omit you can substitute with 1 tablespoon of pure vanilla extract.


Desserts/Pastries · Drinks

Mango Sorbet & Prosecco Cocktails – Happy New Year!!!

Mango Sorbet & Prosecco Floats
I don’t know about you all but 2017 was a freaking doozy and I cannot wait to hit that reset button at midnight for 2018 to come on in!

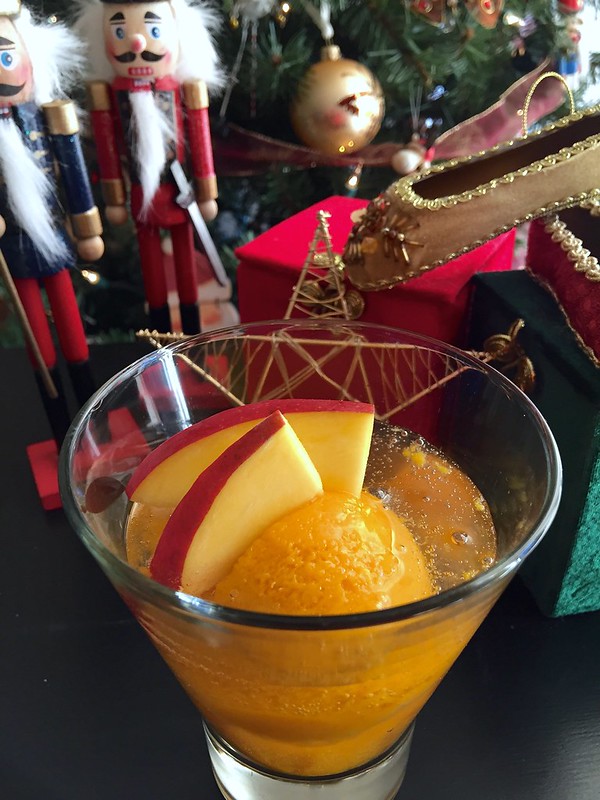
But before the clock strikes midnight, let me share one last thing with you all. A super quick, super easy but delicious “dessertail“.

What’s a “dessertail”?

It’s a mix between a dessert and a cocktail of course!

Mango Sorbet & Prosecco Floats
Mango Sorbet & Prosescco Cocktails. These beauties are so simple that it’s kind of silly that I’m writing it as a recipe. But let me tell you, it’s the PERFECT thing to serve when you don’t have time to make anything elaborate but still want something a little special.

It’s an easier take on the Itallian sgroppino that slowly blends softened sorbetto and prosecco together. But I find that pouring the prosecco over the sorbet is just as delicious. Heck, I don’t even make my own sorbet and prefer to pick up a pint of one of my faves – Talenti’s Alphonso Mango Sorbetto.

Mango Sorbet & Prosecco Floats
And of course, if you’re not a fan of mangoes, any other flavor sorbet would be just as delicious–or even a combination of them. Raspberry and lemon? Passionfruit and coconut? Options are endless!

With that, let me wish you all a very, very Happy New Year. May 2018 bring you all overwhelming joy, fulfillment and of course, delicious Foodventures!

xoxo ❤
__________________________________________________
Mango Sorbet & Prosecco Cocktails

Ingredients:

1 pint mango sorbet
fresh mango slices
1 750mL bottle prosecco

Place two rounded scoops of sorbet in a chilled glass. Add a few slices of mango and slowly pour prosecco over the sorbet. Cheers!

Desserts/Pastries

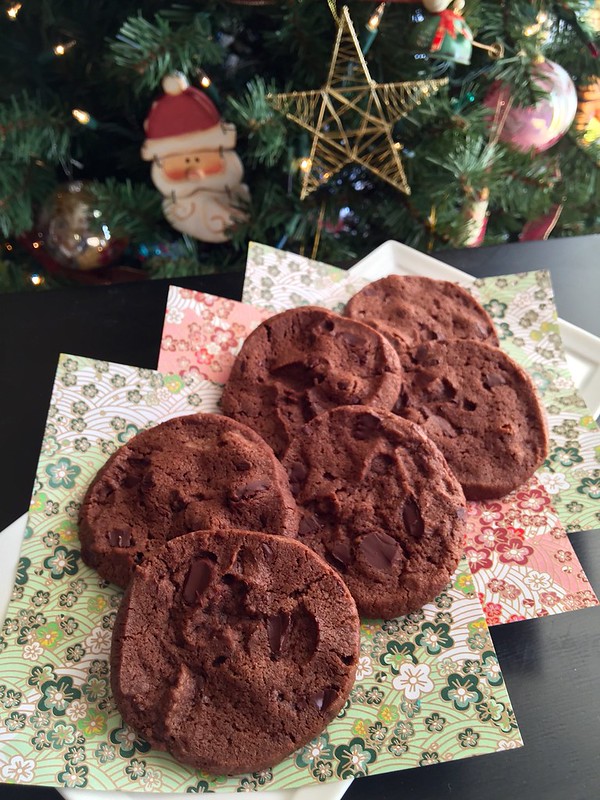
World Peace Cookies…Happy Holidays!

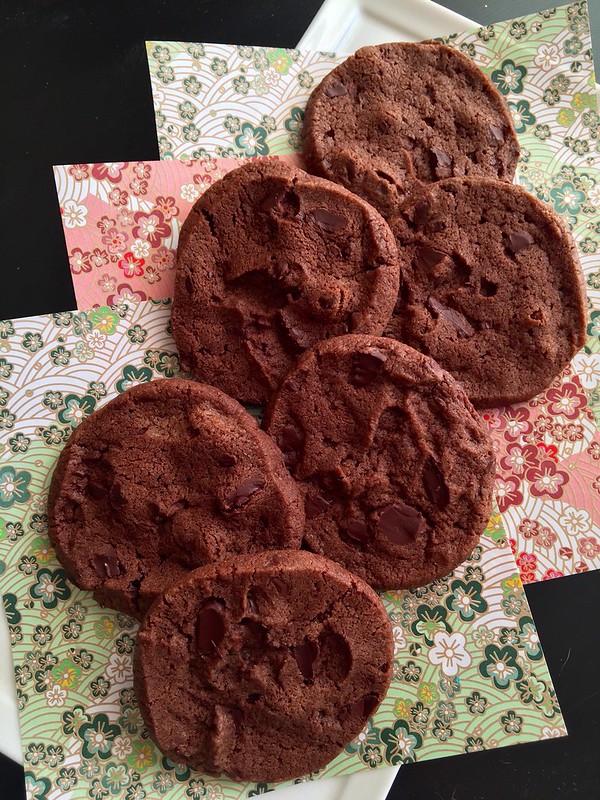
World Peace Cookies
It’s been an incredibly busy holiday season so far and things definitely won’t slow down until after the new year. But I couldn’t let Christmas pass without sharing this old favorite….Dorie Greenspan’s World Peace Cookies.

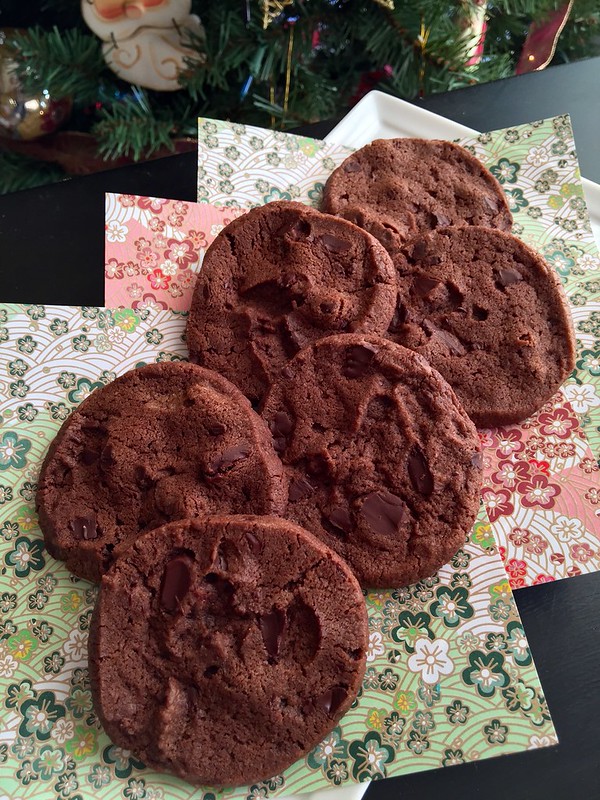
World Peace Cookies
Seester P first made these for me years ago and I was immediately in love. They’re a sablé cookie, a French shortbread.

Buttery, chocolatey and just so darn good!

World Peace Cookies
These beauties come together relatively easy so they’ll be fantastic to leave out for the big guy. And trust me, if you do, you’ll definitely be on his rockstar list.

Happy Holidays!!! ❤

____________________________________
World Peace Cookies
Makes about 3 dozen

Ingredients:

1 1/4 cups (170 grams) all-purpose flour
1/3 cup (28 grams) unsweetened cocoa powder
1/2 teaspoon baking soda
1 stick plus 3 tablespoons (11 tablespoons; 5 1/2 ounces; 155 grams) unsalted butter, cut into chunks, at room temperature
2/3 cup (134 grams) packed light brown sugar
1/4 cup (50 grams) sugar
1/2 teaspoon fleur de sel or 1/4 teaspoon fine sea salt
1 teaspoon pure vanilla extract
5 ounces (142 grams) best-quality bittersweet chocolate, chopped into irregular sized bits


Sift the flour, cocoa and baking soda together.

Working with a stand mixer fitted with the paddle attachment, or in a large bowl with a hand mixer, beat the butter and both sugars together on medium speed until soft, creamy and homogenous, about 3 minutes. Beat in the salt and vanilla. Turn off the mixer, add all the dry ingredients and pulse a few times to start the blending. When the risk of flying flour has passed, turn the mixer to low and beat until the dough forms big, moist curds. Toss in the chocolate pieces and mix to incorporate. This is an unpredictable dough (see above). Sometimes it’s crumbly and sometimes it comes together and cleans the sides of the bowl. Happily, no matter what, the cookies are always great.

Turn the dough out onto a work surface and gather it together, kneading it if necessary to bring it together. Divide the dough in half. Shape the dough into logs that are 11/2 inches in diameter. Don’t worry about the length — get the diameter right, and the length will follow. (If you get a hollow in the logs, just start over.) Wrap the logs in plastic wrap and freeze them for at least 2 hours or refrigerate them for at least 3 hours.

When you’re ready to bake: Center a rack in the oven and preheat it to 325 degrees F. Line two baking sheets with parchment paper or silicone baking mats.

Working with one log at a time and using a long, sharp knife, slice the dough into 1/2-inch-thick rounds. (The rounds might crack as you’re cutting them — don’t be concerned, just squeeze the bits back onto each cookie.) Arrange the rounds on the baking sheets, leaving about 2 inches between them. (If you’ve cut both logs, keep one baking sheet in the fridge while you bake the other.)

Bake the cookies for 12 minutes — don’t open the oven, just let them bake. When the timer rings, they won’t look done, nor will they be firm, and that’s just the way they should be. Transfer the baking sheet to a cooling rack and let the cookies rest until they are only just warm, at which point you can munch them, or let them reach room temperature (I think the texture’s more interesting at room temperature).

Bake the remaining dough.

From Dorie Greenspan

Desserts/Pastries

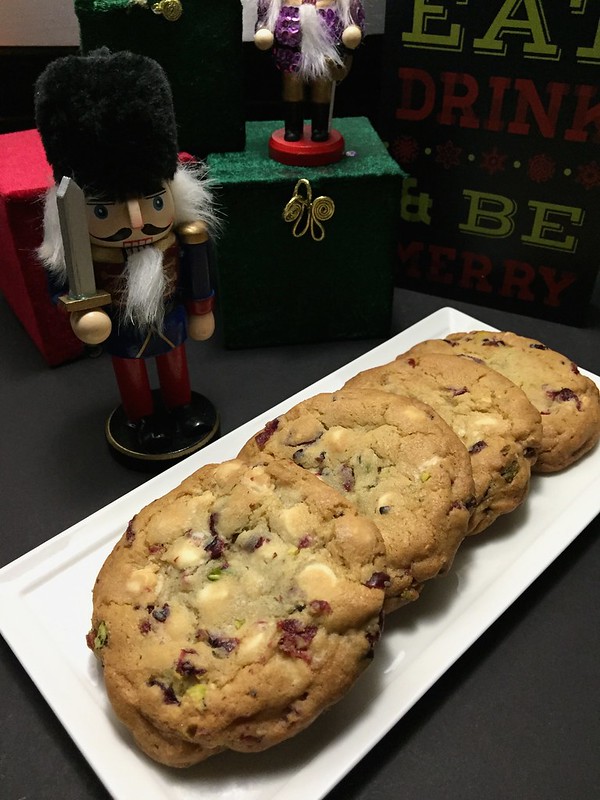
White Chocolate, Cranberry, and Pistachio Cookies

White Chocolate, Cranberry, and Pistachio Cookies

It’s no secret folks…I love cookies.

And it’s during this time of year that I like to try out a few new recipes to add to my Holiday Cookie Platters.

White Chocolate, Cranberry, and Pistachio Cookies
The usual suspects are often:

White Chocolate, Cranberry, and Pistachio Cookies
And sometimes I’ll throw in a Mint Chocolate Chip Brownie or a Peppermint Kissed Brownie to stir things up.

White Chocolate, Cranberry, and Pistachio Cookies
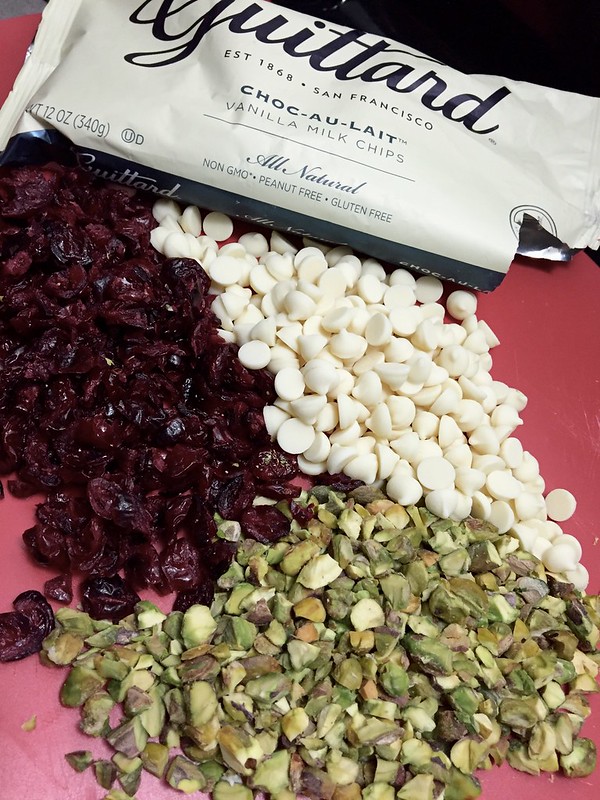
For this year, I wanted to use dried cranberries and pistachios together to create a festive sweet treat. And why not add white chocolate chips to the party?

It’s all kind of healthy-ish….right? Like trail mix?

Ok….that may be a stretch.

White Chocolate, Cranberry, and Pistachio Cookies
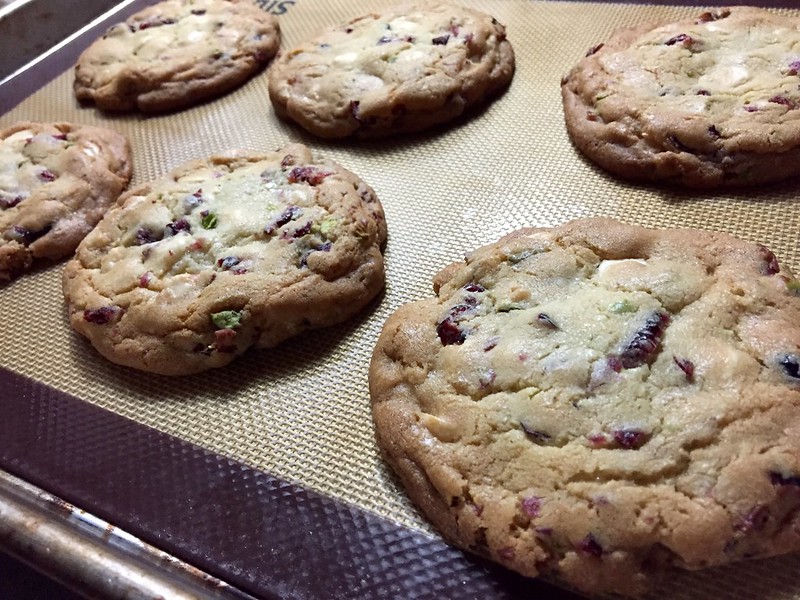
I opted to adapt the NY Times Best Chocolate Chip Cookie recipe from Jacque Torres because I love the textures of the cookie once baked—crisp on the outside and chewy on the interior.

In lieu of the vanilla extract, I used orange extract and fresh orange zest to pair with the flavors.

White Chocolate, Cranberry, and Pistachio Cookies
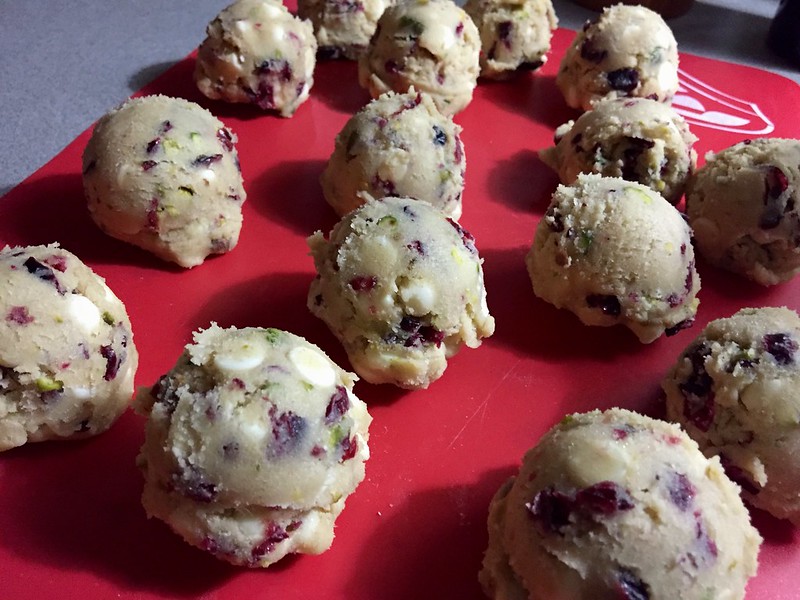
Folks were a fan of them! They’re super chunky and filled with lots of different textures from the nuts, chocolate and berries.

Definitely filled with Holiday goodness.

ps. We’re three days away from Christmas even and I still haven’t finished shopping! EEK!

_____________________________________________
White Chocolate, Cranberry, and Pistachio Cookies
Makes approximately 2 dozen

Ingredients:


8.5 ounces cake flour
8.5 ounces bread flour
1 ¼ teaspoons baking soda
1 ½ teaspoons baking powder
1 ½ teaspoons coarse salt
1 ¼ cups unsalted butter
6 ounces light brown sugar
6 ounces granulated sugar
2 large eggs
1 teaspoons orange extract
1 tablespoon fresh orange zest
12 ounces white chocolate chips
1 heaping cup dried cranberries, roughly chopped
1 heaping cup roasted & unsalted pistachios, chopped


Sift flours, baking soda, baking powder and salt into a bowl. Set aside.

Using a mixer fitted with paddle attachment, cream butter and sugars together until very light, about 5 minutes. Add eggs, one at a time, mixing well after each addition. Stir in the orange extract and zest. Reduce speed to low, add dry ingredients and mix until just combined, 5 to 10 seconds. Add the white chocolate chips, dried cranberries and pistachios—mix until just combined. Press plastic wrap against dough and refrigerate for overnight.

When ready to bake, preheat oven to 350 degrees. Line a baking sheet with parchment paper or a nonstick baking mat. Set aside.

Scoop mounds of dough the size of large golf balls onto baking sheet and slightly flatten the dough balls. Bake until golden brown but still soft, 18 to 20 minutes. Transfer sheet to a wire rack for 10 minutes, then slip cookies onto another rack to cool a bit more. Repeat with remaining dough and enjoy!

Adapted from NY Times Chocolate Chip Cookies


Desserts/Pastries · Sponsored

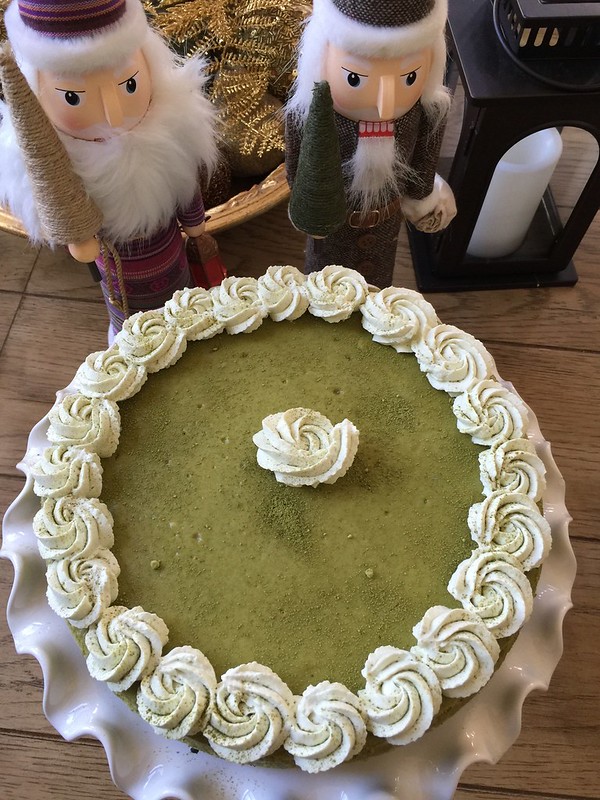
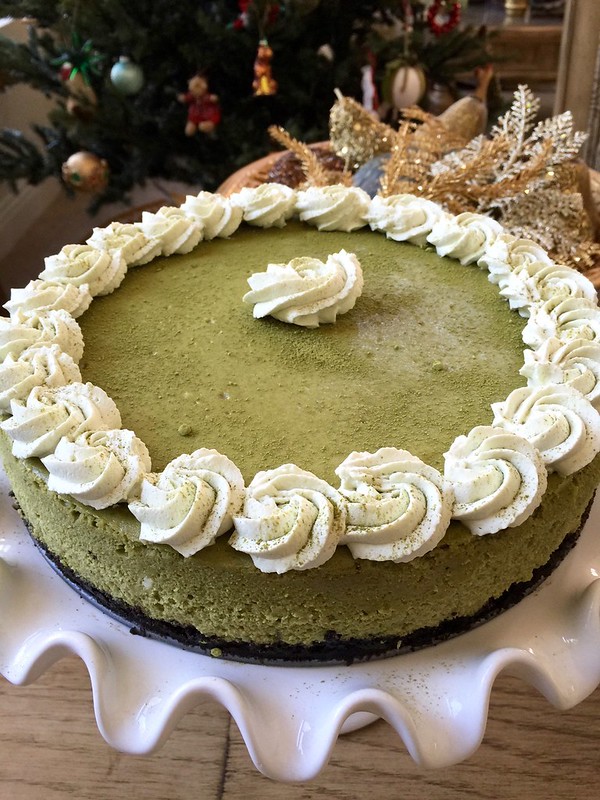
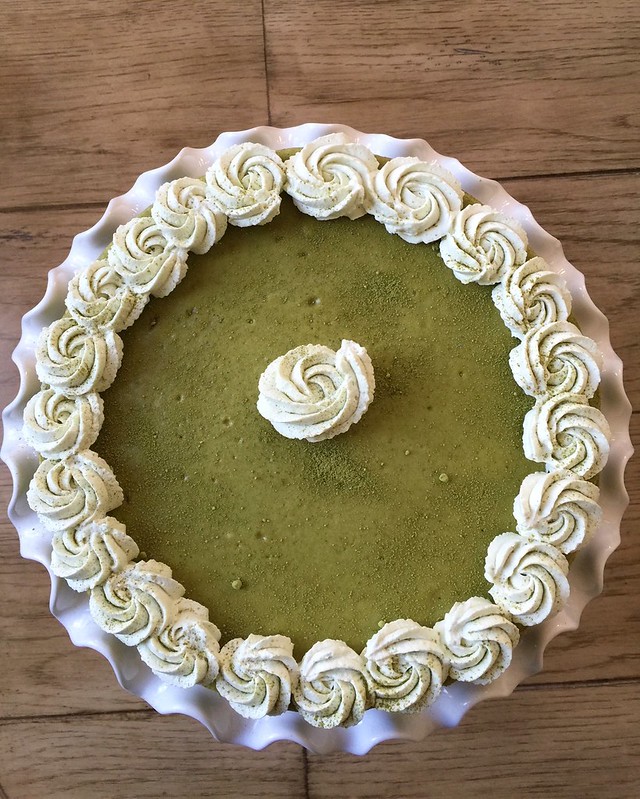
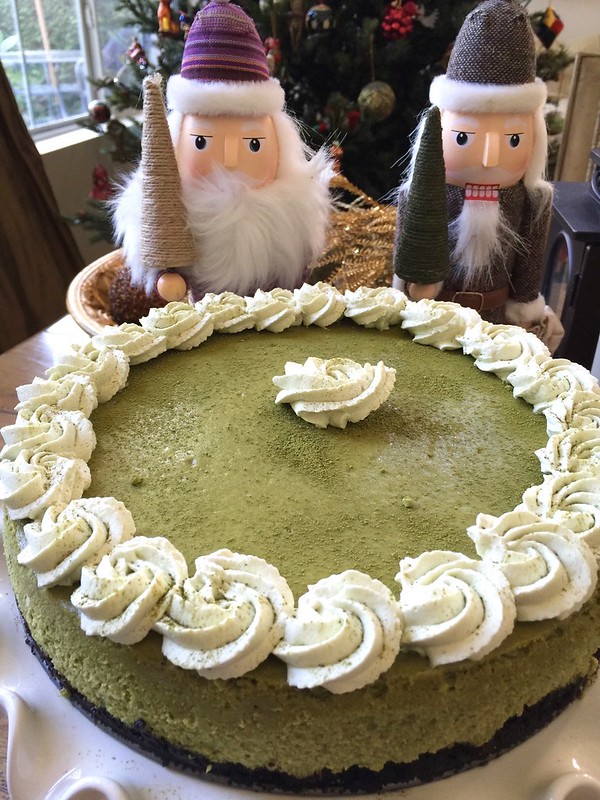
Matcha Green Tea Cheesecake

Matcha Green Tea Cheesecake
If you’ve been with me for awhile then you’re probably familiar with my family’s obsession with ALL things matcha green tea flavored. So when it comes to our celebrations, I’m constantly trying to think of different ways to incorporate the finely ground matcha green tea powder in our desserts

Matcha Green Tea Cheesecake
We’ve done…..

You’d think we’d be sick of it all by now—but of course, we can’t seem to get enough of it!

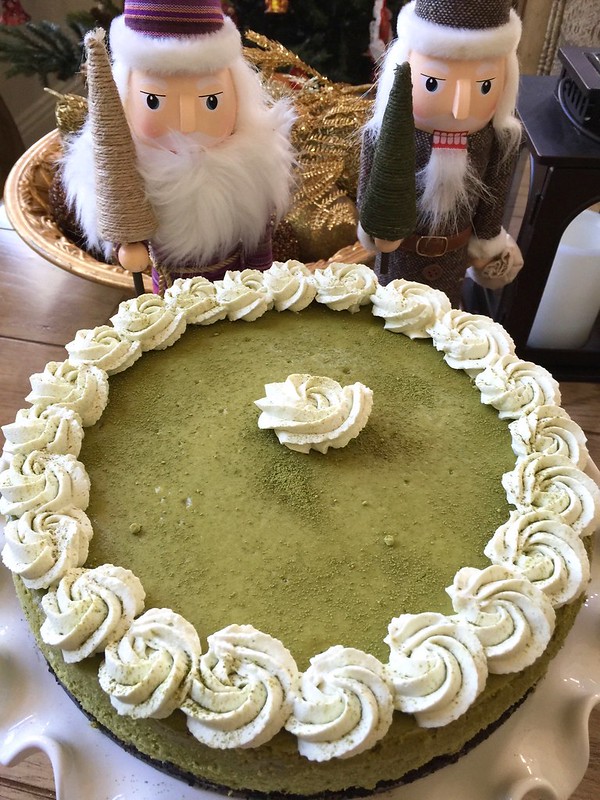
There are even some health benefits to matcha — high in antioxidants, can assist with your concentration and help to detox. And if you use it in baked goods like I do, it finishes into a beautiful green hue –perfectly festive for the  holidays.

Matcha Green Tea Cheesecake
To close out my year as a Davidson’s Dozen, I thought I would take one of our favorite ingredients and combine it with their Safest Choice® pasteurized eggs. The end resulted in a rich and decadent Matcha Green Tea Cheesecake.

There are several different forms cheesecakes. Some are baked and some are unbaked like my Matcha Green Tea Icebox Cheesecake. There are fruit flavored, chocolate based and some are light and airy whereas others are rich and dense.

I generally prefer a denser texture –more along the lines of a New York style cheesecake –which is how this baked Matcha Green Tea Cheesecake was inspired by.

Matcha Green Tea Cheesecake

The crust of the cheesecake started off with chocolate sandwich cookies that I threw into the food processor — cream filling and all. Once the cookies were pulsed into the texture of sand, it’s then mixed with some melted butter and baked off in a springform pan for a few minutes to set.

The filling is a combination of cream cheese, sour cream (for that added bit of tang), sugar, Safest Choice®  Eggs, and a hefty dose of ground matcha green tea. Davidson’s Safest Choice® Pasteurized Eggs are all-natural, hormone and antibiotic free which all leads towards a delicious farm-fresh flavor. They give the cheesecake a smooth and creamy consistency that your loved ones will adore for the holidays.

The cheesecake is then baked in a water bath to provide moisture in the oven so that the top doesn’t crack. After chilling in the fridge overnight, it’s then topped with matcha flavored whipped cream. And I’ve got to admit–it tastes fantastic! Chocolate pairs especially well with matcha — the green tea is slightly bitter and balances the sweetness from the cake.

Matcha Green Tea Cheesecake

If you’d like the recipe for my Matcha Green Tea Cheesecake, click here. And if you need other delicious ideas for your holiday events, visit the recipe center at SafeEggs.com for cocktails, appetizers, entrees and desserts!

Happy Holidays!

Davidsons-Dozen-Blogger-Badge*DISCLOSURE: As a brand ambassador for the Safest Choice™ pasteurized eggs, I was compensated for the creation of this recipe and post. However, as always, all opinions are 100% my own.*
Desserts/Pastries · Ice Cream · Sponsored

Welcome Summer in with Roasted Berries Ice Cream

Roasted Berries Ice Cream

HAPPY FIRST DAY OF SUMMER!!!

And here in San Diego, it came in full force today with a whomping 105 degree weather! Can you imagine what it’ll be like in July?!?

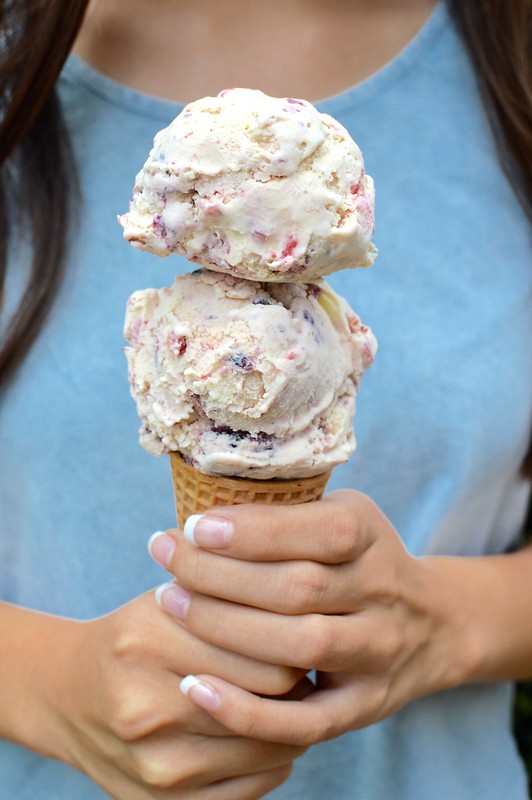
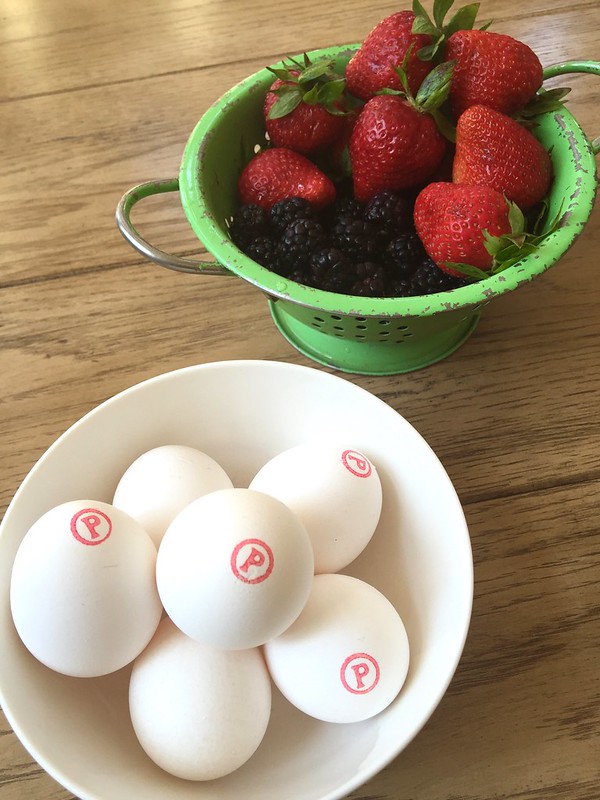
Luckily, I know of very few better ways to beat the heat than with lots and lots of ice cream. So this month I partnered again with our buddies at Safest Choice® Eggs  to whip up an ice cream that was an ode to SummerRoasted Berries.

Berries Ice Cream

Have you ever roasted berries? If not, please do so STAT because it’s a game changer! The berries become so wonderfully intensified in flavor and can be used in so many different ways. Over cakes, with yogurt, on top of meringues and in this case–in ice cream.

I chose strawberries and blackberries this time around but really, you could use any berry that tickles your fancy.

Roasted Berries Ice Cream3

Never attempted homemade ice cream before? No worries! It’s all quite simple and if you’ve got a trusty ice cream machine, it’s a breeze!

Head on over to Safest Choice® Eggs  to read my ice cream post this month and while you’re at it, click here for the recipe.

We’re ready for you Summer!!!

Davidsons-Dozen-Blogger-Badge


Desserts/Pastries

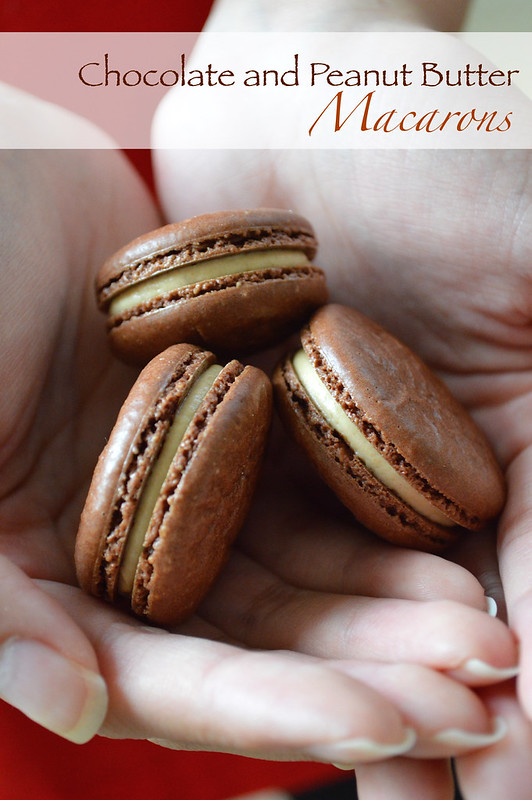
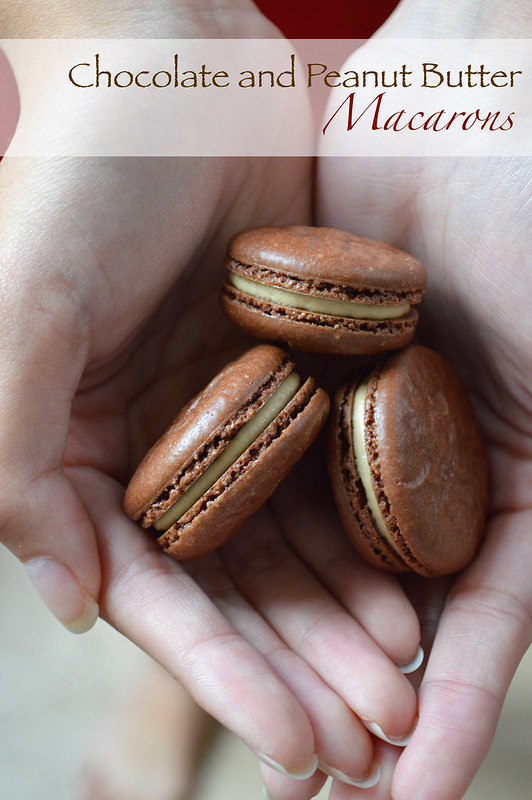
Chocolate and Peanut Butter Macarons – Happy Macaron Day!

Macarons

It’s a double whammy today!

Not only is it the first day of Spring (yahoooooo!) but it also happens to be MACARON DAY!

Now that is a food holiday I can get behind.

Macarons3

It just so happened that we were celebrating my niece’s very belated birthday last week and I had volunteered to make the cake. A few things about our Maya…..

She loves the chocolate and peanut butter combo –and she ADORES macarons. Smart girl, right?

So I set about finding as many ways to incorporate that flavor combo into the cake as possible–and that included adorning the tops with Chocolate and Peanut Butter Macarons.

Over the top?

Hell yes.

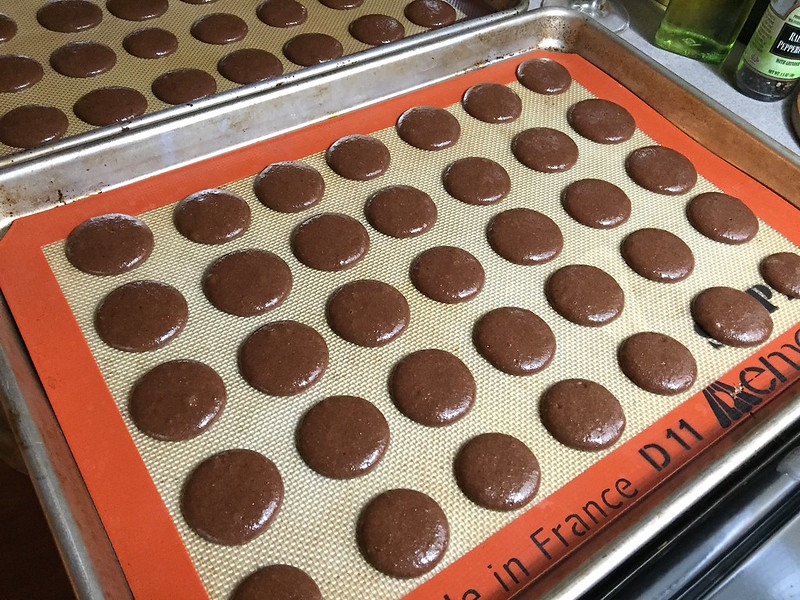
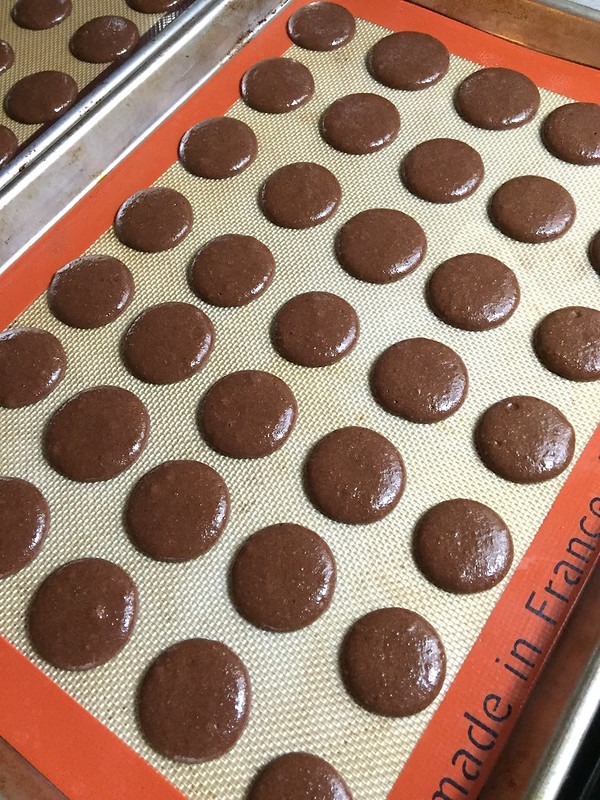
Macarons4

I’ve shared a few macaron recipes will you all before — so you know a few things I have to do when baking them:

  • Age the egg whites
  • Double, if not TRIPLE, sift the ground almonds or almond meals
  • Don’t over whip the meringue
  • Gently tap the baking sheets a few times after you pipe the macaron batter to release air bubbles
  • Allow the shells to harden before baking

But even with those steps, I still get flops from time to time. It’s usually because I wasn’t meticulous enough with the meringues, haven’t allowed the shells to harden enough prior to baking (because I’m impatient) and because my oven has hot spots. I swear if I get a new oven, the first thing I’ll ask the salesperson is “Will it bake consistent macarons?!?!?!”.

But that’s a whole other story for another time…..

Macarons2
Once the shells were baked and done, I filled them with the same Peanut Butter Buttercream I used to frost the cake with. It was rich, sticky and SUPER peanut-buttery. PERFECT!

They were a hit with the birthday girl and maybe next time I’ll swap it so that the shells are peanut flavored and will fill them with chocolate ganache. The options are endless!

HAPPY MACARON DAY!
_________________________________________
Chocolate and Peanut Butter Macarons
Makes 28-30 macarons

Ingredients:

Macaron Shells:
110 grams double sifted almond meal or blanched almonds
15 grams high quality cocoa powder
170 grams confectioner’s sugar
100 grams egg whites, aged at room temperature for 24-48 hours
40 grams granulated sugar

If using blanched almonds, pulse the almonds in a food processor until it becomes finely ground. Sift it twice before measuring out the 110 grams. In a bowl, sift together the almond meal/ground almonds with cocoa powder and the confectioner’s sugar. Set aside.

In a mixing stand fitted with the whisk attachment, whisk egg whites until frothy. Slowly add granulated sugar and continue beating until stiff peaks are barely formed. Carefully begin incorporating the dry mixture into the meringue, gently folding until all items have been integrated and a smooth batter has been formed.

Using a pastry bag fitted with a large round tip, pipe small rounds of the mixture onto baking sheets lined with silicon mats. Rounds should be about 1-1½ inches in diameter. Once the baking sheets are filled, carefully tap the sheets on the counter to remove any possible air pockets. Let the macaron shells sit on the counter for 45-60 minutes to harden the outer shell before baking. Humidity will affect how long it takes for the “skin” to form but the shells should not be sticky when you gently touch them.

Bake the shells at 290 degrees F for 18-20 minutes. Transfer the baking sheets to cooling racks and cool completely before removing shells from the sheets. Macarons shells can be made up to 24 hours in advance before filling and should be stored in airtight containers.

Peanut Butter Buttercream
1 cup smooth peanut butter
6 tablespoons room temperature unsalted butter
1 cup sifted powdered sugar
1 teaspoon vanilla extract
4 tablespoons milk
2-3 pinches sea salt

In a large mixer bowl, whip the peanut butter and butter together for several minutes until very light and fluffy. Slowly add the powdered sugar a few spoonfuls at a time until incorporated. Add the vanilla extract and then slowly drizzle in the milk, sea salt and whip until combined.

Using a piping bag filled with the peanut butter buttercream or with a small knife, fill the flat side of a macaron shell and sandwich with another shell. Filled macarons can be kept up to 2 days in airtight containers.


Desserts/Pastries

Thin Mints Brownies – Happy St. Patrick’s Day!

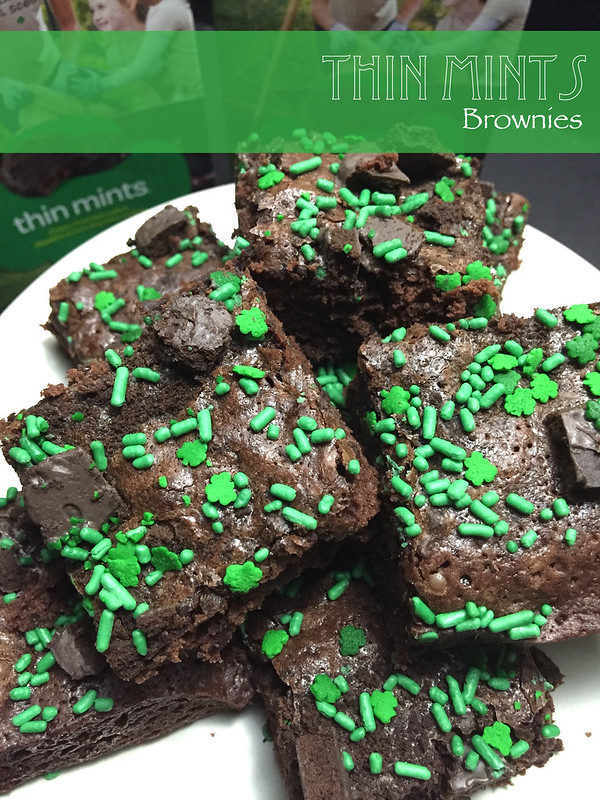
Thin Mints Brownies
I know, I know….it’s usually the time of the year where I whip up a few batches of Chocolate Stout Cupcakes with Irish Cream Buttercream. It’s St.Patrick’s Day after all!

But imagine my predicament last night when it not only hit me that St.Patty’s was a mere hours away but I also didn’t have a drop of stout beer in the house.

Blasphemous!

Thin Mints Brownies
Sure — I could have trekked out to the store to pick up some but there was a crazy, blizzard-snow-storm out!!! Trees were flung out of the ground, pigs were flying and I think I even saw Dorothy’s house spinning out of control in the sky!

Ok, ok….that may not be totally accurate.

It was a beautiful 74 degrees in San Diego.

And I was lazy.

Thin Mints Brownies
But I still wanted to bake something festive to share with the staff for St.Patty’s. And guess what? I may not have had any stout beer but I sure as heck had a TON of Girl Scout Cookies!

Thanks to my cookie-slinging-niece Maya (and a little strong-arming from my seester), I have boxes and boxes of GS Cookies. Enough to last me months and months!

…..more like weeks.

….or days….

Those boxes are getting smaller, right? At least that’s what I tell myself when an entire box magically disappears after a day.

Thin Mints Brownies
With Girl Scout Cookies at my disposal, I toyed around with a few ways I could incorporate them into a festive treat. Previously I’ve used the cookies in:

I even threw some in a birthday cake this past weekend. So it was time that I gave brownies that Girl Scouts touch.

Thin Mints Brownies

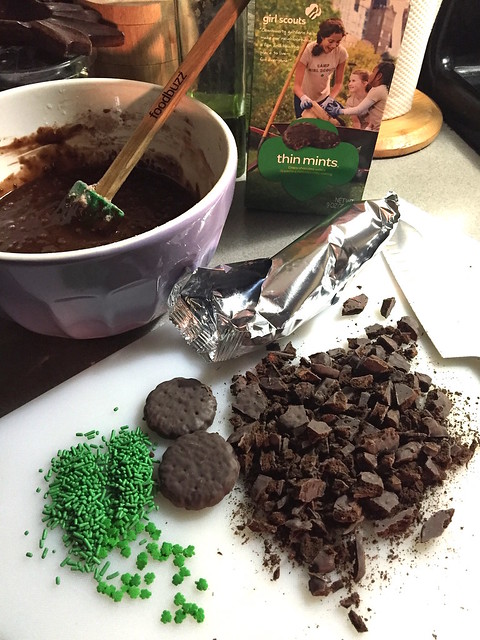
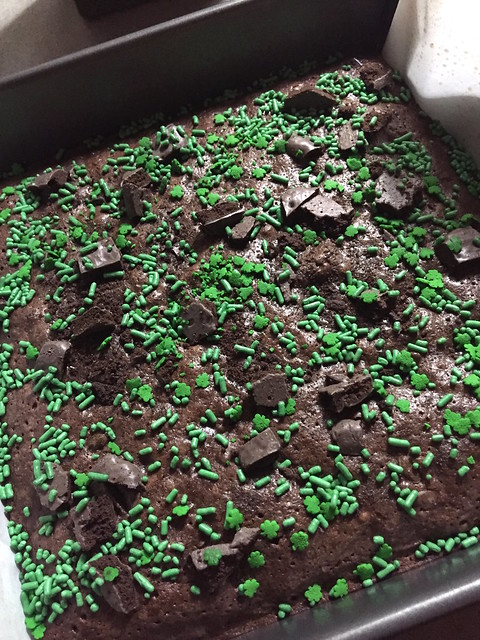
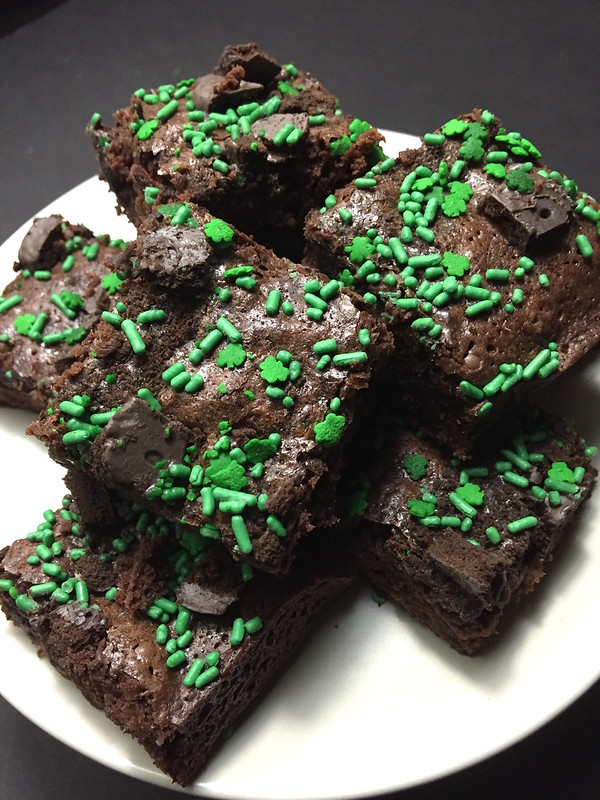
I took my go-to brownies recipe and added chocolate chips and chopped up Thin Mints Cookies. To amp up the mint, a dash or two of mint extract was added to the batter for good measure. And since we are celebrating St. Patty’s, it only seemed appropriate to cover the tops with more cookies and sprinkles!

SLAINTE dear friends and I wish you a  fantastically HAPPY ST. PATRICK’S DAY!

___________________________________

Thin Mints Brownies
Makes 16 squares

Ingredients:

½ cup unsalted butter
1¼ cups premium chocolate, roughly chopped
¼ cup packed light brown sugar
½ cup white sugar
½ teaspoon vanilla extract
1 teaspoon mint extract
2 eggs
¾ cup flour
2 tablespoon unsweetened cocoa powder
¼ teaspoon salt
¼ teaspoon baking powder
½ cup 60% cacao or semisweet chocolate chips
1¼ cup chopped Thin Mints Cookies, divided
2 tablespoons colorful sprinkles


Preheat oven to 350 degrees. Line a 9 inch square baking pan with parchment paper for easy removal. Cover parchment paper with cooking spray.

In a heatproof bowl, melt the butter and chocolate in the microwave until smooth. Do this in 20 second intervals, stirring in between to ensure that you do not scorch the chocolate. Cool the chocolate mixture until room temperature. Stir in the sugars, vanilla extract and mint extract. Add eggs 1 at a time, beating well after each addition, until mixture is glossy and smooth.

In a separate bowl, sift together the flour, cocoa powder, salt and baking powder. Stir in the dry ingredients into the chocolate mixture until combined. Stir in chocolate chips and 1 cup chopped Thin Mints Cookies. Spread the brownie batter evenly in pan. Sprinkle the remaining Thin Mints Cookies over the top of the brownie batter.

Bake for 25-30 minutes until a toothpick inserted in the center comes out clean. Halfway through the baking process, cover the top of the brownies with the sprinkles and rotate the pan. Bake until done. Allow the brownies to cool in the pan and once at room temperature, cut into 16 squares. ENJOY!


Desserts/Pastries

Nini’s Sweet 16 Surprise Party

Nini's Sweet 16

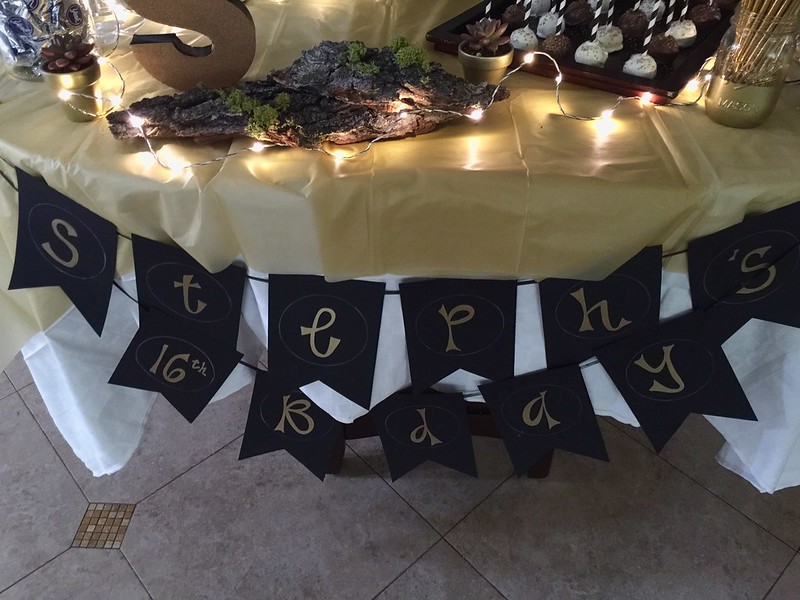
On Saturday we somehow managed to successfully throw my niece, Nini (aka Stephanie), a surprise Sweet 16 Birthday Party. It was quite a covert operation since the birthday gal lives in the house where the party was to be held and all of the decorations and prep items were hidden in various nooks and crannies.

But we pulled a fast one on her.

Nini's Sweet 16
It all actually started with her big seester – my eldest niece, Nina. We had been brainstorming ideas for her upcoming birthday but nothing stuck. At one point when Nini was out of the room, Nina suggested that we throw her a surprise party with all of her favorite things. What a good big seester!

Delish Food…..

Her Near and Dear Friends…..

Succulent Plants…..

All things Gold and Copper…..

Photo Booth…..

Her Fav Candies…..

Nini's Sweet 16

Come to think of it, I’m not sure if Nina had “family” on that list…but I’m going to say it was a given.

With a date and theme in mind, we were off to the races — full party planning mode.

Eldest seester gave the thumbs up to have the meal catered to give us a little breathing room. We brought in our local taco caterers who set a taco and nachos station in the backyard. The spread was full of pollo, carne asada, carnitas, bright yellow nacho cheese, guacamole, rice, beans and ALL of the fixings.

Nini's Sweet 16

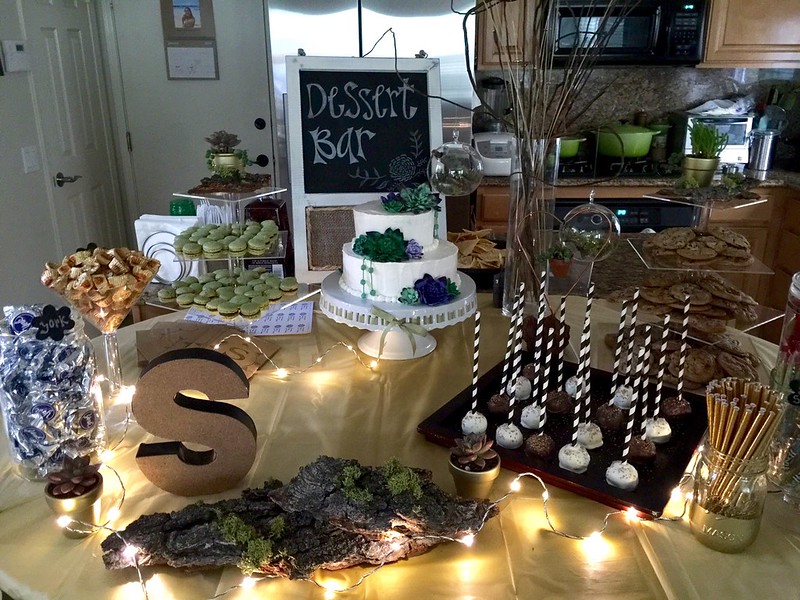
This freed up our time a bit to focus on a dessert bar….because let’s face it, apparently we can’t throw a party these days without one.

Capitalizing on her recent macaron lesson with me a few weeks ago, Nina made a bunch of Matcha Macarons filled with Chocolate Ganache. Nini loves green tea and loves chocolate–and we all love macs so it was a no-brainer.

Eldest seestrah baked up several batches of New York Times Chocolate Chip Cookies –another one of the birthday gal’s favorites.

Nini's Sweet 16

The dessert bar included her favorites candies such as Peppermint Patties, Reese Peanut Butter Cups, Sour Gummy Straws and Red Vines that guests filled their goodie bags with.

As for me, I was tasked with the birthday cake (more on that later) and even whipped up a couple dozen cake pops at the last minute.

Nini's Sweet 16
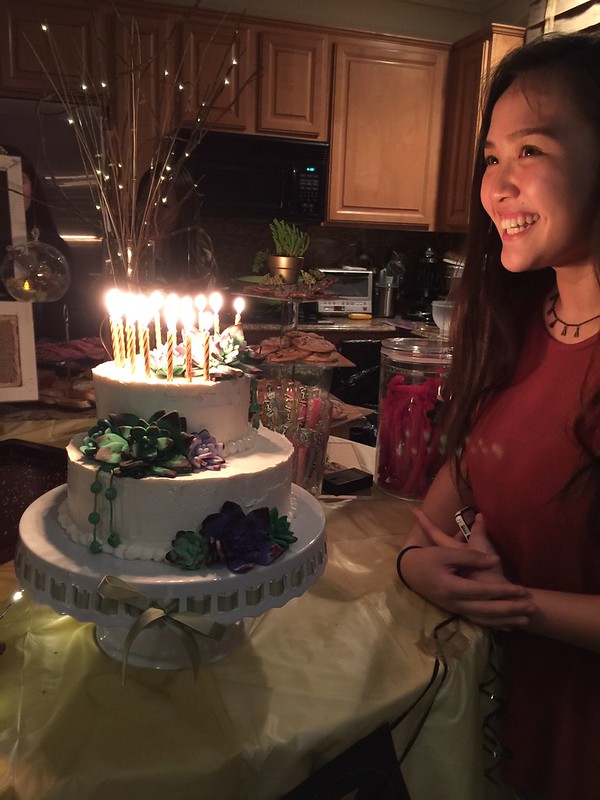
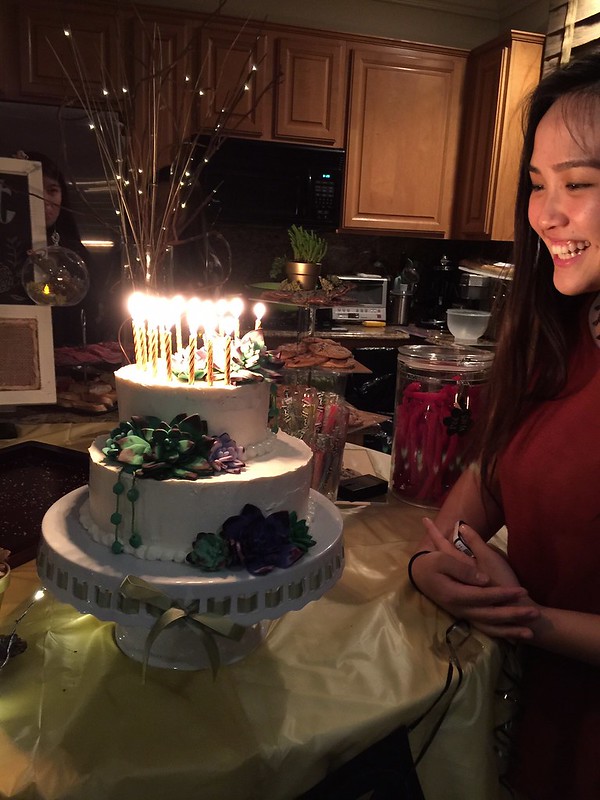
And before we knew it, it was time for the birthday girl to come home to her party. I think you can tell from the look on her face below that she was truly surprised! Success!

Version 2

The night was filled with lots of food, laughter, a few games, LOTS of sweets, presents and endless–and I’m talking ENDLESS selfies!

Oh those teenagers….

We even set up a photo “booth” that was well taken advantage of by the dozens and dozens of teenagers. But get this—they would still take selfies while they were having their pictures taken! I kept asking if they wanted me to take the photos for them but they politely declined. Perhaps normal poses just aren’t cool…. I may never understand it.

Nini's Sweet 16

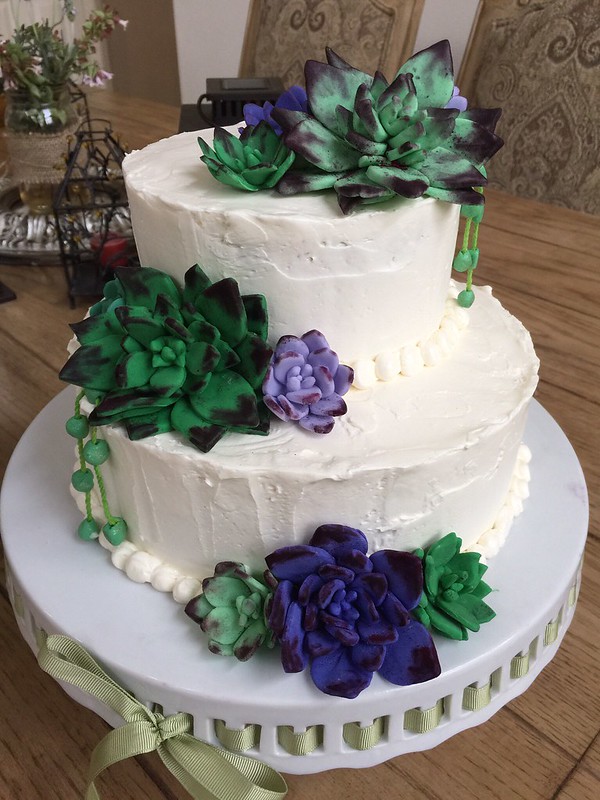
Let’s talk a bit about the cake.

For years, Nini has been obsessed with succulents —she’s absolutely nuts about them!  So when it came time to talk about cakes, the design choice was already made.

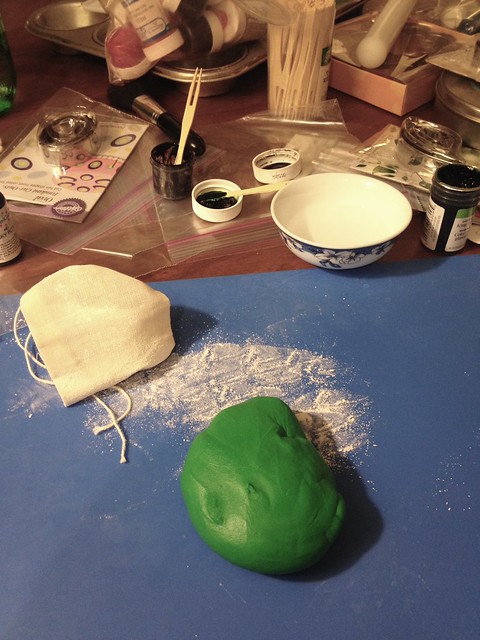
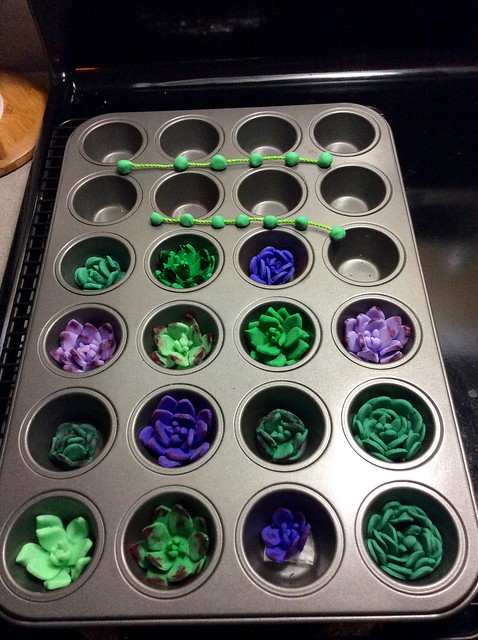
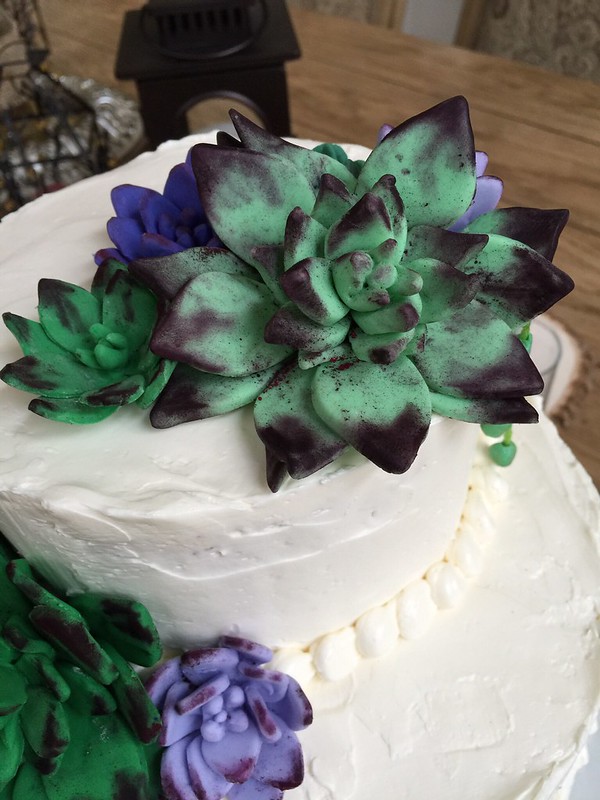
Which meant it was time to bust out the fondant. When I mold fondant decorations, I like to start at least a week out before the event to allow ample time for them to air-dry and harden a bit. This helps to keep the figures’ shapes as well as sets the color of the dye.

Below are a few of my previous fondant works:

Nini's Sweet 16
I’ve always kind of enjoyed playing with fondant—it’s essentially Play-Doh! I just wished it tasted better than it does but at least it’s fun to mold.

Nini's Sweet 16

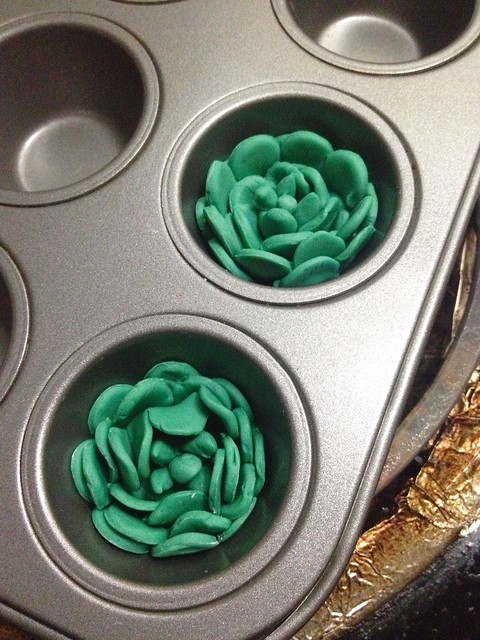
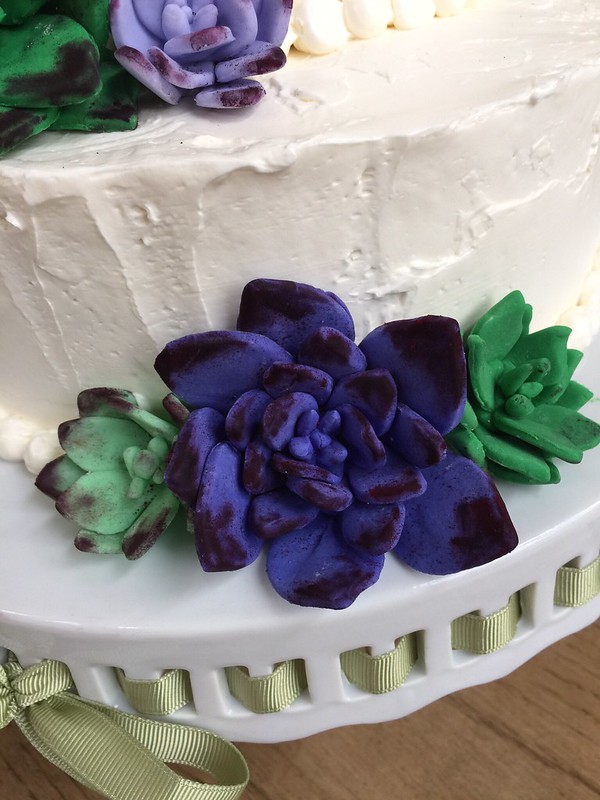
My succulents were not 100% botanically correct, but I think they ended up pretty cute. In addition to coloring the actual fondant, I used powdered food color to paint the tips and edges of some of the leaves for some added depth.

Nini's Sweet 16

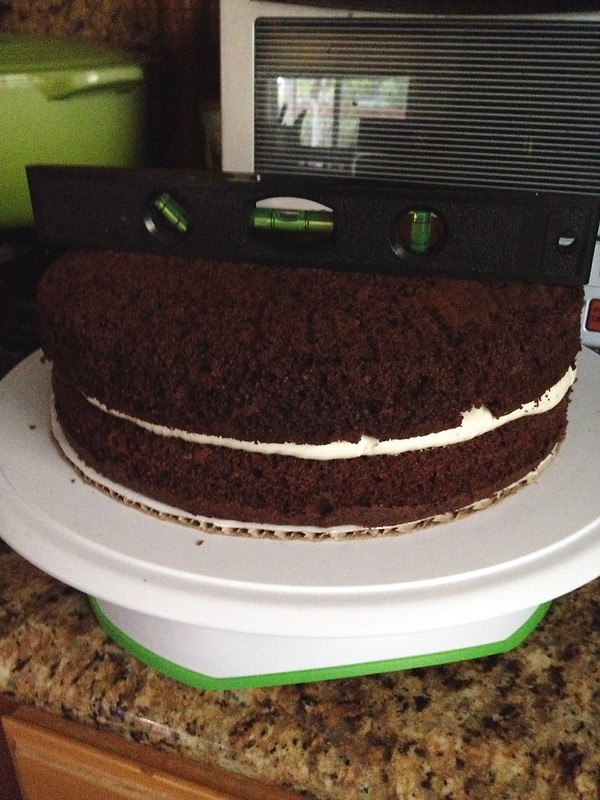
As for the cake itself, or “sponge”, I opted for a dense chocolate cake. For stacked cakes, I’ve always had issues with sponges that were too light (chiffon cakes, etc.) or if they were too moist. I find that they just don’t have the structure to hold up to the stacking weight which leads to a giant hot mess.

After the cakes were baked and cooled (I do this the night before I decorate the cake), it became time to level and tort them. And to be honest, this is my least favorite part. It’s tedious and time consuming but if you don’t do it properly, your cakes will be lopsided. Grab a handy leveler to help your cause out.

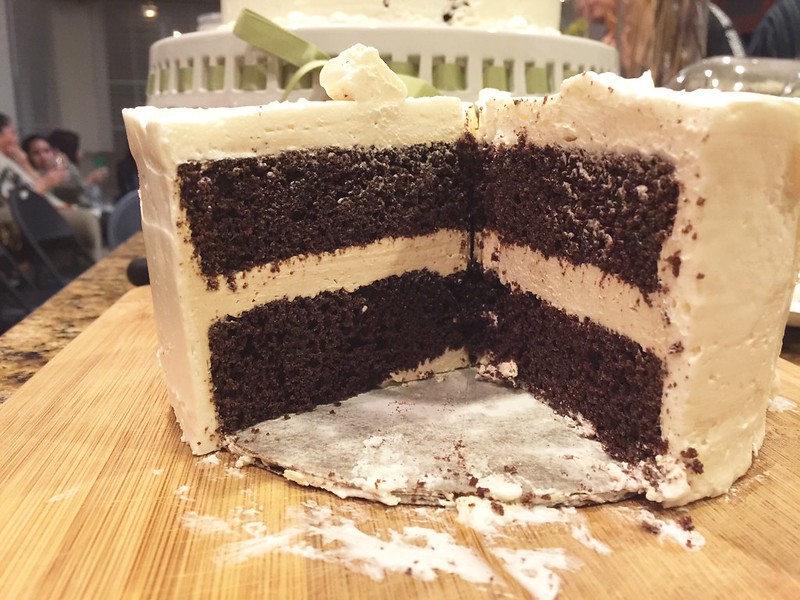
To fill and frost the cakes, I opted for the tried and true Swiss Meringue Buttercream. Not only is it delicious but it’s a good stable frosting. The layers were filled with a coffee flavored buttercream and the exterior of the cakes were frosted with vanilla buttercream to keep the color white.

Nini's Sweet 16

And if all goes well, all of your hard work and patience while torting will yield beautiful clean layers and lines in the cake.

Nini's Sweet 16

Once each cake layer was frosted and smoothed out, I placed the top tier slightly off centered for a bit of whimsy. I then took a Wilton 2A round tip to pipe an quick pearl pattern at the base of each tier.

Nini's Sweet 16
Next, as my seester said, came the fun part – figuring out the placement of the succulents. This is where I wanted to go a bit nuts and throw them all on. But my inner voice and my eldest seester talked me out of it.

Nini's Sweet 16
All in all, I was quite pleased with the final look of the cake and Nini really loved it –which if that doesn’t earn me the auntie of the year award, I don’t know what will……

Nini's Sweet 16
Happy Sweet Sixteen, Nini Love! ❤

Nini's Sweet 16