Breads

Mini Sourdough Bread Boules

Sourdough Bread Boules
Being the carb monster I am, it’s really no surprise that I’ve come to love baking bread–granted, it wasn’t always the case.

But now I find that there’s something about forming something so beautiful and delicious out of a few spare ingredients that most folks have in their cupboards. There’s something ritualistic about the process–and although time consuming, it is completely fulfilling.  Not to mention that we’ve been baking some type of bread, across the world/cultures for thousands and thousands of years.

Sourdough Bread Boules

Sure, some breads can be finicky and depending on the weather and moisture outside, you’ve got to adjust. But when you’ve kneaded that perfectly silky dough, it’s fantastic!

So for Maya’s birthday Fam Din where we served a delicious Clam Chowder that brother made, I quickly volunteered to bake the sourdough bread boules to go along with them. I had never officially baked my own sourdough, although it’s been on my to-do list for some time, but hey-it seemed like a great opportunity.

Sourdough Bread Boules

First off, I needed a “starter” that gives the bread that wonderful chew and flavor. Now, I’m not one of those lucky home bakers that have a starter stored in my fridge that has been handed down in my family for the past century. So I had to create my own.

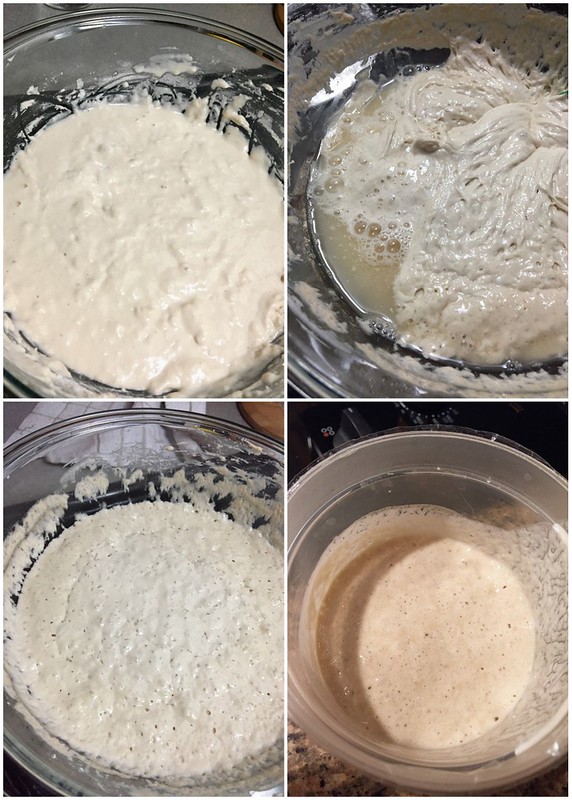
It’s a fairly easy process that essentially involves “growing” a wild yeast over several days through a combination of water and flour. Every day, you “feed” your starter a little bit more of both as it bubbles away. At one point, you may begin to freak out as it starts to separate–and you may think–CRAP! It’s gone bad!

But don’t fret my pet. All is good–in fact, you want that to happen because that’s when you’ll know that you’ve got a fermentation party going on. Just stir it all up and keep on going with the process.

Sourdough Bread

For this particular batch, I chose to make a starter based on a recipe found here. The only exception is that I grew my starter for about 8 days versus the 5 listed in the instructions.

But hey–if you’ve got your own starter recipe, or even better–have some already chilling in your fridge, by all means…go with that.
Sourdough Bread
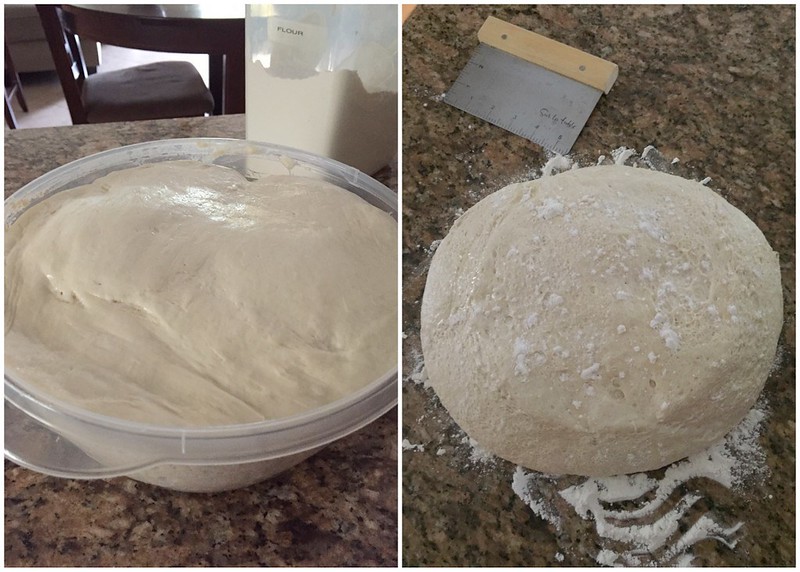
After you’ve introduced your finished starter with a bit of flour to create a “levain”, you’ll want to let it mingle together overnight before adding the final flours to proof. And boy oh boy, will it proof! All through the wonders of your starter and with no additional help of dried yeast.

Magic!

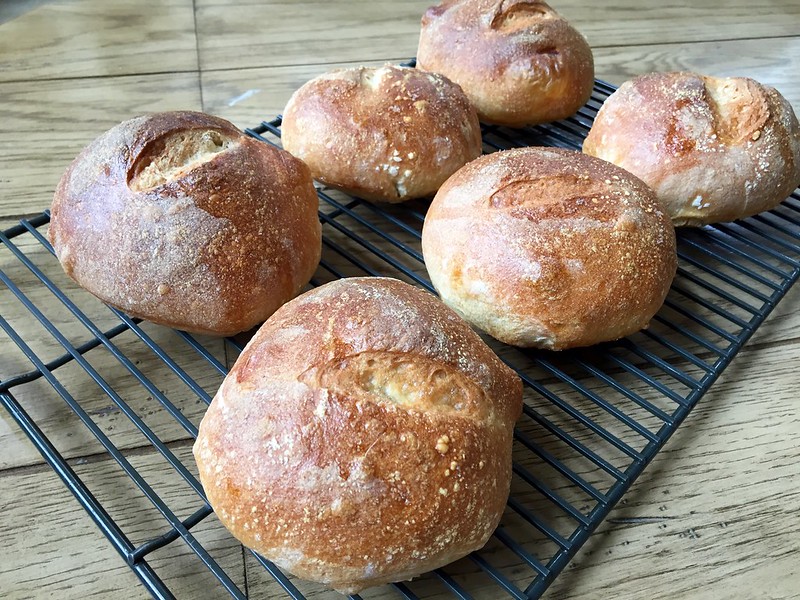
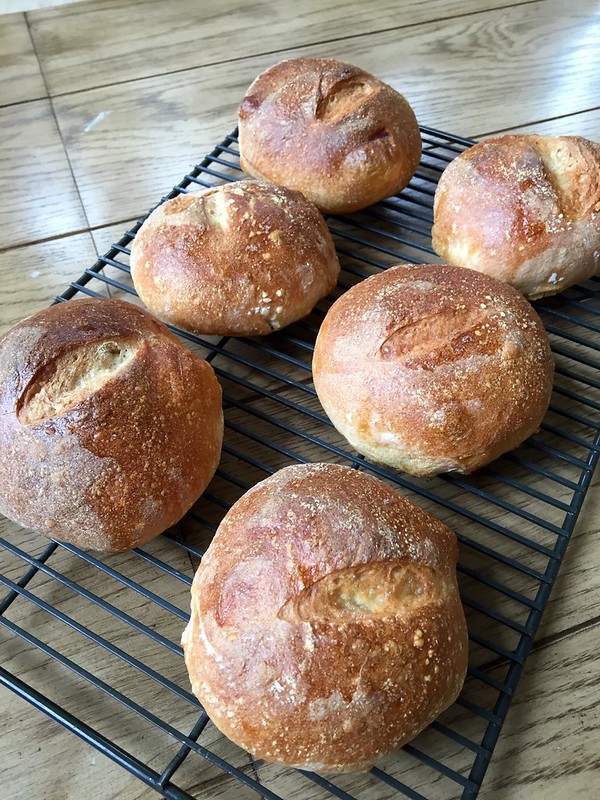
This recipe from Half Baked Harvest produced 6 good-sized boules out of the dough. However, I ended up forming them a little smaller to make 8 per batch. Since we were going to have lots of appetizers before dinner and intended to use them as chowder “vessels”, this smaller sized suited us well.
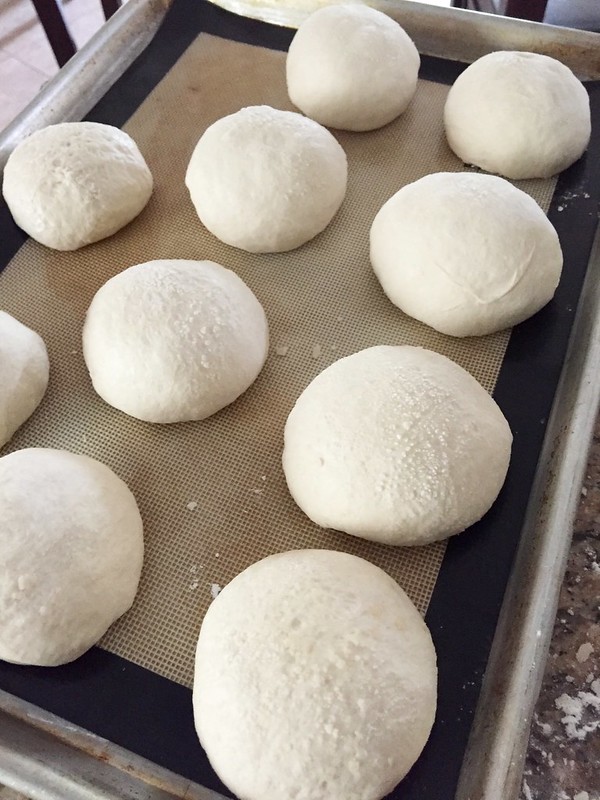
Sourdough Bread Boule
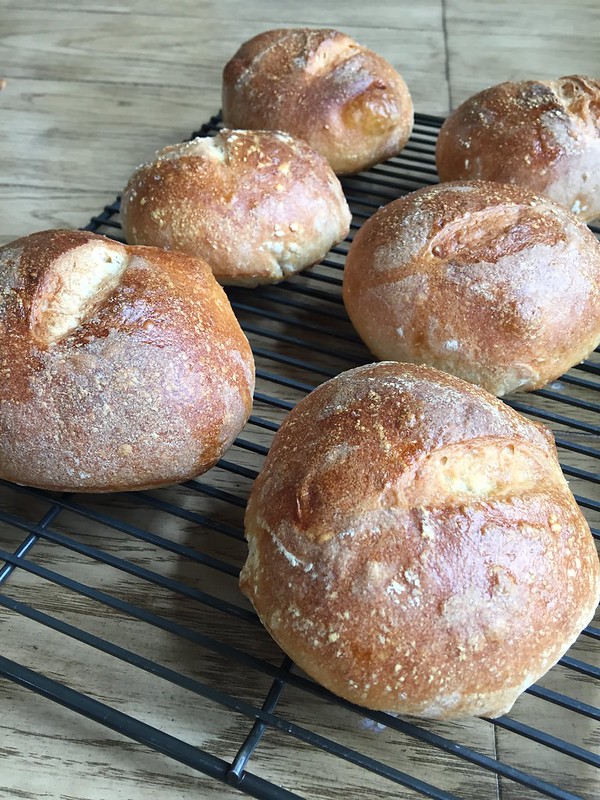
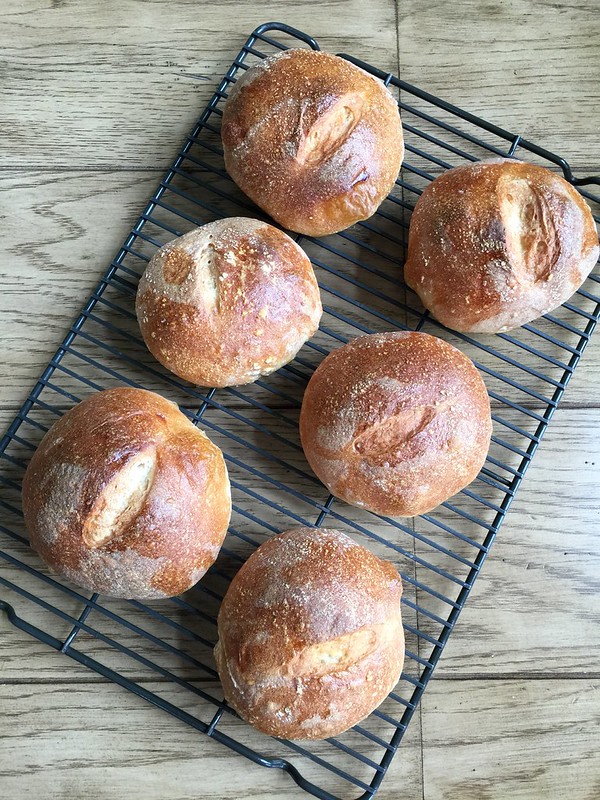
Prior to baking these little guys got brushed with an egg white wash and were quickly spritzed with water. These two additional steps gave them a beautiful golden sheen and helped to create the wonderful crisp exterior texture.

PERFECT sourdough characteristics!
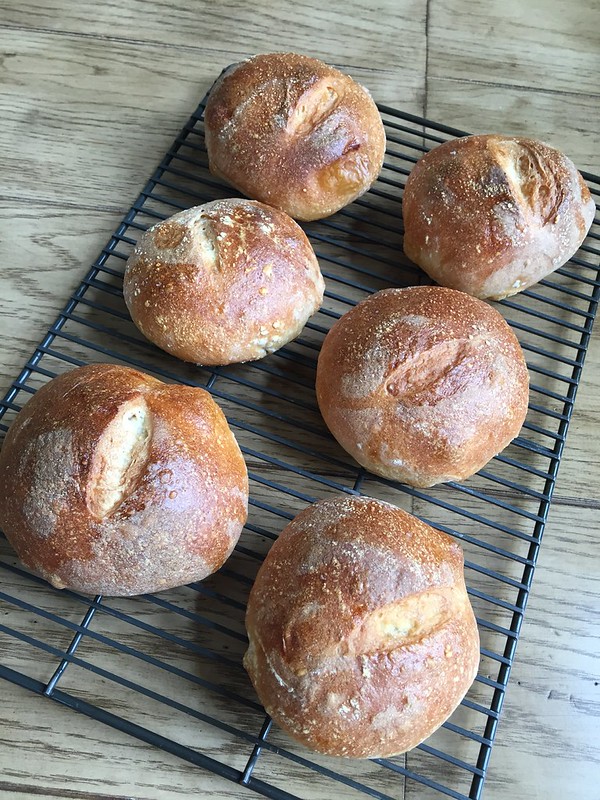
February 2017 Family Dinner
As for the crumb, I wish I would have taken a pic of the interior– it was spongy with great bubble pockets. The flavor was subtly sour—in fact, I would have preferred a bit more. But it was still slightly tangy. I think next time, I’ll give Tartine’s recipe a try now that I’ve gotten my feet wet.

February 2017 Family Dinner

But overall, I definitely recommend it! The method below is quite easy to follow–even for those new to bread baking.

Happy Sourdoughing!

__________________________________
Mini Sourdough Bread Boules
Makes 6-8 mini boules

Ingredients:

1 cup fed sourdough starter
1 1/2 cups lukewarm water
3 cups all-purpose flour
1 tablespoon granulated sugar
2 1/4 teaspoons salt
2 cups bread flour
1 tbsp water optional
1 tbsp egg white lightly beaten with 1 tablespoon water
water


In a large mixing bowl or the bowl of an electric mixer, combine the starter, water, and all-purpose flour. Mix together with a fork or wooden spoon until smooth. Cover with plastic wrap and let sit at room temperature for 4 hours.

Transfer the bowl to the refrigerator and chill overnight, at least 12 hours.

Remove the bowl from the refrigerator and add the sugar, salt, and bread flour to the sponge. Mix until a ball of dough begins to come together. If some of the dry ingredients will not incorporate into the dough, add the additional 1 tablespoon of water to moisten them. Continue kneading the dough (on low speed if using an electric mixer) until the dough is smooth and elastic, about 5-6 minutes. Form the dough into a ball and transfer to a large lightly oiled bowl, turning the dough once to coat in the oil. Cover with plastic wrap and let rise in a warm spot until doubled in volume, 3-4 hours.

Line a baking sheet with a silicone baking mat or parchment paper. Transfer the dough ball to a lightly floured work surface and gently deflate the dough. Divide the dough into eight equal portions. Form each piece of dough into a ball, and tuck any loose edges or seams underneath. Place seam-side down on the prepared baking sheet. Repeat shaping with the other 7 pieces of the dough. Transfer the shaped boules to the prepared baking sheet. Cover loosely with lightly oiled plastic wrap. Let rise in a warm place until nearly doubled in volume, about 2-3 hours.

Place a baking stone or large dutch oven in the oven and preheat the oven to 425? F. Allow the pot to preheat for at least 20 minutes. Just before baking, lightly slash the top of each boule using a sharp serrated knife. Brush the exposed surface of the loaves with the egg wash. Spray the loaves lightly with water. Slide the entire baking sheet onto the baking stone or carefully place 4 boules in the dutch oven with the top on. Bake about 28-32 minutes, rotating the pan halfway through baking, until the crust is golden brown. If baking with the dutch oven repeat once the first four have been baked. Transfer the finished boules to a wire rack and let cool at least 30 minutes before slicing and serving.

Recipe From: Half Baked Harvest

Breads · Breakfast/Brunch · Desserts/Pastries

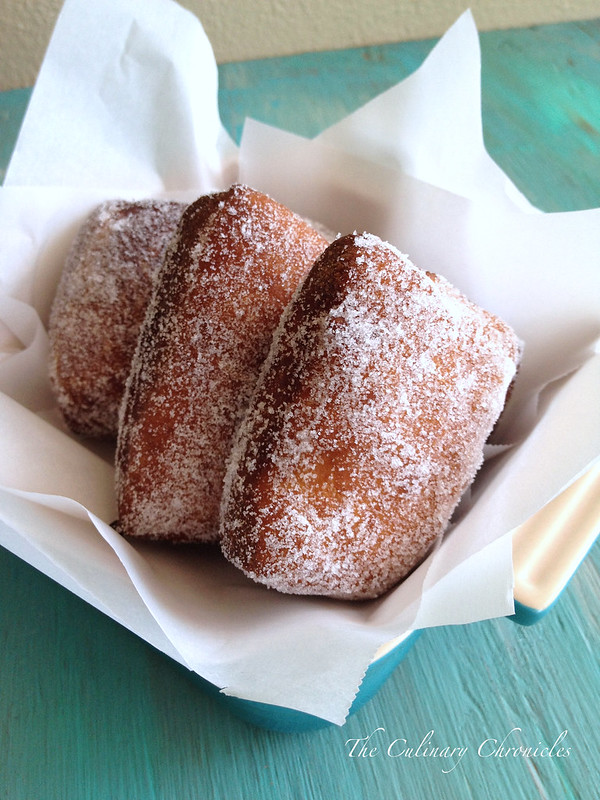
Malasadas – Portuguese Doughnuts

Malasadas

LET’S GET DOUGHNUT WASTED!!!!!!!

And why the heck not? It’s National Doughnut Day!!!

Malasadas

What’s my favorite doughnut or donut?

Easy.

It comes down to either an Old Fashioned with a Chocolate Glaze or Malasadas. Mmmm…malasadas.

Never had one? Let me break it down for you.

Malasadas

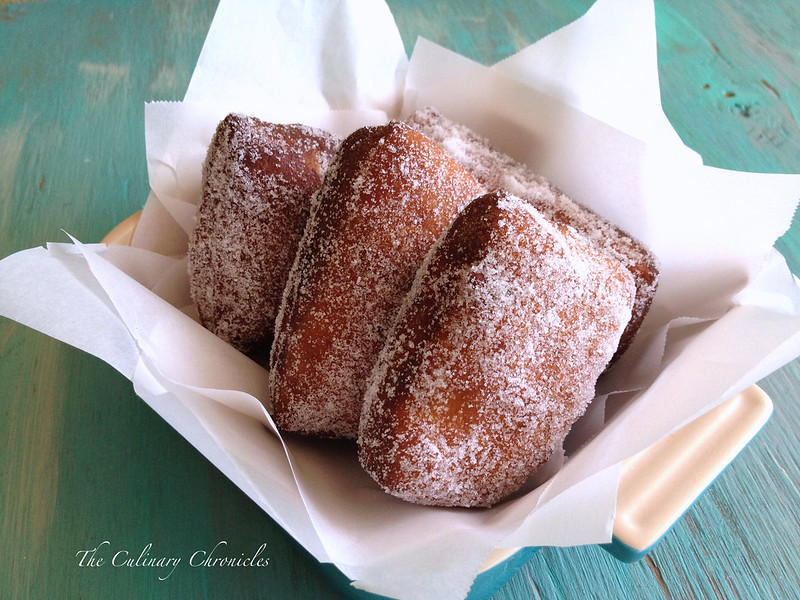
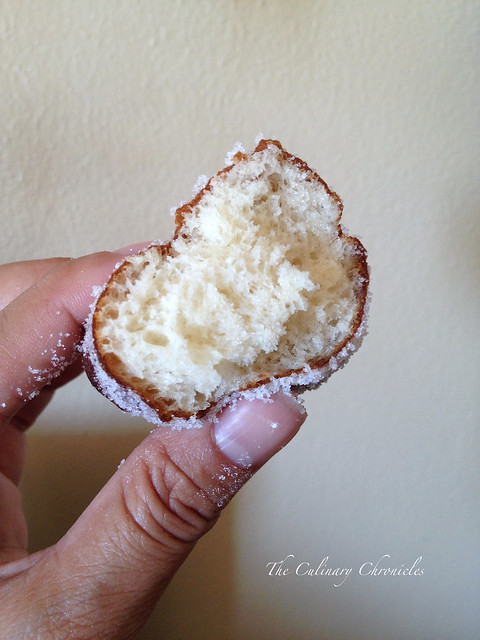
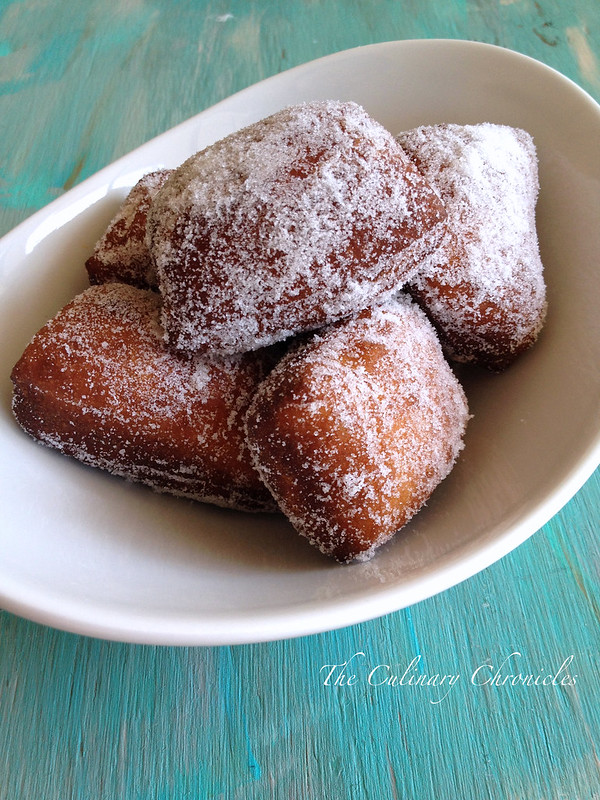
Malasadas are Portuguese doughnuts. They’re a yeast based dough with eggs, butter and milk (or half and half). Rolled in sugar, these babies should be light and fluffy…and freaking amazing.

Now of course, the go-to place for malasadas is Leonard’s Bakery in O’ahu and every time I’m on the island, I MUST pop in for a box of them. Traditionally they’re unfilled but when I’m at Leonard’s, I have to get a variety of the filled ones. I love the ones that are stuffed with haupia (a Hawaiian coconut “pudding”), custard or if I’m lucky, they have the lilikoi (passion fruit) filling as their flavor of the month.

Malasadas

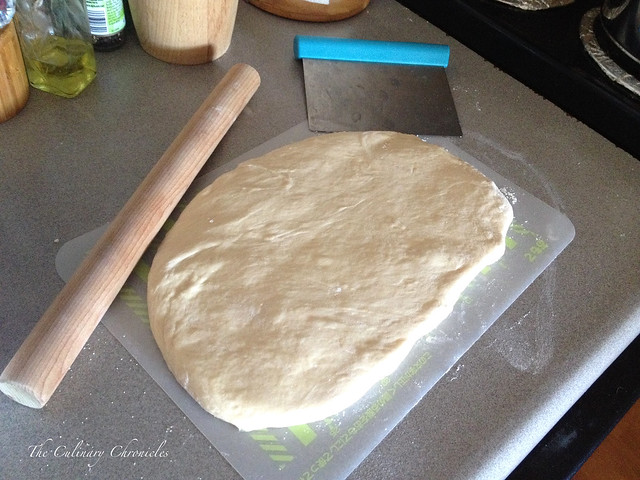
Sadly, I’m not on the islands today and had to take matters into my own hands. I used the recipe below from  Leonard’s and it’s pretty easy to follow. After proofing, the dough is just lovely.

And no surprise here… they were ONOLICIOUS!

Malasadas

In full disclosure, they were not nearly as good as Leonard’s…..I may be in San Diego but the beautiful air in Hawai’i combined with the sounds of the trade winds and ocean definitely add to the flavor of island food and takes it over the top.

But hey, they sure did do the trick and I happily inhaled four of them and washed it all down with a chilled class of Pinot Grigio….keeping it classy.

Happy National Doughnut (or Donut) Day!!!

_____________________________________________________
Malasadas – Portuguese Doughnuts from Leonard’s Bakery
Makes about 1 dozen

Ingredients:

1 tablespoon active dry yeast
112 cups sugar
3 eggs
2 tablespoons unsalted butter, melted
12 cup milk
12 cup half & half
14 teaspoon kosher salt
4 cups bread flour (1 lb. 2 oz.), sifted
canola oil, for frying
Combine yeast, 1 teaspoon sugar, and 2 tablespoons water heated to 115° in a bowl; let sit until foamy, about 10 minutes; set aside. Beat eggs in the bowl of a stand mixer fitted with a paddle attachment until fluffy. Add yeast mixture, 12 cup sugar, butter, milk, half & half, and salt; mix until combined. With the motor running, slowly add flour; beat until dough is smooth. Transfer to a lightly greased bowl and cover loosely with plastic wrap; set in a warm place until doubled in size, about 112 hours.

On a lightly floured surface, roll dough into a 12″ square about 12″ thick. Using a knife, cut dough into 3″ squares; gather and reuse scraps. Place on greased parchment paper-lined baking sheets, at least 3″ apart; cover loosely with plastic wrap and set aside in a warm place until doubled in size, about 1 hour.

Place remaining sugar in a large bowl; set aside. Heat 2″ oil in a 6-qt. saucepan until a deep-fry thermometer reads 350°. Using scissors, cut the donuts out of the parchment paper, leaving about 1″ of paper around the sides of each doughnut (the paper makes it easier to transfer them to frying oil). Working in batches, place donuts in oil, paper side up, using tongs to peel off and discard paper. Cook, flipping once until puffed and golden, 2 to 3 minutes. Transfer to a baking sheet with a wire rack; let cool completely, then toss with sugar.

Repost from Saveur

Breads

Perfect Broiche Buns

Perfect Brioche Buns

Hey y’all! Happy Memorial Day weekend!!!

What is everyone up to? Camping? Beach bonfires? BBQ grilling?

Perfect Brioche Buns

If grilling is on your to do list for tomorrow, I’ve got a little something that will be a GAME CHANGER for you—the most perfect Brioche Buns!

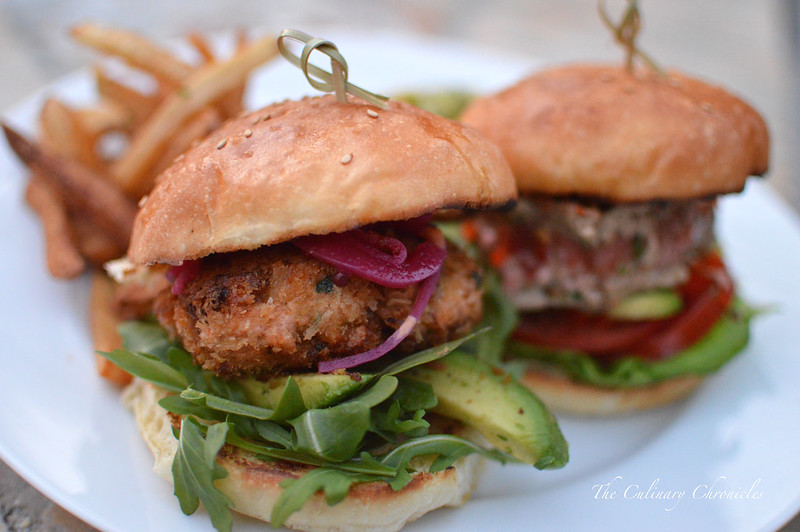
Remember when my fam bam made these seafood burgers the other month for our Sunday Family Dinner?

Seafood Burgers

The seafood patties and fixins’ were definitely the star of the show but the buns….OH THE BUNS! It’s what took things over the top!

Perfect Brioche Buns

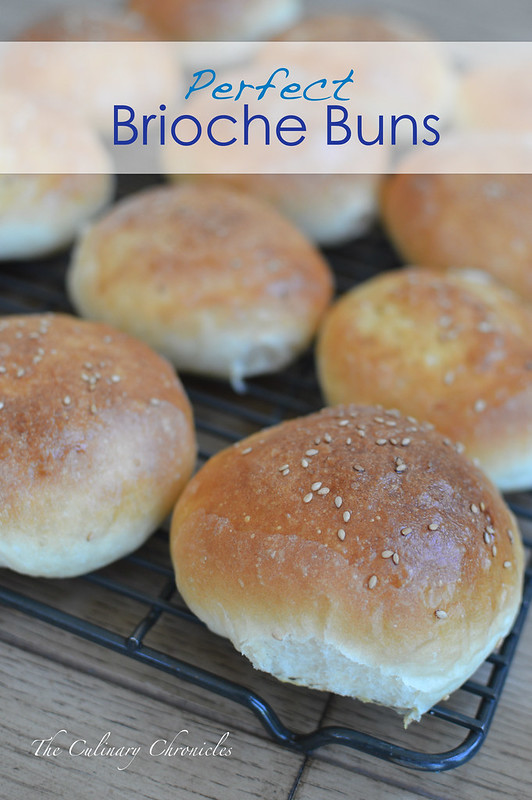
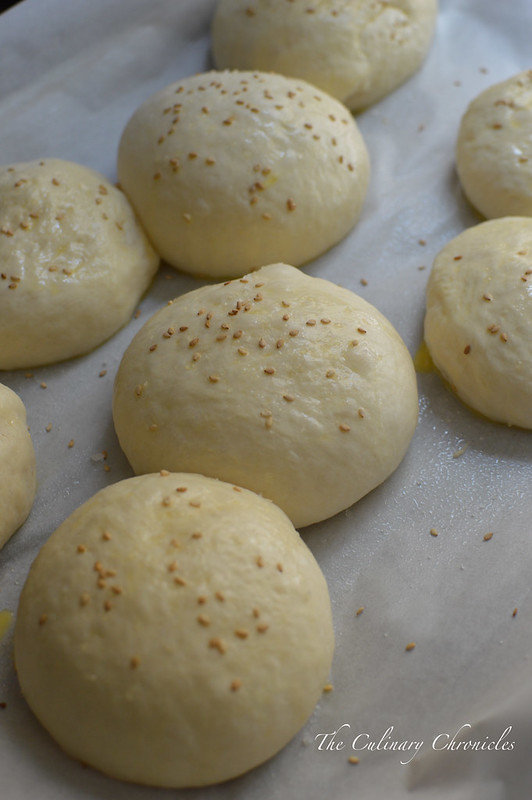
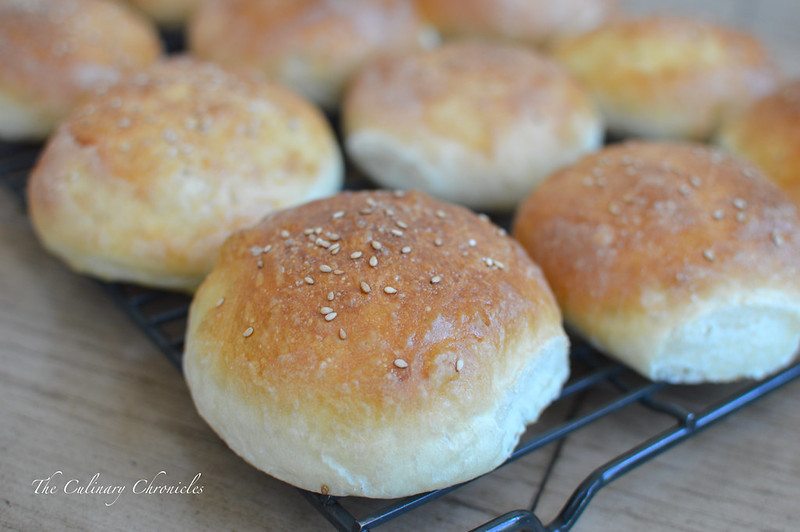
The recipe comes from the former Comma Ca restaurant in LA and have been on my must-bake list for a long time now. And I’ve got to tell you, after having made them, I will look no further because they really are perfect.

Perfect Brioche Buns

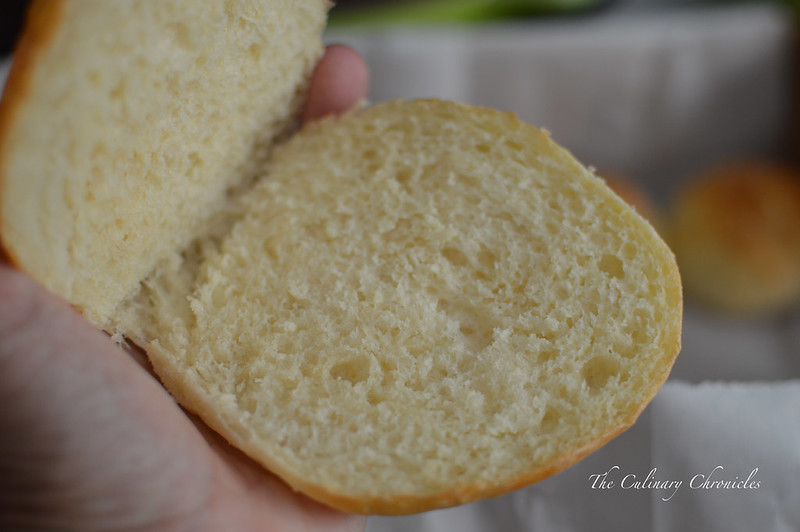
Fluffy but firm enough to be able to hold your burgers or sammies together.

And take a look at the crumb! I die.

Perfect Brioche Buns

They’re buttery yet slightly sweet and can be topped with anything from sesame seeds, poppy seeds, or garlic and onions.

Perfect Brioche Buns

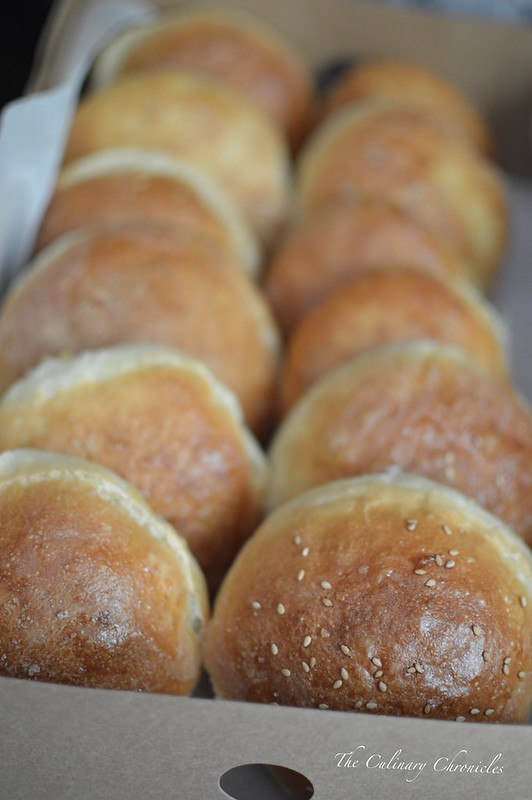
So even if you have already picked up a package of buns from the store—nix them! Because when you pull out these perfect Brioche Buns to serve your fam and loves ones, they will likely break out into song and dance to sing your praises.

I’m talking full on High School Musical style…

Errrrr...you know what I mean.

Perfect Brioche Buns

Make these now! Make them forever!

And absolutely make these for Memorial Day! Have a great weekend friends ! ❤

_____________________________________

Brioche Buns
Makes 8 large buns

Ingredients:

3 tablespoons warm milk
2 teaspoons active dry yeast
2 ½ tablespoons sugar
2 large eggs
3 cups bread flour
⅓ cup all-purpose flour
1 ½ teaspoons salt
2 ½ tablespoons unsalted butter, softened

In a glass measuring cup, combine 1 cup warm water, the milk, yeast and sugar. Let stand until foamy, about 5 minutes. Meanwhile, beat 1 egg.

In a large bowl, whisk flours with salt. Add butter and rub into flour between your fingers, making crumbs. Using a dough scraper, stir in yeast mixture and beaten egg until a dough forms. Scrape dough onto clean, unfloured counter and knead, scooping dough up, slapping it on counter and turning it, until smooth and elastic, 8 to 10 minutes.

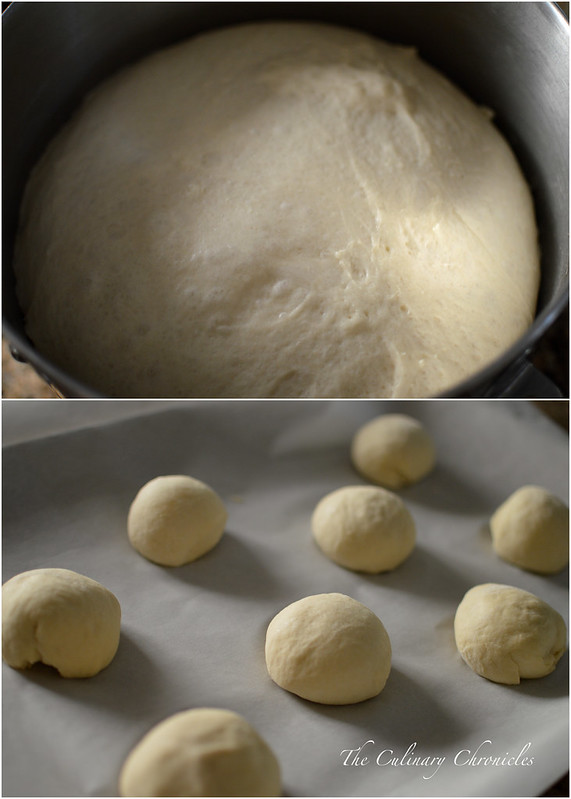
Shape dough into a ball and return it to bowl. Cover bowl with plastic wrap and let rise in a warm place until doubled in bulk, 1 to 2 hours.

Line a baking sheet with parchment paper. Using dough scraper, divide dough into 8 equal parts. Gently roll each into a ball and arrange 2 to 3 inches apart on baking sheet. Cover loosely with a clean kitchen towel and let buns rise in a warm place for 1 to 2 hours.

Set a large shallow pan of water on oven floor. Preheat oven to 400 degrees with rack in center. Beat remaining egg with 1 tablespoon water and brush some on top of buns. Bake, turning sheet halfway through baking, until tops are golden brown, about 15 minutes. Transfer to a rack to cool completely.

*Recipe from the New York Times via Comma Ca restaurant, Los Angeles

Breads

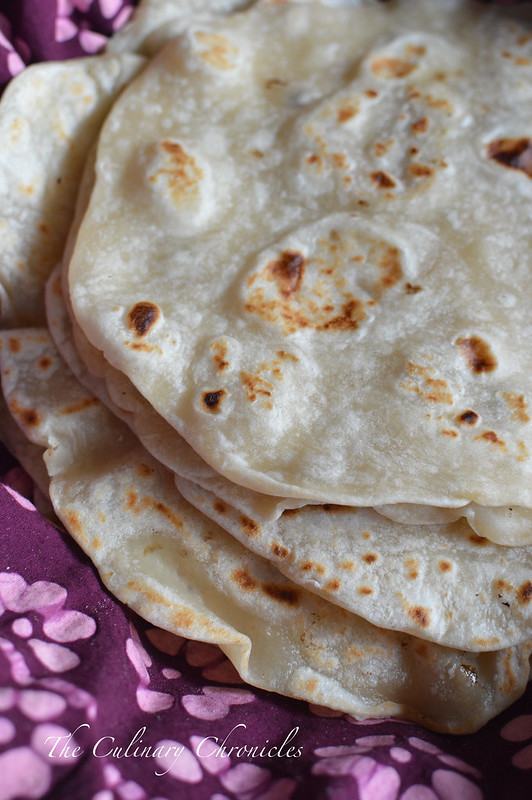
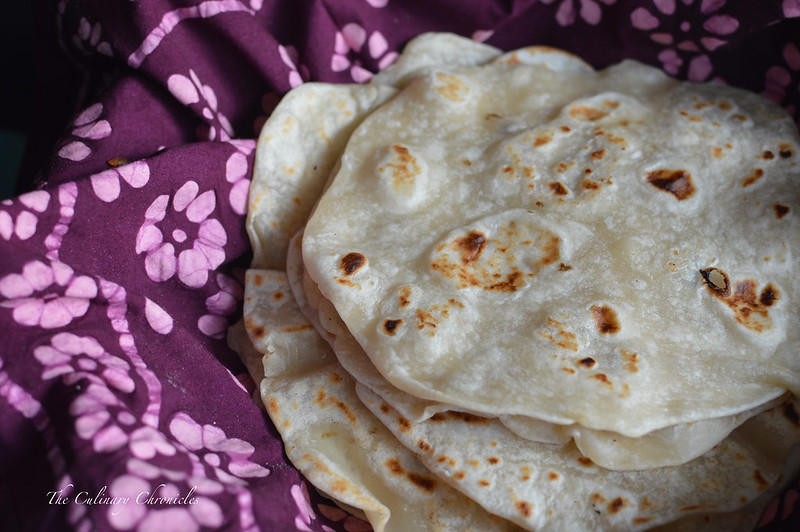
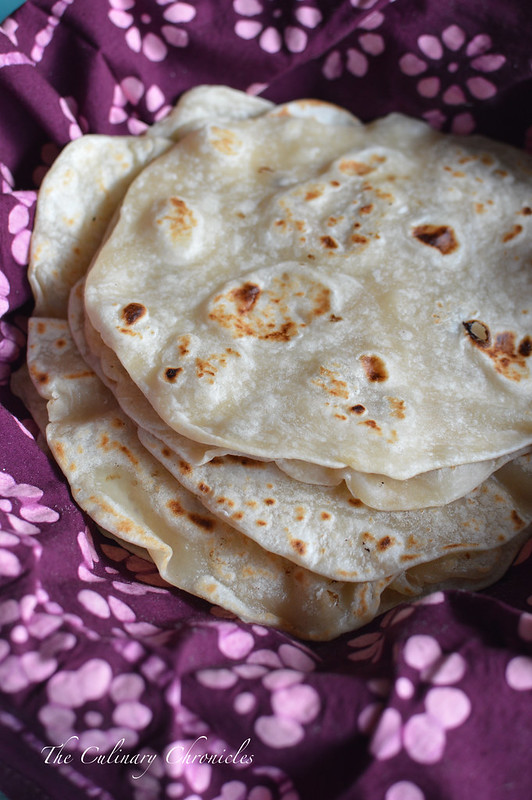
Tortillas de Harina {Flour Tortillas}

Tortillas de Harina {Flour Tortillas}

Because it’s Friday, the sun is shining, and Cinco de Mayo is just a few days away……

it’s Tortillas de Harina time!

Tortillas de Harina {Flour Tortillas}

I’ve always preferred flour tortillas to corn.  And c’mon now, there is just something about fresh tortillas that you just cannot beat. But truthfully, I’ve always been kind of shy to make them as I was never sure as to what type of “fat” yielded the best texture and flavor.

Vegetable oil? Lard? Shortening?

Tortillas de Harina {Flour Tortillas}

So one morning a few months ago, I woke up and channeled my inner abuelita. I played around with several different recipes that varied from AP flour to bread flour to a mixture of both masa and AP. I tried vegetable oil bases,  shortening and even lard.

And in the end….the winner in my book? A combo of AP flour and vegetable shortening—and a recipe courtesy of Chef Rick Bayless, the American chef who is renown for authentic Mexican cuisine.

Tortillas de Harina {Flour Tortillas}

Thankfully, the recipe is quite simple and the resting time is only about 30 minutes.  Once rolled out, the tortilla is cooked on a hot cast iron skillet for less than a minute. Tender, slightly flaky (I’d say due to the shortening)….perfect.

You can also add chopped cilantro, chiles, lime zest, etc. Anything that your heart may desire.

Hands down, my new go-to tortilla recipe. And something you DEFINITELY should make for your upcoming Cinco de Mayo festivities!

___________________________________

Tortillas de Harina {Flour Tortillas}
Makes 12 large tortillas or 24 taco sized tortillas

Ingredients:

2¾ cups all-purpose flour, plus a little extra for rolling the tortillas
5 tablespoons lard or vegetable shortening, or a mixture of the two (I used shortening)
¾ teaspoon salt
¾ cup very warm tap water

Make the dough. Combine the flour and fat in a large mixing bowl, working in the fat with your fingers, until completely incorporated. Dissolve the salt in the water, pour about 2/3 cup of it over the dry ingredients and immediately work it in with a fork; the dough will be in large clumps rather than a homogeneous mass. If all the dry ingredients haven’t been dampened, add the rest of the liquid (plus a little more, if necessary). Scoop the dough onto your work surface and knead until smooth. It should be medium-stiff consistency — definitely not firm, but not quite as soft as most bread dough either.

Rest the dough. Divide the dough into 12 portions and roll each into a ball. Set them on a plate, cover with plastic wrap and let rest at least 30 minutes (to make the dough less springy, easier to roll).

Roll and griddle-bake the tortillas. Heat an ungreased griddle or heavy skillet over medium to medium-high heat.On a lightly floured surface, roll out a portion of the dough into an even 7-inch circle: Flatten a ball of dough, flour it, then roll forward and back across it; rotate a sixth of a turn and roll forward and back again; continue rotating and rolling until you reach a 7-inch circle, lightly flouring the tortilla and work surface from time to time.Lay the tortilla on the hot griddle (you should hear a faint sizzle and see an almost immediate bubbling across the surface). After 30 to 45 seconds, when there are browned splotches underneath, flip it over. Bake 30 to 45 seconds more, until the other side is browned; don’t overbake the tortilla or it will become crisp. Remove and wrap in a cloth napkin placed in a tortilla warmer. Roll and griddle-bake the remaining tortillas in the same manner and stacking them one on top of the other.

Recipe from Rick Bayless

Breads · Side Dish

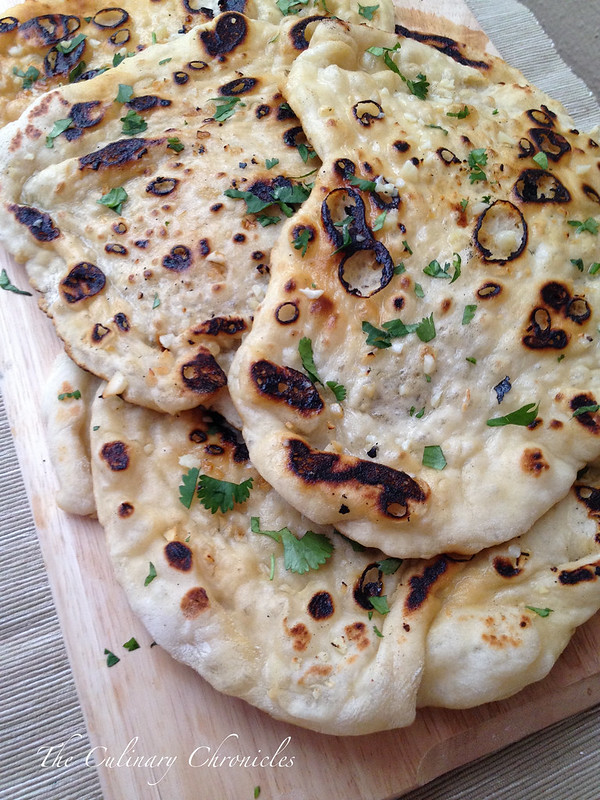
{Cast Iron} Garlic Naan

Garlic Naan

Several years ago I got to spend a little bit of time in India—Chennai to be exact. And as luck would have it, I happened to have visited at the beginning of Diwali – the Hindu festival of lights. Nothing I had read or heard could have prepared me for the country. It’s vivid colors, intense – and I’m talking INTENSE heat, and sounds still replay in my mind as if I was just there. And although I only had a brief 5 days there, the city will forever be imprinted in my heart.

Good thing too because I had such a junky camera at that time — my photos were terrible! 🙂

Anywhoo….

Naan1

Since I only had a short time, I didn’t get to travel around the country too much and stayed primarily in Chennai. I did, however, manage to squeeze in a memorable home stay with a wonderful family –the Bhatts. They welcomed us into their homes, guided us through Chennai and gave us a glimpse of their culture.

Garlic Naan

Over those days, we meandered through the city in and out of markets, braved tuk-tuk rides, and ate—like SERIOUSLY ate. I came to find that Southern Indian food is often vegetarian and was so wonderfully spiced and fulfilling that this carnivore-lovin’ gal didn’t miss the meat. It was also the first time I had ever tried dosas– which I now LOVE.

Dosas are thin “crepes” served with a variety of chutneys. They can be filled or left plain. However, my favorite are the giant paper dosas that are extremely thin and crisp and rolled into a large cylinder. There’s something totally satisfying about breaking off a piece of paper dosa with your fingers and then dunking it into a masala or chutney.

Chicken Aloo Tikka Masala & Garlic Naan

Our home stay mom, Mrs. Bhatt, also did a good amount of cooking during our brief visit. And when she did, I hung around the kitchen trying to make mental notes of how she prepared things. I really wish I would have recorded her rolling out the dough for the parathas because she did it with such lightning speed!

Since my trip, I’ve tried to recreate the flavors I tasted in India –some attempts were definitely more successful than others. Channa Masala and Tikka Masala are on my usual rotation. But I always seemed to have had an issue with making a good naan–which in my opinion, is crucial when I’m devouring the aforementioned dishes. Some recipes turned out too dry or not tender….and others just didn’t taste well.

Garlic Naan

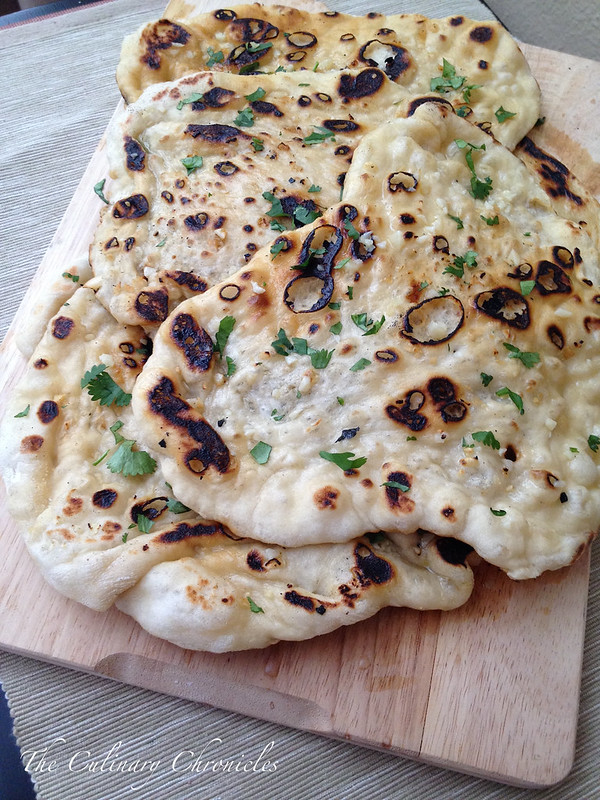
Until I stumbled upon Aarti Sequeira’s recipe–and my search was over. Her recipe uses a combination of both yeast and baking powder which gives it the perfect texture and lightness. I adapted her recipe a bit to make my favorite garlic naan and now there’s no going back.

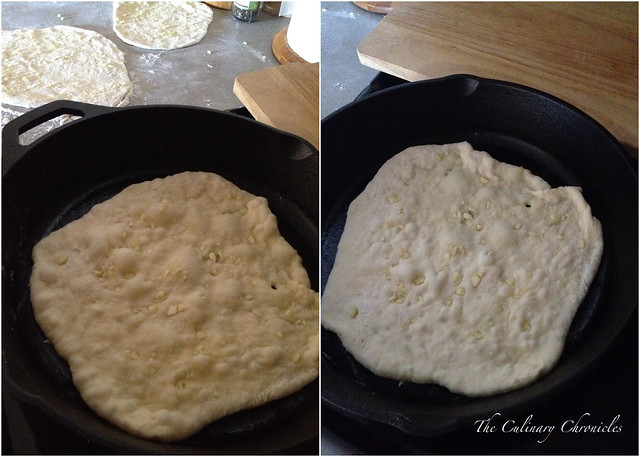
But here’s the thing. Others will disagree with me but unless you have a tandoori oven (or maybe an outdoor brick pizza oven?), you must–and I mean MUST, use a cast iron skillet. There’s no replacing it. I’ve tried baking naan in a regular oven, in a standard skillet, in an easy-bake oven (PSYCH!) and nothing compares to a cast iron. Just add it to another reason why I adore cast iron skillets so much.

Oh- you better be sure that the next time I manage to get to India, I’ll pack two cameras just in case to capture everything. And although it’s been years, much love and thanks to the Bhatt family for their generous hospitality. ❤

_____________________________________

{Cast Iron} Garlic Naan
Makes 6

Ingredients:

1 teaspoon active dry yeast
2 teaspoons sugar, divided
¾ cup warm water
3 tablespoons plain yogurt
2 tablespoons extra-virgin olive oil
2 cups all-purpose flour, plus more for rolling
1 teaspoon kosher salt, more for finishing
1/8 teaspoon baking powder
2 tablespoons unsalted butter (or melted ghee)
1 heaping tablespoon minced fresh garlic, divided
1 teaspoon garlic powder
sea salt
2 tablespoons chopped cilantro

In a small bowl, stir together the yeast, 1 teaspoon sugar and water. Allow the mixture to sit for about 10 minutes until it becomes bubbly. Whisk in the yogurt and olive oil.

In a large bowl, whisk together the flour, kosher salt, remaining sugar, and baking powder. Pour in the yogurt mixture and use your hands to mix the ingredients all together. The dough will be very wet and sticky at first but continue to mix/knead until it becomes rather soft and pliable. Once it comes together, cover the bowl with plastic wrap and place it in a draft free place for 3-4 hours until it nearly doubles in size.

Place the butter and 1 tablespoon garlic in a small, microwave proof bowl. Heat in the microwave until the butter has melted.

Dust your counter (or other work place) with flour and place your naan dough onto it. Using a pastry cutter or sharp knife, divide the dough into 6 even portions. Lightly roll each of the dough balls into the flour to help them from sticking. Using a floured rolling pin, roll one of the dough portions into a circle about ¼ inch thick –it’s completely okay if it’s an imperfect circle. Sprinkle the top side with a bit of the garlic powder and remaining minced garlic. Use your fingers to press it into the dough and then pass the rolling pin over the top of it to ensure it’s secured. Repeat this method with the remaining dough.

Warm a large cast-iron skillet over medium-high heat until it’s nearly smoking. Be sure to have a lid large enough to fit the skillet and have the bowl of garlic butter with pastry brush nearby.

Carefully pick up one of the rolled out naan and gently lay it in the skillet, garlic side up, and cook for about one minute. The dough should start to bubble. After the minute, use tongs/spatula to flip the naan and cook for another 30 seconds to 1 minute. Flip it over again and cover the skillet for about an additional 30 seconds to 1 minute. The bread will look blistered and have blackened in a few spots.

Remove the naan from the skillet and generously brush the top with the garlic butter. Sprinkle the tops with a few pinches of sea salt and chopped cilantro. Repeat with the remaining 5 naan. Serve warm.

Slightly adapted from Aarti Sequeira

Breads

Buttermilk Bread Loaf

Buttermilk Bread Loaf

If you’re anything like me, you have a few ingredients in your fridge that dictate your menu. As in, if I don’t use this within the next day or so, I’ll have to throw it out. Like wilting spinach or proteins that you may have prematurely defrosted.

For me, that often occurs with produce or dairy items—and almost always, buttermilk. Sure, some would say, “Why don’t you just freeze it?” or “Mix some whole milk with lemon juice instead of buying buttermilk?”. Now the latter would make sense if I ever had whole milk in the fridge (other than when I bake or make ice creams) and freezing an upwards of 2+ cups of buttermilk seems odd to me.

Buttermilk Bread Loaf

So when I do find myself with a quart of buttermilk, I’ll deter to my trusted favorite recipes that call for it. Such as Buttermilk Fried Chicken, Red Velvet Banana Pancakes, Blackberry Muffins, or Cheddar Cheese Biscuits.

And of course, this wonderfully quick and easy Buttermilk Bread Loaf. This is one of my go-to recipes for loaf bread as it’s no knead and doesn’t require anytime to bloom the yeast. Sure, it does take a couple of minutes to warm up the buttermilk but other than that, your stand mixer does all the work. And you don’t even need the dough hook!

It’s quite a forgiving dough–perfect for those who are freaked out about yeast recipes. But the end results in a wonderful exterior crust and light interior crumb. Plus, the buttermilk gives a slight tang to the bread.

Start to finish, you’ll have fresh bread in less than 1.5 hours–and that includes proofing time! Can’t beat that!

Recipe from Elinor Klivans via Leite’s Culinara

Breads · Side Dish

Honey Yeast Rolls with Sea Salt

photo(1)-002

I’ve had this little number in my queue to try for some time now and with the holidays just around the corner–what better opportunity!

It was pretty simple to come together and were beautiful when proofed and baked. I decided to add to the original recipe by sprinkling the rolls with Maldon Sea Salt flakes before baking. It added a great flavor and texture to the slightly sweet rolls. YUM!

DSC_0079-001

I made this batch of rolls to accompany a few roasted game hens but they would be great alongside stews/soups, buns for mini sliders or simply slathered with butter. Whichever you choose, I would highly recommend trying them out.

Thanks for stopping by!

________________________________________

Honey Yeast Rolls with Sea Salt

Ingredients:

2¼ teaspoon instant yeast
1 cup warm water
¼ cup honey, plus 2 tablespoons
3 tablespoons vegetable oil
1¼ teaspoon salt
1 egg, lightly beaten
4 cups bread flour
cooking spray
2 tablespoon butter, melted
1/2 tablespoon sea salt flakes

In the bowl of an electric mixer fitted with the paddle attachment, combine the yeast and warm water.  Add ¼ cup honey, oil, salt, and egg and mix well.  Add 3 cups of the flour and mix until the dough comes together in a sticky mass.  Switch to the dough hook and, with the mixer on low speed, incorporate the remaining 1 cup of flour.  Continue kneading on low speed for about 8 minutes, until the dough is smooth and elastic.

Transfer to a lightly oiled bowl, turn once to coat, and cover with plastic wrap.  Let rise in a warm, draft-free spot until doubled in bulk, about 2 hours.

Turn the dough out onto a lightly floured work surface and knead for 30 seconds.  Cover with a towel and let rest for 10 minutes. Punch the dough down and divide into 10-12 equal size pieces.  Shape each piece into a smooth ball and place into a round, lightly greased 9- or 10-inch round baking dish, spacing evenly.  Cover and let rise in a warm, draft-free spot for 20-30 minutes.

Preheat the oven to 400˚ F.  Mix together the melted butter and 2 tablespoons honey, and brush the tops of the rolls with the mixture.  Sprinkle the tops of the rolls with the sea salt. Bake for 15-20 minutes, or until the tops are golden brown and the rolls are baked through.  Let cool slightly before serving.

Slightly adapted from Annie Eats

Breads · Desserts/Pastries · Giveaways · Sponsored

Apple Bread Pudding with Caramel Bourbon Sauce + King’s Hawaiian GIVEAWAY!!

Apple Bread Pudding with Caramel Bourbon Sauce

I am a sucker for Bread Pudding.

There’s something so darn comforting and mouthwatering about a bowl full of this goodness. Rich, sweet–almost sinful.

Drools.

Apple Bread Pudding with Caramel Bourbon Sauce

With Autumn finally coming around, it was the perfect time to make an apple version highlighting the warm spices of cinnamon and nutmeg. And the only thing to take it over the top was a decadent drizzle of Caramel flavored by good ol’ Bourbon.

Apple Bread Pudding with Caramel Bourbon Sauce

Inspired by my visit with the great o’hana of King’s Hawaiian, I used the slightly sweet Original Hawaiian Sweet Round Bread for the pudding. I also cut back on the amount of sugar in the custard base since the final dessert would be sweet enough from the luscious Caramel Bourbon sauce.

But the awesomeness doesn’t stop here! One of our lucky readers has the chance to win a cornucopia of goodness courtesy of our friends from King’s Hawaiian!

The winner will receive a vast assortment of King’s Hawaiian baked products, King’s Hawaiian coffee, apron and more!! Needless to say, you will be a very HAPPY CAMPER!

How to Enter:

Leave a comment and tell us what the first thing you’ll make with some of the Kings Hawaiian Bread products

For extra chances to win, leave a separate comment for each indicating which of the below you did:

  1. Subscribe to The Culinary Chronicles & get automatic emails when new posts are published (If you already Subscribe, leave a comment indicating so);
  2. Like the King’s Hawaiian Facebook Fan Page (If you already “Like King’s Hawaiian, leave a comment and let us know); or
  3. Like our Facebook Fan Page (If you already “Like” us, leave a comment indicating so); or
  4. Follow @CulinaryChron on Twitter (If you already Follow us, leave a comment indicating so).

Due to shipping challenges, this Giveaway is limited to those in the continental United States. Sorry! 🙂

The deadline to enter is Monday, October 8th at 5pm (PST) and the winner will be announced the next day.

Best of luck friends and MAHALOS King’s Hawaiian!!

Pssst! Don’t forget to make this Apple Bread Pudding!

____________________________________________

Apple Bread Pudding with Caramel Bourbon Sauce

Ingredients:

Caramel Bourbon Sauce:
1 Cup Granulated Sugar
¼ Cup Water
4 Tablespoons Unsalted Butter, cut into cubes
¼ Cup Heavy Cream
2 Tablespoons Bourbon
Sea Salt (optional)

Bread Pudding:
2 Large Eggs, beaten
¾ Cup Milk
¾ Cup Heavy Cream
½ Cup Light Brown Sugar
¼ Teaspoon Ground Cinnamon
3-4 Pinches Nutmeg
2 Pinches Salt
1 Tablespoon Vanilla Extract
6 Cups Kings Hawaiian Sweet Bread, cubed and toasted (Brioche can be substituted)
1 Cup Apples, cubed (I chose a mix of Granny Smith and Fuji)
Additional Unsalted Butter to grease the pan
Fresh Whipped Cream (optional)

In a heavy bottomed saucepan, dissolve the sugar and water over medium-high heat. Once the liquids begin to bubble, swirl the saucepan around and continue cooking until it reaches an amber color. Reduce the heat to low and whisk in the cubes of butter one at a time until fully incorporated. Remove from heat and whisk in the heavy cream. (The liquids will bubble up so be careful!) Stir in the Bourbon and a few pinches of sea salt (optional). Set aside.

Preheat oven to 350 degrees F and thoroughly butter the bottom and sides of an 8×8 inch pan.

In a large bowl, whisk together the first 8 ingredients of the bread pudding. Add in the cubed bread and apples making sure that they have been coated by the custard mixture. Let set for 5 minutes to allow the bread to absorb some of the custard. Pour the entire contents into the greased pan and spread evenly. Take a few spoonfuls of the Caramel Bourbon Sauce and drizzle on the top. Bake the Bread Pudding in the preheated oven for approximately 35-40 minutes until the custard has set and the top is golden brown. Remove from the oven and allow to slightly cool before cutting. Serve warm with additional sauce drizzled on top and fresh whipped cream.

Breads · Desserts/Pastries

Nutella Swirled Banana Bread

Nutella Swirled Banana Bread

I’m Bananas…..

For Nutella.

Shocking— I know.

Nutella Swirled Banana Bread

So why not add Nutella to Banana Bread? Seemed like a Win-Nguyen Situation to me.

And it sure was 🙂

______________________________________

Nutella Swirled Banana Bread
Makes one 9-inch loaf

Ingredients:

2 cups unbleached all-purpose flour
3/4 cup sugar
3/4 teaspoon baking soda
1/2 teaspoon salt
3 very ripe, soft, darkly speckled large bananas, mashed well
1/4 cup plain yogurt
2 large eggs, beaten lightly
3/4 stick (6 tablespoons) unsalted butter, melted and cooled, plus more for the pan
1 teaspoon vanilla extract
6 tablespoons Nutella

Adjust an oven rack to the lower-middle position and heat the oven to 350°F (175°C) degrees. Butter the bottom and sides of a 9 by 5-inch loaf pan. Dust the pan with flour, tapping out the excess.

Whisk the flour, sugar, baking soda, and salt together in a large bowl. Mix the mashed bananas, yogurt, eggs, butter, and vanilla with a wooden spoon in a medium bowl. Lightly fold the banana mixture into the dry ingredients with a rubber spatula until just combined and the batter looks thick and chunky. Spoon 1/2 the batter into the prepared loaf pan. Spread 1/2 the Nutella on top and lightly swirl the Nutella into the batter with a butter knife. Do not over mix. Spoon the rest of the batter on top and repeat with Nutella swirls.

Bake until the loaf is golden brown and a toothpick inserted in the center comes out clean, about 60 minutes. Cool in the pan for 5 minutes, then transfer to a wire rack. Serve warm or at room temperature. (The bread can be wrapped with plastic wrap and stored at room temperature for up to 3 days.)

Slightly adapted from Cooks Illustrated

Breads

American Sandwich Bread

American Sandwich Bread

THIS is what dreams are made of.

Well…..at least MY “carb loving dreams”.

American Sandwich Bread

Inspired to bake sliced bread for my lunchtime sandwiches, I took to Baking Illustrated for their American Sandwich Bread recipe.

The dough came together quite easy and was an absolute dream—beautifully silky and smooth. You do however, need a bit of patience when it comes to mixing the dough but just let your stand mixer do the work for you.

Quick tip: Sometimes when I have my mixer going for a long time, the bowl can get stuck in the stand with all that whirling going on. To prevent that from happening, cover the bottom of your metal mixing bowl with a little bit of cooking spray before twisting it onto the mixing stand.

American Sandwich Bread

The recipe calls from a 9-inch loaf pan but unfortunately my largest metal loaf pan is only 7 inches. I was a bit nervous to see how my glass pan would work out but luckily, it came out quite good. Though note to self: Keep my eyes open for 9-inch metal loaf pans on sale 🙂

American Sandwich Bread

Baking Illustrated did not lead me astray with this recipe as the bread was really delicious. The pan of water in the oven helped create a wonderful crust for the loaf and the crumb was light and slightly spongy. Not to mention that it made my home smell amazing and the loaf of bread was quite stunning if I do say so myself. In fact, when I brought my turkey sammy in for lunch (using the bread of course), my coworkers wouldn’t believe me that I had baked the bread! What naysayers!

But one thing is for sure, with bread so delicious and easy, there really is no need for me to buy my once beloved supermarket-sliced-bread again 🙂

_______________________________________

American Sandwich Bread

Ingredients:

3 ¾ cups all-purpose flour
2 tsp. salt
1 cup warm whole milk (about 110°)
1/3 cup warm water (about 110°)
2 tbsp. unsalted butter, melted
3 tbsp. honey
1 envelope (about 2 ¼ tsp.) instant yeast

Adjust an oven rack to the lowest position and heat the oven to 200°.  Once the oven temperature reaches 200°, maintain the heat for 10 minutes, then turn off the oven.

Mix 3 ½ cups of the flour and the salt in the bowl of a stand mixer fitted with the dough hook.  Mix the milk, water, butter, honey and yeast in a 4-cup liquid measuring cup.  Turn the machine to low and slowly add the liquid.  When the dough comes together, increase the speed to medium and mix until the dough is smooth and satiny, stopping the machine two or three times to scrape dough from the hook, if necessary, about 10 minutes.  (After 5 minutes of kneading, if the dough is still sticking to the sides of the bowl, add flour 1 tablespoon at a time and up to ¼ cup total, until the dough is no longer sticky.)  Turn the dough onto a lightly floured work surface; knead to form a smooth, round ball, about 15 seconds.

Place the dough in a very lightly oiled large bowl, rubbing the dough around the bowl to coat lightly.  Cover the bowl with plastic wrap and place in the warmed oven until the dough has doubled in size, about 40-50 minutes.

On a floured work surface, gently press the dough into a rectangle 1 inch thick and no longer than 9 inches.  With a long side facing you, roll the dough firmly into a cylinder, pressing with your fingers to make sure the dough sticks to itself.  Turn the dough seam-side up and pinch it closed.  Place the dough seam-side down in a greased 9×5-inch loaf pan and press it gently so it touches all four sides of the pan.  Cover with plastic wrap; set aside in a warm spot until the dough almost doubles in size, 20-30 minutes.

Keep one oven rack at the lowest position and place the other at the middle position and heat the oven to 350°.  Place an empty baking pan on the bottom rack.  Bring two cups of water to boil in a small saucepan.  Pour the boiling water into the empty pan on the bottom rack and set the loaf onto the middle rack.  Bake until an instant-read thermometer inserted at an angle from the short end just above the pan rim into the center of the loaf reads 195°, 40-50 minutes.  Remove the bread from the pan, transfer to a wire rack and cool to room temperature.  Slice and serve.

From Baking Illustrated