Desserts/Pastries

Peppermint Crisps = Confidence Boost

Peppermint Crisps


Today was one of those days in the kitchen. You know what I’m talking about….those days where everything you attempt seems to go to heck in a handbag. It started at about 7:30am and after 4 failed desserts/pastries, I finally had to throw in the towel at about 1:00pm. I won’t get into the details of every misadventure but it was bad. Really bad.

Yes, I was the epitome of a Hot Mess.

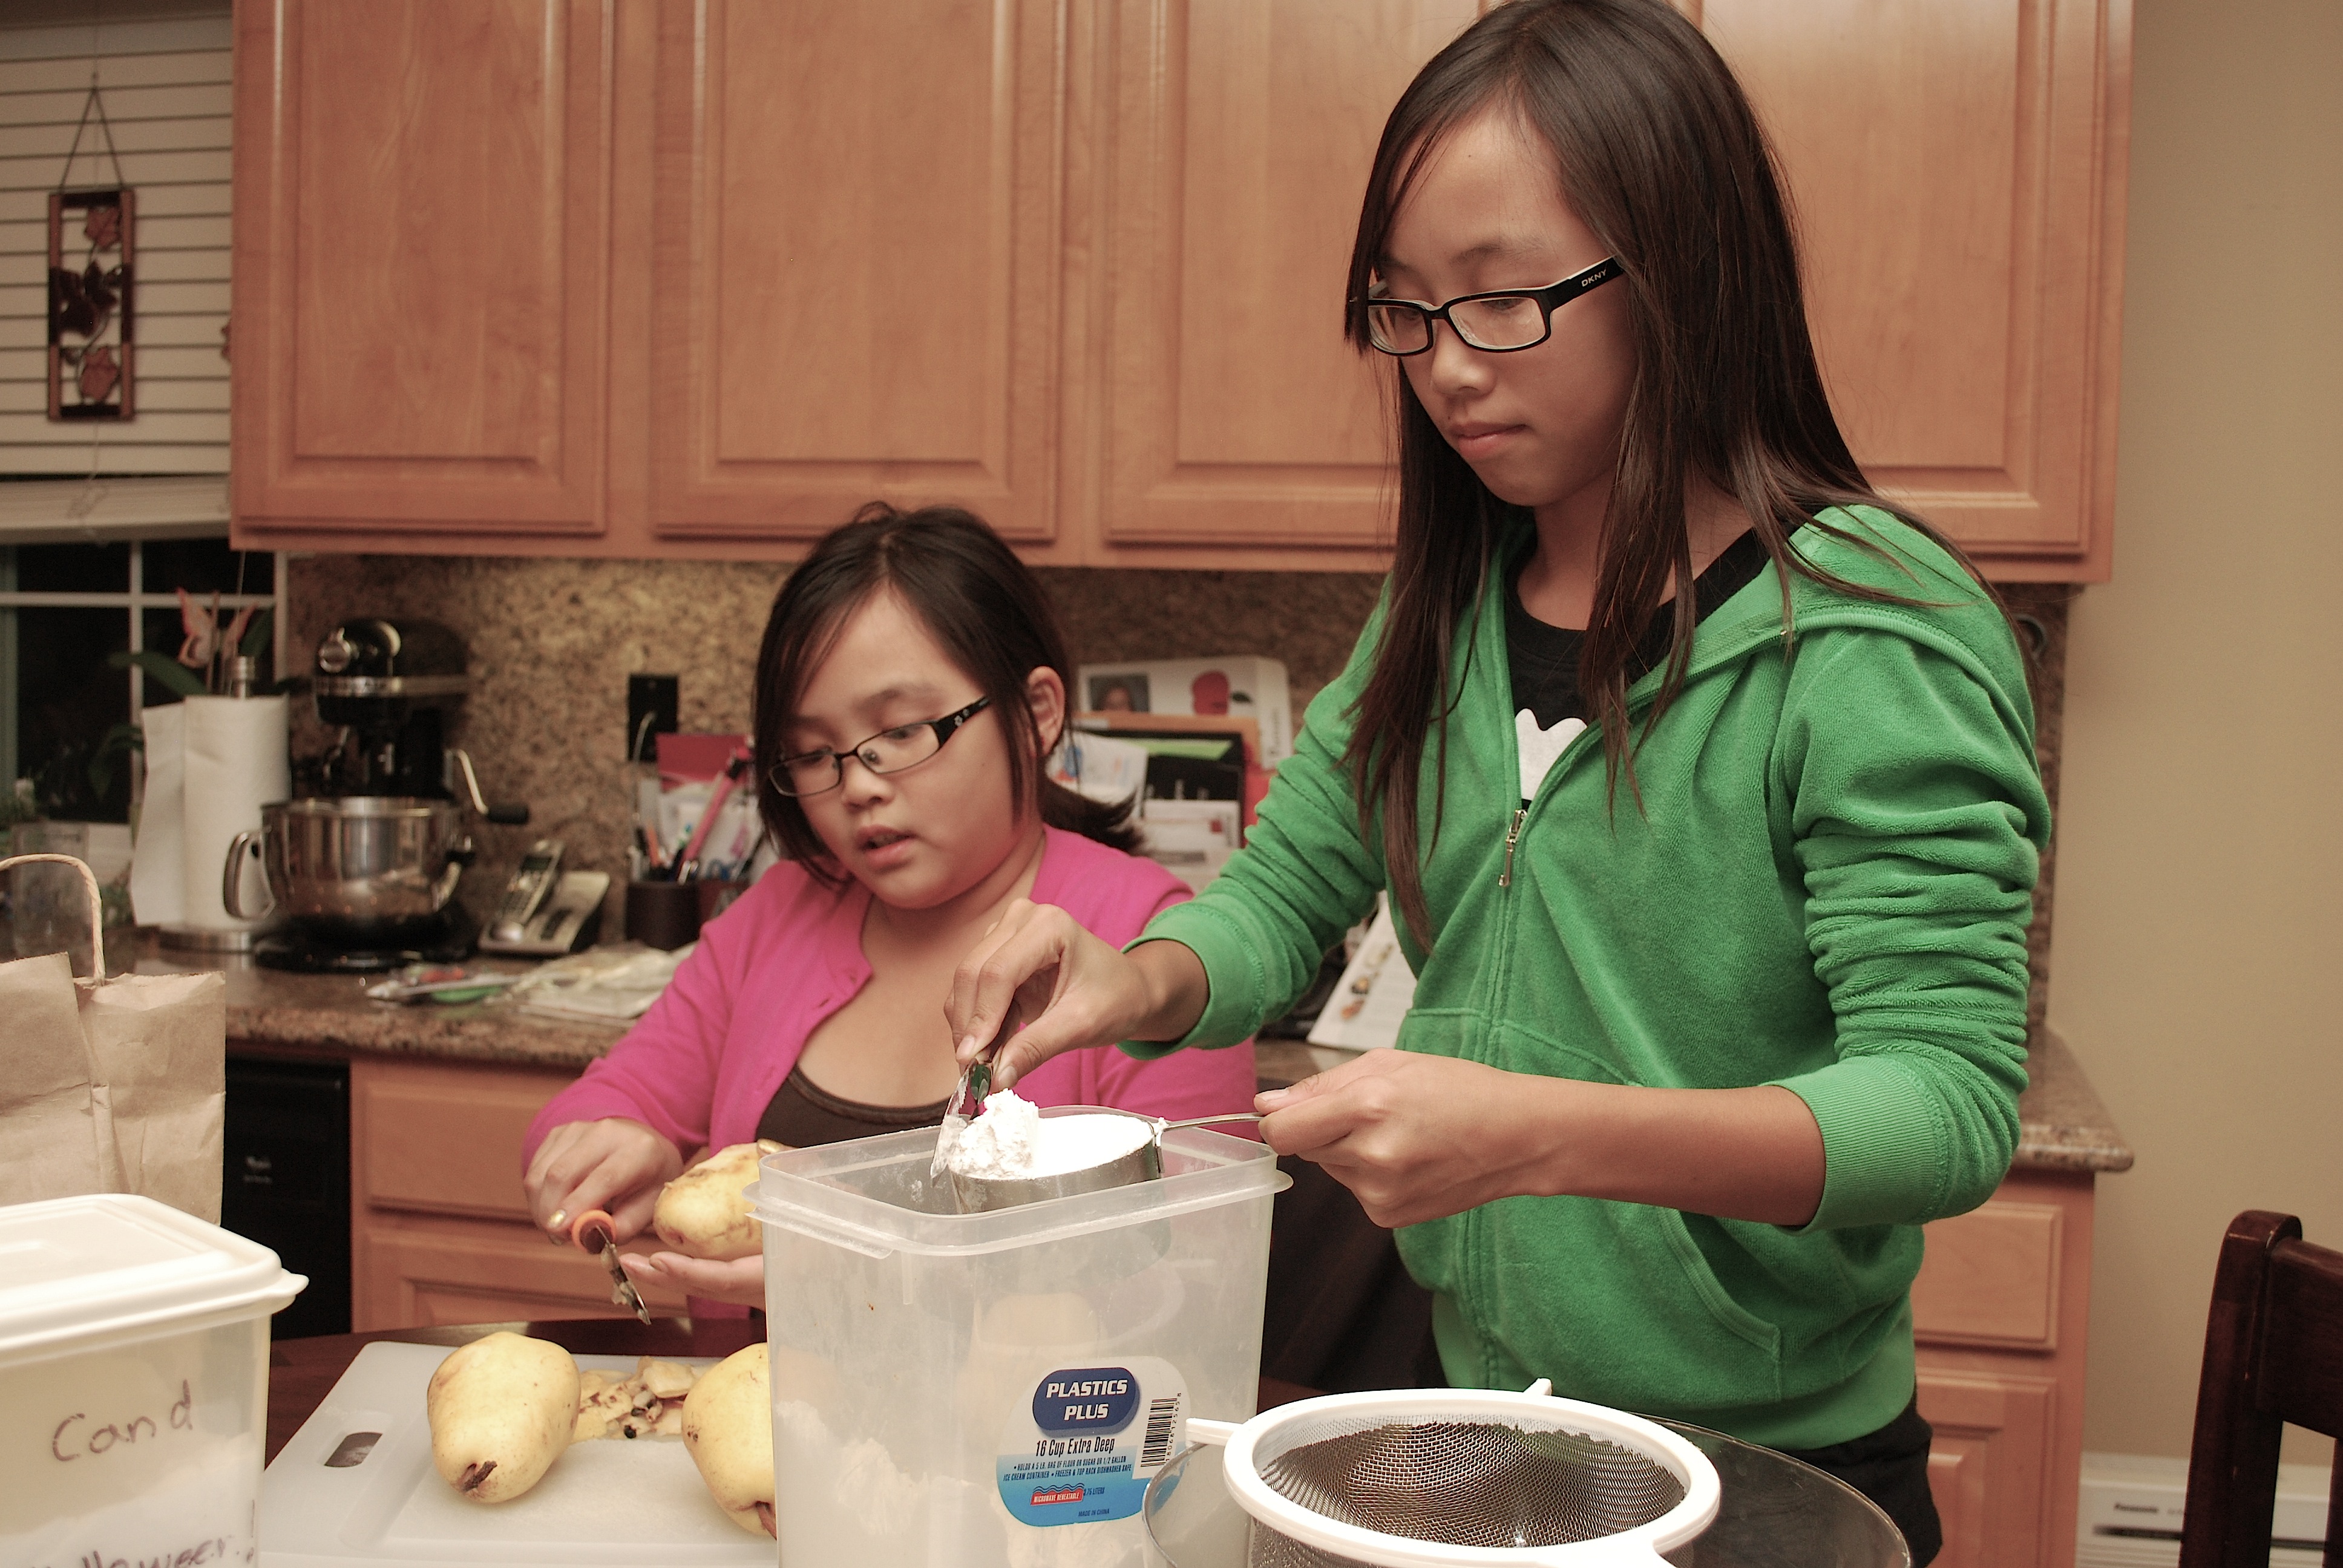
But then I took a look at my nieces who I had promised a full day of baking to and decided to put on my big girl panties and get back into the kitchen. Their Cô Nam (auntie) is no quitter!

Since I was nursing a little bruised spirit, I opted for a sweet treat that required no “baking” and few ingredients. Hey—I was trying to increase my odds for success to end the day off in a good note. 🙂

Luckily, The Galley Gourmet recently posted a recipe for “Peppermint Crisps” and they looked delectable. A few hours later and HALLELUJAH–we did it! A bright treat after a tumultuous morning.

These little guys are perfect for a “late afternoon pick-me-up” or as a small goodie to end off a meal. Wonderfully minty with the delicious finish of chocolate. Pair it with a hot cup of tea or glass of dry red wine and you’ll be a happy camper.

PHEW!!! Victory at last!

Life lesson of the day….Humility is best served alongside a piece of chocolate 🙂

Note: A tin full of these minty bites would make a wonderful gift for the holidays!

________________________________

Peppermint Crisps
From The Galley Gourmet
Makes about 2 dozen 1 1/2-inch crisps

Ingredients:

½ Cup Granulated Sugar
½ Cup Water
1½ Teaspoons Peppermint Extract, divided
4 Ounces Dark Chocolate, chopped
4 Ounces Milk Chocolate, chopped
¼ Cup Shredded Unsweetened Coconut

Line a baking sheet with a sheet of parchment paper.

Place sugar and water in a medium saucepan and stir to combine.  Over medium heat dissolve the sugar.  Increase the heat to medium-high and cook without stirring until the mixture turns a light caramel color, about 7-9 minutes.  Halfway through wipe the sides of the pan down with a damp pastry brush to remove and crystallization.  Remove from the heat and add 1 teaspoon of the peppermint extract.  Swirl the pan to distribute the extract.

Pour the mixture onto the prepared baking sheet and set aside for 15 minutes or until completely hardened and cooled.  Break the hardened peppermint sugar into shards and place in the bowl of a food processor fitted with a metal blade.  Pulse to break up the large pieces, then process until it resembles fine sand.

Line a baking sheet with parchment paper.

Place the chocolates in a microwave safe bowl and microwave for 1 minute.  Remove from the microwave and stir.  If not melted, return to the microwave and cook for an additional 30 seconds.  Stir and repeat if necessary until the chocolate is completely melted.  Once melted, stir in the coconut, remaining peppermint extract and the processed peppermint sugar.  Pour the mixture onto the prepared baking sheet.  Using an offset spatula, spread the chocolate into a 10×8-inch rectangle, about 1/4-inch thick.  Holding the parchment to the baking sheet, gently rap the baking sheet on the counter to even the surface.  Place the baking sheet in the refrigerator to harden the chocolate, about 1 hour.

Remove from the refrigerator and let rest for 5 minutes.  Gently transfer the parchment to a cutting surface. Using a 1 1/2-inch circle cutter, cut out as many rounds as you can.  Reserve the scraps for nibbling or fold into your favorite ice cream.  Store in an airtight container in a cool location or in the refrigerator for a cool peppermint taste.  Enjoy!

Desserts/Pastries

Gingerbread Cupcakes with Spiced Molasses Frosting

Gingerbread Cupcakes with Spiced Molasses Frosting

I think one of my biggest challenges if I ever became a professional cook would be consistency. One day I’ll make something and it’ll turn out quite yummy. But to my disappointment, the next time I make the exact same thing, it’s a flop. Same conditions, no additions, no edits……just different results. Bummer, right?

Unfortunately that was the case when I made these Gingerbread Cupcakes. Last year I made them for the holidays and I was smitten! They had a wonderful flavor and were super fluffy—-I just couldn’t wait to whip some out for this winter season.

I happily volunteered to make these cupcakes for a holiday party my sister recently hosted. I was true to the cupcake recipe and didn’t change a thing. But I did however take some liberties and switched the Cardamom Frosting for my take on a Spiced Molasses Cream Cheese Frosting.

As they were baking, the cuppies emitted a spicy, rich aroma and I just knew the frosting would be a wonderful match for them. Needless to say, expectations were high. But alas, this batch just fell short. The cake did have a great flavor–just as I remembered it but the texture was quite dry and dense. Yeah….I was bummed. The good news is the saving grace was the new frosting—slightly tangy from the cream cheese and deeply fragrant from the spices and molasses.

Golden cuppies before getting their frosting swirls…

Gingerbread Cupcakes with Spiced Molasses FrostingDid you happen to catch the cute little gingerbread men sprinkles on top?? Courtesy of Barbara of Pauline’s Cake Decorating Supplies in San Jose, CA

This rendition of Gingerbread Cupcakes is definitely worth a “Do-Over“—especially since I know that they can be deliciously moist. But if for some strange reason I get the same “dry” results, I’ll just turn them into Gingerbread Cake Pops. Shhh! It’ll be our little secret. 🙂

_________________________________________________________________

Gingerbread Cupcakes with Spiced Molasses Frosting
Makes 12 Cupcakes

Gingerbread Cupcakes (from The Spice Kitchen: Everyday Cooking with Organic Spices)
8 Tablespoons Unsalted Butter, at room temperature
½ Cup Firmly Packed Brown Sugar
½ Cup Molasses
1 Egg
½ Teaspoon Vanilla
½ Cup Boiling Water
1 Teaspoon Baking Soda
1½ Cups All-Purpose Flour
2 Teaspoons Ground Cinnamon
1 Teaspoon Ground Ginger
1 Teaspoon Ground Cloves
1 Teaspoon Dried Lemon Zest
¼ Teaspoon Salt

Spiced Molasses Frosting
10 Ounces Cream Cheese, at room temperature
4 Tablespoons Unsalted Butter, at room temperature
¼ Cup Molasses
1/8 Teaspoon Ground Cloves
1/8 Teaspoon Ground Cinnamon
3-4 Cups Confectioner Sugar, sifted

Preheat the oven to 350 degrees and line muffin tin with paper cups.

Cream the butter and brown sugar in a large mixing bowl until light and fluffy. Beat in the molasses, egg, and vanilla. In a small bowl, stir together the boiling water and baking soda until dissolved. Stir the baking soda water into the molasses mixture.

Sift together the flour, cinnamon, ginger, cloves, lemon zest, and salt into a small bowl. Whisk the flour mixture into the molasses mixture until the batter is combined.

Spoon the gingerbread batter into the prepared muffin cups. Bake the cupcakes until a toothpick inserted in the center of one or two of the cupcakes comes out clean, about 20 minutes. Remove the cupcakes from the oven and allow them to cool for 5 minutes before removing them from the pan. Place the gingerbread cupcakes on a rack to cool for 30 minutes.

While cupcakes are cooling, prepare frosting. In an electric mixer fitted with the paddle attachment, cream together the cream cheese and butter until fluffy.  Mix in molasses, cinnamon, and cloves. Gradually add in the confectioners’ sugar, ½ cup at a time. Continue adding sugar to desire consistency. Fill a piping bag with the frosting and pipe large swirls on top of the cupcakes.

Desserts/Pastries

Chocolate Raspberry Tart inspired by “World AIDS Day”

Chocolate Raspberry Tart inspired by "World AIDS Day"


December 1st is World AIDS Day—an international day that aims to “raise awareness, commemorate those who have passed on, and celebrate victories such as increased access to treatment and prevention services”.

I don’t pretend to be an expert on HIV and AIDS but I am proud to have siblings who are and work tirelessly towards the treatment, research, education, and yes—-even the development of vaccinations. So on this day, I ask that you join me and take a minute to learn more and share that knowledge. Don’t know where to start? Here’s a brief list of resources you can peruse:

The theme for World AIDS Day 2010 is “Universal Access and Human Rights”. Beautiful, poignant, and to the point….don’t you think? So to honor World AIDS Day 2010, I made individual Chocolate Raspberry Tarts –equipped with raspberry red ribbons! And although I am almost positive these delicious tarts will be finished by the end of the day, advocacy and awareness of HIV and AIDS should not.

Together, We can Educate, Advocate, and Act.


Chocolate Raspberry Tart inspired by "World AIDS Day"

_________________________________

Chocolate Raspberry Tart

Ingredients:

Shortbread Crust
1 Cup Unsalted Butter, room temperature
½ Cup Confectioner Sugar
1 Teaspoon Pure Vanilla Extract
1½ Cups All Purpose Flour
1 Tablespoons Cornstarch
¼ Teaspoon Salt

Chocolate Filling
10 Ounces Good Quality Dark Chocolate, chopped
1 1/3 Cup Heavy Cream
1 Tablespoon Framboise or Raspberry Extract
*Fresh Raspberries for garnish

Preheat oven to 325 degrees. Using a brush, grease a 9 inch tart pan with melted butter. (Or four individual sized tart pans like I did.)

In a large bowl, sift together flour, cornstarch, and salt. In a standing mixer, cream butter and sugar until light and fluffy. Add vanilla extract. Slowly begin incorporating in flour mixture a few spoonfuls at a time. When the dough begins to come together, transfer to the prepared tart pan and press dough into it. Prick the bottom of the dough all over with a fork and place in freezer for at least 10 minutes to let rest. Once chilled, line the tart with parchment paper and fill with pie weights or beans. Bake in oven for 10-15 minutes, until edges are lightly golden brown and set. Carefully remove the parchment paper from the pie and place back in the oven for 5-10 minutes until center of tart is golden brown. Remove from oven and place on cooling rack.

Using a double boiler, heat the cream until it’s very hot but not boiling. Remove from stove and add the chocolate. Gently stir the mixture until all the chocolate is melted and combined. Add Framboise (or raspberry extract) and stir until combined. You should have a beautiful glossy mixture when finished.  Pour chocolate filling into the thoroughly cooled baked crusts.  Carefully tap the side of the pan to even out the filling. Leave tart on the counter to cool (about 30 minutes) and then move to the refrigerator to chill for an additional 2 or 3 hours. The filling should be firm when done.

Remove the tart from refrigerator and carefully slide out the outer pan ring. Transfer tart to serving platter and garnish with raspberries. ENJOY!

Desserts/Pastries

Chocolate Soufflés with Raspberry Sauce

Chocolate Souffles with Raspberry Sauce

I love spending time in the kitchen with my nieces (baby nephew is still a tad too young for cooking). The older ones are at the “tween” and “pre-teen” age and cooking/baking has been a wonderful time for us to catch up and bond.

I recently had a “Girls Night” with them–Dinner, Dessert, and a DVD. 🙂 They had the chance to choose whatever they wanted to eat for dinner, pick up the ingredients at the store, and then prepare it. Not only did it give them the chance to see exactly what went into the food they were eating but they were able to celebrate in the success of creating a delish meal!

Together, we made Mini Turkey Sliders on Kings Hawaiian Rolls (with all the fixins’) and fresh cut Cajun Seasoned French Fries. And for dessert, Chocolate Soufflés with Raspberry Sauce. You may be thinking, “Aren’t Soufflés too difficult to make with kids?” I resolutely say, NOPE! One just needs to follow all the steps in the right order, and VOILA! Deliciously decadent Soufflés that are light and fluffy—and let’s be honest. They look darn impressive. In fact, the most difficult step was snapping a photo quick enough before the Soufflés fell. (Yeah…..I was a little stressed while trying to get good lighting and a photo in time. <Sigh>…the challenges of being a novice photographer!)

If you’re new to Soufflés, I really suggest trying the recipe below from Zen Can Cook. It’s quite straight forward with wonderful results. The only edits we made was the addition of a pinch of Cream of Tartar when whipping the meringue (for extra stability) and serving it with my Raspberry Sauce versus their Creme Anglaise. I personally think the tartness of the Raspberry Sauce is a wonderful pairing for the deep set chocolate flavor—allowing the overall dessert to not be too sweet.

And if by chance you find yourself with a Soufflé or two leftover, fear not! Pop the ramekin into the microwave and warm for about 10-15 seconds. Invert the Soufflé onto a plate and serve with a scoop of vanilla bean ice cream and drizzle of raspberry sauce. And there you have it–-Warm Chocolate Cake a la mode! Just as delish and surprisingly, still light and fluffy!

With that dear friends, I wish you all a wonderful Thanksgiving Holiday filled with laughter, fun, and of course…Foodventures 🙂

________________________________________________________

Chocolate Soufflés with Raspberry Sauce
Serves 6

Chocolate Soufflé (from Zen Can Cook)
1/3 Cup Half-and-Half
3 Ounces Valhrona Manjari or your favorite bittersweet chocolate, chopped
½ Cup Unsweetened Cocoa Powder, preferably Valhrona
1/3 Cup Water
8 Large Egg Whites
½ Cup Granulated Sugar
Pinch of Cream of Tartar
Powdered Sugar for Dusting

Raspberry Sauce
10 Ounces Frozen Raspberries
1/3 Cup Granulated Sugar
1/3 Cup Red Wine
Zest of 1 Lemon

Place all raspberry sauce ingredients in a medium sized, heavy saucepan. Simmer on medium-low until berries have broken down and the wine has cooked off. Approximately 10-15 minutes. Let cool.

Preheat the oven to 375 degrees. Use a pastry brush (or your fingers!) to coat the inside ramekins with softened butter. Fill the mold with granulated sugar, and then pour out the excess.

Pour the half-and-half into a saucepan and heat over medium high heat until bubbles begin to form around the edge of the pan. Remove from the heat and make a ganache by adding the chopped chocolate. Stir well until combined and all of the chocolate has melted. Make a double-boiler by setting a large mixing bowl over a pot of boiling water. Place the ganache in the mixing bowl, add the cocoa powder and water, and whisk until very hot. Remove from the heat and set aside.Place the egg whites in a large mixing bowl and whip on medium speed until foamy. Add Cream of Tartar. Increase the mixer speed to medium-high and make a French meringue by adding the sugar 1 tablespoon at a time and whipping the whites to stiff but not dry peaks. Do not over whip the egg whites! You can tell the egg whites are over whipped if they start to separate and resemble scrambled eggs. Use a rubber spatula to gently fold about half the meringue into the warm chocolate mixture. Then fold the chocolate mixture into the remaining meringue, being careful not to deflate the batter. The soufflé mixture should be homogeneous in color, but if you still see streaks of meringue in the batter, that’s okay. Use a large spoon to gently place the soufflé mixture in the buttered and sugared mold. Fill to about 1/4 inch below the rim of the mold. Run your thumb around the rim to remove the excess butter and sugar. Bake until the soufflé has risen to about 1 1/2 half-inch over the rim and starts to brown on top, about 12 minutes. Remove from the oven and dust the top with powdered sugar.

Serve immediately with a side of Raspberry sauce.

Date Night with My GirlsNina and Stephanie with their creations.

Desserts/Pastries · Miscellaneous

“Ad Hoc at Home” Winners & Decadent Brownies

Brownies from "Ad Hoc at Home"

Thanks to everyone who entered the giveaway for Thomas Keller’s “Ad Hoc at Home“. The response was truly overwhelming—so much so that I was convinced to pick TWO winners!

Drum roll please…..

Congrats to Xochitl M. (Fallon, Nevada) and Virginia R. (Artesia, California)! WOOT! Hope you both enjoy this lovely book and are inspired to try out some of Keller’s delish delights!

And in the spirit of “Ad Hoc at Home“, I decided to make the utterly decadent Brownies from the book. Honestly, you can’t go wrong with these bad boys. And in truth, “decadent” doesn’t even begin to describe them!  So ridiculously choco-licous that you’ll just have to whip them up yourself.

You won’t regret it. For reals.

And if you have a few extra minutes, check out the video link at the end of this post with Chef Keller as he dicusses “Ad Hoc at Home”.

Hope you all have a fabulous weekend! (I know I will—Harry Potter comes out today!!) 🙂

____________________________________________

Brownies from Ad Hoc at Home
From Chef Thomas Keller

Ingredients:

¾ Cup All-Purpose Flour
1 Cup Unsweetened Alkalized Cocoa Powder
¾ Pound (3 sticks) Unsalted Butter, cut into 1-tablespoon pieces
1 Teaspoon Kosher Salt
3 Large Eggs
1¾ Cups Granulated Sugar
½ Teaspoon Vanilla Paste
6 Ounces 61 to 64% Chocolate, chopped into chip-sized pieces
Powdered Sugar for dusting


Preheat the oven to 350F. We use a 9-inch square silicone mold, because it keeps the edges from overcooking; if you use a metal or glass baking pan, butter and flour it. Set aside.

Sift together the flour, cocoa powder, and salt; set aside.

Melt half the butter in a small saucepan over medium heat, stirring occasionally. Put the remaining butter in a medium bowl. Pour the melted butter over the bowl of butter and stir to melt the butter. The butter should look creamy, with small bits of unmelted butter, and be at room temperature.

In a bowl of a stand mixer fitted with the paddle, mix together the eggs and sugar on medium speed for about 3 minutes, or until thick and very pale. Mix in the vanilla. On low speed, add about one-third of the dry ingredients, then add one-third of the butter, and continue alternating the remaining flour and butter. Add the chocolate and mix to combine. (The batter can be refrigerated for up to 1 week.)

Spread the batter evenly in the pan. Bake for 40 to 45 minutes, until a cake tester or wooden skewer poked into the center comes out with just a few moist crumbs sticking to it. If the pick comes out wet, test a second time, because you may have hit a piece of chocolate chip; then bake for a few more minutes longer if necessary. Cool in the pan until the brownie is just a bit warmer than room temperature.

Run a knife around the edges if not using a silicone mold, and invert the brownie onto a cutting board. Cut into 12 rectangles. Dust the tops with powdered sugar just before serving.

Desserts/Pastries

Triple Chocolate Mint Cookies

Triple Chocolate Mint Cookies


I think if you asked most people what their earliest candy memories were, they would probably say licorice, jellybeans, lollipops, or even chocolate bars. Nope, not me. My earliest candy memories were of Andes Chocolate Mints. Sure, it may seem strange for a 4-year old to love Andes Mints, but they were the special treats that our grandparents would give us—mostly by my Grandpa, Ôn.

When we were good (or needing consoling), he would hand us a few of the one-inch rectangles of minty-chocolate goodness. I would savor each little piece, allowing it to slowly melt in my mouth. Yum. And to this day, I attribute my love of “minty” things to these delicious confections.

So you can imagine my delight when I came across a bag of Andes Mint Chocolate Baking Bits at the local grocery store. (And they were on sale, too–SCORE!) So many options came across my mind of how to incorporate these minty bits into some type of decadent dessert. Should I make Brownies? Cupcakes? Ice cream?

Upon my sister’s suggestion, I settled on Cookies and looked to America’s Test Kitchen for some guidance. The recipe below is quite similar to the Chocolate Toffee Cookies I had made a few months ago with the same rich, brownie-like consistency. But of course what made these cookies so special were the bits of mint sprinkled throughout each bite. Truly reminiscent of Andes Chocolate Mints and my childhood.

Now Friends, a question for you…….What was your  favorite childhood candy?

_______________________________________________________

Triple Chocolate Mint Cookies
Adapted from The America’s Test Kitchen Family Baking Book

Ingredients:

16 Ounces Semi-Sweet Chocolate
2 Cups All-Purpose Flour
½ Cup Unsweetened Cocoa Powder
2 Teaspoon Baking Powder
¾ Teaspoon Salt
4 Large Eggs
2 Teaspoons Vanilla Extract
10 Tablespoons Unsalted Butter, room temperature
1½ Cups Brown Sugar
½ Cup Granulated Sugar
1½ Cups Andes Mint Chocolate Baking Bits

Preheat the oven to 350 degrees F, with the oven racks in the upper-middle and lower-middle positions. Line 2 large baking sheets with parchment paper.

In a medium bowl, melt semi-sweet chocolate. This can be done by placing the bowl over a pot of simmering water (for a make-shift double-boiler) or in the microwave at 50% power. Stir and set aside to cool.

In a medium bowl, whisk together flour, cocoa powder, baking powder, and salt. In the bowl of a stand mixer (or in a large bowl, using a hand electric mixer), beat butter, brown sugar, and granulated sugar at medium at speed until the mixture is light and fluffy, 3 to 5 minutes. Add one egg a time to the butter mixture, beating after each addition. Add vanilla extract and beat until combined. Add the cooled melted chocolate and beat until well combined.

Reduce the mixer speed to low and gradually add the flour mixture. Mix until just combined. Stir in mint-chocolate baking bits. Cover the bowl with plastic wrap and let the mixture sit at room temperature for 15 to 20 minutes, or until the mixture is easy to scoop and fudge-like.

Using 3 tablespoons of dough for each cookie, roll the dough into balls and place on the prepared baking sheets, 2 inches apart. Place the baking sheets in the oven and bake for 10 to 12 minutes, switching the position of the sheets and rotating them back to front halfway through baking. The cookies are baked when the edges are set, but the center are still soft. The cookies will still look a little raw in between the cracks, but are done.

Let the cookies cool on the baking sheets for 10 minutes, then remove to a wire rack. Repeat with the rest of the dough, using cooled cookie sheets. Serve the cookies warm or at room temperature.

Makes 25 to 30 cookies.

Note: I only had dark-coated baking sheets on hand when making these and found that the bottoms of the cookies were too dark despite the decrease in oven temperature to compensate for the sheets. As a result, I switched to using Silpats instead of parchment and had much better results.


Triple Chocolate Mint Cookies
Did I mention that these would be delicious as a vessel for Ice cream Sandwiches? YUM!

Breads · Breakfast/Brunch · Desserts/Pastries

Spiced Pear Cake for National Bundt Day

Spiced Pear Cake


Was it a coincidence or luck? Perhaps a little bit of both was on our side this weekend as my nieces and I prepared a delicious spiced pear cake using a bundt pan. And to my amusement as I was drafting up this post, I discovered that today is National Bundt Day!

This is the time of year when I bust out all of the warm spices (cloves, nutmeg, cinnamon, etc) and begin feverishly baking molasses cookies, gingerbreads, and other spiced desserts. YUM. I just love the aromatics and the deep warmth it brings to your home/kitchen when you’re creating such delights.

Since pears are in season and were in abundance at the market, I picked up a few Boschs with the intention of creating a cake that would be great for breakfast. (Cake for all times of the day, I say!) I also took the opportunity to try out this recipe with my nieces, Nina and Stephanie. They are turning out to be quite the whizzes in the kitchen and have refined palates for their age. And in truth, they did most of the work with this cake with me just guiding them through the process. I’m a proud Auntie.

The end results were just what I was hoping for. An extremely moist cake speckled with diced pears and perfumed with warm spices. Perfect with a huge cup of steaming coffee in the morning. With breakfasts like these (and wonderful nieces), perhaps I’ll make it through the chilly season after all.

And with that dear friends, rummage through your pantries to whip out those wreath-like pans—Celebrate National Bundt Day! (I know, I know….I’m a sucker for any “holiday” 🙂 )


Stephanie and Nina hard at work…..Great things will come out of their kitchens in the future 🙂

_______________________________

Spiced Pear Cake
Approximately 10 servings

Ingredients:

Cake Batter
3 Cups All Purpose Flour
1 Cup Light Brown Sugar
1 Cup Granulated Sugar
1½ Teaspoon Baking Soda
½ Teaspoon Salt
½ Teaspoon Ground Cloves
½ Teaspoon Ground Nutmeg
2 Teaspoons Ground Cinnamon
¼ Cup Molasses
2 Teaspoons Vanilla Extract
1 Cup Vegetable Oil
3 Large Eggs
3 Cups Diced Pear

Glaze
½ Cup Unsalted Butter, melted
¼ Cup Water or Apple Juice
1 Cup Confectioner Sugar
½ Tablespoon Ground Cinnamon

Preheat oven to 350 degrees. Thoroughly grease a large bundt pan.

In a large mixing bowl, sift together flour, baking soda, salt, cloves, nutmeg, cinnamon, and granulated sugar. Mix in brown sugar, breaking up any clumps. Create a well in the center of the dry ingredients and mix in oil, eggs, vanilla extract and molasses. The batter will be quite thick. Fold in the diced pears being careful to not break up the fruit too much.

Spoon the cake batter into the greased bundt pan and spread the mixture evenly. Bake for approximately 1 hour or until a tooth pick inserted in the center comes out clean. Let cool in pan for 20 minutes before inverting on to a plate.

While cake is cooling, prepare glaze. Melt butter and slowly add confectioner sugar and cinnamon. Add apple juice (or water) and mix until combined. Strain the glaze to remove any potential lumps. Slowly pour over the cake while its still warm.

Breads · Breakfast/Brunch · Desserts/Pastries

Doughnut Muffins

Doughnut Muffins

Mmmm….Doughnuts. I don’t think I’ve ever met someone who didn’t love them 🙂

I personally prefer cake-batter doughnuts over yeast-batter doughnuts—chocolate old fashioned being the best! Yum.

I’ve always wanted to make fresh doughnuts but most of the cake-better recipes I’ve seen require doughnut pans. And as cute as those pans are, they’re pretty limited in functionality. So when I came across a few posts featuring Doughnut Muffins, I was EXCITED!

The recipe below was quite simple to follow–which was perfect since I had my niece Maya helping me. The only tweak that I made was the addition of ground cinnamon and vanilla extract in the batter. And let me just tell you, your kitchen will smell amazing when these little guys are baking in the oven. DEE-LISH!

I think these Doughnut Muffins are best right out of the oven. But if you happen to have a few left over the next day, pop them in the microwave for a few seconds to warm them up. So yummy, you won’t regret it 🙂

____________________________________________________


Doughnut Muffins

Adapted from Blue Ribbon Cookbook (via Evil Chef Mom)

Ingredients:

Muffins:
3 Cups All Purpose Flour
2½ Teaspoons Baking Powder
¾ Teaspoon Salt
½ Teaspoon Ground Nutmeg
1 Teaspoon Ground Cinnamon
¼ Teaspoon Baking Soda
1 Teaspoon Vanilla Extract
¾ Cup Whole Milk, at room temperature
2 Tablespoons Buttermilk, at room temperature
10 Tablespoons Unsalted Butter, at room temperature
¾ Cup plus 2 Tablespoons Sugar
2 Large Eggs, at room temperature

Cinnamon Sugar Coating:
1 Cup Sugar
1 Tablespoon Ground Cinnamon
8 Tablespoons Unsalted Butter, melted

Preheat oven to 375 degrees. Grease and flour 2 (12 cup) mini muffin tins.

In a bowl, sift together the flour, baking powder, salt, nutmeg, cinnamon and baking soda. In a separate bowl, whisk together the milk and buttermilk. In the bowl of an electric mixer fitted with a paddle attachment, beat butter and sugar until light and fluffy. Beat in eggs, one at a time, until just combined. Add vanilla extra. With the mixer set on low speed, beat in one fourth of the dry ingredients. Then beat in one third of the milk mixture. Continue to alternate until all ingredients are incorporated, finishing with dry ingredients. Do not over mix. The batter will be heavy, it’s ok.

Fill the prepared muffin cups just to the rim with batter. Bake until lightly golden and firm to the touch, 15-20 minutes. Let the muffins cool in the pan for 5 minutes. Remove the muffins from the tin and transfer to a wire rack set over a baking sheet.

To coat the muffins: Combine the sugar and cinnamon in a paper bag. Brush each muffin generously with melted butter. Then place a few muffins in the bag with the cinnamon and sugar mixture. Shake well to coat the muffins. Repeat.

Serve warm or at room temperature.

Jelly Doughnut Muffins: Allow muffins to cool and use a small pastry tip to make a hole in the bottom of each muffin. Fill the pastry bag with your favorite jam, jelly, or citrus curd, and squeeze into the muffin.


Doughnut Muffins
All that’s missing is a tall cold glass of milk.

Desserts/Pastries

“Chocolate Malt” Cupcakes

"Chocolate Malt" Cupcakes


Growing up I used to love going to Thrifty’s Drugstore (now known as Rite Aid in California) to get ice cream. At 35 cents a scoop you couldn’t beat the price and it was darn good! I usually rotated between two flavors, either Mint Chocolate Chip or their infamous Chocolate Malted Crunch. And yes, to this day I have been known to pick up a 1/2 gallon of it or so. You really can’t blame me—chocolate flecks with little malt balls enrobed in malt ice cream…..Who can resist??? My sibs also love Chocolate Malted Milk Shakes–YUM!

Thus was my inspiration to give these “Chocolate Malt” cuppies a try. I turned to Martha Stewart’s recipe and was happy to find that my sister had a jar of Horlicks Malt Powder on hand. I did make two minor tweaks to her recipe as I read that folks found that the cake didn’t have enough malt flavor. As a result, I increased the malt powder amount by an additional 1/4 cup and folded in a 1/2 cup of chocolate covered malt balls into the batter. As for the recipe, it was quite easy to follow–pretty much a one bowl situation. And when I pulled the cuppies out of the oven, I was pleased to see beautiful even domes on the tops.

The Chocolate Malt Buttercream was a great pairing for the cuppies, too–giving it that extra oompf of malt flavor. Of course, it didn’t hurt that I topped them each with chocolate covered malt balls. Hey, I never said this was low-calorie 🙂


"Chocolate Malt" Cupcakes


Chocolate Malt Cupcakes…..same great flavors as a Chocolate Malted Milk Shake without the potential brain freezes 🙂

___________________________________________________

“Chocolate Malt” Cupcakes
Cupcakes adapted from Martha Stewart Cupcakes
Buttercream adapted from Oh My! Sugar High
Makes approximately 28 Cupcakes

Ingredients:

Cupcakes:
2¼ Cups All-Purpose Flour
¾ Cup Unsweetened Dutch-Process Cocoa Powder
½ Cup Granulated Sugar
¾ Cup Packed Brown Sugar
1½ Teaspoons Baking Soda
½ Teaspoon Salt
1 Cup Milk
1½ Cups Malted Milk Powder
1 Cup Vegetable Oil
3 Large Eggs, at room temperature
1 Cup Sour Cream, at room temperature
1 Teaspoon Vanilla Extract
½ Cup Chocolate Covered Malt Balls, chopped

Chocolate Malt Buttercream:
1 Cup Unsalted Butter, at room temperature
1 Cup Vegetable Shortening, at room temperature
½ Cup Malted Milk Powder
2-4 Tablespoons Unsweetened Dutch-Process Cocoa Powder
2 Teaspoons Instant Espresso Powder
3 Tablespoons Milk
4 Cups Confectioner Sugar, sifted
*Chocolate Covered Malt Balls and Straws to garnish (Optional)

Preheat oven to 350 degrees. Line standard muffin tins with paper liners. Whisk together flour, cocoa, both sugars, baking soda and salt. In another bowl, whisk together milk and malted milk powder until powder is dissolved.

With an electric mixer on medium-high speed, beat flour mixture, milk mixture and oil until combined. Add eggs, one at a time, beating until each is incorporated, scraping down sides of bowl as needed. Add sour cream and vanilla, and beat just until combined. Fold in crushed chocolate covered malt balls.

Divide batter evenly among lined cups, filling each halfway. Bake, rotating tins halfway through, until a cake tester inserted in centers comes out clean, about 20 minutes.

While cupcakes are cooling, prepare frosting. In a large mixer bowl, whip the butter and shorting for several minutes until very light and fluffy. Sprinkle in malted milk powder, espresso powder and cocoa powder. Whip for 1 minute. Slowly add the powdered sugar a few spoonful at a time, letting it incorporate until the frosting becomes thicker and stiff. Add milk, one tablespoon at a time and whip until combined.

Fill bag with the frosting and pipe large swirls on top of cupcakes. Top with candies and straw garnish.

Enjoy!

**Note: I was able to make these cuppies extra special by using the wonderfully decadent Valrhona Cocoa Powder for both the cake and the buttercream. Valrhona is quite arguably one of the best chocolates/cocoa to bake with and adds a lovely intense/pure flavor. With that said, I was able to get away with only using 2 tablespoons of cocoa powder in the buttercream where I may have needed more had I used another brand.**

"Chocolate Malt" Cupcakes

Desserts/Pastries

Coconut Macarons with White Chocolate-Mango Ganache

Coconut Macarons with White Chocolate-Mango Ganache

Coconut again?! Yup. This time in Macaron form. What can I say, I’m a coco-nutty kind of gal.

I learned my lessons from our first Parisian Macarons experience and paid heed to do the following:

  • Use a scale to measure the weight of ingredients;
  • Age the egg whites;
  • Let the shells “harden” for at least 30 minutes before baking;

Initially I had wanted to fill the Coconut Shells with a Passion Fruit-flavor filling but was unsuccessful in finding a pure concentrate or nectar flavoring agent. But since I had Mango extract on hand, I figured it would be a nice tropical “oompf” for the white chocolate ganache filling. Unfortunately it didn’t bring out as much of the mango flavor as I had hoped—though the end result was still quite tasty. Next time, I’m taking my sister’s advice and use a pineapple filling. Coconut Shells + Pineapple Filling = Piña Colada Macarons. And that, dear friends, is a Nguyen-Win Situation at its best 🙂


Coconut Macarons
Piped shells “aging” for 45 minutes. I only had almond meal that had almonds ground with their skins in tact—thus the pretty speckled pattern.


Coconut Macarons
Les pieds des Macarons!!!! Oh YES– the feet 🙂

I have to admit that I did exhale a sigh a relief after making these little treats. Thank goodness that it wasn’t just beginner’s luck last time! But on the next try, I think I’m going Caramel flavored.

So until my next kitchen adventure Mes Amis, a tout le heure!


Coconut Macarons with White Chocolate-Mango Ganache

___________________________________________________

Coconut Macarons with White Chocolate-Mango Ganache

Ingredients:

Macarons Shells:
110 Grams Almond Meal
180 Grams Confectioners’ Sugar
25 Grams Ground Desiccated Coconut
100 Grams Egg Whites, aged at room temperature for 24 hours
50 Grams Granulated Sugar

White Chocolate-Mango Ganache
8 Ounces White Chocolate, finely chopped
4 Ounces Heavy Cream
1 Teaspoon Pure Mango Extract
1-2 Drops Yellow Food Coloring (optional)

Grind almond meal, desiccated coconuts, and confectioners’ sugar in a food processor to remove any lumps. Sift mixture into another bowl and set aside.

In a mixing stand, whisk egg whites until frothy. Slowly add granulated sugar and continue beating until stiff peaks are formed. Carefully begin incorporating dry mixture into the meringue—gently folding until all items have been integrated.

Using a piping bag fitted with a large round tip, pipe small rounds of the mixture onto Silpat lined baking sheets. Rounds should be about 1½ inches in diameter. Once baking sheets are filled, tap the sheet carefully but firmly on the counter to remove any possible air pockets. Let baking sheets sit on the counter for 45 minutes to harden the outer shell before baking.

Bake at 300 degrees for 10-12 minutes. Transfer the pans to cooling rack and cool completely before removing shells.

In a saucepan, bring cream to a boil. Remove from heat and strain the hot cream through a fine-meshed sieve directly into the bowl of the chopped chocolate. Let the mixture sit 1 to 2 minutes without stirring, and then gently whisk until the chocolate is entirely melted. Stir in the mango extract and food coloring. Cover with plastic wrap and chill about 20 minutes, or until slightly thickened.

Transfer ganache to a piping bag and fill the macaron shells.


Coconut Macarons with White Chocolate-Mango Ganache