Breakfast/Brunch · Desserts/Pastries

Blame it on the Monkey Bread

Monkey Bread

I’ve been a bit behind on posting these past few weeks. Well…you know. I’ve been training for a triathalon, saving baby elephants, walking 150 miles in the snow for groceries, mining crystals for a new lightsaber and baking monkey bread. Oh-and the dog ate my homework.

Alright…that’s not totally true. I only walked 100 miles in the snow. But I think you’ll forgive me if you make this Monkey Bread. Easy and decadently delicious. The recipe isn’t cutting edge or new but it’s definitely one you need to have in your back pocket.

I start off by cutting up canned biscuit dough. Yup, the store bought kind. You can definitely make your own dough but this gal likes to live life on the edge.

Monkey Bread

Then toss the dough into a mixture of sugar, cinnamon, cloves, allspice and nutmeg.

Shake, shake, shake…..

Monkey Bread

Pile the dough into a greased bundt pan or an angel food pan.

Monkey Bread

Next I melt just a tad of butter and brown sugar together. After the sugar dissolves, I whisk in a few splashes of vanilla extract and a pinch or two of kosher salt.

Monkey Bread

Then I drizzle the caramel-like sauce over the dough and bake it for about 30-35 minutes or until golden brown.

Monkey Bread

After the Monkey Bread cools for a bit, carefully invert it onto a plate.

Bada-Bing! Bada-Boom!

The most delish donut/cinnamon roll/breakfast bun magic you’ll ever taste! Super ooey-gooey from the glaze with little crunchy, sugar bits.

Swoon.

Monkey Bread

Forgive me for now? 🙂

_________________________________________

Monkey Bread

Ingredients:

3 16-ounce cans biscuit dough
1 cup granulated sugar
1 tablespoon ground cinnamon
1/8 teaspoon ground nutmeg
2-3 pinches ground cloves
2-3 pinches ground allspice
cooking spray
3/4 cup unsalted butter
1/2 cup brown sugar
2 pinches kosher salt
1 teaspoon vanilla extract

Preheat oven to 350 degrees F.

Cut each biscuit into quarters. In a large plastic resealable bag, add in the sugar, cinnamon, nutmeg, cloves and allspice. Seal the bag and gently shake so the ingredients are well mixed.

Open the bag and add the biscuit dough. Seal the bag again and carefully shake until all of the dough has been well covered. *You may need to do this in two separate bags to fit all of the dough.

Spray the inside of a bundt pan or angel food pan with cooking spray. If using an angel food pan, be sure to cover the bottom with aluminum foil. Layer the sugared dough into the pan. Sprinkle any of the remaining sugar mixture from the plastic bag on top of the dough.

In a small sauce pan, melt together the butter and brown sugar. Once the sugar has dissolved, remove from the heat. Whisk in the salt and vanilla extract.

Pour the sauce over the dough and gently rap the pan on the counter a few times. Place the pan on a baking sheet (in case the sauce bubbles over) and bake for about 30-35 minutes or until the top becomes a deep golden brown. Allow to cool for 10 minutes on a cooling rack before inverting onto a large plate. Serve immediately.

Desserts/Pastries · Miscellaneous

Lucas’ Galatic Star Wars Birthday Party

Lucas' 4th Birthday

It was my Lucas’ 4th birthday the other week. And as his auntie/godmama, I’ve affectionately nicknamed him Lucasaurus.

Don’t let his charming smile, bright wit and adorable face fool ya. He can be a downright rascal—– a veloci-rascal!

Lucas' 4th Birthday

But I just adore the kid to pieces.

So last year, when I mentioned to my seester (pictured above with her super photogenic fam) that we should throw him a Star Wars themed birthday party–she was all for it.

And that’s where I was in trouble. Now some of you all may have witnessed my tendencies to go overboard with certain things and that my OCD habits can get me in a tough spot. Well–then you have not met my seesters…..and in particular, my over-the-top party planning sister, T.

Star Wars1-001

Nearly 5 months before Lucas’ birthday, she started sending me texts about deals she found on party favors, decorating ideas she found on Pinterest, signage she had created, etc. The next thing I knew it, we were headed warp speed into Star Wars mania.

As for me, I just went along for the ride hoping my desserts would get the stamp of approval by the party planning Jedi.

Lucas' 4th Birthday

But look at this little guy? How could we not get carried away?!

…Wrapped around his finger, he has us….

So then this happened.

Star Wars Dessert Tablescape

A bountiful Star Wars tablescape with desserts and goodies galore. But as much as I wish I could take the credit for all the galactic-goodness, I was only in charge of the desserts.

Seester did all the decor (that she started putting up 2 weeks before the party), cute signs, overflowing swag bags, and all the adorable touches that would have made the Jedi Council proud.

Star Wars5-001

Of course a regular Star Wars themed party wouldn’t cut it, so they upped the ante and arranged a Jedi Training Camp in order for all the padawans to prepare for their path to Jedi Knighthood.

IMG_1200

Lightsabers and Jedi Robes were a must, including cadet boxes to store all their goodies.

Star Wars4-001

To quench our thirst on the beautiful day, we sipped fresh Millennium Margaritas (for Jedi Masters 21+), Yoda Soda and Vader-Ade. Special props to my brother-in-law for hand squeezing the 25+ limes I needed to make the margaritas.

Trust me, we will never scoff again at those who own electric citrus juicers–DOH!

Star Wars2-002

And to fuel our Force, we summoned the Taco Master all the way from Orange County— I mean Tatooine. 🙂

Mouthwatering Carne Asada, Carnitas, Fish, Nachos….ideal nourishment to battle the Empire.

Taco Master from Tattoine

Back at our tablescape, Seester put together these cute Star Wars themed candies. Yoda Treats, Han’s Rolo, Edible Ewoks, & Thermal Detonators.

Star Wars-001

And poor Han.

All he wanted to do was to come wish Lucas a Happy Birthday but then he got himself frozen in carbonite again.

Star Wars3-001

Seester got to employ her knife skills by carving a watermelon Death Star. Lord Vader would have been pleased.

Watermelon Death Star

Lucky for us, Chewbacca was kind enough to guard the goodies from any other Sith Lords.

Lucas' 4th Birthday

Speaking of Sith Lords, I started off my dessert contributions by molding Stormtrooper and Darth Vader chocolates to place on top of the cupcakes. They later received a bit of edible disco dust for a bit of sheen….they are from outer space after all.

Darth Vader & Storm Trooper Chocolates

They perched atop rich Chocolate Cupcakes topped with big swirls of Vanilla Bean-Swiss Meringue Buttercream and sprinkles. Some of the cuppies were also topped with vanilla whipped cream.

Darth Vader & Storm Trooper Cupcakes

I paid additional homage to Darth Vader with these Chocolate Shortbread Cookies made with Valrhona cocoa powder.

Chocolate Darth Vader Cookies

How would it be a party without Master Yoda? These were Citrus Scented Sandwich Cookies filled with a Dark Chocolate Ganache.

Delicious, he was.

Yoda Sandwich Cookies

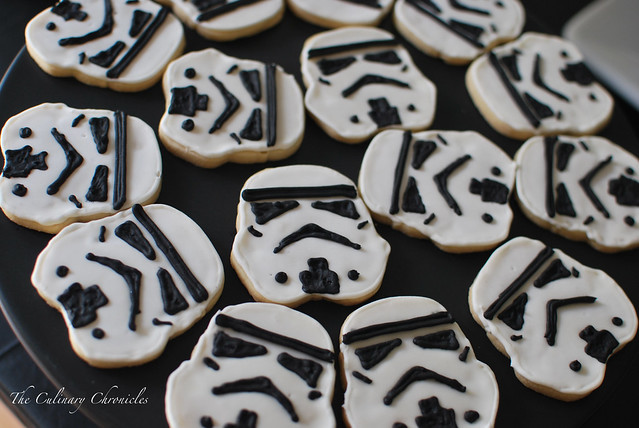
And to keep Darth Vader company, I made an army of Stormtrooper Sugar Cookies that were decorated with Royal Icing.

They were super fun to make and all of the cutters can be purchased from Williams Sonoma.

Storm Trooper Sugar Cookies

There were also pops for all to enjoy…..

Princess Leia Cake Pops & Death Star Rice Krispy Pops

“That’s no moon-it’s a Space Station!”

Not quite Master Obi-Wan but you’re close. They’re Rice Krispy Pops shaped as Death Stars. Not only a superweapon but super-yummy.

Death Star Rice Krispy Pops

And Princess Leia Cake Pops. Lucas really enjoyed these.

Princess Leia Cake Pops

And what’s a birthday party without a birthday cake?

I just had to make a little cake for our Jedi in training although Seester called it a “gentleman’s cake”. This was a 6 inch, 3-layer chocolate cake frosted with Vanilla Bean-Swiss Meringue Buttercream. I decorated the little cake with a fondant Stormtrooper accented with royal icing, fondant lightsabers, fondant Star Wars banner, Darth Vader molded chocolates, fondant stars and a star sparkler.

Star Wars Birthday Cake

At Jedi Training Camp, there was a Space Pod and stations for the padawans to bottle their own galaxies.

Lucas' Birthday

And then it was time to don their robes because…

Lucas' 4th Birthday

Duh, duh, duh, dum, da-dah, dum, da-dah………..

Darth Vader appeared! He was powerful, all-knowing, and—

Lucas' 4th Birthday

He liked parachutes. Yup, parachutes.

Lord Vader thought it was an integral training tool for the young padawans and can be seen here strategizing with the younglings.

Lucas' 4th Birthday

Heck–Vader even cleaned up after the parachute exercises!

There may still be good in him.

Lucas' 4th Birthday

Then he showed the padawans how to properly yield their sabers and spar.

I think that Lucas is saying– “You look a lot bigger on TV but I still pity the foo’ who messes with me!”

Oh yes, that was a Star Wars–Mr. T crossover moment.

Lucas' 4th Birthday

Cake Time!

Lucas' 4th Birthday

But that sneaky Vader used The Force to make the candles relight after Lucas blew them out.

He’s quite a trickser—when he’s not serving the Emperor and upholding the Dark Side.

Lucas' 4th Birthday

Lucas and Vader. They’re BFFs now.

The Lucasaurus always wins over the Dark Side.

Lucas' 4th Birthday

It was an action packed and exhausting day but the little guy had a blast.

And of course, we prevailed by restoring balance to the Force.

Lucas' 4th Birthday

The Force is strong with this one and I look forward to watching him grow into Jedi greatness.

Until our next Jedi Episode (hopefully for my other nephew, Leonidas’ birthday)— MAY THE FORCE BE WITH YOU!

Lucas' 4th Birthday

Desserts/Pastries · Sunday Family Dinner

Matcha (Green Tea) Icebox Cheesecake

Green Tea "Icebox" Cheesecake

Have you ever made an icebox cheesecake? They’re actually quite easy and don’t require a finicky water bath. In lieu of eggs, the filling utilizes gelatin to help it set. The end results? Something quite light and fluffy that won’t leave you feeling too heavy at the end of the meal.

Green Tea "Icebox" Cheesecake

This particular icebox cheesecake is flavored with matcha– a finely ground green tea powder. It’s quite floral and has a slightly bitter taste which is why it pairs so well with the chocolate crust. Depending on the quality of the matcha that you use, you may want to add more than the recipe lists to oompf up the flavor.

My fam-bam are fans of green tea so we served big slices of this cheesecake with heaping scoops of green tea ice cream at our last Family Dinner. But if you prefer, you can serve it with dollops of fresh whipped cream or by itself.

Totally Oishii.

_________________________________________

Matcha (Green Tea) Icebox Cheesecake
Serve 8-10

Ingredients:

2½ cups chocolate cookie/wafer crumbs (I used Oreos)
1 cup + 1 heaping tablespoon sugar, divided
4 tablespoons melted butter
1¼ cups chilled heavy cream
16 ounces cream cheese, at room temperature
1 cup milk
1 tablespoon matcha (green tea) powder, more for dusting
2¼ teaspoons gelatin powder
¼ cup water

Preheat oven to 325 degrees F.

Cover a 10-inch springform pan with a light layer of cooking spray. Combine the cookie/wafer crumbs, 1 tablespoon sugar and butter until moistened and resembles the texture of wet sand. Press crumbs into an even layer on the bottom of the pan and up the sides. Bake for 10 minutes and allow to cool completely on a wire rack.

Using a standing mixer fitted with the whisk attachment, whip the chilled heavy cream on high until it just holds stiff peaks. Set the whipped cream aside.

Using a clean bowl, whip the cream cheese using the stand mixer fitted with the paddle attachment until light and fluffy. Gradually add in the remaining sugar, stopping every so now and then to scrape down the sides.

Heat the milk until it is hot but not boiling. Whisk in the matcha until full incorporated. Turn the mixer with the cream cheese on low and slowly stream in the cooled milk mixture. Mix until just combined.

In a small bowl, bloom the gelatin in the water.

Gently fold the whipped cream into the cream cheese mixture. Fold until just combined. Add the gelatin and gently fold in. *If the gelatin has hardened, microwave for 10 seconds until it becomes liquid again before adding into the cheesecake mixture.

Pour the cheesecake filling over the cooled crust. Cover with plastic wrap and refrigerate for at least 8 hours or preferably overnight.

Before serving, gently release the springform pan ring. Dust the top with additional matcha powder and serve.

Adapted from Dessert First

Desserts/Pastries · Sunday Family Dinner

Pistachio–Orange Blossom Cake

Pistachio-Orange Blossom Cake

Our monthly Sunday Family Dinners have kind of morphed into Saturday Family Dinners. It may not have the same ring to it but after an evening of consuming tons of goodness, the last thing I want to do is to drive back home to San Diego to make it to work the next morning.

March 2013 Family Dinner

So last weekend, we held our monthly Fam-Din at my seester’s casa where we jumped into a Middle Eastern inspired menu. The seesters made Roasted Garlic Hummus, Cucumber-Chickpea-Feta Salad, Shish Tawook and Basmati Rice.

March 2013 Family Dinner

Shish Tawook are chicken skewers that are marinated in yogurt, citrus, spices and then grilled. My seester served them with toum which was a super garlicky sauce that she was obsessed with. Truth be told, I had no idea what toum was before this weekend but it was fantastic over the chicken. As for the salad, it went really well with the Shish Tawook as the acidity helped to cut and brighten the dish.

March 2013 Family Dinner

Initially I was going to bake fresh pita to serve alongside with the hummus and chicken but well…I got lazy, really lazy. And since one of my seesters lives down the street from a wonderful Middle Eastern grocery store, I decided to pick up some of their delicious sangkak that they bake fresh throughout the day. Sangkak is a Persian flatbread that is slightly chewy and the one I picked up from Aria was about 36 inches long, speckled with sesames seeds, and was steaming hot.

Pistachio-Orange Blossom Cake

As for my homemade contributions to dinner, I made a Pistachio-Orange Blossom Cake for dessert and Pomegranate Mojitos. Yea, yea….I know mojitos are Cuban but I considered it a fusion since I used pomegranates and fresh mint for this cocktail—totes Middle Eastern flavors. 🙂

Pistachio-Orange Blossom Cake

As for the cake, well…..truth be told, this was an 11th hour addition. The original dessert I had planned to make was a Pistachio Pound Cake but when it cooled, it weighed a gazillion pounds and was as hard as a brick!!! It totally confounded me as the recipe appeared “normal” and I didn’t over bake it but that’s how new dessert recipes roll sometimes. Hit or miss. But if I didn’t experiment on my loved ones, who would I try new recipes on? 🙂

So with dinner just a few hours away, I pulled out one of my tried and true recipes and modified it a bit to compliment our Middle Eastern themed menu. To a trusted cake batter, I added finely ground pistachio nuts, fresh orange zest and a few dashes of orange blossom water that I had picked up when I grabbed the sangkak.

With a hope and a prayer, I served my “do-over” cake with fresh berries, a citrus scented whipped cream and crushed pistachios. And guess what? The seebs and kids really liked it! Really! Because if they didn’t, they would’ve told me in a heartbeat. That’s the thing with family. They give brutally honest feedback–something I completely appreciate it….when it comes to cooking, that is.

The cake was rather light and beautifully aromatic from the pistachios and orange flavors. And although I did cover it with a glaze, it wasn’t too sweet and paired well with the fluffy whipped cream I scented with orange zest. As for the berries, wonderfully tart and bright.

All in all, it was a delicious and successful Fam-Din! And true to form, we hadn’t finished 1/2 of our meal before we started planning April’s menu—Japanese!

The Vapors would be so proud.


This Month’s Family Dinner Menu

Cocktails: Pomegranate Mojito
Appetizers: Roasted Garlic Hummus with Sangkak Flat Bread
Entrees: Shish Tawook with Toum, Crispy Rice, Cucumber-Chickpea-Feta Salad
Dessert: Pistachio-Orange Blossom Cake

_______________________________________

Pistachio–Orange Blossom Cake
Serves 8-10

Ingredients:

Cake Batter
2¼ cups all purpose flour
1 tablespoon baking powder
½ teaspoon salt
1¼ cups buttermilk
3 large eggs, at room temperature
1½ cups sugar
1½ tablespoons fresh orange zest
½ cup unsalted butter, at room temperature
1 teaspoon almond extract
1 tablespoon orange blossom water
½ cup finely ground pistachios

Glaze
½ cup powdered sugar
1 tablespoon unsalted butter
1 tablespoon honey
1 tablespoon heavy cream
1 teaspoon fresh orange zest
¼ cup roughly chopped pistachios

Orange Scented Whipped Cream
1 cup heavy cream, chilled
2 tablespoons sugar
1 tablespoons fresh orange zest

Preheat oven to 350˚ F.

In a medium bowl, sift together the flour, baking powder and salt. Whisk together the milk and eggs in another bowl.

In a bowl of a stand mixer, combine the sugar, orange zest and rub them together with your fingers until the sugar is moist and fragrant. Add the butter and with the paddle attachment beat at medium speed until ingredients are light and fluffy. Beat in the almond extract and orange blossom. Then add 1/3 of the flour mixture, still beating on medium speed. Mix in ½ of the milk-egg mixture, then beat in 1/3 of the remaining dry ingredients until incorporated. Add the rest of the milk and eggs, mixing until the batter is well mixed, then add the last of the dry ingredients. Continue beating for another minute to ensure that the batter is thoroughly mixed and then add in the ground pistachios. Mix until just combined. Pour the cake batter into a well greased bundt pan and bake for 35-40 minutes or until a toothpick inserted in the center comes out clean. Allow to cool in the pan for 10 minute before carefully inverting onto a wire rack to cool completely.

Once the cake has completely cooled, create the glaze. In a large measuring cup, combine all the glaze ingredients except the nuts. Microwave in 20 second intervals until the glaze has just combined (whisking in between). Slowly spoon the warm glaze over the cake, allowing it to soak in between spoonfuls. Sprinkle the crushed pistachios over the cake and let it cool for 1 hour before slicing and serving. *The glaze is quite thin. For a thicker consistency, double the amount of powdered sugar.

Before serving, prepare the whipped cream. Using a standing mixer fitted with the balloon whisk attachment, whip the chilled heavy cream on high until it just holds stiff peaks. Slowly sprinkle in the sugar until you reach a thick consistency. Add in the zest and whip until combined.

Serve the cake with dollops of whipped cream, additional chopped pistachios and fresh raspberries (optional).

Desserts/Pastries

Mixed Berry Hand Pies for π Day!

Mixed Berry Hand Pies

HOLY COW!!! I almost missed it—again! But thanks to my fab Twitter feed, I was reminded in the nick of time that today is…….. π (Pi) Day!!!!

Yup, the mathematical constant π (Pi) that is approximately 3.14159 is celebrated every year on March 14th. 3/14 = 3.14 Get it????? Oh so clever!

Mixed Berry Hand Pies

So, what does one do to celebrate π Day? Well– I guess if you’re a big math fanatic, you may spend your day racing through equations or preparing for the next Math Olympics. OR you can spend your day baking and eating delicious pies.

Seeing how I’m rather mathematically inept, I chose the latter and made these fun Mixed Berry Hand Pies. Crispy, flaky crust filled with tart fresh berries. Scrumptious!

And in case you’re feeling extra naughty today, you can choose to deep fry the hand pies instead of baking them. Why the π not?

Mixed Berry Hand Pies

And with that Friends, Happy π (Pi) Day!!!

ps. Obviously I was too busy shoving my face with these hand pies to wipe my fingers clean of powdered sugar before snapping this pic. Ooops!

_________________________________________

Mixed Berry Hand Pies
Makes 10-12 pies

Ingredients:

2 cups diced fresh strawberries
1 cup diced fresh blackberries
½ teaspoon lemon zest
seeds from ½ vanilla bean pod
1½ tablespoons sugar (more if berries are too tart)
1½ teaspoons cornstarch
flour for dusting
1 pound pie dough*
1 egg, beaten
1 tablespoon heavy cream or water
powdered sugar

Preheat oven to 400 degrees F. Line a baking sheet with parchment paper or silicon mat.

In a bowl, gently mix together the berries, lemon zest, vanilla beans, sugar and cornstarch. Depending on the sweetness of the berries, more sugar may be added. Set aside.

Dust a workspace with flour and roll the pie dough to about 1/8 inch thickness. Use a 5-6 inch round cookie cutter to cut circles out of the dough. Place about 2 spoonfuls of the berry mixture in the center of a pastry circle. Fold over the dough to cover the filling and gently press the edges together to seal. You may also use a fork to crimp the edges to secure the seal. Repeat with the remaining dough.

Transfer the hand pies to the baking sheet. In a small bowl, whisk together the egg and heavy cream/water. Brush the tops of the hand pies with the egg wash and make a small nick with a sharp knife on top to allow the steam to release while the pies bake.

Bake the hand pies for 20 minutes or until golden brown. Don’t worry if some of the berry filling bubbles out. Once done, allow the hand pies to cool on racks for about 10 minutes. Dust the hand pies with powdered sugar and serve.

Fried Option: If you opt to deep fry your hand pies, do not brush them with the egg wash or cut an air vent in the filled pies. Once formed, refrigerate them for at least 20 minutes. Fill a heavy bottom pot with 2 inches of vegetable oil and heat to 375 degrees F. In batches, fry the hand pies for 1-2 minutes on each side or until golden brown. Transfer the hand pies to cooling racks to drain excess oil. After 5 minutes, dust them with powdered sugar and serve.

*When it comes to pie dough, I’m a big fan of using Cook’s Illustrated’s Foolproof Pie Dough recipe or Martha Stewart’s Patee Brisee recipe. Both yield great results AND they’re both ideal to make double batches of to freeze when you need them.

Desserts/Pastries

Samoa Cupcakes…and those savvy Girl Scouts

Samoa Cupcakes

When it comes to cookies, I’ve always believed that the Girl Scouts could hustle. I mean, c’mon now. Adorable little girls, pleading for some philanthropic cause while slinging delicious cookies. A no brainer!

And every year, you could always count me in for at least a box or two of those delectable bites. But alas, two years ago, my fate was sealed.

Yup. My niece, Maya, had joined the Scouts. I was in trouble.

IMG_7864

Look at that face! Who could say “no“?

Although, more accurately, I think she started as a “Daisy”—a neophyte Girl Scout, I think. Thus my 1-2 boxes of cookies has now grown to 6, 7, 8….. Ugh–you get my drift.

Samoa Cupcakes

But how can you really blame me? I’m a sucker for my little buggers and when they’ve got cookies, I’ve got no chance.

The cookies are delicious on their own and even frozen. But every so now and then, I try to rework the beloved Girl Scout cookie into a cupcake like my Tagalong Cupcakes (a cookie on the bottom and top), Thin Mint-Chocolate Cupcakes (cookies in the batter and on top), and finally these Samoa Cupcakes.

Samoa Cupcakes

These cuppies are my tribute to the Samoa Cookie (and Maya)—a chocolate cupcake topped with a caramel cream cheese frosting, rolled in toasted coconut flakes, topped with a chocolate drizzle and half a Samoa cookie. Yup…I went there.

So friends, as long as Maya is a Scout, you can count on an annual Girl Scout themed cuppie. With that said, anyone else having flashbacks of Shelley Long in Troop Beverly Hills?

________________________________________

Samoa Cupcakes
Makes approximately 2 dozen cupcakes

Ingredients:

Cupcake Batter
5 ounces dark chocolate, finely chopped
1 cup strongly brewed hot coffee
½ cup unsweetened cocoa powder
2 cups all purpose flour
1½ teaspoons baking soda
½ teaspoon baking powder
1 cup + 2 tablespoons granulated sugar
1 teaspoon salt
2 large eggs
¾ cup vegetable oil
1 cup buttermilk
2 teaspoons vanilla extract

Caramel Cream Cheese Frosting
16 ounces cream cheese, at room temperature
8 tablespoons unsalted butter, at room temperature
3 heaping tablespoons caramel sauce
4-5 cups sifted confectioner sugar (varies due to preferred frosting consistency)

Toppings
1½ cups toasted coconut flakes
¼ cup melted chocolate
12 Samoa® Cookies, sliced in half

Preheat oven to 350 degrees. Place paper liners in muffin pans.

Place finely chopped chocolate in a bowl and pour hot coffee over it. Cover bowl with plastic wrap and allow to sit for 1-2 minutes. Remove plastic and stir until smooth.

Sift together cocoa powder, flour, baking soda, baking powder, sugar, and salt into a large bowl. In electric mixer fitted with the paddle attachment, beat eggs until it becomes pale yellow. Beat in oil, buttermilk, and vanilla extract. Scrape down the sides of the bowl and slowly incorporate the melted chocolate. In increments, add the dry ingredients and mix until just incorporated. Pour batter into the lined cups–about 3/4 way. Bake for 20 minutes or until a toothpick inserted in the center comes out clean. Allow cupcakes to cool in the pans for 5 minutes before removing to cooling racks.

In an electric mixer fitted with the paddle attachment, whip together the cream cheese and butter until fluffy. Add caramel sauce and then gradually add in the confectioners’ sugar, ¼ cup at a time. Continue adding sugar until desire consistency.

Fill a pastry bag and pipe frosting on top of cooled cupcakes. Roll the tops of the cupcakes in the toasted coconut flakes. Drizzle the melted chocolate over the tops and then garnish with ½ a Samoa® cookie. Enjoy!

Desserts/Pastries

Sweet Treats from 2012 and Happy New Year!!

Alice in Wonderland Chocolate Cupcakes

With just a few hours left in 2012, I wanted to wish you and your loved ones Happiness, Joy, Endless Laughter and epic Foodventures! May 2013 be everything you wish it to be and more.

I also wanted to show some sweet treats that I pulled together in 2012 but didn’t get a chance to share with you before.

Alice in Wonderland Chocolate Cupcakes

Alice in Wonderland  themed cupcakes for my niece’s Birthday Tea Party. Chocolate Cupcakes frosted with Vanilla Buttercream with toppers that were molded from fondant and edible markers

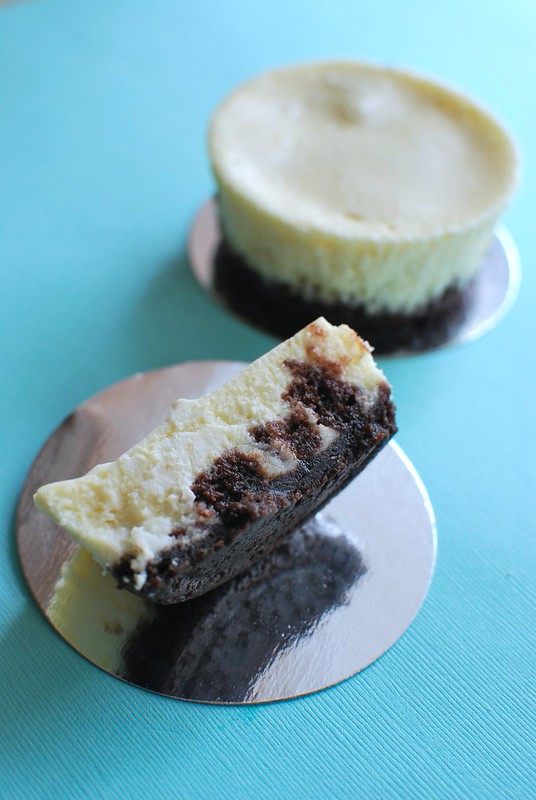
Mini White Chocolate-Brownie Chunk Cheesecake

Mini White Chocolate-Brownie Chunk Cheesecakes

Chiffon Cupcakes w/ Strawberry Swiss Meringue Buttercream

Chiffon Cupcakes with Strawberry Swiss Meringue Buttercream

Chocolate Malt Cupcakes

Chocolate Malt Cupcakes

Chocolate Soccer Cupcakes

Soccer Themed Chocolate Cupcakes for my nephew’s 3rd birthday

Chocolate Soccer Cupcakes

Toppers made with fondant and painted with gel food colors, royal icing and edible markers

Chiffon Cupcakes w/ Swiss Meringue Buttercream

Vanilla Bean Chiffon Cupcakes with Swiss Meringue Buttercream topped with handmade White Chocolate Shell Candies for a Beach Themed Bridal Shower

Chiffon Cupcakes w/ Lemon Curd & Swiss Meringue Buttercream

4 layer Vanilla Bean Wedding Cake filled with Lemon Curd and frosted with Swiss Meringue Buttercream in a “ribbon” pattern

Vanilla Cake Pops

Vanilla Cake Pops for a Bridal Shower

Chocolate Raspberry Petal Cake

3 layer rich Chocolate Cake filled with Raspberry Coulis and frosted with Chocolate Buttercream in a “petal” pattern for my niece’s birthday party

Chocolate Raspberry Petal Cake

Creating a “petal” pattern with Chocolate Buttercream

And with that, I’m off to the countdown with friends and bubbly. Here’s to a delicious 2012 and Cheers to all of the wonderful things to come in 2013! HAPPY NEW YEAR!!!

Desserts/Pastries

M&M Chocolate Cookies…Happy Holidays!!

M&M Chocolate Cookies


‘Twas the night before Christmas, when all through the house
Not a creature was stirring, not even a mouse;
The M&M Chocolate Cookies were laid out with care,
In hopes that St. Nicholas soon would be there!

HAPPY HOLIDAYS! Wishing you and your loved ones a joyous time filled with endless laughter and Foodventures!

_______________________________________

M&M Chocolate Cookies
Makes 2½ dozen cookies

Ingredients:

5 ounces semisweet or dark chocolate, chopped
½ cup unsalted butter
½ cup cocoa powder
1¾ cups all purpose flour
¾ teaspoon salt
½ teaspoon baking soda
1 ½ cup granulated sugar
2 large eggs
½ tablespoon vanilla extract
1½ cups M&M candies

Preheat oven to 325 degrees F.

In a small bowl, microwave the chocolate and butter together until melted and smooth. This should be done in 15-20 second intervals, stirring in between to avoid scorching the chocolate. Set aside to cool.

In a separate bowl, sift together the cocoa powder, flour, salt and baking soda.  Set aside.

In a mixer fitted with the paddle attachment, beat together the sugar and eggs until combined. Whisk in the chocolate mixture and then slowly add in the dry ingredients. Stir in 1 cup of the M&M candies.

Line a baking sheet with parchment paper. Scoop the cookie dough (about 1½ tablespoons each) and place on the sheet a few inches apart. Flatten the dough balls slightly. With the remaining M&Ms, add a few candies to the top/sides of each cookie dough, pressing them slightly in.

Bake for 12-14 minutes until the cookies begin to slightly crack. Allow the cookies to cool on the baking sheets for 5 minutes and then transfer to wire racks to cool completely.

Desserts/Pastries

Gingerbread-Pear Cupcakes + Nambé Winner!

Gingerbread-Pear Cupcakes

Is it just me or is time FLYING by?!

I feel like I was just wondering what my Halloween costume was going to be and within a blink of an eye, Thanksgiving has come and gone and now we’re barreling towards the Winter Holidays. YIKES!

But with the Winter Holidays comes all the flavors that I adore —- and gingerbread probably tops the lot.

These gingerbread cuppies are wonderfully spiced, deeply flavored with molasses & fresh ginger and are quite moist. I added in some pears for an additional level of flavor and texture and think they paired well with the spiced frosting. However, if you feel like cutting out some sweetness, simply serve the cupcakes inverted as the pears will act as a wonderful “topping”. Either way, your guests will adore you for them.

Gingerbread-Pear Cupcakes

And now for the winner of our Nambe platter! Drum Roll please………….

CONGRATS Ryan M. who said he would use this platter to feature local cheeses and jams he has made this year. MMMmmm!! Ryan, please check your email for instructions.

THANK YOU to everyone who participated! And a big THANKS to our friends at Nambe!!!!

______________________________________________________

Gingerbread-Pear Cupcakes with Spiced Cream Cheese Frosting
Makes approximately 24-28 cupcakes

Ingredients:

Batter
2½ cups all-purpose flour
2 teaspoons ground cinnamon
½ teaspoon ground cloves
¼ teaspoon ground black pepper
¼ teaspoon ground nutmeg
1/8 teaspoon salt
1 cup boiling water
2 teaspoons baking soda
¾ cup molasses
1¼ cups granulated sugar
1 cup vegetable oil
2 large eggs, beaten
½ tablespoon vanilla extract
1 tablespoon freshly grated ginger
1 cup chopped pears

Frosting
16 ounces cream cheese, softened
½ cup unsalted butter, softened
1 tablespoon molasses
1/8 teaspoon ground cloves
1/8 teaspoon ground cinnamon
5-6 cups confectioner sugar, sifted

Preheat the oven to 350 degrees F and line muffin tin with paper cups.

In a bowl, sift together the flour and dried spices. Set aside.

In another large bowl, whisk together the boiling water, baking soda, sugar and molasses until combined. Stir in the vegetable oil. Allow the liquids to cool slightly. Mix in the dried ingredients and then the eggs, vanilla extract and fresh ginger. Once the batter has been combined, carefully fold in the pears.

Fill the paper cups three-quarters full and bake for approximately 25 minutes or until a toothpick inserted in the center of them comes out clean. Allow the cupcakes to cool in the pans on a wire rack 10 minutes and then transfer to a wire rack to cool completely.

While cupcakes are cooling, prepare the frosting. In a mixer fitted with the paddle attachment, cream together the cream cheese and butter until fluffy. Whip in molasses, cinnamon, and cloves. Gradually whip in the confectioner sugar, ½ cup at a time. Continue adding sugar until you reach your desired consistency. Fill a piping bag with the frosting and pipe large swirls on top of the cooled cupcakes.