Pastas/Noodles · Seafood

Lobster Macaroni and Cheese because it’s my Blogiversary!

Lobster Macaroni and Cheese

My how time flies……

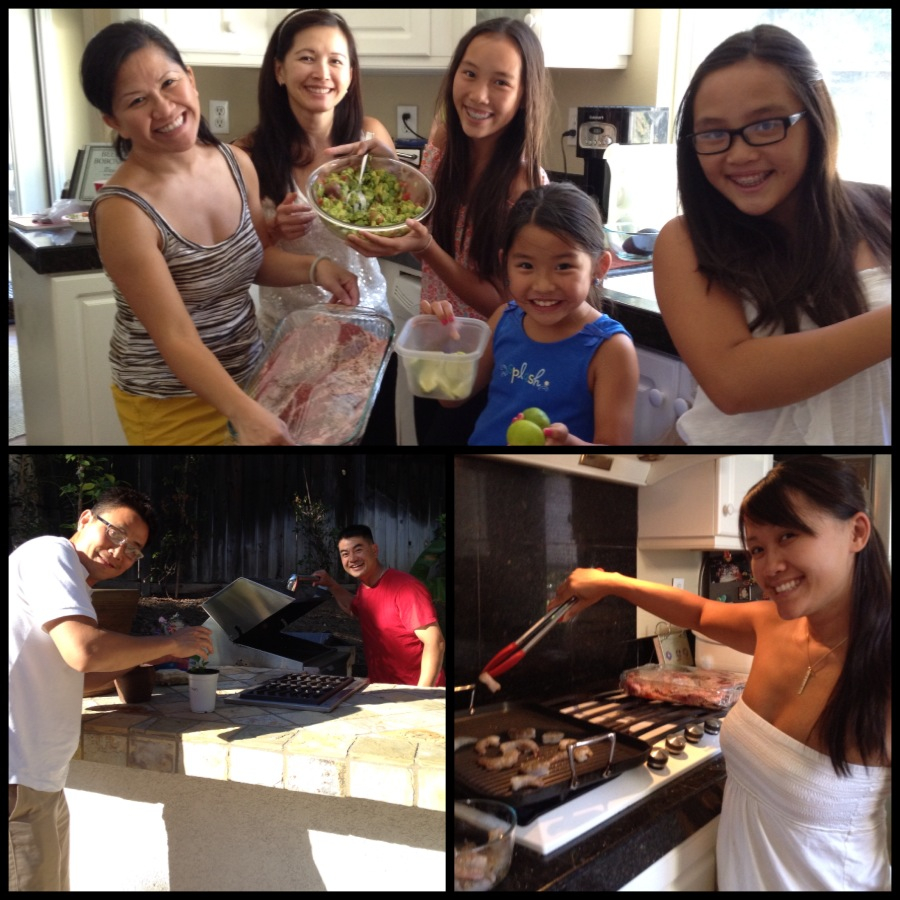
In the past three years, I left a comfortable job and moved to a brand new city. My family has welcomed a few new additions and have had our share of ups and downs. I’ve celebrated milestones with friends and loved ones and have stumbled upon great adventures.

And of course, three years ago I started this blog.

Lobster Macaroni and Cheese

I can hardly believe how a quick decision one “wine-induced” night has catapulted me into a wonderful world of food and self-exploration.

Lobster Macaroni and Cheese

This experience has introduced me to the food blogging community—a group of folks who are so supportive and generous. And I have been extended wonderful projects to participate in–which I still find so mind boggling! Not too shabby for this home cook 🙂

Lobster Macaroni and Cheese

After three years, I am still so grateful. Thanks to my loved ones who serve as my steady food testers and inspiration.

And Thanks to you All for your continued support of The Culinary Chronicles. I promise, there’s a lot more to come.

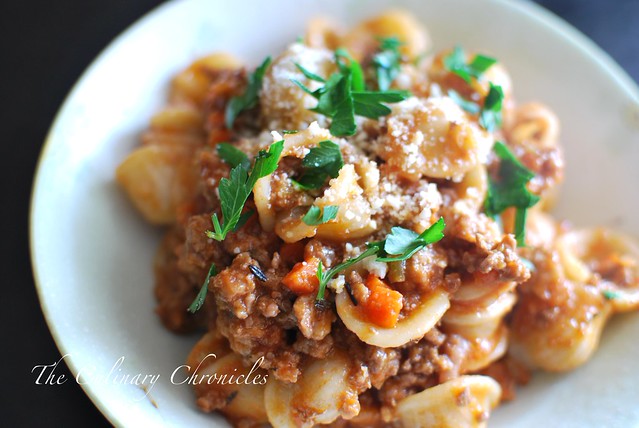
ps. To celebrate, try out my Lobster Macaroni and Cheese. Comforting and a bit decadent…just how I like my food.

Happy Foodventures!

_______________________________________

Lobster Macaroni and Cheese
Serves 6

Ingredients:

¾ Pound Elbow Pasta
2½ Cups Whole Milk
2 Tablespoons Vegetable Oil
4 Tablespoons Unsalted Butter
4 Tablespoons All Purpose Flour
2 Cups Gruyere Cheese, shredded
1 Cup Sharp Cheddar Cheese, shredded
1 Cup Fontina Cheese, cubed
½ Teaspoon Crushed Red Pepper Flakes
1/8 Teaspoon Freshly Grated Nutmeg
Kosher Salt, to taste
Black Pepper, to taste
10 Ounces Cooked Lobster Meat, tail and claw
½ Cup Toasted Panko Breadcrumbs
¼ Cup Parmesan Cheese, finely grated
2 Tablespoons Olive Oil
2 Tablespoon Fresh Chives, diced

Bring a large pot of water to boil. Heavily salt the water and cook the pasta for 8-10 minutes until it is just shy of al dente. Drain well and set aside.

In a small saucepan, add the milk and bring to a slow simmer.

Meanwhile, in a large pot, melt the butter and vegetable oil together over medium-low heat. Sprinkle in the flour and whisk for about 2-3 minutes to allow the flour to cook. Whisk in the hot milk and continue to stir until the sauce thickens. Remove the pot from heat and add in the Gruyere, Cheddar Cheese and Fontina. Stir until the cheeses have melted and then add in the red pepper flakes, nutmeg, kosher salt and black pepper. Add in the pasta and lobster and stir until thoroughly combined. Pour the mixture into a greased 9×9 inch baking dish. Sprinkle the top with Panko and Parmesan Cheese. Drizzle the olive oil over the top and bake in a 400 degree F oven for 25-30 minutes until the top is golden brown. Remove from the oven and sprinkle the chives over the baked dish.

Pastas/Noodles · Seafood · Sunday Family Dinner

Grilled Shrimp with Chimichurri Orzo

Grilled Shrimp with Chimichurri Orzo

I’m quite pleased to share that our Sunday Family Dinners have been going swimmingly well.

And what’s fun is that we’ve adopted some international themes for each dinner—the last inspired by Latin flavors. It was a memorable afternoon/evening where everyone had a hand in creating our delicioso menu.

My contribution this time around were fresh margaritas (no pre-bottled stuff here!) and a huge bowl of Grilled Shrimp with Chimichurri Orzo.

Grilled Shrimp with Chimichurri Orzo

I’m pretty obsessed with Chimichurri Sauce –full of bright herbs and citrus flavors. I usually drizzle it over grilled skirt steak but I’ve been known to stir a spoonful of it into scrambled eggs or as a spread in sandwiches in lieu of pesto.

The dish turned out to be a winning combination that can be served either warm or at room temperature. Total Nguyen-Win 🙂

Stay tuned for our upcoming Family Dinner where we will venture to Europe!


This Month’s Family Dinner Menu

Cocktails:  Margaritas on the Rocks
Appetizers: Fresh Guacamole
Entrees: Grilled Tri Tip, Grilled Shrimp with Chimichurri Orzo

__________________________________________

Grilled Shrimp with Chimichurri Orzo
Serves approximately 6

Ingredients:

1 Pound Dried Orzo
1 Pound Large Shrimp, peeled and deveined
Kosher Salt
Pepper

Chimichurri Sauce
1 Large Bunch Fresh Cilantro, roughly chopped
1 Large Bunch Fresh Parsley, roughly chopped
6 Sprigs Fresh Oregano
2 Large Garlic Cloves
1 Serrano Chile Pepper*
1 Tablespoon Lime Zest
¼ Cup Lime Juice
1 teaspoon red wine vinegar
½ Teaspoon Red Chili Flakes*
1 Teaspoon Honey
3/4 – 1 Cup Olive Oil, more if needed
Kosher Salt
Pepper

Season the shrimp with salt and pepper and set aside.

Prepare the Chimichurri Sauce. In a food processor or blender, add the first nine ingredients and pulse several times. Stream in the olive oil and blend until the items have fully incorporated. More olive oil can be added if a smoother, loose texture is desired. Check for seasonings and add salt and pepper as needed. Refrigerate until ready to be used. (*Chile amounts can be adjusted based on heat level preference)

Bring a grill pan to medium high heat. Cover the pan with cooking spray and grill the shrimp about 1-2 minutes per side. Transfer the shrimp to a plate and set aside.

Bring a large pot of salted water to a boil. Cook the orzo until al dente, about 8-10 minutes. Drain well.

In a large bowl, toss together the orzo, shrimp and ½ cup of the Chimichurri Sauce at a time. (Add additional sauce as needed.) Plate and garnish with additional cilantro.

Pastas/Noodles · Seafood

Shrimp and Tofu Pad Thai

Shrimp and Tofu Pad Thai

Okay. Here’s my confession.

The way I feel about Pad Thai is how I imagine “non-Vietnamese folks” feel about phở. It’s kind of the gateway dish to the culture’s cuisine but it’s so flippin’ good!

Shrimp and Tofu Pad Thai


Pad Thai has a whole range of textures and flavors all in one plate…what’s not to love?

So it was high time that I started to make it on my own. After grabbing a few key essentials, I turned to Alice over at Sweet Savory Life to fix up some seriously authentic and delicious Pad Thai.

Shrimp and Tofu Pad Thai

By far, this is the best recipe I have tried yet. The sauce is totally clutch and is what makes this version a keeper! I also suggest to not substitute cane sugar for palm sugar as it will be way too sweet.

As for the tamarind, I opted for the concentrate like Alice but my sis shared that she used tamarind pulp when she took a Thai cooking classes.

Shrimp and Tofu Pad Thai

And once you have the sauce done, the rest goes by super quick and easy. I owe you big time Alice—this recipe is definitely staying in heavy rotation! 🙂

With that dear Friends, I hope you have a fabulous Mother’s Day Weekend!

__________________________________________

Shrimp and Tofu Pad Thai
From The Sweet Savory Life

Ingredients:

1/3 cup fish sauce
1/2 cup palm sugar
1/2 cup tamarind juice concentrate
4 cloves garlic, minced
4 ounces dried rice stick noodles
6 tablespoons vegetable oil, divided
4 cloves garlic, minced
1 cup red onion, thinly sliced
1 ½ cups thinly sliced shrimp and fried tofu
1 egg
1 cup carrots, match sticks
1 cup green onion cut diagonal in ½ inch segments
1 cup mung bean sprouts
1 cup cilantro
1 cup toasted peanuts chopped
Lime wedge

  1. To make pad thai sauce, heat a small pan on medium low and add fish sauce, palm sugar, tamarind concentrate, and garlic. Cook sauce until palm sugar has completely dissolve. At this point, you will want to taste the sauce and tweek the sweetness or hotness (be careful, the sauce will be hot). To make it more spicy add a little Thai chili powder (I used Thai chiles). Remove from heat and allow to cool 10 minutes before storing it in a jar or plastic container.
  2. Boil noodles for 4-5 minutes and drain immediately rinsing with cold water for a few seconds. Noodles should be slightly firmer than Al dente. But don’t worry, they will continue to soften and cook later when stir frying. Using kitchen shears, cut the noodle clump in half. This will make it easier to fry and eat.
  3. Heat 3 tablespoons of oil in a wok or frying pan on high and cook raw shrimp with tofu for 3-4 minutes. Remove tofu/seafood into a small bowl. Next, heat the remaining oil and then add garlic and red onions to the hot pan and stir fry for 1 minute stirring the garlic mixture so it will not burn. Add noodles and stir for 1 minute. Add 3-4 tablespoons Pad Thai sauce continually stirring noodle mixture until well coated with sauce. Add cooked meat/tofu/seafood back and fry for 2-3 minutes. Move the noodle and meat mixture to one side of the pan and crack an egg on the other side. Scramble the egg with a wooden spoon and cook for 30 seconds. Add carrots, green onions, and sprouts and cook for one more minute frying everything together. Test the firmness of the noodle. If the noodle is too firm, fry for an additional minute. If your noodles need more flavor, add another tablespoon of sauce and fry another half minute.
  4. Remove from heat and serve. Garnish with remaining raw carrot match sticks, spouts, cilantro, toasted peanuts, and a wedge of lime. Enjoy!
Pastas/Noodles · Poultry

Creamy Pesto Rigatoni

Creamy Pesto Rigatoni

This past weekend I caught up with some friends over dinner. And before we knew it, we launched into an extensive and detailed conversation on how we believe that Pesto goes with practically anything.

Sandwiches, appetizers, crackers, pastas……….

P had even threatened to top the panna cotta I made for dessert with it but his wife quickly intervened. Okay…that may have been a bit much but I see where he was going with it.

Creamy Pesto Rigatoni


I typically go on a major pesto binge when herbs are abundant at my local farmers market. It’s so easy to change things up with various herbs and whatever types of nuts you have on hand. And the awesome thing is— Pesto freezes beautifully! Just drizzle some olive oil on top before sealing the container and your fresh pesto can keep in the freezer for months! A quick and easy way to flavor dishes with yummy herbaceous notes.


Creamy Pesto Rigatoni


This little number is a delicious and satisfying quick meal. PERFECT for any weeknight as you can pull it together in under 30 minutes! Easy Peasy!

And for an added spin, toss the pesto pasta with a cup of shredded cheese (of your choice) and spread into a casserole dish. Top with panko bread crumbs, more parmesan cheese and drizzle olive oil on top. Bake for 20 minutes at 400 degrees and you’ve got a hearty and tummy warming alternative dish!

Oh Pesto….I love you.

______________________________________

Creamy Pesto Rigatoni
Serves 6

Ingredients:

1 Pound Chicken Breast, skinless and boneless
1 Tablespoon Minced Garlic
1 Cup Pesto
1 Cup Grape Tomatoes, halved
1/4 Teaspoon Red Chili Flake
1/2 Cup Heavy Cream
1/4 Cup Grated Parmesan Cheese
Kosher Salt
Black Pepper
Olive Oil
1 Pound Rigatoni Pasta

Slice chicken breast into strips and season with salt and pepper. Set aside.

Fill a large pot of water and bring it to a boil. Heavily salt the water and cook pasta according to directions.

In a heavy bottom pan, add 1-2 tablespoons of olive oil and brown the chicken. Once cooked, remove the chicken from the pan. Add an additional tablespoon of oil and cook garlic over medium heat for 1-2 minutes before tossing in the tomatoes and red chili flakes. Cook for about 2 minutes and stir in pesto. Heat the pesto and then stir in the heavy cream. Once incorporated, toss in the pasta, chicken, parmesan cheese and coat well. Check for seasonings and adjust with salt and pepper as needed. Serve warm.

Pastas/Noodles · Vegetables/Vegetarian

Vegetarian Chap Chae for Mom

DSC_0276

A short time ago, we held the 5 year anniversary of our mom’s passing. And for a long time, the siblings and our dad tossed around a lot of different ideas on how we would commemorate Mom. But at the end of the day, it all came down to focusing on what was important to her—-Family and of course, Good Food.

So, on a beautiful and sunny Southern California day, the clan gathered. Aunties, Uncles, Cousins, Children, Grandkids (including Canine Grandkids) all converged upon my sister’s home to honor Mom. We spent time with each other, retold stories of her, cooked, and ate. And boy, did we eat!

It was all quite fitting actually. Mom was the head Foodie of our family and irrefutably the best cook. If we didn’t have a delicious spread for the party held in her honor, she would not have been a happy camper!

Vegetarian Chap Chae

One of the things that made Mom such a Foodie was her wide range of taste and her fearlessness to experiment in the kitchen. In the latter years she went through a big Korean phase—and I’m not only talking about Korean cuisine. I would often come for a visit and find my parents watching Korean soap operas—without subtitles! They claimed they could still figure out the storyline despite the fact that they didn’t understand the dialogue. Go figure.

It seemed fitting that one of my contributions for Mom’s international menu would be Chap Chae–a dish she would often make for Dad and their friends.  I went the vegetarian route but it’s just as easy to add beef, pork, chicken or seafood.

All in all, I think we did Mom proud. I’m sure she would have preferred for us to bicker less during the preparation but hey—we’re her kids! We love, we laugh, we bicker, we eat. 🙂

We love and miss you Mama!!

___________________________________________

Vegetarian Chap Chae (Jap Chae)

Ingredients:

1 Pound Sweet Potato Noodles
½ Cup Low Sodium Soy Sauce
1 Tablespoon Sugar
2 Tablespoons Vegetable Oil
1 Medium sized Carrot, julienned
2 Small Shallots, thinly sliced
1 Tablespoon Minced Garlic
1 Small Red Bell Pepper, julienned
2 Scallions, cut into 1 inch pieces
1 Cup Shitake Mushrooms, sliced
1 Cup Inoke Mushrooms, cut into 2 inch pieces
2 Cups Fried Tofu, cut into long strips
2 Cups Fresh Spinach Leaves, washed well and drained
¼ Cup Mirin
Black Pepper
½ Tablespoon Sesame Oil
1 Tablespoon Toasted Sesame Seeds

In a large pot, boil the noodles until firm–about 5-6 minutes. Strain the noodles and rinse with cold water. Using kitchen shears, cut the noodles about 4-6 inches in length.

In a small bowl, stir the sugar into the soy sauce until dissolved. Set aside.

Heat a large wok, with the vegetable oil. Add in shallots, carrots, bell peppers, mushrooms and stir fry until tender. Add in tofu, garlic, scallions, spinach and cook for an additional minute. Use the mirin to deglaze the pan and then season with black pepper. Quickly toss in the noodles and half of the soy sauce mixture. Stir fry for an additional 1-2 minutes. Remove from heat and drizzle in the sesame oil. Taste and add in more of the soy sauce mixture as needed.  Plate the Chap Chae and sprinkle the sesame seeds over the top.

Pastas/Noodles · Pork · Soups/Stews

Pasta e Fagioli

Pasta e Fagioli

I’m kind of in love.

With this soup, that is.

It’s warming and fulfilling with tons of veggies, beans, sausage, and pasta. I also threw in some beautiful Swiss Chard at the end for some added texture and flavor— but any type of dark, leafy green could do the trick. Extra veggies never hurt a gal, right?

Depending on how you like the consistency of your soup, you can either add or limit the amount of chicken broth. I personally like mine on the soupier side so I can dunk some crusty bread in.

But one thing is for certain. No matter how you prefer it, this Pasta e Fagioli is the ultimate comfort food.

_____________________________________

Pasta e Fagioli
Serves 6-8

Ingredients:

2 tablespoons olive oil
1 pound spicy Italian sausage, casings removed
1 cup white onion, diced
1 cup celery, diced
1 cup carrots, diced
1 tablespoon fresh garlic, finely minced
1 28-ounce can diced tomatoes
1 15-ounce can cannellini beans, drained and rinsed
6 cups low sodium chicken broth, or more depending on desired consistency
3-4 sprigs fresh thyme
2 dried bay leaves
¾- 1 cup macaroni noodles, or other short pasta
¼ cup Parmesan cheese, grated
3 cups Swiss Chard, cleaned and roughly chopped
kosher salt and black pepper

In a large dutch oven or stock pot, heat olive oil over medium. Add sausage and use a wooden spoon to crumble up the meat. Continue browning until the sausage is barely pink. Add the onions, celery, and carrots to the pot and sauté until the vegetables have softened. Add in the garlic and cook for an additional 2 minutes.

Pour in the tomatoes with its juices and Cannellini beans. Add chicken stock, thyme and bay leaves. Partially cover and bring the pot to a boil. Remove the lid and stir in the pasta. Lower the heat to a simmer and cook until pasta is al dente—about 9-10 minutes. Remove and discard the bay leaves and thyme stems. Stir in the cheese and Swiss Chard. Season with salt and pepper and serve.

Beef · Pastas/Noodles

Orecchiette Bolognese

Orecchiette Bolognese

Weekends are for slowly cooked meals.

Meals that emit utterly delicious aromas throughout your home for hours that once it’s finally finished cooking, you can barely wait to tear into it. And when you take that first bite, you just know that it was totally worth the wait.

This Bolognese fits that bill perfectly. Utterly rich, savory, and meaty.

I like serving this with Orecchiette because it’s the type of pasta that can hold up to such a hearty sauce and envelopes the meaty goodness. Yup…I said “meaty goodness” but you can use whichever type of pasta that tickles your fancy.

And although this Bolognese does take some time to make, it freezes beautifully. So make a double batch and store the extra in your freezer for a tummy warming, weekday dinner.

Now excuse me as I lick my computer screen 🙂

______________________________________________

Orecchiette Bolognese
Serves 6-8

Ingredients:

1 Pound Ground Beef
½ Pound Ground Veal
1 Cup White Onion, finely minced
1 Cup Celery, finely minced
1 Cup Carrots, finely minced
1 Tablespoon Fresh Garlic, finely minced
3 Tablespoons Olive Oil
½ Teaspoon Dried Red Chili Flakes (or less depending on your heat preference)
2 Dried Bay Leaves
1 Tablespoon Fresh Thyme Leaves
2 Tablespoon Tomato Paste
1 Cup Milk or Cream
1 Cup Dry Red Wine
1 28-Ounce Can Crushed Tomatoes
1 Pound Orecchiette Pasta, cooked al dente
Kosher Salt and Black Pepper to taste
2 Tablespoons Fresh Italian Parsley, chopped
2-3 Tablespoons Grated Parmesan Cheese

Heat olive oil in a large heavy pot. Add onions, carrots, celery, and garlic. Saute until softened but not browned. Add chili flakes and sauté for an additional minute. Add beef, veal, and ½ teaspoon of kosher salt. Use a wooden spoon to crumble the meat and break into small pieces.  Once the meat is no longer pink, add thyme and bay leaves. Add tomato paste and cook for an additional 2-3 minutes.

Add the milk and bring to a simmer. Continue simmering until all the milk has evaporated and only clear juices remain—about 10 minutes. Add the wine and bring to a simmer. Continue simmering until all the wine has evaporated—about 10 minutes.

Add tomatoes with its juices and bring to a boil, then place the heat at the lowest setting. Continue on this very low simmer for 2 – 2 ½ hours, stirring every 20 minutes until you get a rich, thick meaty sauce. Check for seasonings and add kosher salt and pepper accordingly.

Toss the cooked Orecchiette in the Bolognese sauce and serve topped with Parmesan cheese. Garnish with Italian parsley and Enjoy!

Pastas/Noodles · Seafood

Celebrating our Blogoversary with Uni (Sea Urchin) Pasta!

Uni (Sea Urchin) Pasta

I still can hardly believe it…..

Today, is our 2 year Blogoversary! And on 11.11.11 to boot!

Uni (Sea Urchin)

Over the past two years, I have loved this space that has allowed me to share my voice and Foodventures with you. But above all, I am so thankful for the overwhelming encouragement and support I have received from my family, friends, and the fabulous food community. Awww shucks gang….y’all are awesome.

By the way….stay tuned next week for a pretty neato giveaway I’ll be hosting to show my appreciation 🙂

Uni (Sea Urchin) Pasta

In honor of our 2 year Blogoversary, I wanted to indulge and use one my favorite things in a decadent pasta—UNI!  And what better way to celebrate, right?

The super unctuous texture of the uni with its fresh sea flavor is the perfect pairing with linguine. Of course you could use any long strand pasta you choose but I like the slightly thick noodle so that it can hold more of the rich sauce. Sooo good! And you know what’s even better? This delicious pasta can be done in 15 minutes! Perfect if you need to make an impressive dish but not have a lot of time.

But be warned…this pasta is not for the faint of the heart. It’s the real–super rich–super decadent deal!

And with that Dear Friends….here’s to many, MANY more years of Foodventures together!

xoxo….

________________________________________

Uni (Sea Urchin) Pasta
Serves 2

Ingredients:

¼ pound dried linguine, or pasta of your choice
1 tablespoon olive oil
1 tablespoon unsalted butter
1 teaspoon finely minced garlic
¼ teaspoon red chili flakes
¼ cup heavy cream
5 ounces fresh uni (or one tray)
1 tablespoon fresh chives, finely diced
1 teaspoon toasted sesame seeds
seasoned Nori (seaweed), chiffonade
kosher salt and white ppper

Bring a large pot of salted water to boil. Cook the pasta to al dente.

In a large skillet over medium heat, melt the olive oil and butter together. Add garlic and sauté for 1-2 minutes. Add in chili flakes and heavy cream. Bring to a slight slimmer and add all but 4 pieces of the uni.

Remove from heat and whisk items together until the uni has broken down into the sauce. Toss in the cooked pasta until the noodles have been evenly coated. Season with salt and pepper.

Plate the pasta and place the remaining whole uni segments on top.  Sprinkle the tops with chives, sesame seeds, and nori. Serve immediately.

Pastas/Noodles

Zaru Soba and Memories of Japan

Zaru Soba

In 2006, I spent a whirlwind 5 days experiencing Japan.

Not knowing when the next opportunity would arise for me to visit the country, I was determined to see, feel, experience, and of course EAT as much as I could.

Over the course of 5 days, I visited the cities of Kobe, Osaka, Tokyo, Hiroshima, Kyoto, and Kishigawa. That’s  over 1,200+ miles back and forth—-thanks to my Japan Rail Pass.

I attended a major league baseball game, walked around the Hiroshima Peace Park and Atomic Bomb Dome, traversed the busy subways & shops of Tokyo, prayed in shrines, sang at a karaoke bar, stayed at a hostel/ryokan, got lost—A LOT, biked around the streets of Kyoto, attended a Donjiri Festival, meandered around the different hamlets, and above all –engaged with the people of Japan. Needless to say, I barely nicked the surface.

Zaru Soba

But by far, my most precious memory of Japan was when I met Yushiko in Kyoto. That day, my friend Kate and I rented rickety old bikes to explore the old imperial city. As we were wandered around a part of the city infamous for old temples, we spotted a tiny, older woman sweeping the steps of a temple. She looked up as we went by and smiled. After exchanging a few greetings, she stopped and pointed to me and said “Japanese?” I said no, and responded “Vietnamese”. She laughed and began trying a few words in English. It turned out that the “temple” was not a temple at all but was her home. We later discovered that Yushiko was 94 years old (though she looked at least 15 years younger than that!) and that the home belonged to her late husband’s family line.

Yushiko invited us to come in and to view her garden. I was floored and so excited by her generosity. At one point, she motioned us to go through this old wooden door through a stone wall. We didn’t know what to expect but as I pushed the door which looked like it hadn’t been used in years, tears swelled up in my eyes. It was amazing– just as how I would have imagined the “Secret Garden” would look like. It was so peaceful and serene. Kate and I stayed in there for a few minutes just marveling at the beauty around us and feeling so lucky that this kind soul had invited us into her home.  We stayed and chatted with Yushiko for nearly 30 minutes and although she said she was “too old” for us to take photos with her– I just know that I will never forget her face and the precious time we spent with her.


A quick snapshot of Yushiko’s garden and home. Trust me, the photo does not do justice at all.

Of course it just wouldn’t be me if I didn’t mention any of the food we encountered during my time in Japan. And OH…THE…FOOD.


Japan 2006 Collage

Noodles, Sashimis, Bento Boxes, Donburis, Sweets, Sakes, and snacks of all kinds. Oh man….my mouth is watering just thinking about it all.

Soba Noodles


Since we’ve been having such warm weather lately and because my travel bug has been itching like crazy, I decided to make one of the dishes I ate a ton of when I was in Japan–SobaSoba are noodles made of buckwheat flour and can be served either hot or chilled–-Zora Soba is my personal preference.


Dashi

At the heart of Zaru Soba is the tsuyu–or dipping sauce. The tsuyu is a pungent mixture of dashi, shoyu, and mirin but its strong flavors matches so well with the mild soba noodles. You can definitely make your own dashi broth but I kind of “cheat” and use instant packets. Go ahead…judge me all you like 🙂

Zaru Soba

Zaru Soba is typically served with tons of nori, scallions, and wasabi. I also like to have a side of tempura with it for a offset of temperature and crunch. Oishii!!!

But one thing is for certain….Whether hot or chilled, loud slurping while eating your Soba is mandatory. True Story.

<Sigh>….I miss Japan. And until I can find my way back to the beautiful country, I will have to console myself with Nihon goodies such as ramen and this soba.

And for the immense generosity and experiences I had in Japan–-Arigatou gozaimasu!

Kyoto: 2006Snapshot of me on a bridge in Kyoto after a full day of biking around the town.

___________________________________________

Zaru Soba
Serves 3-4

Ingredients:

1 Package Dried Soba Noodles (approximately 9 ounces)

Tsuyu (Dipping Sauce):
1 Tablespoon Dried Dashi Soup Stock (or Dashi packets)
¼ Cup Low Sodium Shoyu (Soy Sauce)
¼ Cup Mirin
2 Cups Water

Accoutrements:
½ Cup Scallions, chopped
Seasoned Nori, sliced
Wasabi
Tempura Shrimp and Vegetables (optional)

Prepare the tsuyu. In a small saucepan bring the water to a slow boil. Add dashi soup stock and simmer for 4-5 minutes. Add shoyu and mirin and simmer for an additional 2-3 minutes. Remove from heat and cool.

Meanwhile, bring a large pot of water to a boil and cook soba noodles for 3-4 minutes or accordingly to package instructions. Drain the soba and rinse well with cool water. Shake of the excess water and plate the noodles. Top with nori and serve with scallions, wasabi, and tsuyu.

Pastas/Noodles · Seafood · Sponsored

Spicy Prawns with Ginger Peanut Noodles

Spicy Prawns with Ginger Peanut Noodles

I was thrilled at the chance to participate in this month’s 24×24 with Foodbuzz—particularly since the theme was focused on budget friendly meals. And not only did our meal need to be budget conscience but we had to use items already found in our pantries. Sounds like the making of a good cooking show to me.

I began thinking of things that I ALWAYS have on hand either in my cupboards or fridge and came up with the following things:

  1. Dried pastas
  2. Fresh Garlic and Chili (whether chili sauce, paste, or even fresh chili peppers)
  3. Some type of protein in the freezer (usually shrimp or chicken)
  4. Canned vegetables
  5. Condiments (Remember, I’m a condiment monster.)
  6. Booze (Um……self explanatory.)

With that list, it became a no brainer for me………. I was going to make some type of pasta for this challenge.


Nini and Nina_9.24.11

I decided to make Ginger Peanut Noodles for lunch with my nieces and served it with some spicy grilled prawns. Stephanie and Nina are always such willing taste testers for my experiments. And don’t let their age fool you, they’ve got quite the refined palettes. Oh—and in case you missed the photo above, Bella was trying to squeeze in on the taste testing, too.  She heard “peanut butter” and came running.

I’ve made these Ginger Peanut Noodles on several occasions with just items pulled right out of my pantry. The type of noodle can be substituted with whatever you have on hand as I’ve used spaghetti, fettuccine, and even chow mein—anything goes! For this particular preparation we happened to have some red bell pepper which added great texture and freshness. However, thinly sliced cucumber, zucchini or even bean sprouts would be great in it, too.

Bella is still focused on the fact that I just said “peanut butter”.


Bella_9.24.11


As for the protein, I happen to prefer prawns with this but chicken, pork, or even tofu would be just as delicious. Just use the same marinade for whichever you choose.


Spicy Prawns with Ginger Peanut Noodles

This entire meal comes together in about 30 minutes and is perfect for a weeknight dinner or when you’re short on time during the weekends.

Fast? Budget friendly? Yummy?

Now that is a Trifecta of Goodness.

________________________________________________

Spicy Prawns with Ginger Peanut Noodles
Serves approximately 6

Ingredients:

Prawns:
1 Pound Prawns, shelled, deveined with tails on
1 Teaspoon Red Chili Flakes
1 Tablespoon Sriracha Chili Sauce, or chili sauce of your choice
1 Tablespoon Fresh Garlic, finely minced
1 Tablespoon Low Sodium Soy Sauce
1 Tablespoon Sesame Olive Oil
2 Tablespoon Vegetable Oil

Noodles:
¾ Cup Smooth Peanut Butter
1 Tablespoon Honey
1/3 Cup Low Sodium Soy Sauce
¼ Cup Rice Wine Vinegar
1½ Tablespoons Sesame Oil
1½ Tablespoons Sambal Chili Paste
2 Tablespoons Fresh Ginger, finely minced
1 Tablespoon Fresh Garlic, finely minced
1 Teaspoon Lime Zest
½ Tablespoon Fresh Lime Juice
¼ – ½ Cup Hot Starchy Water (from boiling the pasta)
1 Whole Red Bell Pepper, thinly sliced
2 Scallions, cut into 1 inch strips
1 Pound Linguine
*Top with ¼ Cup Toasted Sesame Seeds and ½ Cup of Crushed Roasted Peanuts

Bring a large pot of water to a rolling boil. Cook linguine noodles barely over al dente.

Combine the prawns with all of its marinade ingredients together in a bowl. Cover and refrigerate.

In a blender, combine the first 10 ingredients of the noodles together. Blend until smooth. Add the starchy liquid from the pasta water until you reach the desired consistency—about ¼ – ½ Cup. Set aside.

Bring a grill pan or a large skillet to medium high heat. Lightly cover with cooking spray and cook prawns for 1-2 minutes on each side until they are opaque and golden. Remove to a clean plate and cover.

When then noodles have cooked, drain well and return to the hot pot. Ladle in a few spoonfuls of the peanut sauce at a time until the noodles have been thoroughly coated. Toss in the scallions and bell pepper slices. Plate with a mound of the peanut noodles, prawns, and sprinkle the tops of each plate with sesame seeds and crushed peanuts.