Beef · Condiments/Sauces

Beef Fajitas with Fresh Tomatillo Salsa and Pico De Gallo

I love Mexican cuisine. Something about the spice and citrus flavors remind me of my own heritage’s cuisine—though, in a completely different light.

Lucky for me, I live in an area where Mexican and Spanish ingredients are readily available for my culinary experiments. Plus, the BF has become quite adept to making some stellar salsas and pico de gallos

One night, we decided to try our hand with tomatillos. It is, after all, my goal for 2010 to cook with ingredients I’ve never tried before. So we headed to our local Mexican grocer, Mercados Suvianda in San Jose, California to pick up some supplies. Sure, this trusted establishment has their own array of pre-marinated proteins to choose from. However, I was up for the challenge and wanted to marinate my own carne asada with chipotle peppers.

The overall results? Muy Bueno!!! Of course, I think salsas get better over time. And in fact, our Tomatillo Salsa and Pico de Gallo improved after each day. We opted to cook the Tomatillo Salsa a bit to mellow out the “green”—almost “not yet ripe” flavor that it has. That choice proved quite successful. As for the beef, I was quite heavy handed with the chipotle peppers. Therefore, if you like a less “smoky” flavor, decrease the amount to only 1.5-2 ounces of the peppers.

We were quite pleased with our midweek Mexican eats. And since we knew exactly what was going in it—it was all fairly healthy. Whole-wheat tortillas, good fats from the avocado, moderate amounts of beef, tons of veggies. And that’s the key to balanced eating. Fresh, bright, flavors will make you a balanced foodie 🙂

Prepping the Tomatillo Salsa


Simmering the Tomatillo Salsa


Assemble and ENJOY!


______________________________________________

Beef Fajitas with Fresh Tomatillo Salsa and Pico De Gallo
Serves 4-5

Beef Fajitas
1 Pound Carne Asada (Beef skirt steak or flank steak)
3 Ounces of Chipotle Peppers in Adobo Sauce, diced
1 Teaspoon Cumin
1 Teaspoon Onion Powder
1 Teaspoon Garlic Powder
1 Teaspoon Kosher Salt
1 Tablespoon Fresh Cilantro, chopped
1 Tablespoon Vegetable Oil

Tomatillo Salsa
3 Pounds Fresh Tomatillos, chopped
2-3 Tablespoons Cilantro, diced
1 Large Jalapeno Pepper, diced
1 Medium Serrano Chili, diced
1 4-Ounce Can of Roasted and Peeled Green Chiles, diced
¼ Cup Yellow Onions, diced
1 Tablespoon Garlic, diced
½ Tablespoon Lime Juice
Salt and Pepper to taste

Pico de Gallo
2 Pounds Tomatoes, seeded and chopped
¼ Cup Yellow Onions, diced
1-2 Tablespoons Cilantro, diced
½ Large Jalapeno Pepper, diced
1 Medium Serrano Chili, diced
2 Tablespoon Lime Juice
Salt and Pepper to taste

Side Accompaniments
1-2 Ripe Avocados, diced
8-12 Tortillas
Grilled Bell Peppers and Onions
Tortilla Chips
Lime Wedges

Take the first 8 ingredients of the Tomatillo Salsa and place in a food processor. Pulse until smooth. Salt and pepper to taste before moving to a medium sized sauce pan. Simmer on low for 7-10 minutes. Let cool before moving to the refrigerator. Chill for at least one hour. Taste to check seasonings prior to serving. Add salt and pepper as needed.

Take the first 6 ingredients of the Pico de Gallo and mix in a medium sized bowl. Salt and pepper to taste and refrigerate for a minimum of one hour. Taste to check seasonings prior to serving. Add salt and pepper as needed.

Take all ingredients for the beef fajitas and place in a gallon sized ziploc bag. Be sure to get most of the air out of the bag before sealing it. Let marinate for 30-40 minutes.

Heat grill pan to medium-high. Lightly cover pan with cooking spray. Cook beef for 3-4 minutes on each side until golden brown. Remove to cutting board and rest for 5 minutes before slicing into strips. Plate along side grilled onions and bell peppers.

Assemble each wrap with beef, grilled bell peppers & onions, avocados, and salsa/pico de gallo.

ENJOY!

Appetizers/Small Plates

Awesomely-Blooming Onion Flower

You know that fried onion thingy you can get at various mass chain restaurants in the States? Yup—we made it. 🙂

It was surprisingly easy once you correctly slice the onion. Although true, the BF was in charge of this one— but even he was pleased at its simplicity.

Recommendations for next time:

  1. Try using a Maui onion for a complex onion flavor;
  2. After soaking the onion in chilled ice water, gently use fingers to pry the “petals” open further to get a nice “bloom”;
  3. Gently push the dredging ingredients into the base of the onion or only the tips will be covered;
  4. Perhaps adding cornstarch or a bit of finely ground cornmeal to the dredge would add a crispier exterior to the onion;
  5. Be sure not to fill your fryer/pot with too much oil or it will overflow and that’s just No Bueno;
  6. Roast your own peppers for the dipping sauce. Canned versions just don’t do the aioli justice;
  7. For even more heat, add a few teaspoons of Sriracha Chili Sauce to the mixture.

Overall…we were quite happy with the results. Super easy, crispy—and just darn fulfilling to pull that “onion flower” out of the oil since it looks close to the original.

ENJOY!

Slicing the onion…..the BF has got some knife skills 🙂


After the first dredge….


Bubbling away…


Finished Goodness with a Creamy/Spicy Aioli


______________________________________________

Awesomely-Blooming Flower Onion
Adapted from CopyKat.com


Ingredients:

Onion
1 Large Onion
1½ Cups All Purpose Flour
1 Teaspoon Paprika
1 Teaspoon Garlic Salt
1 Teaspoon Onion Powder
½ Teaspoon Garlic Powder
½ Teaspoon Kosher Salt
½ Teaspoon Black Pepper
1 Cup Buttermilk Mixture (1 Teaspoon Kosher Salt, ½ Teaspoon Black Pepper, ½ Teaspoon Cayenne Pepper)
Vegetable Oil for frying
Salt and Paprika to finish

Dipping Sauce
½ Cup Mayonnaise
2 Tablespoons Roasted Peppers
½ Teaspoon Garlic Salt
½ Teaspoon Onion Powder
½ Teaspoon Cayenne Powder
2 Tablespoons Olive Oil Salt and Pepper to taste

Mix all dry ingredients for the onion together.

Onion may be sliced like a blossom by cutting the top ¼ off, the top has the stem. Then peel and be very careful to leave the root intact. Carefully slice from the top of the onion down but stop about ½ inch before you get to the root, taking care not to cut through the root. Slice the rest of the onion like a pie into many servings. When complete, soak onion in cold ice water for 30-45 minutes so the onion’s petals will start to open up and bloom.

Drain onion and dip in flour mixture and dust well. Dip onion then in buttermilk mixture and back in flour mixture. Place in hot oil and fry until golden. Oil should cover onion. When done drain well and place on plate and cut center out of onion so the petals may easily be removed. Garnish with paprika and kosher salt.

Dipping Sauce: Combine all together in a food processor and stream in olive oil.

Breakfast/Brunch

Mediterranean Style Eggs Benedict

I LOVE Brunch. And I LOVE Eggs Benedict.

Poached eggs with unctuously runny yolks? Goooood. Creamy Hollandaise? Goooood.


So on Easter morning I found myself craving a big old plate of Eggs Benedict. However, the rainy weather deterred me from going to my favorite local brunch spot (Bill’s Café). I’m such a wuss with cold, wet weather 🙂

Hence, I turned to the kitchen to fulfill my Eggs Benedict needs. I chose to dress the Eggs Benedict in a Mediterranean style since I had some feta cheese in the fridge. As for the bacon? Well, I’m in the belief that it isn’t a true brunch if bacon isn’t present. I also decided to use some rustic style bread instead of English muffins to go with the Mediterranean theme.

As for the Hollandaise? I turned to Tyler Florence’s recipe as the BF had used it a few months ago. By vigorously whisking the eggs before cooking it, it decreased the whisking time over the double boiler. MUCH easier. However, I will say I had to ask the BF to take over whisking at the beginning as my wimpy arms were getting tired. 🙂

It all came together pretty easily and quickly. I loved what the Spinach Spread added to the dish. And let’s be honest, there’s something so darn fulfilling to take your fork and cut into the poached egg. Yolk— gloriously oozing out. 🙂 As for the Hollandaise, it was a tad too acidic for us. I’d recommend cutting the lemon amount in half.

All in all, I was happy with the results and my craving was fulfilled. 🙂  Next time you’re in the mood for Eggs Benedict, give this version a try.

______________________________________________

Mediterranean Style Eggs Benedict
Serves 2

Ingredients:

Hollandaise Sauce (Adapted from Tyler Florence)
2 Egg Yolks
½ Tablespoon Lemon Juice
¼ Cup Unsalted Butter, melted
Pinch Cayenne
Pinch Salt

Spinach Spread
1 Cup Cooked Spinach
¼ Cup Crumbled Feta Cheese
1 Tablespoon Sundried Tomatoes, diced
1 Teaspoon Garlic, finely minced
¼ Teaspoon Dried Thyme
1 Tablespoon Olive Oil
Salt and Pepper

Poached Eggs
4 Large Eggs
½ Tablespoon White Vinegar

Additional Ingredients
4 Slices Rustic Style Bread, toasted
4 Slices of Crispy Bacon
Paprika and White Pepper to Garnish

Spinach Spread: Sauté garlic in olive oil for 1-2 minutes until fragrant but not browned. Add Spinach, sundried tomatoes, and thyme. Cook for an additional 1-2 minutes. Remove from heat and add the cheese. Salt and pepper to taste. Cover and keep warm.

Hollandaise: Vigorously whisk the egg yolks and lemon juice together in a stainless steel bowl and until the mixture is thickened and doubled in volume. Place the bowl over a saucepan containing barely simmering water (or use a double boiler,) the water should not touch the bottom of the bowl. Continue to whisk rapidly. Be careful not to let the eggs get too hot or they will scramble. Slowly drizzle in the melted butter and continue to whisk until the sauce is thickened and doubled in volume. Remove from heat, whisk in cayenne and salt. Cover and place in a warm spot until ready to use for the eggs benedict. If the sauce gets too thick, whisk in a few drops of warm water before serving.

Poached Eggs: Bring a deep skillet of water to a simmer. Add vinegar. Gently break an egg into a large ladle and carefully lower it into the simmering water. Repeat with the remaining eggs. Poach the eggs for about 3-4 minutes, making sure that the eggs don’t stick together. With a slotted spoon, carefully remove the eggs and rest on a plate covered with a paper towel.

To Assemble: Place two pieces of bread on a plate and spread a spoonful of Spinach Mixture over each. Lay bacon over the spinach and carefully place one egg over each slice of bread. Spoon the Hollandaise over the egg and sprinkle with paprika and ground white pepper.

Desserts/Pastries

“Easy-Peasy” Dulce de Leche

Here’s the thing. I heart my Honey. And when you heart someone AND you love to cook/bake, you usually try to find ways to make things that they heart eating.

And one of the things that he loves is caramel……in fact, all things caramel-like. In the past, I’ve made him caramel candy, caramel cupcakes, flan with TONS of caramelized sugar, etc., etc. I was running out of ideas until I stumbled upon the Cupcake Project’s post a few weeks ago on Dulce de Leche.

True, Dulce de Leche differs from Caramel. Caramel is typically sugar cooked down (with or without a tad of water, depending on your preferred method). Often it’s “stopped” with cream or butter if you’re using it as a sauce. Dulce de Leche is a heavily sweetened milk that is slowly cooked down. Different in approach but both have very similar flavor profiles. And I knew the BF would love either I made.

But what caught my eye was the cooking method described by the Cupcake Project. Usually recipes for Dulce de Leche are extremely time intensive, cooking large amounts of milk and sugar down—while needing to carefully keep an eye out to not scorch or burn the mixture. All this method required was a can of condensed milk and a crock pot. Seriously…it was a Set It–And–Forget It situation. Heck–I can do that! And BAM–8 hours later, I was opening a decadent and luscious can of Dulce de Leche. And the options are limitless for what one can do with Dulce de Leche. This particular can was going towards some cupcakes I was working on.

Do I recommend people trying it? Heck Yes! It was SO easy! I will definitely be doing it again. Placed in an airtight container, the Dulce de Leche can be stored in your fridge for up to a month. But trust me….it won’t make it past a few days. But then again, I live with a “Love All Things Caramel” monster 🙂

Take a can (or two, or three) of condensed milk. Remove the label and COMPLETELY submerge under water in a crock pot. Set on low heat.

8 hours later…and it’s ready!

Carefully remove from the crock pot.

Wipe can clean.

Slowly open the can and watch the ooey-gooey goodness creep out 🙂

Carefully stir to eliminate any accumulated lumps and you’re all set!!!

Seriously, it doesn’t get any easier than that 🙂

Reviews

Livermore Valley’s 2nd Annual Barrel Tasting Weekend

Sunshine. Spring. Loved Ones. Wine.

We couldn’t have asked for any more as we enjoyed the first Sunday of Spring at the Livermore Valley’s 2nd Annual Barrel Tasting Weekend.

Per the the Livermore Valley Winegrowers Association:

“Less than an hour east of San Francisco, Livermore Valley Wine Country welcomes visitors with a flourish expanse of vineyards, wineries, and wine country experiences. Amid picturesque canyons, ridges and outposts of suburbia, the lush vines and convivial tasting rooms increasingly define the quality of life in the valley.

One of California’s oldest wine regions, the Livermore Valley played a pivotal role in shaping California’s wine industry. Spanish missionaries planted the first wine grapes in the Livermore Valley in the 1760s. In the 1840s, California pioneers looking for outstanding vineyard sites began planting grapes in the region.

Livermore Valley captured America’s first international gold medal for wine in 1889 at the Paris Exposition, putting California on the world wine map.

Livermore Valley wineries were the first to bottle varietal labeled Chardonnay, Sauvignon Blanc and Petite Sirah. Nearly 80% of California’s Chardonnay vines trace their genetic roots to a Livermore Valley clone.”

Livermore County Wineries are a wonderful alternative to folks in the South Bay who want to enjoy an affordable wine experience and do not want to make the 2+ hour drive to Napa.

The Barrel Tasting Weekend spanned two days. With presale tickets ($25), participants were able to visit over 25 wineries that included tastings and a souvenir wine glass. I particularly appreciated the fact that the ticket was valid for both days if folks didn’t want to try and squeeze all the wineries into one day. The intent of the event was to feature upcoming wines from each wineries as well as attract visitors to Livermore County.

With a car packed of snacks and water, my comrades and I opted to squeeze as many wineries into Sunday beginning at 12pm. We were blessed with gorgeous weather and took full advantage of seeing all that Livemore Valley had to offer.

Before I go further, I have to admit what a knucklehead I was to forget my SLR battery in the charger at home. Thus the photos in this post were either taken via my iPhone or borrowed from our friend Carol who is quite the photographer 🙂

Our first stop of the day began at Fenestra Winery

We sampled the Malbec, Petit Verdot, Estate Mouvedra, and Cabernet Franc. I preferred the Estate Mouvedra as it had a fuller, bold flavor. The BF LOVED the Mouvedra and remained his favorite for the day.

Their wine bottling machine.

(Photo by Carol Le)
Since we were tasting right out of the barrel, they used this tool called a “thief” to siphon the wine. It became my goal to convince someone to allow me to try my hand with the thief by the end of the day 🙂

Fenestra Winery
83 Vallecitos Road
Livermore, CA 94550
(925) 447-5246

Next stop, Page Mill Winery.

At Page Mill we sampled a Cabernet Sauvignon and an Estate Petite Sirah–both from 2008. I really enjoyed the Cabernet. As for the winery itself–very charming and great for photos 🙂

(Photo by Carol Le)
Giving the Estate Petite Syrah a try 🙂

Page Mill Winery
1960 S. Livermore Avenue
Livermore, CA 94550
(925) 456-7676

Next stop…Tamas Estates Winery and Wente Vineyards Estate Winery. Quite convenient since the tastings were taking place at the same location. I love efficiency 🙂

At Tamas, we sampled their 2008 Sangiovese Riserva. And although they were very kind and I loved the smoked cheese they had to offer, the wine was somewhat non-memorable.

At Wente, we sampled their 2008 Small Lot Merlot and another red. Both wines….not my fav.

However, we took advantage of the grounds and picnic tables to take in some snackies.

Cold cuts, cheese, fruits, crackers, and homemade Caramel Apple Mini Cupcakes with Cinnamon Cream Cheese Frosting–made by Carol. 🙂

Tamas Estates Winery
5489 Tesla Road
Livermore, CA 94550
(925) 456-2380

Wente Vineyards Estate Winery and Tasting Room
5565 Tesla Rd
Livermore, CA 94550
(925) 456-2305

We then hustled to Les Chenes Estate Vineyards because we heard they were offering food pairings with their wine tastings 🙂

At Les Chenes, we sampled by 2007 and 2009 Syrah. The food paired with the wines were a bright, fresh bruschetta and an amuse bouche. I preferred the 2007 to the 2009 Syrah.

However, this was one of my favorite vineyards of the day for overall charm and scape. Just gorgeous. 🙂

(Photo by Carol Le/Jason Leong)
On our way to the next tasting….

Les Chenes Estates Vineyards
5562 Victoria Lane
Livermore, CA 94550
(925)373-1662

We were then in need of some good eats for our tummies and heard that Charles R Vineyards had tri-tip sandwiches for sale. Did someone say Barbecue????
Tucked away off of Crane Ridge Road, Charles R was in full swing by the time we arrived. Alas to our chagrin….no more tri-tip sandwiches. Needless to say, I was Sad Panda 😦

So we settled on tucking into their tastings of 5 varietals: Zinfandel, Syrah,  2007 & 2008 Cabernet Sauvignon, and Chardonnay. I enjoyed the ’08 Cabernet Sauvignon and we grabbed a table al fresco to enjoy the sun and live music.

Charles R Vineyard
8195 Crane Ridge Road
Livermore, CA 94550
(925) 454-3040

Next up? White Crane Winery. And this is when thing got out of hand—in a good way, of course 🙂 By the time we arrived, their quaint little tasting room was filled to the brim. Their barrel tastings included the 2007 Cabernet Franc and 2007 Estate Cabernet Sauvignon. Neither suited me well but they were also offering their full tasting wines—6 to be exact.We sampled  Zinfandel, Merlot, 2 additional Cabernets, Chardonnay, Sparkling Wine and a Port. Yup, it was A LOT! In hindsight, perhaps it was not too smart to mix the ports, sparklings and various reds. But I guess hindsight is 20/20 🙂

My favorites (hard to believe I remembered them all!) were the 2005 Estate Reserve Cabernet Sauvignon and the Winery 21 2006 Cabernet Sauvingon. The 2005 was indeed, more refined and priced so at over $50. Their Winery 21 line is more affordable wines but still, delicious. At a little over $20 a bottle, we thought it was a good deal for what we were getting, and walked away with a bottle.

White Crane Winery
5405 Greenville Road
Livermore, CA 94550
(925) 455-8095

Still standing, we headed over to what we thought would be the last winery of the day– McGrail Vineyards and Winery.

We sampled three types of 2007 Cabernet Sauvignon which were held in French, American, and Hungarian oak barrels. I was surprised to find how distinct a flavor each of the oaks left on the wine.

2007 Cabernet Sauvignon in American Oak

2007 Cabernet Sauvignon in Hungarian Oak

2007 Cabernet Sauvignon in French Oak

The grounds at McGrail Vineyards were beautiful–the lush lawns are almost made for weddings and other festivities. We particularly appreciated the BBQ they had for sale and snagged up a few sammies to fill our tummies.

(Photo by Carol Le)
Basking in the sun…..

McGrail Vineyards and Winery
5600 Greenville Road
Livermore, CA 94550
(925) 215-0717

At McGrail, we somehow made quick buddies with a couple who told us of a vineyard that was staying open later than the rest and allowed you to bottle your own wine. WHAT?! Let’s do it! So off we headed to El Sol Vineyard.

They had several varieties to taste: 2004 Cabernet Franc, 2005 Petite Sirah, 2003 Cabernet Sauvignon….but I’ll be honest friends. At this point in the game, things were getting a little fuzzy to me. Wine Fuzzy that is 🙂 BUT, two things occurred at El Sol that made my wine tour day!

First, I got to use the “thief” and poured tastings for my friends and new friends!!! SO fun! Unfortunately I don’t have any pics of it—-amidst my excitement, we didn’t take any.

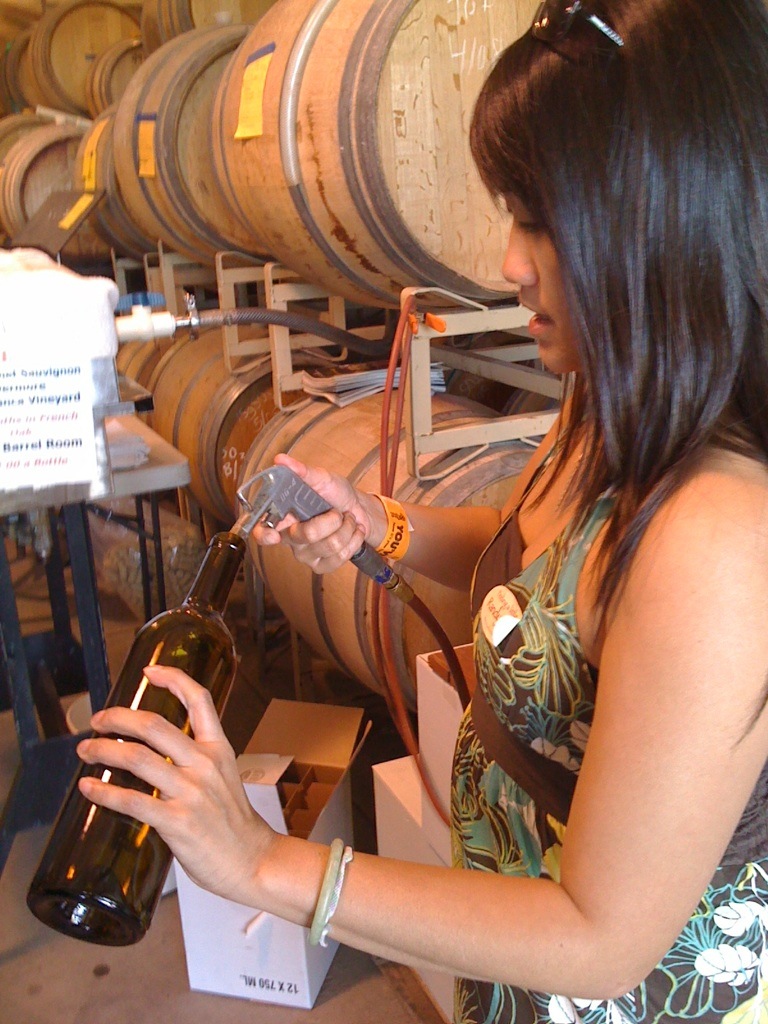
And second, I bottled my own wine! Sounds kitschy right? But no, it was SO much fun!!! For only $14 I bottled a 2003 Livermore Cabernet.

Using a high air pressure apparatus to clean out the bottle

Filling the bottle with vino

Corking the bottle


Affixing the foil seal

(Photo by Jason Leong)
Labeling the bottle

(Photo by Jason Leong)
MY OWN BOTTLED WINE!!! Yiippee!!!

El Sol Vineyard
8626 Lupin Way
Livermore, CA 94550
(925) 606-1827

If you were keeping count….it was 9 wineries in a course of 6ish hours with countless wines tasted. Beautiful spring day with wonderful friends. It’s days like these that make this foodie-in-training feel utterly blessed. 🙂

(Photo by Darren Yuen)
HUGE THANKS to Carol and Jason for photography, organizing the event, and of course–driving! 🙂

(Photo by Carol Le)
And of course to Darren…for all the laughs.

(Photo by Carol Le)
And lastly, to My Better Half, for ALWAYS indulging this Wine-O.  🙂
Reviews

Al Pastor? Yes, please.

I LOVE “Mom & Pop” joints.  And I LOVE Street Foods. So when you combine the two things, it’s just bliss.

For the past few years, one of my favorite places to pick up such goodness is just a hop-skip-and-jump away near our home at Metro Balderas 1 in San Jose, California. We’re blessed on the West Coast, and in particular California, to have great authentic Mexican food readily accessible. And in the Bay Area, that’s no exception.

Like most taquerias, Metro Balderas 1 offers the standard fair of tacos, burritos, quesadillas, sopas, pambazos, tortas, and more—all filled with your choices of proteins. Pollo, carne asada, chorizo, cabeza, tripas, camarones….Oh My. And let us not forget, my personal favorite…..the Al Pastor.

Al Pastor is beautifully marinated pork that is slow roasted on a vertical rotisserie called a Trompo, It has an appearance of the Shawarma but the flavors are completely different.

And Metro Balderas 1 does them THE BEST.

Offered 5pm to close only on Thursdays to Sundays, hoards of patrons flock to Metro Balderas 1 as the amazing aromas of the Al Pastor roasting on the Trompo waft in the streets. With only 4 tables indoors, its ideal to grab a seat al fresco to watch the “Al Pastor Man” expertly slice thin pieces of the meat into the fresh small tortillas cradled in his hand. With a small flick of the wrist, he cuts a tiny piece of the pineapple that sits at the top of the Trompo to top of your tacos.

We order our tacos with “everything”….which includes the corn tortillas quickly dipped in the Al Pastor grease (yup….it’s THAT good), Al Pastor, chopped onions, and cilantro. A quick squeeze of lemon or lime with a little drizzle of one of their fresh salsas and I am in HEAVEN. The meat is so perfectly marinated, juicy, and gets that beautiful roasted charred flavor from the rotisserie flames.

Side accompaniments include, fresh tortillas chips, sliced cucumbers, radishes, grilled onions, and pickled jalapenos & carrots. And yes, all those fixins’ come free.

And the final kicker? Al Pastor tacos are only $1.50 each. <Pause for dramatic effect>.

Fresh. Authentic. Delicious. Cheap.

It just doesn’t get any better than that. 🙂

And if delicious rotisserie pork isn’t your thing—their menu has a little of everything to please all palettes. Their Quesadilla des Camarones is pretty amazing too. Perfectly seasoned and grilled shrimp with cheese. Yum.

So next time you see a rotisserie going with a ginormous slab of meat in front of a taqueria, stop on in and grab an Al Pastor Taco. And if you’re within a 30 mile radius of San Jose Thursday-Sunday nights, come to Metro Balderas 1.

You won’t regret it.

In fact, message me if you do. I’ll meet you there with a Negra Modela in hand. 🙂

Metro Balderas 1
688 South Almaden Avenue
San Jose, CA 95110
(408) 295-4078

Did I mention they have Al Pastor??? 🙂

Desserts/Pastries

A.B.’s Chewy Chocolate Chip Cookies

Some things just don’t get old…..

For me, that list includes my Jack Johnson albums, watching “The Breakfast Club”,  Foster Farm Chicken Commercials, and perusing through the Sunday morning Target ads. Oh, and of course, Chocolate Chip Cookies.

Very few things beat the beautiful aromas of freshly baked chocolate chip cookies 🙂

So, when one of my Besties was driving through town on a road trip with her family, I thought I would pack them a little basket of snacks that would include a few cookies. If anything, I thought it would occupy her beautiful little daughter on the car ride down to the aquariums, too.

Now, everyone has their texture preference of a chocolate chip cookie. I prefer the slightly crunchy outside and chewy interior—with of course, TONS of ooey-gooey chips! I initially wanted to give the NY Times Best Chocolate Chip Cookie recipe a go but quite frankly, didn’t have the extra 24 hours to age the dough. Eh, there’s always next time.

I decided to give our boy, Alton Brown’s, recipe a try. With over 600+ reviews and a title of “chewy”, I figured it couldn’t be bad.

And it wasn’t.

That Alton. He always gets me. 🙂

True to form, crispy on the outside—chewy on the inside. With two…count them, TWO cups of chocolate chips. Mmmm….

A few things to note:

  • I didn’t have Bread Flour on hand, so per Joy of Baking, I substituted with All Purpose Flour. Not exact but the ratios are pretty close.
  • I had wanted to add a little Fleur de Sel over the cookies before they baked but had run out. So, I used a bit of course Kosher Salt but since it’s flaked—it melted into the cookie too much. Meh, now I know better 🙂
  • Although the recipe said you can get 2½ dozen cookies, I only got 20. Pretty typical results for me actually—I never get the amount recipes quote.

And of course, while you enjoy them, don’t forget an extra large and icy glass of milk. 🙂

Cheers!

A shower of chocolate chips

I like to use an ice cream scooper for nice, round cookies

6 will fit on one Silpat covered baking sheet

These cookies took about 12 minutes–turning the sheet once half way through the baking time

Mmmm….Cookies….

Chewy Chocolate Chip Cookies
From Alton Brown
Makes 20 Cookies

Ingredients
2 Sticks Unsalted Butter
2¼ Cups Bread Flour
1 Teaspoon Kosher Salt
1 Teaspoon Baking Soda
¼ Cup Sugar
1¼ Cups Brown Sugar
1 Egg
1 Egg Yolk
2 Tablespoons Milk
1½ Teaspoons Vanilla Extract
2 Cups Semisweet Chocolate Chips

Heat oven to 375 degrees F.

Melt the butter in a heavy-bottom medium saucepan over low heat. Sift together the flour, salt, and baking soda and set aside.

Pour the melted butter in the mixer’s work bowl. Add the sugar and brown sugar. Cream the butter and sugars on medium speed. Add the egg, yolk, 2 tablespoons milk and vanilla extract and mix until well combined. Slowly incorporate the flour mixture until thoroughly combined. Stir in the chocolate chips.

Chill the dough, then scoop onto parchment-lined baking sheets, 6 cookies per sheet. Bake for 14 minutes or until golden brown, checking the cookies after 5 minutes. Rotate the baking sheet for even browning. Cool completely and store in an airtight container.

And to make them EXTRA special, package them in clear bags with a pretty little ribbon

Desserts/Pastries

Milk Chocolate-Peanut Butter-Toffee Brownies


There are very few American desserts in my opinion that are more iconic than the brownie (yeah-yeah….some would say Apple Pie but that’s just too cliche 🙂 )

Now the texture of a Brownie can truly vary from one person to the next. Some prefer the cake-like approach, whereas I enjoy the dense-chewy brownie. I also love the crunchy bits that the corner squares offer—mmm, good!

So, when the BF and I decided to make a triple feature at the drive-in movies one evening, I immediately began whipping up a batch of brownies to pack with us. I decided to kick up my “go-to” milk chocolate brownie batter by adding some toffee chips and peanut butter. Because as my girl Ina Garten would say, “How bad could that be?” 🙂

And they were OH-SO-GOOD!! Gooey, chocolatey, decadent…..and the bits of toffee added such a great texture. I’m wondering why I didn’t think of this earlier! But at least we’ve got it now and I’m more than happy to share the goodness.

So friends, pour yourself a nice icy-cold glass of milk and tuck into one of these brownies. You won’t regret it! 🙂


______________________________________________

Milk Chocolate-Peanut Butter-Toffee Brownies
Makes 9, 3 inch Brownies

Ingredients:
½ Cup Unsalted butter
1½ Cups Milk Chocolate Chips, plus ¼ Cup reserved (I used Ghirardelli Chips)
½ Cup Toffee Chips
½ Cup Smooth Peanut Butter, plus1Tablespoon Water
¾ Cup Packed Light Brown Sugar
½ Tablespoon Vanilla Extract
2 Large Eggs
¾ Cup All-Purpose Flour
1 Tablespoon Unsweetened Cocoa Powder
¼ Teaspoon Salt
¼ Teaspoon Baking Powder

Preheat oven to 350 degrees. Line a 9 inch square baking pan with parchment paper for easy removal. Cover parchment paper with cooking spray.

In a heatproof bowl, melt butter and 1½ cups milk chocolate chips in the microwave until smooth. Do this in 20 second intervals, stirring in between to ensure that you do not scorch the chocolate. Cool the chocolate mixture until room temperature. Stir in brown sugar and vanilla. Add eggs 1 at a time, beating well after each addition, until mixture is glossy and smooth.

Whisk together remaining ingredients and combine with chocolate mixture. Stir in remaining ¼ cup chocolate chips and toffee chips. Spread batter evenly in pan. Mix peanut butter and water in a heatproof bowl. Microwave for 15 seconds to thoroughly incorporate both ingredients. Drizzle peanut butter mixture on top of the brownie batter. Using the tip of a pairing knife, create swirls of the peanut butter. Do not over mix, as you want to keep the peanut butter visible.

Bake for 25 to 30 minutes or until a toothpick inserted comes up mostly clean.  Cool in pan for at least 10 minutes and cut into 3 inch squares.


Breakfast/Brunch · Desserts/Pastries

Blueberry-Meyer Lemon Bundt Cake

My dear co-worker’s birthday was coming up and as her assigned “birthday buddy”, I was in charge of bringing in a cake to our staff meeting to celebrate her fabulousness. Since I knew she had a chocolate cake for her festivities at home, I was sure that I wanted to bake her something sans-chocolate. Lucky for me, our Meyer Lemon tree was filled with ripe lemons for the picking so I opted for a fruit-citrus cake.

I turned to my gal, Martha Stewart, for some inspiration. Since our staff meetings are in the morning, I opted for a bundt cake that makes you feel better about eating sweets in the morning since it “looks” more “breakfast-like”. I know…not really–but work with me here 🙂

I settled on Martha’s Blueberry Lemon Bundt Cake, with of course, a few tweaks. For the batter, I added fresh meyer lemon juice to kick up the bright citrus flavor. I also thought the cake was a bit “naked” and created a light glaze to cover the tops. Incidentally, I hadn’t greased the pan thoroughly so the glaze acted as the perfect “cover up” to my imperfections. Also, if you don’t have fresh blueberries, use frozen ones like I did. Just be sure not to defrost them before use—just toss the frozen ones directly with the zest and flour before folding into the batter. 🙂

A few quick suggestions to a successful cake:

  1. Generously and THOROUGHLY cover your bundt pan with cooking spray. I thought I had but clearly I hadn’t done enough when I inverted the cake later. Yikes!
  2. It’s really important to cool the cake in the pan for some time. Trying to flip it too early could cause tears and sticking since the cake hasn’t fully set yet.
  3. I used Meyer Lemons in my recipe which may vary if you use regular lemons. Meyer lemons tend to be juicier and less tart than the more commonly found ones, so adjust accordingly to your preference.
  4. If you glaze the bundt cake, be sure to wait until the cake has fully cooled or the glaze will soak into the cake versus “glazing” it.

Overall, I think the birthday gal and my co-workers enjoyed the cake. The citrus gave a light flavor which was further accented by the berries. The sour cream also assisted in the moist texture. Next time you’re looking for an alternative to a chocolate cake, give this Lemon Bundt Cake a try 🙂

After creaming the butter and sugars.

Tossing the blueberries with zest and flour.

Inverting the bundt cake. EEKS! Clearly, not enough cooking spray!

No problem–that’s where glazes act as a tasty cover up to any imperfections!


______________________________________________

Blueberry-Meyer Lemon Bundt Cake
Adapted from Martha Stewart

Ingredients

For Cake:
2½ Cups All-Purpose Flour, plus 1 teaspoon for blueberries and zest
2 Teaspoons Baking Powder
½ Teaspoon Salt
1 Cup Unsalted Butter, room temperature
1 Cup packed Light-Brown Sugar
1 Cup Granulated Sugar
4 Large Eggs
1 Teaspoon Vanilla Extract
2 Tablespoons Meyer Lemon Juice
1 Cup Sour Cream
2 Cups Blueberries
2 Tablespoons Grated Meyer Lemon Zest
Nonstick cooking spray, for pan

For Glaze:
¼ Cup Meyer Lemon Juice
2 Cups Confectioner’s Sugar (*add more for thicker glaze)

Preheat oven to 350 degrees. In a bowl, whisk 2 1/2 cups flour with baking powder and salt; set aside.

In a mixing bowl, cream butter and sugars on high speed until light and fluffy. Add eggs, one at a time, beating until incorporated. Beat in vanilla and lemon juice. Reduce speed to low; add flour mixture in three additions, alternating with two additions of sour cream.

In a bowl, toss blueberries and zest with remaining teaspoon flour; gently fold into batter. Coat a 12-cup nonstick Bundt pan with cooking spray. Spread batter in prepared pan.

Bake cake on bottom rack of oven until a toothpick inserted into center of cake comes out clean, 60 to 70 minutes. Cool in pan 20 minutes. Invert onto a rack; cool completely, top side up.

While cake is cooling, whisk lemon juice and confectioner sugar to create glaze. Mix until all the sugar has dissolved and there are no longer lumps. When the cake has completely cooled, drizzle glaze over the cake.

Serve and enjoy!

Condiments/Sauces · Pork

Celebrating National Corndog Day

National Corndog Day……yes, it does exist.

According to the National Corndog Day website, “National Corndog Day coincides with the Saturday of the final 32 teams in NCAA basketball tournament (this year it’s March 20th).” True, I can’t say that I am an avid college basketball fan but I am a huge supporter of any themed “food” day. So, in honor of this esteemed event, we made corndogs. 🙂

Ironically, I typically don’t enjoy corndogs—except for the ones served at Disneyland…mmm, those are amazing. Usually the batters are either too thick or don’t have enough flavor to them. But some time ago I came across an episode of Alton Brown’s “Good Eats” where he had such an interesting take on the corndog batter. And this particular holiday was the perfect reason to give Alton’s version a try.

We also decided to step up our game by making a homemade ketchup (or is it catsup?). It’s so easy to make without using any preservatives that I wonder why more people don’t do it. Plus, you can add just about anything to make a kicked-up ketchup……peppers, horseradish, curry powder, etc.

As for the corndogs…..wow, they were amazing. The batter had the perfect level of crispiness and was still crunchy 20-30 minutes after being fried. The textures that the canned corn and jalapenos gave were fantastic—which helped the batter to not be too thick or “doughy”. Alton used chopsticks to spear the hotdogs but I ended up using a few sturdy wooden coffee stirrers—courtesy of my local chained coffee shop 🙂 My one warning if you do decide to give this recipe a try (and I truly hope you will) is to be EXTREMELY careful when dropping the corndogs into the hot grease. Due to the whole corn kernels in the batter, the oil was popping like crazy! Definitely proceed with caution and wear a long sleeve shirt in case you get a little residual splatter. Lastly, when you drop the hot dogs in the oil, try and hold it in the grease with a pair of tongs for a little while before letting them go. If you don’t, the hotdogs will settle on the bottom of your pot and the batter will stick to the pot and not your hotdog. It happened to me and it was No Bueno.

These little bad boys will become a regular in mi casa for game days, movie nights—and any other time I can find an excuse to make them. You can probably cut the hotdogs in half, too, should you choose to make mini-corndogs.

So to you my friends, HAPPY NATIONAL CORNDOG DAY!!!

Prepping the batter.

The batter needs to rest for at least 10 minutes.

The hot dogs dredged in cornstarch.

Compiling the ketchup ingredients.

The ketchup needs to chill in the fridge for at least 30 minutes for the flavors to meld.

Ta-Da!!! Crispy Corndogs and Homemade Ketchup

______________________________________________

Corndogs
From Alton Brown

Ingredients

1 Gallon Peanut Oil (I used 1 quart of canola oil)
1 Cup Yellow Cornmeal
1 Cup All-Purpose Flour
2 Teaspoons Kosher Salt
1 Teaspoon Baking Powder
¼ Teaspoon Baking Soda
½ Teaspoon Cayenne Pepper
2 Tablespoons Jalapeno Pepper, seeded and finely minced
1 (8.5-ounce) Can Cream-style Corn
1/3 Cup Finely Grated Onion
1½ Cups Buttermilk
4 Tablespoons Cornstarch, for dredging
8 Beef Hot Dogs (I used Hebrew National)

Pour oil into a deep fryer or large heavy pot and heat to 375 degrees F. In a medium mixing bowl, combine the cornmeal, flour, salt, baking powder, baking soda, and cayenne pepper. In a separate bowl, combine the jalapeno, corn, onion, and buttermilk. Add the dry ingredients to the wet ingredients all at once, and stir only enough times to bring the batter together; there should be lumps. Set batter aside and allow to rest for 10 minutes.

Scatter the cornstarch into a dry pie pan. Roll each hot dog in the cornstarch and tap well to remove any excess.

Transfer enough batter to almost fill a large drinking glass. Refill the glass as needed. Place each hot dog on chopsticks, and quickly dip in and out of the batter. Immediately and carefully place each hot dog into the oil, and cook until coating is golden brown, about 4 to 5 minutes. With tongs, remove to cooling rack, and allow to drain for 3 to 5 minutes.

Ketchup

Ingredients

6 Ounces Tomato Paste
2-3 Tablespoons Rice Wine Vinegar (to taste)
1 Tablespoon Brown Sugar
2 Tablespoons Water
1 Teaspoon Soy Sauce
1 Teaspoon Garlic Powder
1 Teaspoon Onion Powder
Salt and Pepper to taste

In a small food processor, combine all ingredients until well incorporate. Refrigerate ketchup for 30 minutes before serving.

Note: For this particular batch, I added 1 teaspoon of prepared horseradish.