Breads

Mini Sourdough Bread Boules

Sourdough Bread Boules
Being the carb monster I am, it’s really no surprise that I’ve come to love baking bread–granted, it wasn’t always the case.

But now I find that there’s something about forming something so beautiful and delicious out of a few spare ingredients that most folks have in their cupboards. There’s something ritualistic about the process–and although time consuming, it is completely fulfilling.  Not to mention that we’ve been baking some type of bread, across the world/cultures for thousands and thousands of years.

Sourdough Bread Boules

Sure, some breads can be finicky and depending on the weather and moisture outside, you’ve got to adjust. But when you’ve kneaded that perfectly silky dough, it’s fantastic!

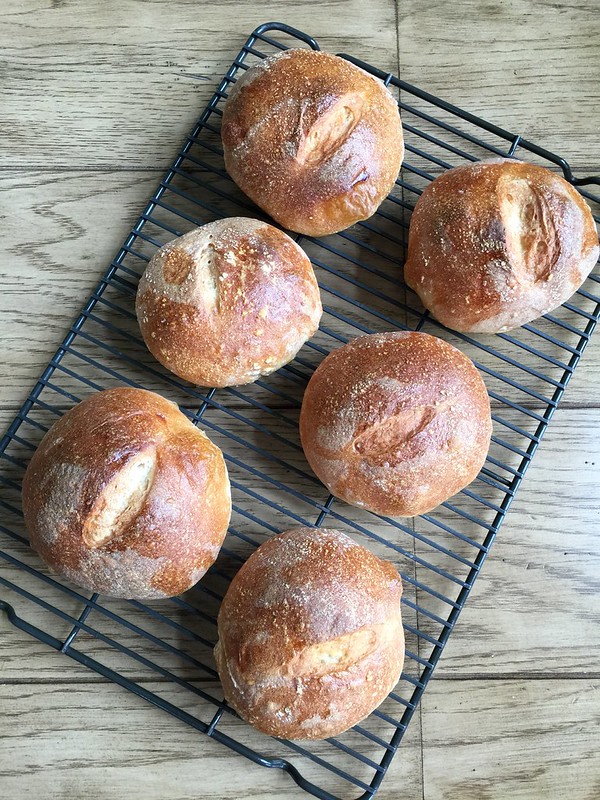
So for Maya’s birthday Fam Din where we served a delicious Clam Chowder that brother made, I quickly volunteered to bake the sourdough bread boules to go along with them. I had never officially baked my own sourdough, although it’s been on my to-do list for some time, but hey-it seemed like a great opportunity.

Sourdough Bread Boules

First off, I needed a “starter” that gives the bread that wonderful chew and flavor. Now, I’m not one of those lucky home bakers that have a starter stored in my fridge that has been handed down in my family for the past century. So I had to create my own.

It’s a fairly easy process that essentially involves “growing” a wild yeast over several days through a combination of water and flour. Every day, you “feed” your starter a little bit more of both as it bubbles away. At one point, you may begin to freak out as it starts to separate–and you may think–CRAP! It’s gone bad!

But don’t fret my pet. All is good–in fact, you want that to happen because that’s when you’ll know that you’ve got a fermentation party going on. Just stir it all up and keep on going with the process.

Sourdough Bread

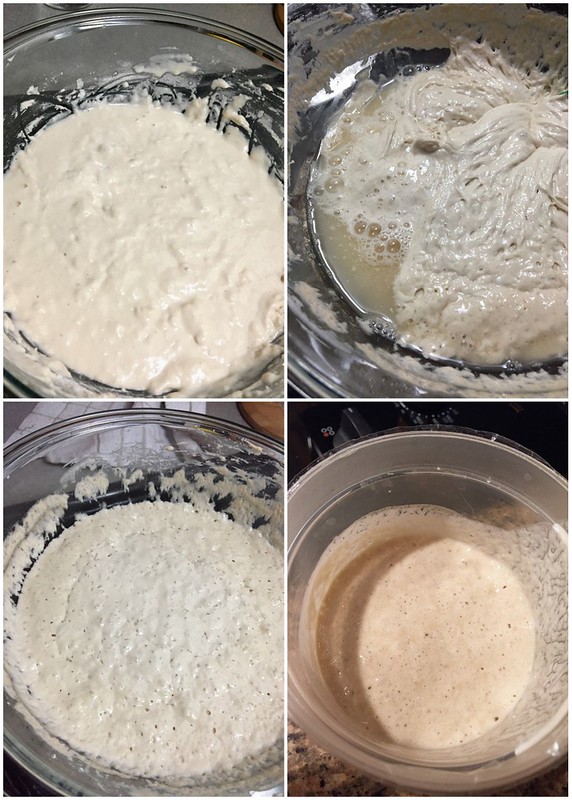
For this particular batch, I chose to make a starter based on a recipe found here. The only exception is that I grew my starter for about 8 days versus the 5 listed in the instructions.

But hey–if you’ve got your own starter recipe, or even better–have some already chilling in your fridge, by all means…go with that.

Sourdough Bread
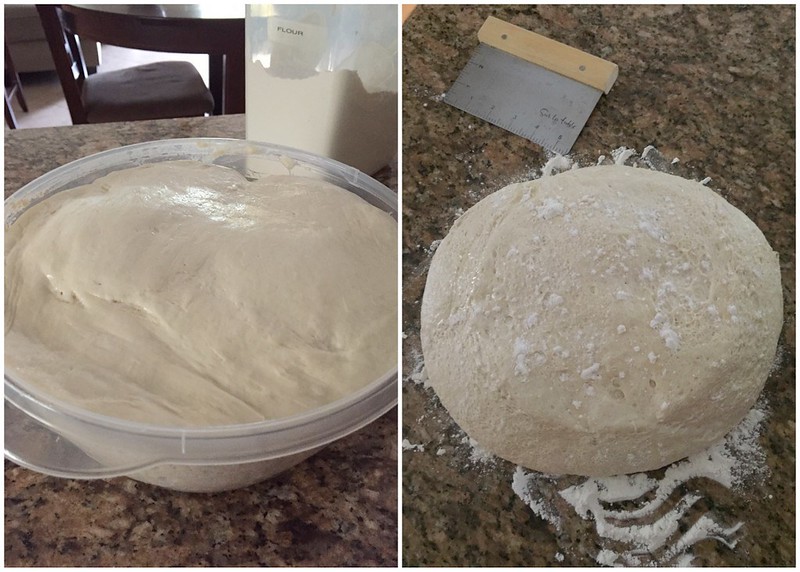
After you’ve introduced your finished starter with a bit of flour to create a “levain”, you’ll want to let it mingle together overnight before adding the final flours to proof. And boy oh boy, will it proof! All through the wonders of your starter and with no additional help of dried yeast.

Magic!

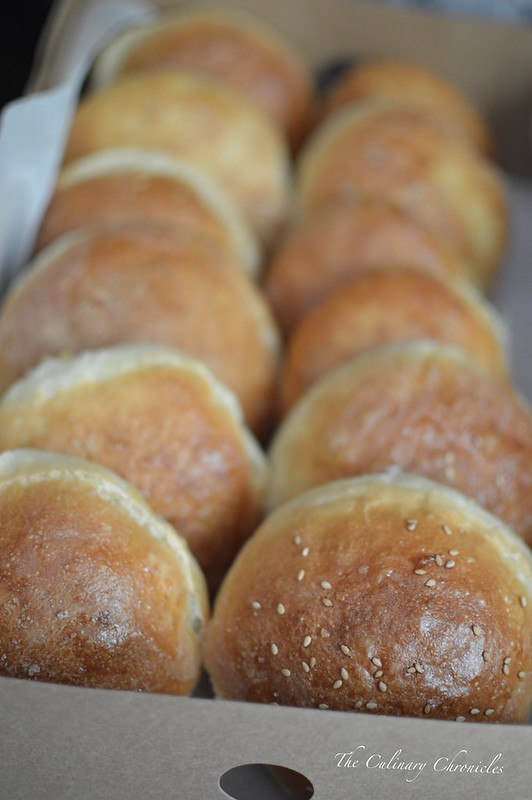
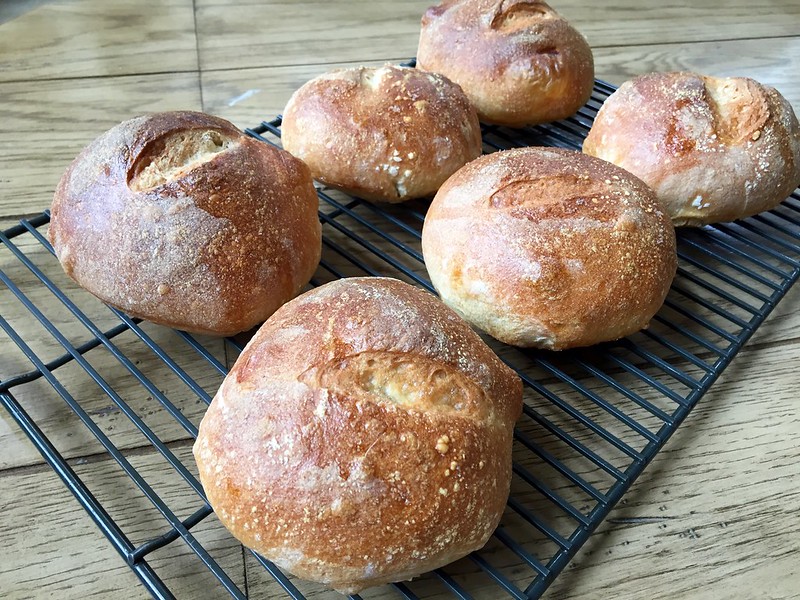
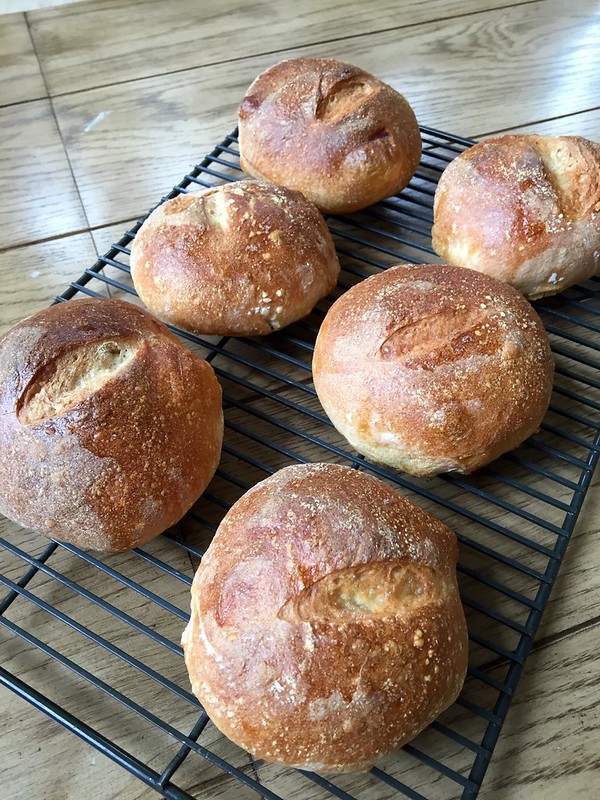
This recipe from Half Baked Harvest produced 6 good-sized boules out of the dough. However, I ended up forming them a little smaller to make 8 per batch. Since we were going to have lots of appetizers before dinner and intended to use them as chowder “vessels”, this smaller sized suited us well.

Sourdough Bread Boule
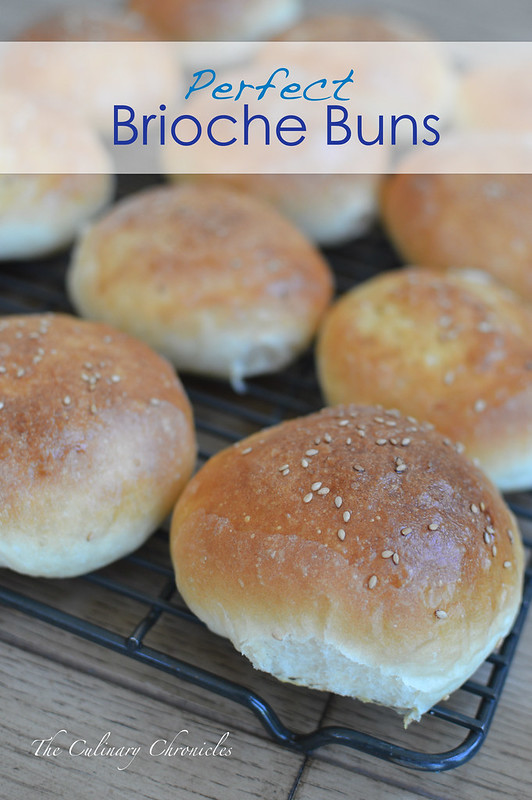
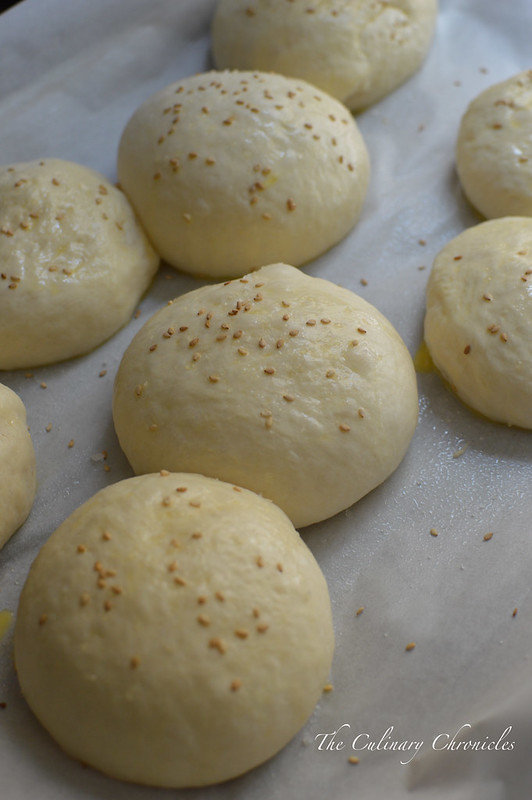
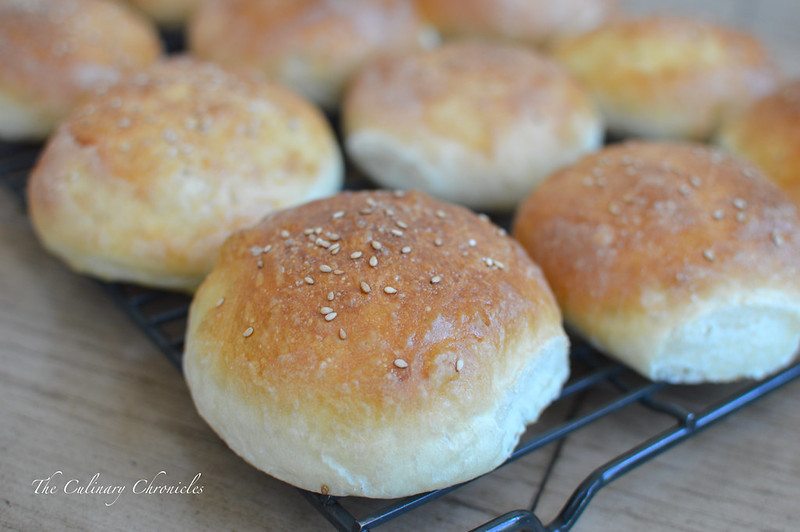
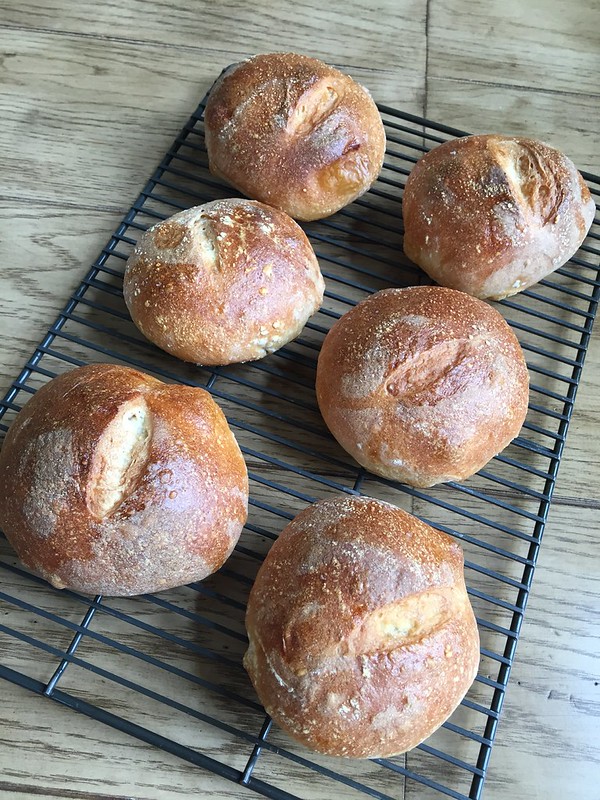
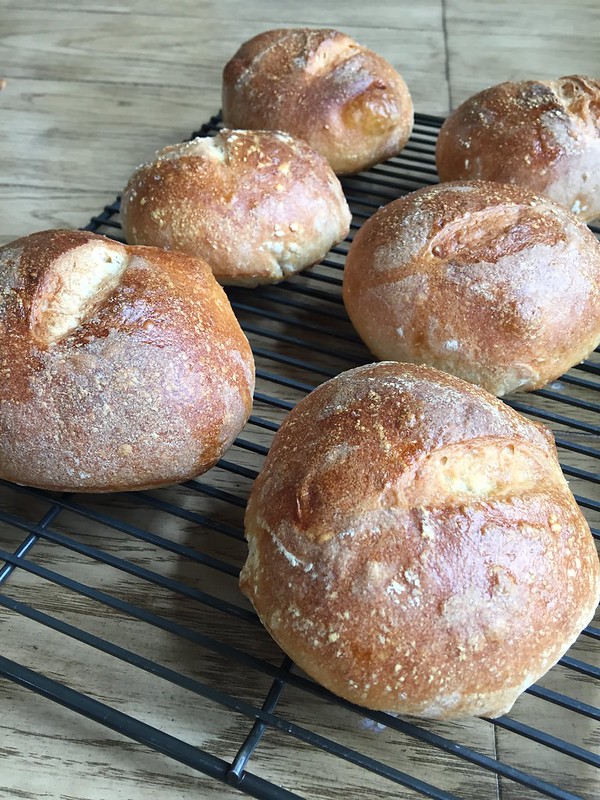
Prior to baking these little guys got brushed with an egg white wash and were quickly spritzed with water. These two additional steps gave them a beautiful golden sheen and helped to create the wonderful crisp exterior texture.

PERFECT sourdough characteristics!

February 2017 Family Dinner
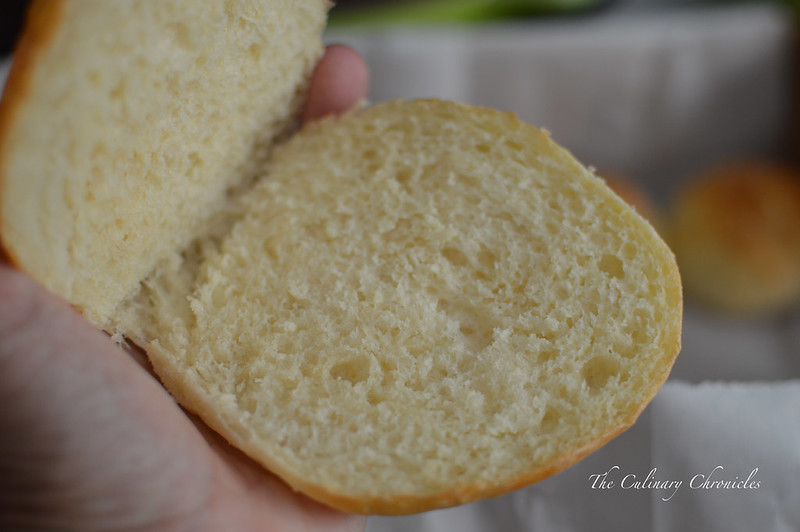
As for the crumb, I wish I would have taken a pic of the interior– it was spongy with great bubble pockets. The flavor was subtly sour—in fact, I would have preferred a bit more. But it was still slightly tangy. I think next time, I’ll give Tartine’s recipe a try now that I’ve gotten my feet wet.

February 2017 Family Dinner

But overall, I definitely recommend it! The method below is quite easy to follow–even for those new to bread baking.

Happy Sourdoughing!

__________________________________
Mini Sourdough Bread Boules
Makes 6-8 mini boules

Ingredients:

1 cup fed sourdough starter
1 1/2 cups lukewarm water
3 cups all-purpose flour
1 tablespoon granulated sugar
2 1/4 teaspoons salt
2 cups bread flour
1 tbsp water optional
1 tbsp egg white lightly beaten with 1 tablespoon water
water


In a large mixing bowl or the bowl of an electric mixer, combine the starter, water, and all-purpose flour. Mix together with a fork or wooden spoon until smooth. Cover with plastic wrap and let sit at room temperature for 4 hours.

Transfer the bowl to the refrigerator and chill overnight, at least 12 hours.

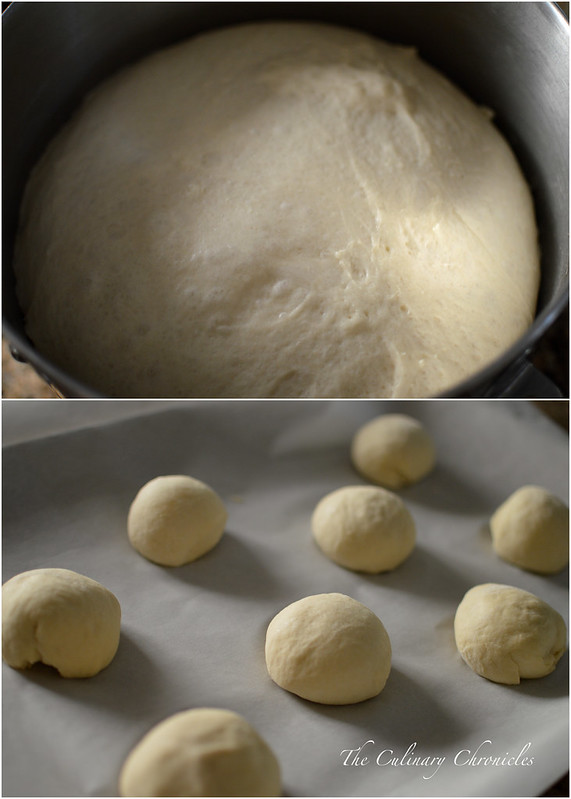
Remove the bowl from the refrigerator and add the sugar, salt, and bread flour to the sponge. Mix until a ball of dough begins to come together. If some of the dry ingredients will not incorporate into the dough, add the additional 1 tablespoon of water to moisten them. Continue kneading the dough (on low speed if using an electric mixer) until the dough is smooth and elastic, about 5-6 minutes. Form the dough into a ball and transfer to a large lightly oiled bowl, turning the dough once to coat in the oil. Cover with plastic wrap and let rise in a warm spot until doubled in volume, 3-4 hours.

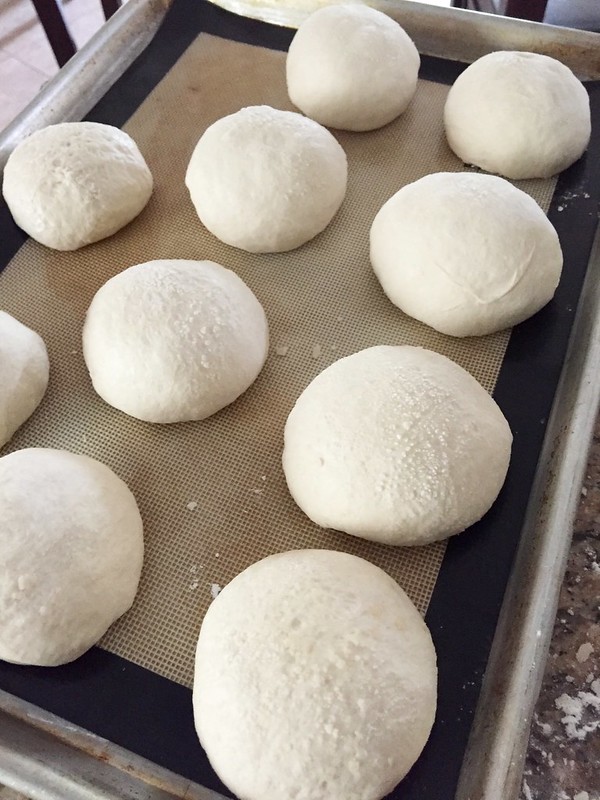
Line a baking sheet with a silicone baking mat or parchment paper. Transfer the dough ball to a lightly floured work surface and gently deflate the dough. Divide the dough into eight equal portions. Form each piece of dough into a ball, and tuck any loose edges or seams underneath. Place seam-side down on the prepared baking sheet. Repeat shaping with the other 7 pieces of the dough. Transfer the shaped boules to the prepared baking sheet. Cover loosely with lightly oiled plastic wrap. Let rise in a warm place until nearly doubled in volume, about 2-3 hours.

Place a baking stone or large dutch oven in the oven and preheat the oven to 425? F. Allow the pot to preheat for at least 20 minutes. Just before baking, lightly slash the top of each boule using a sharp serrated knife. Brush the exposed surface of the loaves with the egg wash. Spray the loaves lightly with water. Slide the entire baking sheet onto the baking stone or carefully place 4 boules in the dutch oven with the top on. Bake about 28-32 minutes, rotating the pan halfway through baking, until the crust is golden brown. If baking with the dutch oven repeat once the first four have been baked. Transfer the finished boules to a wire rack and let cool at least 30 minutes before slicing and serving.

Recipe From: Half Baked Harvest

Breads

Perfect Broiche Buns

Perfect Brioche Buns

Hey y’all! Happy Memorial Day weekend!!!

What is everyone up to? Camping? Beach bonfires? BBQ grilling?

Perfect Brioche Buns

If grilling is on your to do list for tomorrow, I’ve got a little something that will be a GAME CHANGER for you—the most perfect Brioche Buns!

Remember when my fam bam made these seafood burgers the other month for our Sunday Family Dinner?

Seafood Burgers

The seafood patties and fixins’ were definitely the star of the show but the buns….OH THE BUNS! It’s what took things over the top!

Perfect Brioche Buns

The recipe comes from the former Comma Ca restaurant in LA and have been on my must-bake list for a long time now. And I’ve got to tell you, after having made them, I will look no further because they really are perfect.

Perfect Brioche Buns

Fluffy but firm enough to be able to hold your burgers or sammies together.

And take a look at the crumb! I die.

Perfect Brioche Buns

They’re buttery yet slightly sweet and can be topped with anything from sesame seeds, poppy seeds, or garlic and onions.

Perfect Brioche Buns

So even if you have already picked up a package of buns from the store—nix them! Because when you pull out these perfect Brioche Buns to serve your fam and loves ones, they will likely break out into song and dance to sing your praises.

I’m talking full on High School Musical style…

Errrrr...you know what I mean.

Perfect Brioche Buns

Make these now! Make them forever!

And absolutely make these for Memorial Day! Have a great weekend friends ! ❤

_____________________________________

Brioche Buns
Makes 8 large buns

Ingredients:

3 tablespoons warm milk
2 teaspoons active dry yeast
2 ½ tablespoons sugar
2 large eggs
3 cups bread flour
⅓ cup all-purpose flour
1 ½ teaspoons salt
2 ½ tablespoons unsalted butter, softened

In a glass measuring cup, combine 1 cup warm water, the milk, yeast and sugar. Let stand until foamy, about 5 minutes. Meanwhile, beat 1 egg.

In a large bowl, whisk flours with salt. Add butter and rub into flour between your fingers, making crumbs. Using a dough scraper, stir in yeast mixture and beaten egg until a dough forms. Scrape dough onto clean, unfloured counter and knead, scooping dough up, slapping it on counter and turning it, until smooth and elastic, 8 to 10 minutes.

Shape dough into a ball and return it to bowl. Cover bowl with plastic wrap and let rise in a warm place until doubled in bulk, 1 to 2 hours.

Line a baking sheet with parchment paper. Using dough scraper, divide dough into 8 equal parts. Gently roll each into a ball and arrange 2 to 3 inches apart on baking sheet. Cover loosely with a clean kitchen towel and let buns rise in a warm place for 1 to 2 hours.

Set a large shallow pan of water on oven floor. Preheat oven to 400 degrees with rack in center. Beat remaining egg with 1 tablespoon water and brush some on top of buns. Bake, turning sheet halfway through baking, until tops are golden brown, about 15 minutes. Transfer to a rack to cool completely.

*Recipe from the New York Times via Comma Ca restaurant, Los Angeles

Breads

Buttermilk Bread Loaf

Buttermilk Bread Loaf

If you’re anything like me, you have a few ingredients in your fridge that dictate your menu. As in, if I don’t use this within the next day or so, I’ll have to throw it out. Like wilting spinach or proteins that you may have prematurely defrosted.

For me, that often occurs with produce or dairy items—and almost always, buttermilk. Sure, some would say, “Why don’t you just freeze it?” or “Mix some whole milk with lemon juice instead of buying buttermilk?”. Now the latter would make sense if I ever had whole milk in the fridge (other than when I bake or make ice creams) and freezing an upwards of 2+ cups of buttermilk seems odd to me.

Buttermilk Bread Loaf

So when I do find myself with a quart of buttermilk, I’ll deter to my trusted favorite recipes that call for it. Such as Buttermilk Fried Chicken, Red Velvet Banana Pancakes, Blackberry Muffins, or Cheddar Cheese Biscuits.

And of course, this wonderfully quick and easy Buttermilk Bread Loaf. This is one of my go-to recipes for loaf bread as it’s no knead and doesn’t require anytime to bloom the yeast. Sure, it does take a couple of minutes to warm up the buttermilk but other than that, your stand mixer does all the work. And you don’t even need the dough hook!

It’s quite a forgiving dough–perfect for those who are freaked out about yeast recipes. But the end results in a wonderful exterior crust and light interior crumb. Plus, the buttermilk gives a slight tang to the bread.

Start to finish, you’ll have fresh bread in less than 1.5 hours–and that includes proofing time! Can’t beat that!

Recipe from Elinor Klivans via Leite’s Culinara

Condiments/Sauces · Vegetables/Vegetarian

Caprese Sandwiches with Balsamic Vinegar Reduction

Caprese Sandwiches

I recently had a two week stint gorging myself on fresh, sweet, summer heirloom tomatoes. I just couldn’t help it–DELICIOUS and so colorful!

I had to take advantage of the few short weeks left of summer when these beauties are best here in San Diego and enjoyed them in salads, over pizzas, as a condiment (pico de gallo), as a light side dish and of course– in sandwiches.

Caprese Sandwiches

One of my fav go-to “salads” is Insalata Caprese which usually consists of tomato slices, fresh mozzarella, basil leaves and olive oil. I also like to serve them as appetizers by making little caprese skewers and use sweet grape tomatoes instead of tomato slices.

Caprese Sandwiches

For a light lunch, I grabbed a few heirlooms I had picked up earlier that morning to make Caprese Sandwiches. These sammies have all of the traditional fixins’ of Insalata Caprese with the addition of a rich and thick reduction of balsamic vinegar. The reduction adds a light sweetness and acidity to the sandwich which pairs so well with the cool tomatoes, velvety mozzarella and floral basil.

Total winner and can be whipped up Lickety- Split…..

In a jiffy……

In a blink of the eye……

In the speed of light…..

In no time flat……

……… Really fast. You get the point.

Did I mention these would be FAB for picnics?

______________________________________________________________

Caprese Sandwiches with Balsamic Vinegar Reduction
Serves 2

Ingredients:

1 cup balsamic vinegar
2-3 pinches sugar
1/2 teaspoon red chili flakes
2 ciabatta rolls, toasted (or bread of your choice)
8-10 fresh whole basil leaves, washed and dried
4 ounces fresh mozzarella cheese, sliced
2-3 heirloom tomatoes, sliced
sea salt or kosher salt

In a small sauce pan, add the vinegar, sugar and chili flakes. On medium-high heat, bring to a boil, stirring often. Reduce the heat to a low simmer. Continue stirring and cooking until the liquids have reduced by half and take on the a thick, syrup consistency. Be sure to watch the reduction closely as it can burn quickly. Transfer to a bowl and allow to cool.

Slice each of the toasted rolls in half. Place half of the basil leaves on the bottom piece of bread and top with a few slices of cheese. Drizzle some of the balsamic vinegar reduction over the mozzarella and top with slices of tomato. Lightly sprinkle sea salt over the tomatoes and place the other 1/2 of the roll on top. Enjoy!

Sponsored

My Golden Ticket to Kings Hawaiian

KH Spreads Aloha

I was always so envious of that Charlie.

Don’t get me wrong–he totally deserved it but to get FULL access to Willy Wonka’s Factory?! C’mon Now! How must have that felt? What did he do? What amazing aromas did he smell?

And then out of the blue, I got my Golden Ticket…….to the AMAZING Kings Hawaiian in Torrance, California. JACKPOT!!

KH Spreads Aloha

In 1950, Robert Taira, opened up a bakery in Hilo, Hawai’i featuring delicious baked goods inspired from his neighbor’s ONO Portuguese bread. After much determination and ambition, Kings Hawaiian has not only become the number one dinner roll in the country but also offers delicious local grindz and pastries.

So you can imagine my utter glee when I accepted their invitation to participate in their first EVER public tour!!!! Chhheeeee-Hoooooo!!

KH Spreads Aloha

After being warmly greeted with fresh floral leis, POG juice and fresh fruit, we were given an Aloha from Kings Hawaiian’s CEO, Mark Taira. Mark and the ‘Ohana, gave us an overview of the history of KH and where the organization was headed. And before the bread comatose kicks in, let me say, that the KH organization truly exudes the spirit of Aloha.

I have had the fortunate privilege to spend some time in Hilo. And unlike it’s hustle-bustle sister-city of Honolulu, Hilo is a little slower paced and focuses on communal-‘ohana living. And I’m proud to say that the organization of Kings Hawaiian exudes every part of that.

KH Spreads Aloha

We were then privy to a first hand tour of the factory and OH….MY…GAWD.

Words CANNOT begin to describe the delicious aromas that filled ALL of my senses. It took EVERY ounce of will power for me to not reach over the belts and grab a roll.

KH Spreads Aloha

And lucky for us at the end of our factory tour, our group was able to sample fresh rolls that were steaming HOT right out of the ovens, pulled from the conveyer belts, and into my mouth. Good grief! Did I mention that we slathered them with butter?!

At that point, I had died and gone to heaven.

KH Spreads Aloha

We were then escorted to an amazing luncheon featuring local food trucks who used King Hawaiian products in their dishes. SERIOUSLY!?!

Lobsta Truck, Kogi BBQ, Ludo Truck, Buttermilk Truck and ONO grindz from Kings Hawaiian! Everything was so flipping ONO-LICIOUS that my only question was–Why didn’t someone tell me to wear elastic waistband pants?!?

Everything I tasted hit a note that made me do a Happy Dance.

At the end of the day, I walked away with the following:

  • What makes Kings Hawaiian stand out from the rest is their impeccable quality and TRUE Aloha Spirit;
  • Their products taste FANTASTIC with EVERYTHING;
  • Never doubt that a business model of ‘Ohana can create an AMAZING organization.

KH Spreads Aloha

Mahalo nui loa Kings Hawaiian for the wonderful day and memorable experience! Your spirit has truly inspired me.

Much, MUCH Alohas,

ps. And to the ROCKIN’ bloggers, food writers, and food lovers I met that day—let’s K.I.T.!!!

pps. Stay tuned as some RAD recipes featuring Kings Hawaiian bread will soon to follow!

Breads · Desserts/Pastries

Nutella Swirled Banana Bread

Nutella Swirled Banana Bread

I’m Bananas…..

For Nutella.

Shocking— I know.

Nutella Swirled Banana Bread

So why not add Nutella to Banana Bread? Seemed like a Win-Nguyen Situation to me.

And it sure was 🙂

______________________________________

Nutella Swirled Banana Bread
Makes one 9-inch loaf

Ingredients:

2 cups unbleached all-purpose flour
3/4 cup sugar
3/4 teaspoon baking soda
1/2 teaspoon salt
3 very ripe, soft, darkly speckled large bananas, mashed well
1/4 cup plain yogurt
2 large eggs, beaten lightly
3/4 stick (6 tablespoons) unsalted butter, melted and cooled, plus more for the pan
1 teaspoon vanilla extract
6 tablespoons Nutella

Adjust an oven rack to the lower-middle position and heat the oven to 350°F (175°C) degrees. Butter the bottom and sides of a 9 by 5-inch loaf pan. Dust the pan with flour, tapping out the excess.

Whisk the flour, sugar, baking soda, and salt together in a large bowl. Mix the mashed bananas, yogurt, eggs, butter, and vanilla with a wooden spoon in a medium bowl. Lightly fold the banana mixture into the dry ingredients with a rubber spatula until just combined and the batter looks thick and chunky. Spoon 1/2 the batter into the prepared loaf pan. Spread 1/2 the Nutella on top and lightly swirl the Nutella into the batter with a butter knife. Do not over mix. Spoon the rest of the batter on top and repeat with Nutella swirls.

Bake until the loaf is golden brown and a toothpick inserted in the center comes out clean, about 60 minutes. Cool in the pan for 5 minutes, then transfer to a wire rack. Serve warm or at room temperature. (The bread can be wrapped with plastic wrap and stored at room temperature for up to 3 days.)

Slightly adapted from Cooks Illustrated

Breads

American Sandwich Bread

American Sandwich Bread

THIS is what dreams are made of.

Well…..at least MY “carb loving dreams”.

American Sandwich Bread

Inspired to bake sliced bread for my lunchtime sandwiches, I took to Baking Illustrated for their American Sandwich Bread recipe.

The dough came together quite easy and was an absolute dream—beautifully silky and smooth. You do however, need a bit of patience when it comes to mixing the dough but just let your stand mixer do the work for you.

Quick tip: Sometimes when I have my mixer going for a long time, the bowl can get stuck in the stand with all that whirling going on. To prevent that from happening, cover the bottom of your metal mixing bowl with a little bit of cooking spray before twisting it onto the mixing stand.

American Sandwich Bread

The recipe calls from a 9-inch loaf pan but unfortunately my largest metal loaf pan is only 7 inches. I was a bit nervous to see how my glass pan would work out but luckily, it came out quite good. Though note to self: Keep my eyes open for 9-inch metal loaf pans on sale 🙂

American Sandwich Bread

Baking Illustrated did not lead me astray with this recipe as the bread was really delicious. The pan of water in the oven helped create a wonderful crust for the loaf and the crumb was light and slightly spongy. Not to mention that it made my home smell amazing and the loaf of bread was quite stunning if I do say so myself. In fact, when I brought my turkey sammy in for lunch (using the bread of course), my coworkers wouldn’t believe me that I had baked the bread! What naysayers!

But one thing is for sure, with bread so delicious and easy, there really is no need for me to buy my once beloved supermarket-sliced-bread again 🙂

_______________________________________

American Sandwich Bread

Ingredients:

3 ¾ cups all-purpose flour
2 tsp. salt
1 cup warm whole milk (about 110°)
1/3 cup warm water (about 110°)
2 tbsp. unsalted butter, melted
3 tbsp. honey
1 envelope (about 2 ¼ tsp.) instant yeast

Adjust an oven rack to the lowest position and heat the oven to 200°.  Once the oven temperature reaches 200°, maintain the heat for 10 minutes, then turn off the oven.

Mix 3 ½ cups of the flour and the salt in the bowl of a stand mixer fitted with the dough hook.  Mix the milk, water, butter, honey and yeast in a 4-cup liquid measuring cup.  Turn the machine to low and slowly add the liquid.  When the dough comes together, increase the speed to medium and mix until the dough is smooth and satiny, stopping the machine two or three times to scrape dough from the hook, if necessary, about 10 minutes.  (After 5 minutes of kneading, if the dough is still sticking to the sides of the bowl, add flour 1 tablespoon at a time and up to ¼ cup total, until the dough is no longer sticky.)  Turn the dough onto a lightly floured work surface; knead to form a smooth, round ball, about 15 seconds.

Place the dough in a very lightly oiled large bowl, rubbing the dough around the bowl to coat lightly.  Cover the bowl with plastic wrap and place in the warmed oven until the dough has doubled in size, about 40-50 minutes.

On a floured work surface, gently press the dough into a rectangle 1 inch thick and no longer than 9 inches.  With a long side facing you, roll the dough firmly into a cylinder, pressing with your fingers to make sure the dough sticks to itself.  Turn the dough seam-side up and pinch it closed.  Place the dough seam-side down in a greased 9×5-inch loaf pan and press it gently so it touches all four sides of the pan.  Cover with plastic wrap; set aside in a warm spot until the dough almost doubles in size, 20-30 minutes.

Keep one oven rack at the lowest position and place the other at the middle position and heat the oven to 350°.  Place an empty baking pan on the bottom rack.  Bring two cups of water to boil in a small saucepan.  Pour the boiling water into the empty pan on the bottom rack and set the loaf onto the middle rack.  Bake until an instant-read thermometer inserted at an angle from the short end just above the pan rim into the center of the loaf reads 195°, 40-50 minutes.  Remove the bread from the pan, transfer to a wire rack and cool to room temperature.  Slice and serve.

From Baking Illustrated

Breads

Peter Reinhart’s Rich Man’s Brioche

Peter Reinhart's Rich Man's Brioche

One pound of butter is in this brioche.

Yep. You read correctly. One POUND!

And worth every calorie.

Peter Reinhart's Rich Man's Brioche

With that in mind, it’s no wonder why Peter Reinhart named this the Rich Man’s Brioche in  The Bread Baker’s Apprentice. Moist and quite frankly, downright buttery. Did I mention, 1 POUND of butter?? 🙂

With the family together last weekend, I was inspired to bake up some brioche for a decadent morning bite. For the sponge and proofing time, you need to get this project started early on—in my case, the night before. We didn’t’ have those cute fluted brioche molds on hand and resorted to baking 2 loaves with the dough instead. Per my sis’ suggestion, I formed the brioche into 4 “logs” per pan to make “pull apart loaves”. You can find the recipe here.

Peter Reinhart's Rich Man's Brioche

The brioche came out a lovely color with a great crust and beautiful crumb. However next time, I think I’ll add an additional tablespoon of granulated sugar into the dough for just a tad more sweetness. Serve warm with a bit of preserves (homemade olallieberry in our case) and a steaming cup of joe and you’ll be in a very happy place!


And stop by on Monday to check out our birthday celebration for a very special little gal. 🙂

Appetizers/Small Plates · Vegetables/Vegetarian

Bruschetta with Smoked Mozzarella Cheese

Bruschetta with Smoked Mozzarella Cheese

For a good chunk of my life, I didn’t like tomatoes.

I thought they were mealy and rather “bleh” in flavor. I’d pick them out of salads, burgers, well….pretty much out of everything.

And you know what the problem was? For the first 20+ years of my life, I was eating BAD tomatoes!

Because when you take a bite out of a gorgeous tomato at its peak in the season, it’s absolutely delicious! They’re sweet and juicy with the right balance of acidity. And last summer, I even found myself growing the most beautiful Early Girl Tomatoes via our Topsy Turvy. (For the record, the Topsy Turvy is awesome!)

Needless to say, I was missing out for so many years!


Bruschetta with Smoked Mozzarella Cheese

One of my favorite ways to enjoy fresh tomatoes are in Bruschetta. The simplicity of ingredients paired with the herbaceous basil  really highlights the true flavor of the tomato. On its own, it’s quite fabulous but I decided to add a spin by throwing in some smoked mozzarella cheese I stumbled on at my local specialty market. It was perfect!

And on warm summer nights like we’ve been having, I could eat Bruschetta every day! Mom would be proud that I’m eating my veggies 🙂

_________________________________________

Bruschetta with Smoked Mozzarella Cheese
Serves 4 as an Appetizer or 2 for a Light Meal

Ingredients:

1½ Cups Tomatoes, diced
½ Cup Smoked Mozzarella Cheese, cubed
¼ Cup Fresh Basil, leaves torn
1 Garlic Clove, finely minced or grated
1 Tablespoon Good Quality Balsamic Vinegar
1 Tablespoon Good Quality Extra Virgin Olive Oil
Kosher Salt and Black Pepper

In a bowl, mix together the tomatoes, cheese, basil, garlic, vinegar, and oil. Season with salt and pepper. Cover and refrigerate for at least 20 minutes. Taste and adjust seasonings accordingly. Serve with your choice of flat bread or toasted baguettes.

Breads

Pain d’Epi (Wheat Stalk Bread)

Pain d'Epi


Stick a fork in me….I’m done.

And by “done”, I mean that I am DONE searching for a reliable bread recipe that is relatively easy, fuss-free, and above all—tasty. Because I found the recipe of my dreams from Jeff Hertzberg and Zoë François—authors of Artisan Bread in Five Minutes.


Pain d'Epi


Their objective was wonderful really…..to create amazing home baked bread with only 5 minutes of “active preparation”. 5 Minutes and NO Kneading! The dough can also sit in your fridge for up to 2 weeks which means fresh baked bread whenever your heart desires 🙂


Pain d'Epi


Their master recipe dough can be formed into any shape that you like. I usually lean towards a boule or baguette as it’s the quickest to shape. But when I want the maximum amount of “crunch” and “crust”, I shape a Pain d’Epi—or “wheat stalk” bread. I love how you can just tear off a section of the Pain d’Epi and essentially have your own little mini baguette. Wonderfully crunchy texture on the outside and soft-spongy interior. DEEEEE-luxe.

My Bread Baking Life will never be the same 🙂

_________________________________________

Pain d’Epi (Wheat Stalk Bread)
Adapted from Artisan Bread in Five Minutes a Day

Master Dough Ingredients:

6½ Cups All Purpose Flour
1½ Tablespoons Active Yeast
1½ Tablespoons Kosher Salt
3¼ Cups Warm Water
Olive Oil
Additional Flour (for dusting)
1 Cup Hot Water (for baking)

Add the yeast to the water. Allow it to activate and get foamy—about 10 minutes.  In a large bowl, combine the flour and salt together. Add the yeast/water mixture and stir it until all of the flour is incorporated into the dough. The dough will be really shaggy and rough. You can also do this step in a stand mixer but be sure to only “mix” until the ingredients have combined. You are not looking to knead the dough.

Transfer dough to a large container (at least a 5 quart) that has been greased with olive oil. Put the lid on the container but do not seal it completely as you need to allow some of the gases to escape during the proofing process. Allow the dough to sit at room temperature for about 2 hours to rise.  At this point, the dough should be really bubbly and would have filled the majority of your container. Do not punch down the dough—it will deflate the air bubbles. Seal the lid completely and refrigerate. The dough can be used after a few hours or can be stored for up to two weeks.

When you are ready to make your bread, uncover your container and dust the surface of the dough with a little flour. Pull out desired loaf amount and cut off with floured kitchen shears. Lightly flour the dough and form a ball by folding the dough over on itself several times. Cover the dough and allow to rest for about 30 minutes.

If using a baking stone, place it in the middle rack of the oven and place an empty broiler pan on the rack directly below it. Preheat oven to 450 degrees.

Once rested, take the dough and gently shape it into an oval. Fold the dough in thirds (like a letter) and bring in one side and gently press it into the center. Bring up the other side and pinch the seem closed. Stretch the dough very gently into a log. You don’t want to compress the air out of the dough. If it resists your pulling on it then let it rest for just a moment to relax the glutens. Continue to work the dough until you have a nice thin baguette. It is okay if you let the dough rest a few minutes and then come back to it to give it a gently stretch.

Cover a large baking sheet with parchment paper. Sprinkle corn meal in a low row and place your baguette on top of it. With your kitchen scissors cut the dough from one end at a 45 degree angle until you are about a 1/4″ from the cutting board. Being careful not to cut all the way through the dough. Lay the piece you’ve cut over to one side. Continue to cut in this fashion until you’ve reached the other end.

Once completed, slide the formed Pan d’Epi onto the baking stone in the preheated oven. If you’re not using one, place the entire baking sheet on the middle rack. Put a cup of hot water into the broiler tray below the baking stone/baking sheet and quickly shut the door. Bake for about 30 or until it is nicely browned. Allow to cool completely on racks. If you cut into it too early, you may get a tough crust and a gummy interior.

**You can find step-by-step photos on how to form a Pain d’Epi here.