Desserts/Pastries

Ring in the New Year with Earl Grey Macarons

Earl Grey Macarons

Whether you’re at a large gala, intimate gathering or a cozy night at home — your New Year’s Eve countdown absolutely must have bubbly.

#MyFav

Earl Grey Macarons

And you know what is the perfect accompaniment to bubbly?

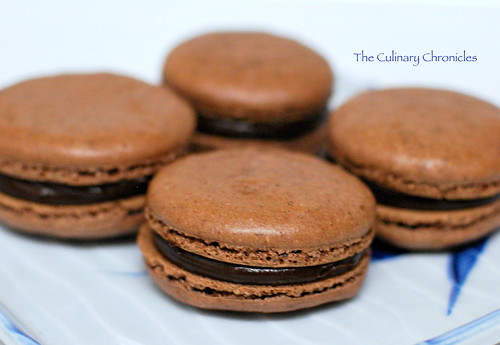
Parisian Macarons of course! The sweet little gems are a wonderful pairing to the dry sparkling wine. An absolute match made in heaven.


Earl Grey Macarons

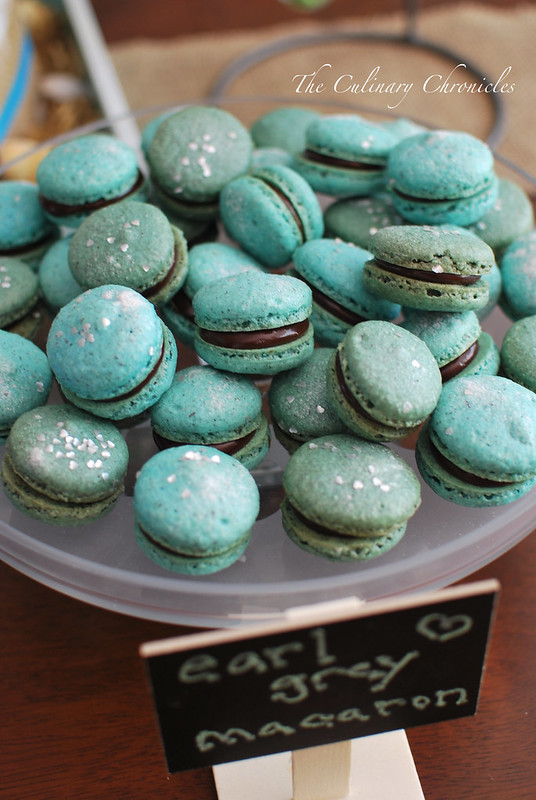
Ever since I started baking macarons, my seester T had been trying to convince me to make an Earl Grey version — an homage to her favorite macarons from Bottega Louie in LA.

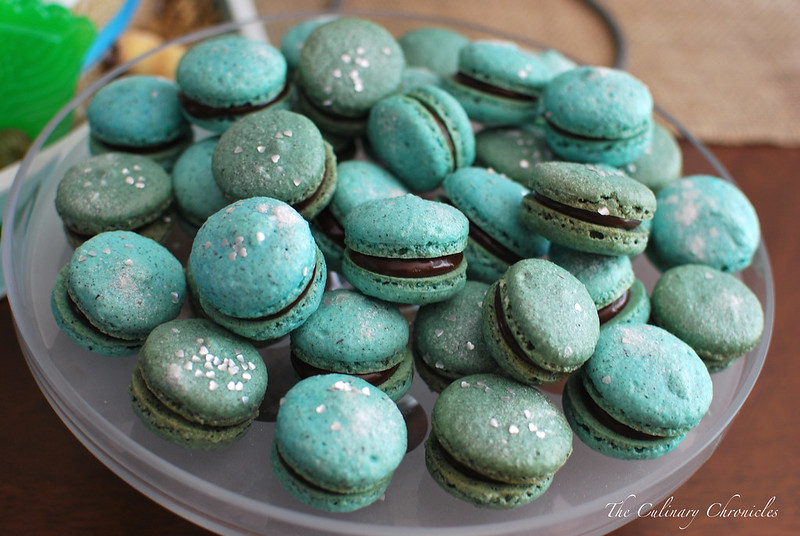
This past summer, I finally was able to get the proportions down and they even made an appearance at my seester P’s baby shower. The shells have a great floral scent with a bit of spice–stemming from the bergamot of the tea. The little specks of tea with a sprinkle of disco dust add to the charm to the shells as well.

Earl Grey Macarons

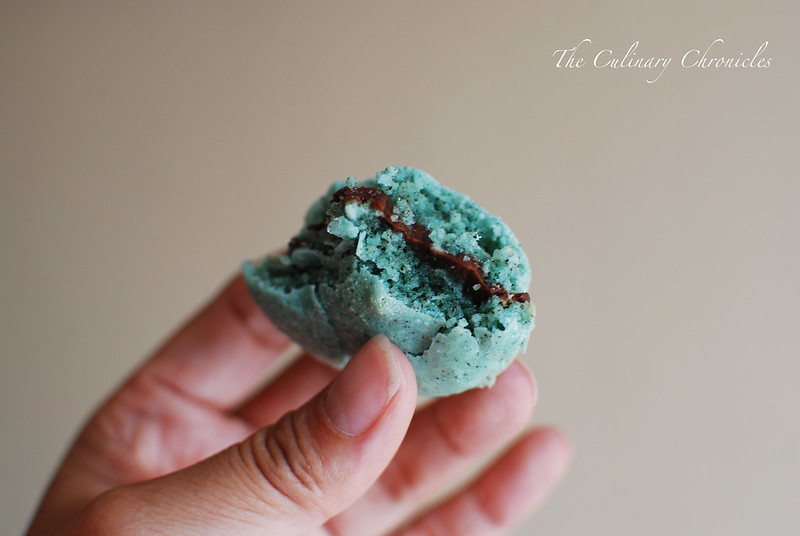
I know I have a propensity towards filling almost all of my macarons with chocolate ganache, but I promise, it really is the perfect filling for the Earl Grey flavor. But if you prefer a non-chocolate approach (which is both strange and crazy to me), I’d recommend a myer lemon curd or even an Earl Grey Buttercream.

Earl Grey Macarons

However you choose to fill it, you must have these little beauties for your countdown to 2015. What better way to ring in the year than with the perfect little sweet treat.

And with that dear friends, Happy New Year!!!

_______________________________________________

Earl Grey Macarons filled with Chocolate Ganache

Ingredients:


Macaron Shells:
110 grams almond meal or blanched almonds
15 grams loose Earl Grey tea leaves (about 2 tea bags)
170 grams confectioner’s sugar
100 grams egg whites, aged at room temperature for 24 hours
40 grams granulated sugar
powdered food color (optional)
edible glitter (optional)

If using blanched almonds, pulse the almonds in a food processor until it becomes finely ground. In a spice grinder, grind the tea leaves into a fine powder. In a bowl, sift together the ground almonds (or almond meal), tea powder and the confectioner’s sugar. Set aside.

In a mixing stand fitted with the whisk attachment, whisk egg whites until frothy. Slowly add granulated sugar and continue beating until stiff peaks are formed. Carefully begin incorporating the dry mixture into the meringue, gently folding until all items have been integrated and a smooth batter has been formed. Optional: Halfway through the folding, add in the food color.

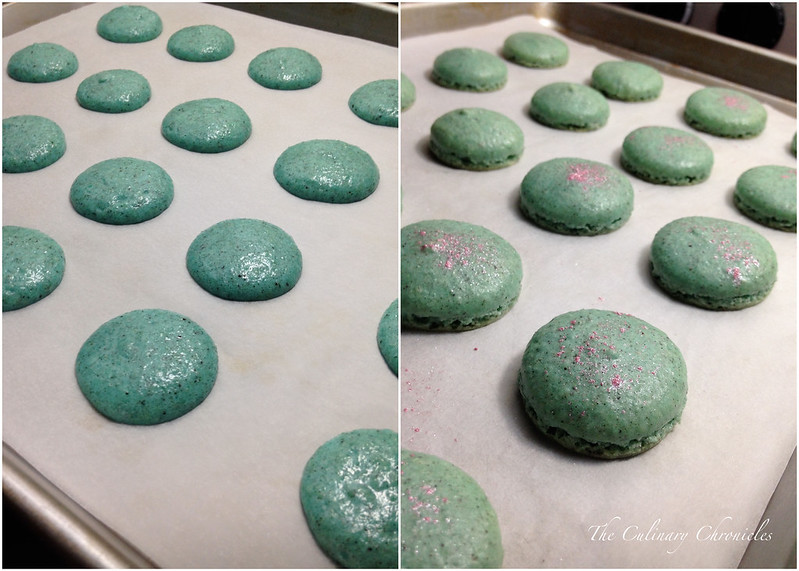
Using a pastry bag fitted with a large round tip, pipe small rounds of the mixture onto baking sheets lined with silicon mats. Rounds should be about 1-1½ inches in diameter. Once the baking sheets are filled, carefully tap the sheets on the counter to remove any possible air pockets. Let the macaron shells sit on the counter for 45-60 minutes to harden the outer shell before baking. Humidity will affect how long it takes for the “skin” to form but the shells should not be sticky when you gently touch them. Optional: If you choose to use edible glitter, sprinkle on the shells after it’s dried for 15 minutes.

Bake the shells at 290 degrees F for 18-20 minutes. Transfer the baking sheets to cooling racks and cool completely before removing shells. Macarons shells can be made up to 24 hours in advance before filling and should be stored in airtight containers.

Chocolate Ganache
4 ounces heavy cream
5 ounces bittersweet chocolate, finely chopped

In a small saucepan, bring the heavy cream just to a boil. Remove and pour the scalded cream through a fine-meshed sieve directly into the bowl of the chopped chocolate. Let the mixture sit for 1 to 2 minutes and then gently whisk until the ganache is smooth and glossy. Allow the ganache to sit for 20-30 minutes at room temperature until it becomes thick enough to pipe.

Fill the flat side of a macaron shell with ganache and sandwich with another shell. Filled macarons can be kept up to 2 days in airtight containers.


Desserts/Pastries

Chocolate Raspberry Cupcakes

Chocolate Raspberry Cupcakes


It’s been a minute since I’ve baked Cupcakes. In fact, I gave up baking for the entire month of January. The holidays just wiped me out and I needed some reprieve.

But lately when I open up my cabinets, I see my little muffin/cupcake pans looking at me sadly. You know what I’m talking about. It’s the “why have you abandoned us” kind of look.

These little pans have been good and loyal….. and they were in need of some TLC.

So when I made plans to reconnect with some old friends the other day, I thought it was high time to whip them out, blow off the dust, and get Cupcakin‘!


Chocolate Raspberry Cupcakes

I managed to pull together a rich chocolate cupcake, filled them with a raspberry sauce, and topped them off with a whipped chocolate ganache and fresh raspberries.

Easy, simple, and pretty.

Perfect to get my Cupcake Baking Love going again. 🙂

Note: I used a Wilton 4B Tip to pipe the ganache.


________________________________________

Chocolate Raspberry Cupcakes
Makes approximately 24 Cupcakes (depending on size)

Ingredients:

Chocolate Cake:

½ Cup Unsweetened Cocoa Powder
2 Cups All Purpose Flour
1½ Teaspoons Baking Soda
¾ Teaspoon Baking Powder
1 Teaspoon Salt
2 Cups Granulated Sugar
5 Ounces Dark Chocolate, finely chopped
1 Cup Buttermilk
1 Cup Strong Brewed Hot Coffee
½ Cup Vegetable Oil
2 Large Eggs
2 Teaspoons Raspberry Extract

Chocolate Ganache:
12 Ounces Quality Dark Chocolate, finely chopped
1 Cup Heavy Cream
1 Tablespoon Framboise Liqueur

Raspberry Filling:
2 Cups Frozen Raspberries
1 Cup Granulated Sugar
1 Tablespoon Framboise Liqueur
1 Teaspoon Fresh Lemon Zest

Prepare Cakes: Preheat oven to 350 degrees. Place paper cup liners in cupcake pans. Place finely chopped chocolate in a bowl and pour hot coffee over it. Cover bowl with plastic wrap and allow to sit for a few minutes. Remove plastic and stir until smooth. Sift together cocoa powder, flour, baking soda, baking powder, sugar, and salt into a large bowl. In a mixing stand, beat eggs for a few minutes until they become a pale yellow. Beat in oil, buttermilk, and raspberry extract .  Scrape down the sides of the bowl and slowly add the chocolate. Slowly add dry ingredients and mix until just incorporated. Pour batter into the lined cups–about 3/4 way. Bake for 20 minutes or until a toothpick inserted in the center comes out clean. Allow cupcakes to cool in the pans for 10 minutes before removing to cooling racks.

Prepare Raspberry Filling: Place all raspberry sauce ingredients in a medium sized, heavy saucepan. Simmer on medium-low until berries have broken down and the sauce has thickened. Approximately 10-15 minutes. Let cool to room temperature. *If you don’t want seeds in your filling, puree the raspberries in a blender and strain before cooking.

Prepare Chocolate Ganache: Place chocolate pieces in a large bowl. Heat heavy cream on medium high until it comes to a boil.  Remove from heat and immediately pour cream over chocolate. Cover bowl with plastic wrap and allow to sit for a few minutes. Remove plastic and add framboisestir until smooth and glossy. Allow ganache to cool completely before frosting. *If you wish a fluffier “whipped” frosting, allow ganache to cool completely before transferring to a stand mixer. On medium-high speed, whip until you reach the desired consistency.

Assemble Cupcakes: Once all items have been prepared, fill a piping bag with a small round tip with the raspberry filling. Fill another piping bag with the ganache. Taking one cupcake, place the tip of the raspberry filled bag into the cake and squeeze in a few teaspoons of the filling. Be careful not to “inject” too much or your cupcakes will implode 🙂 Finally with the piping bag filled with ganache, pipe/decorate swirls on top of the cupcake. Garnish with fresh raspberries.

Desserts/Pastries

French Macarons…..The Holy Grail of Pastries


Chocolate Macaron with Chocolate Espresso Ganache


I finally did it. Or more accurately, WE finally did it.

I, along with thousands of other aspiring bakers, have been meaning to try my hand at the elusive French Macarons. But for some reason or another, I always found myself pushing it off. “Why?”– you ask. Well, as the song goes….

“At first I was afraid, I was petrified……….”

It’s true. These finicky “Cookie Sandwiches” had me extremely intimidated. Simple in the number of ingredients—yet so much room for possible error. The amount of precision required to create them was simply daunting. But ever since I had my first bite of a Macaron from the famed Bouchon Bakery, I’ve been dreaming about them….Macarons—The Holy Grail of Pastries.

I cannot recount how many posts and articles I have read about Macarons to prepare myself for the day that I could muster up the courage to make them. But reading can only do so much—as I highly doubt I could fly a plane by just reading instructions alone! If I wanted to make Macarons, I’d just have to do it! Time to put on my big girl panties (or apron, in this case) and face my fears!

I entered this daunting experiment with my friend Carol and her sister Christine. Both ladies are quite the bakers and I figured it may be better to attack in numbers. In fact, the few days leading before our big baking day were filled with emails back and forth with various recipes and grocery lists. Heck, we were prepared!

I will not bore you all with the nitty gritty details of all 4+ hours we had in the kitchen but I will simply fast forward to the results (and some pointers). After all the stress and the worry, we were pretty darn successful!! We ended up making two types of Macarons that day. The first, a Chocolate Macaron with Chocolate Espresso Ganache (care of Annie Eat’s) and the second, a Lemon Macaron with Lemon Buttercream (care of Tartlette). Our Chocolate Macarons were the highlight of our day, warranting in my opinion a B+. Unfortunately, our Lemon Macarons were not so successful—-actually kind of a hot mess! The shells (or cookie) were suprisingly quite flavorful but just looked terrible….C- . Strangely enough, we did better with our first Macaron (chocolate) then our second batch (lemon)! We’re hoping it’s not beginners luck!

Here are some notes from our Chocolate Macaron with Chocolate Espresso Ganache:

  • We used Almond Meal that was ground with their skins intact (figured it was going to be chocolate so the speckles should be ok). Next time, I’ll try the Almond Meal without skins as the shells were a tad bumpy;
  • We had VERY good success using silpat mats but did not try parchment paper. Hey, why mess with a good thing?;
  • Getting a stiff peak with the egg whites is quite important before incorporating dry ingredients;
  • We tried both piping methods—piping “straight with a point” and as “commas”. The straight point yielded better tops – don’t worry about the points as they flattened anyhow;
  • We piped our shells on the slightly larger side–almost 2.5 inches. I’d recommend a little bit smaller…perhaps 1.5 inches;
  • Cookies were left for about 30-40 minutes to get the “hard shell” before baking
  • We baked each sheet for 9 minutes but it could have gone another 1-2 minutes (unfortunately there is no way to tell if they’re done than taking a bite into it). Also, the Macarons appeared to taste better the next day. “Aging” may possibly assist in texture/consistency;
  • If filling with Ganache, a thicker consistency is much easier to handle;
  • Using a scale to weigh things (as opposed to measuring) makes a difference.

Allowing the batter to rest after piping is imperative to achieve the macaron “crust”

Hallelujah!!! We have FEET!

Chocolate Macaron with Chocolate Espresso Ganache…..these little guys make me smile.


Here are some notes about our Lemon Macaron with Lemon Buttercream:

  • We didn’t weigh out everything but measured with cups, spoons, etc. to see if it made a difference. Turns out, it does.;
  • Egg Whites may not have been the precise measurement (see above);
  • We ground Almond Slivers instead of using Almond Meal and could not get a fine enough grind that resulted in grainy batter;
  • By using Almond Slivers, there potentially could have been more natural oils in the mixture thus causing inconsistency in the batter;
  • The meringue we added was very stiff….perhaps too stiff;
  • We could have used more confectioner sugar in the buttercream.

At this point, they still looked like they had potential…..

AGGGHH!! These aren’t French Macarons—they look like shiny cookies!

Ladies and Gentlemen…..this is what you call a HOT MESS! EEEeekk! (Photo by Carol Le)

I do have to reiterate that although our Lemon Macarons looked a bit crazy, it tasted REALLY yummy! The freshly ground almonds gave a wonderful, “true” almond flavor to the shells. We even considered just calling them a cookie versus a macaron. That way, we’d feel better about it 🙂

Our Little Babies (Photo by Carol Le)

Now, with the first attempt out of the way, I’m happy to report that it wasn’t as ridiculous as I had expected. Tedious, yes…but not impossible. It did help TREMENDOUSLY to have two great gals to work with (a little sparkling wine didn’t hurt either!) to whom we could each bounce back ideas and suggestions to. Thanks Carol and Christine–I’d bake with you two anytime!

The Moral of the Story? I’ll have to quote Julia Child on this one:

“The only real stumbling block is fear of failure. In cooking you’ve got to have a what-the-hell attitude.”

I’m am sure that other attempts are in my near future 🙂