Okay. Here’s my confession.
The way I feel about Pad Thai is how I imagine “non-Vietnamese folks” feel about phở. It’s kind of the gateway dish to the culture’s cuisine but it’s so flippin’ good!

Pad Thai has a whole range of textures and flavors all in one plate…what’s not to love?
So it was high time that I started to make it on my own. After grabbing a few key essentials, I turned to Alice over at Sweet Savory Life to fix up some seriously authentic and delicious Pad Thai.

By far, this is the best recipe I have tried yet. The sauce is totally clutch and is what makes this version a keeper! I also suggest to not substitute cane sugar for palm sugar as it will be way too sweet.
As for the tamarind, I opted for the concentrate like Alice but my sis shared that she used tamarind pulp when she took a Thai cooking classes.

And once you have the sauce done, the rest goes by super quick and easy. I owe you big time Alice—this recipe is definitely staying in heavy rotation! 🙂
With that dear Friends, I hope you have a fabulous Mother’s Day Weekend!
__________________________________________
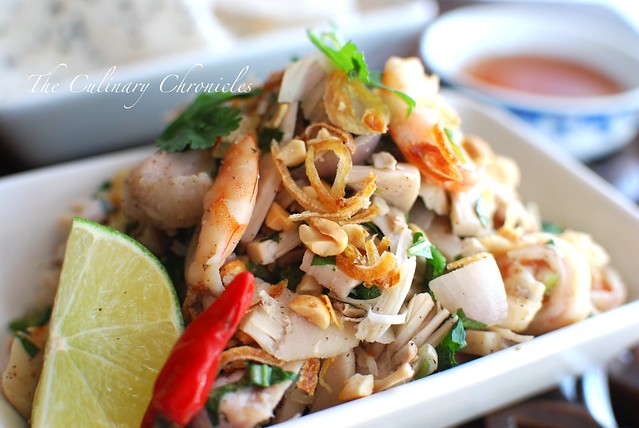
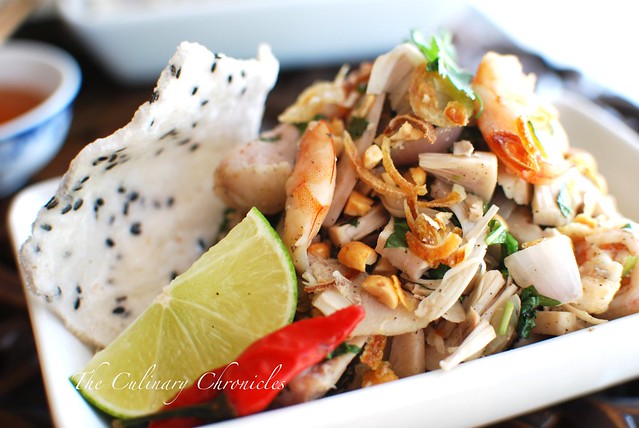
Shrimp and Tofu Pad Thai
From The Sweet Savory Life
Ingredients:
1/3 cup fish sauce
1/2 cup palm sugar
1/2 cup tamarind juice concentrate
4 cloves garlic, minced
4 ounces dried rice stick noodles
6 tablespoons vegetable oil, divided
4 cloves garlic, minced
1 cup red onion, thinly sliced
1 ½ cups thinly sliced shrimp and fried tofu
1 egg
1 cup carrots, match sticks
1 cup green onion cut diagonal in ½ inch segments
1 cup mung bean sprouts
1 cup cilantro
1 cup toasted peanuts chopped
Lime wedge
- To make pad thai sauce, heat a small pan on medium low and add fish sauce, palm sugar, tamarind concentrate, and garlic. Cook sauce until palm sugar has completely dissolve. At this point, you will want to taste the sauce and tweek the sweetness or hotness (be careful, the sauce will be hot). To make it more spicy add a little Thai chili powder (I used Thai chiles). Remove from heat and allow to cool 10 minutes before storing it in a jar or plastic container.
- Boil noodles for 4-5 minutes and drain immediately rinsing with cold water for a few seconds. Noodles should be slightly firmer than Al dente. But don’t worry, they will continue to soften and cook later when stir frying. Using kitchen shears, cut the noodle clump in half. This will make it easier to fry and eat.
- Heat 3 tablespoons of oil in a wok or frying pan on high and cook raw shrimp with tofu for 3-4 minutes. Remove tofu/seafood into a small bowl. Next, heat the remaining oil and then add garlic and red onions to the hot pan and stir fry for 1 minute stirring the garlic mixture so it will not burn. Add noodles and stir for 1 minute. Add 3-4 tablespoons Pad Thai sauce continually stirring noodle mixture until well coated with sauce. Add cooked meat/tofu/seafood back and fry for 2-3 minutes. Move the noodle and meat mixture to one side of the pan and crack an egg on the other side. Scramble the egg with a wooden spoon and cook for 30 seconds. Add carrots, green onions, and sprouts and cook for one more minute frying everything together. Test the firmness of the noodle. If the noodle is too firm, fry for an additional minute. If your noodles need more flavor, add another tablespoon of sauce and fry another half minute.
- Remove from heat and serve. Garnish with remaining raw carrot match sticks, spouts, cilantro, toasted peanuts, and a wedge of lime. Enjoy!