Desserts/Pastries

Fresh Strawberry Cheesecake…because it’s Leap Day!

Fresh Strawberry Cheesecake

It’s Leap Day-–so let there be Cheesecake!

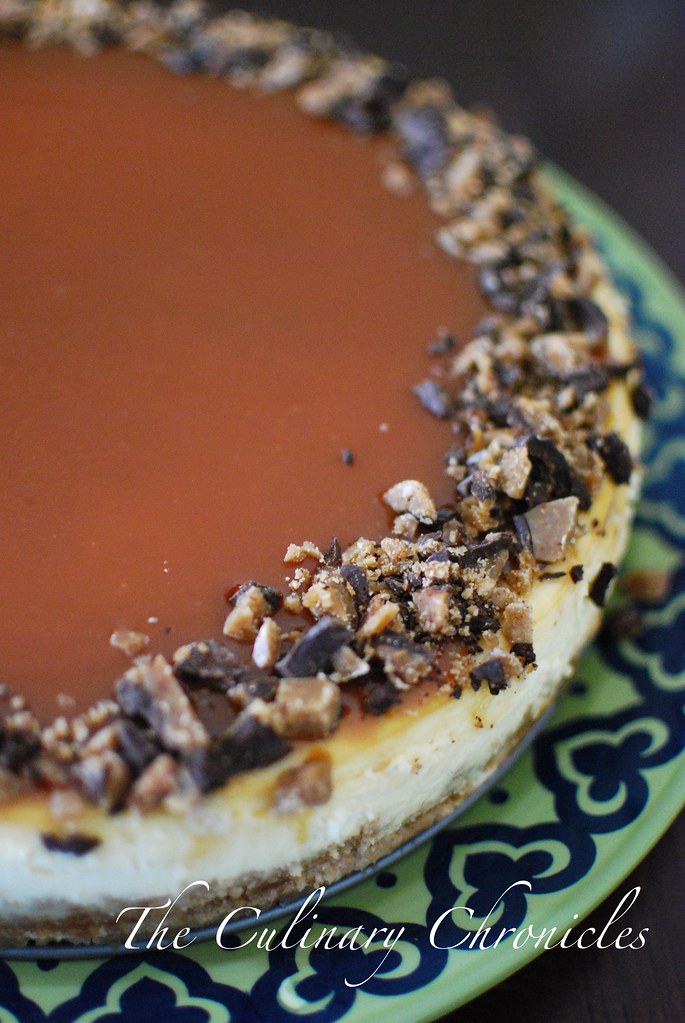
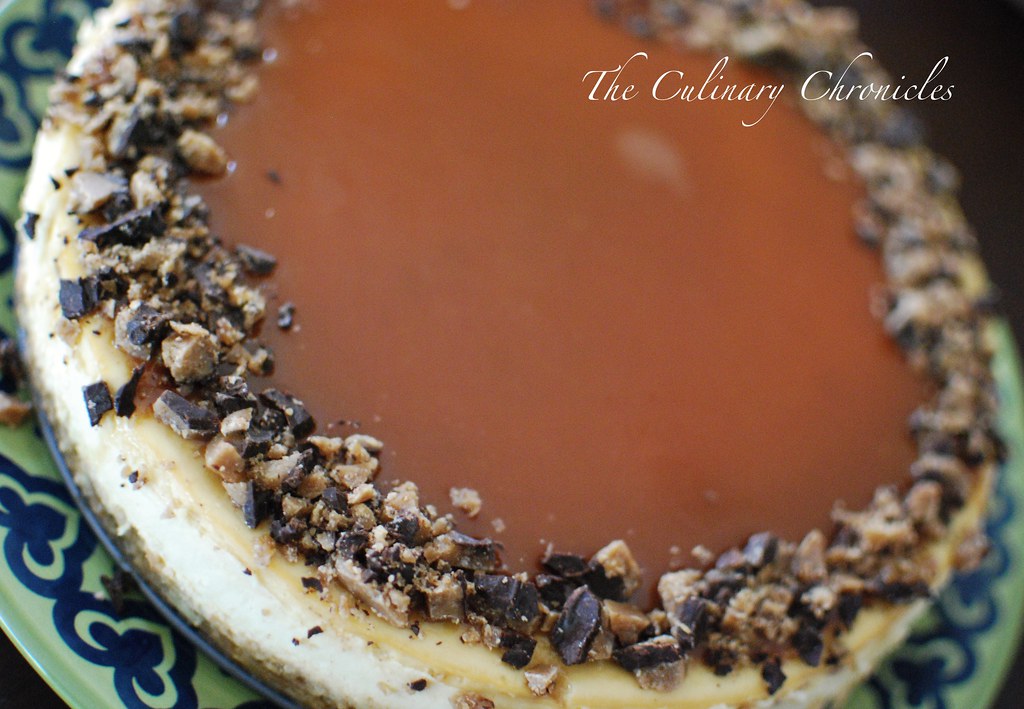
Fresh Strawberry Cheesecake to be exact.

Fresh Strawberry Cheesecake

You may be wondering what Fresh Strawberry Cheesecake and Leap Year have in common. Not much really but I’ll take any excuse to indulge in something yummy and pretty 🙂

Happy Leap Day!

________________________________________

Fresh Strawberry Cheesecake

Ingredients:

Crust:
2½ Cups Graham Cracker Crumbs
3 Tablespoons Sugar
6 Tablespoons Unsalted Butter, melted

Filling:
24 Ounces Cream Cheese, at room temperature
¼ Cup Sour Cream, at room temperature
1 Cup Granulated Sugar
3 Large Eggs, at room temperature
¼ Teaspoon Cornstarch
2 Teaspoons Pure Vanilla Extract
Zest of 1 Lemon

Whipped Cream:
1 Cup Heavy Cream, chilled
2 Tablespoons Sugar

1 Pint Fresh Strawberries, washed and stemmed

Preheat oven to 325 ˚F.

Prepare a 9-inch spring form pan by wrapping the outside with 2-3 sheets of heavy-duty aluminum foil. Spray the inside of the pan with cooking spray. Combine the graham cracker crumbs, sugar and butter until moistened and resembles the texture of wet sand. Pour into the pan and evenly press the crumbs into the bottom of the pan and about one inch up the sides. Bake for 8-10 minutes until golden and cool to room temperature.

Using a standing mixer fitted with the paddle attachment, whip the cream cheese and sour cream until its light and fluffy. Gradually mix in the sugar. Mix in the eggs one at a time, beating well after each addition. Add the vanilla extract, lemon zest and cornstarch until well combined. Pour the filling into the cooled crust.

Place the springform pan in a large roasting pan on the middle rack of the oven. Fill the roasting pan with hot water to come halfway up the sides of springform pan. Bake for 50-60 minutes or until the center is set. Allow the cake to sit in the oven (heat turned off) with the door propped open for about 30 minutes. Remove from the oven and transfer to a wire rack. Allow the cake to cool for an additional 30 minutes. Wrap well with plastic film and foil. Refrigerate for at least 8 hours. Carefully remove the sides of the pan by running a hot knife around the outside of the cake. Carefully release the ring mold.

Prepare the whipped cream. Using a standing mixer fitted with the whisk attachment, whip the chilled heavy cream on high until it just holds stiff peaks. Slowly sprinkle in the sugar until you reach a thick consistency.

Arrange the whole strawberries on top of the cheesecake. Place a piping tip inside of a pastry bag and fill with whipped cream. Pipe decorative patterns of whipped cream on top of the cheesecake.

Desserts/Pastries

Chocolate Tart with Hazelnut-Graham Crust

Chocolate Hazelnut Tart

The Tết Festivities (Lunar New Year) has finally come to a close. And so far, the Year of the Dragon isn’t looking too bad at all. I’ve eaten a ton of yummy food, my home is spankin’ clean, work hasn’t been a hot mess, and I even found money in the pocket of one of my coats I haven’t worn in awhile. Score!

Ok, let me revise that. The BEST thing this week is that I get to meet my brand new nephew, Leonidas (Leo), tomorrow! He’s so adorable and CHUBBY! Of course, pictures are to come.

Over the weekend, the clan got together at my auntie’s home for Tết. We ate, drank, gambled, gave/received lì xì (lucky money), and had a good ol’ time with the peeps.

I had struggled for some time thinking what I should bring to the party as my aunties and sis would be covering the Vietnamese dishes. Vietnamese desserts aren’t really my specialty so after much mulling around, I decided to whip up a few Chocolate Tarts. I know…not the least bit Vietnamese or even Asian for that fact but I was pretty sure the fam wouldn’t complain.

For the recipe and cute video tutorial, check out Dulce Delight.

I’ve got two quick tips should you try this little number out… … First, after you bake the tart you may freak out a bit if the filling looks a bit grainy or bubbly. I know, cause I totally did! But don’t worry, once it cools, it all settles and the gorgeous honey-ganache glaze covers any imperfections. And second, although the flavor of the crust was divine, mine was really crumbly. I’d recommend throwing in another tablespoon of butter to the party.

I served the tart with fresh whipped cream and it was bliss. The tart itself is like a rich, decadent truffle and the hazelnut crusts added a great crunch and flavor—kind of like a Ferrero Rochers. Mmmm…I love those.

All in all, I’m liking the Dragon. 🙂

Desserts/Pastries

White Chocolate Raspberry Cheesecake

White Chocolate Raspberry Cheesecake

Forgive me. This is a HORRIBLE photo.

But the fact of the matter is, you wouldn’t forgive me if I didn’t share this with you. So after weighing out the lesser of two evils, I said— “LET THEM EAT (cheese)CAKE!”

I made this for our family Christmas party and amidst all of the cooking/baking, catching up with the fam, and partaking in holiday cocktails—I totally missed photographing this little number and only caught a quick pic on my phone. I know, I know. The same woman who makes her loved ones eat cold food because I have to take a hundred photos first, totally blew it. DOH!

But I think you’ll forgive me once you try this beauty. Creamy, dense cheesecake studded with white chocolate and swirls of raspberry puree. DEE-LISH. I chose to use ginger snaps for the crust as an homage to the holidays but you can definitely swap them out for graham crackers or even better–chocolate cookies!

Guess I’ll just have to make this again so I can snap some better photos.

Yup–It’s a difficult task but someone has got to do it.

_____________________________________________

White Chocolate Raspberry Cheesecake
One 9-inch cake

Ingredients:

Crust:
2½ Cups Ginger Snap Crumbs (or Graham Cracker Crumbs if you prefer)
3 Tablespoons Sugar
6 Tablespoons Unsalted Butter, melted

Filling:
24 Ounces Cream Cheese, at room temperature
¼ Cup Sour Cream, at room temperature
1 Cup Sugar
3 Large Eggs, at room temperature
¼ Teaspoon Cornstarch
2 Teaspoons Pure Vanilla Extract
6 Ounces White Chocolate, chopped

Raspberry Puree:
10 Ounces Frozen Raspberries
¼ Cup Granulated Sugar
¼ Cup Red Wine
Zest of 1 Lemon
Preheat oven to 325 ˚F.

Prepare the raspberry puree by placing all the ingredients in a small sized, heavy saucepan. Simmer on medium-low until berries have broken down and the wine has cooked off. Approximately 10-15 minutes. Transfer contents to a blender and puree until smooth. Strain through a sieve, using a rubber spatula to help press the puree through. Cover and set puree aside.

Prepare a 9-inch spring form pan by wrapping the outside with 2-3 sheets of heavy-duty aluminum foil. Spray the inside of the pan with cooking spray. Combine the ginger snap crumbs, sugar and butter until moistened and resembles the texture of wet sand. Pour into the pan and evenly press the crumbs into the bottom of the pan and about one inch up the sides. Bake for 8-10 minutes until golden and cool to room temperature.

Using a standing mixer fitted with the paddle attachment, whip the cream cheese and sour cream until its light and fluffy. Gradually mix in the sugar.  Mix in the eggs one at a time, beating well after each addition.  Add the vanilla extract and cornstarch until well combined.  Sprinkle the white chocolate over the cooled crust and pour the filling on top. Spoon dollops of the raspberry puree over the cheesecake. Run the tip of a pairing knife or a toothpick through the raspberry puree to create a marble effect.

Place the springform pan in a large roasting pan on the middle rack of the oven. Fill the roasting pan with hot water to come halfway up the sides of springform pan. Bake for 50-60 minutes or until the center is set. Allow the cake to sit in the oven (heat turned off) with the door propped open for about 30 minutes. Remove from the oven and transfer to a wire rack.  Allow the cake to cool for an additional 30 minutes.  Wrap well with plastic film and foil. Refrigerate for at least 8 hours. Carefully remove the sides of the pan by running a hot knife around the outside of the cake.

Serve with whipped cream and a drizzle of the remaining raspberry puree. Enjoy!

Desserts/Pastries

Nutella Pinwheel Cookies

Nutella Pinwheel Cookies

Dear Santa,

Do you like Nutella?

Surely, you must. You seem like a guy with good taste.

After all, Mrs. Claus is quite the catch.

Nutella Pinwheel Cookies

Nevertheless, I hope you enjoy these Nutella Pinwheel Cookies I’ve set out for you. Hopefully it will give you that little sugar boost to finish all of your deliveries on Christmas Eve.

xoxo,

Nam

ps. And if you happen to have an extra iPad around, I know of a certain blogger who would happily put it to use. Thanks 🙂

___________________________________________

Nutella Pinwheel Cookies
Makes 4 dozen

8 oz unsalted butter, at room temperature
1 cup granulated sugar
2 extra large egg yolks
2 teaspoon pure vanilla extract
2 1/3 cup unbleached all-purpose flour
1/4 teaspoon kosher salt
1/2 cup Nutella, divided

In a small, bowl stir together the flour and salt.  Set aside.

In the bowl of a standing mixer, cream the butter and sugar, about 2-3 minutes.  Add the egg yolks and vanilla and mix until combined.   With the mixer on low, add the flour mixture.  Mix until it forms a soft dough.  Transfer the dough on to a lightly floured surface.  Shape in to square and divide it in half.  Transfer each half to a sheet of plastic wrap.  Wrap tightly and refrigerate for at least 30 minutes.

Unwrap one half of the dough and place on a piece of lightly floured parchment paper.  Cover with a sheet plastic wrap and roll the dough to 1/4-inch thickness, about 10″x8″ rectangle.

Remove the plastic wrap.  Using an off-set spatula,  spread half (1/4 cup) Nutella on to the dough leaving a 1/4-inch edge all around.    Using the parchment as a guide, roll the dough starting from the longest side, in to a tight log.  Wrap the parchment around the log and refrigerate for at least 30 minutes or freeze for 15 minutes.  Repeat with the remaining half.

Preheat the oven to 350 F.  Line a baking sheet with parchment paper.

Unwrap the log and slice into approximately 1/3-inch  slices.  Place the slices on the prepared baking sheet 1-2″ apart (I can fit 15 cookies on a 12×15-inch baking sheet).  Bake for 12-15 minutes or until just golden around the edges.  Remove from the oven and cool on the baking sheet for 2 minutes.  Remove the cookies to a wire rack to cool completely.  Store cookies in an airtight container for 1 week.

From The Gallery Gourmet

Desserts/Pastries

Red Velvet Cupcakes with White Chocolate Buttercream

Red Velvet Cupcakes with White Chocolate Buttercream

It’s hard to believe but it’s been over a year since I’ve made a batch of Red Velvet Cupcakes.

Crazy, eh?

But I think at some point, I had just overdosed on them.

Yes, My Friends…….I had too much of a good thing.

Red Velvet Cupcakes with White Chocolate Buttercream

But then the next thing I knew it, the holidays were smacking me upside the head. Everywhere you looked it was hues of blues, silvers….green, red. I just had to bring out my tried and true Red Velvet recipe to ring in the holiday cheer. The beautiful color is just so darn festive.

And let’s face it. It would be near “Grinch-like” if I didn’t.

Red Velvet Cupcakes with White Chocolate Buttercream

To add a little different flair to my Red Velvet Cuppies, I decided to swap out my favorite cream cheese frosting with a super decadent and sweet White Chocolate Buttercream. It was a nice change from the tangy cream cheese but if you don’t like sweet frostings or want to cut back a bit, you may want to stick with the classic.

But c’mon now—it’s the holidays! I won’t tell if you don’t 🙂

________________________________________________

Red Velvet Cupcakes with White Chocolate Buttercream
Makes approximately 18-20 Regular Sized Cupcakes

Ingredients:

Batter:
1¼ Cups All Purpose Flour
½ Teaspoon Baking Soda
¼ Teaspoon Salt
1½  Tablespoons High Quality Unsweetened Cocoa Powder
½ Cup Unsalted Butter, room temperature
1 Cup Granulated Sugar
2 Large Eggs, room temperature
½ Cup Sour Cream
½ Cup Milk
1 Teaspoon Vanilla Extract
2-3 Tablespoons Red Food Color, depending on desired intensity of color

White Chocolate Buttercream:
10 Ounces Unsalted Butter, room temperature
6 Ounces White Chocolate, melted and cooled
3-4 Cups Sifted Confectioner Sugar, varies due to preferred frosting consistency
1 Teaspoon Vanilla Extract
2-3 Tablespoons Milk, if needed

*Optional: White Chocolate Shavings to top the cupcakes.

Preheat the oven to 350°degrees and place paper liners in pans.

In a separate bowl, sift together the flour, cocoa powder, baking soda, and salt. Set aside.

In a standing mixer, beat butter and sugar until light and fluffy for about 3-4 minutes. Beat in eggs, one at a time. Add milk, sour cream, vanilla, and food color. Slowly incorporate dry ingredients until well blended.

Fill each lined cup 2/3 full. Bake for approximately 18-20 minutes, rotating halfway between baking time. Cupcakes are done when a toothpick inserted in the center comes clean. Cool completely in pans on top of a wire rack.

While cupcakes are baking, prepare the frosting. In an electric mixer fitted with the paddle attachment, cream together the vanilla and butter until fluffy.  Add the white chocolate and whip until combined. Gradually add in the confectioners’ sugar, a few tablespoons at a time. Continue adding sugar to desire consistency. Should the buttercream appear dry, whip in a tad of milk.

When cupcakes are thoroughly cooled, frost or pipe decorate swirls on top. Sprinkle with white chocolate shavings.

Happy Holidays!!

Desserts/Pastries · Giveaways

Toffee Caramel Cheesecake & a GIVEAWAY!!!

Toffee Crunch Caramel Cheesecake

I’m still recovering from Thanksgiving.

From tons of cooking, eating, family time, and shopping. In fact, I need a vacation from my vacation!

Toffee Crunch Caramel Cheesecake

But through it all, I’ve got to take a step back and remember all that I’m thankful for. Loved ones, good health, and of course, this Toffee Crunch Caramel Cheesecake 🙂

I made this little number for Thanksgiving and was pretty darn happy with the cake. It’s dense, creamy and surprisingly not overly sweet even with the caramel. It was also a perfect way to use the homemade toffee my nieces my made. Yep, they’ve got skills.

Toffee Crunch Caramel Cheesecake

And of course, I am thankful for you all. OOBER Thankful.

To show my appreciation, we’re giving away a lovely KitchenAid® 7-Speed Hand Mixer so that you can whip up your own tasty creations (hopefully this yummy cheesecake will be on your list, too!).  The mixer is lightweight, durable and just pretty! A kitchen must!

And you’ve got 4, count ’em F-O-U-R different chances to win it! To enter:

  1. Leave a comment and tell us what the first thing you’ll make using the mixer;
  2. Subscribe to The Culinary Chronicles & get automatic emails when new posts are published (If you already subscribe, leave a comment indicating so);
  3. Like our Facebook Fan Page (If you already “Like” us, leave a comment indicating so); or
  4. Follow @CulinaryChron on Twitter (If you already Follow us, leave a comment indicating so).

The giveaway will end on Tuesday, December 6th at 5pm (PST) and the winner will be announced the next day.

GOOD LUCK and THANKS for being you! 🙂

__________________________________

Toffee Crunch Caramel Cheesecake
One 9-inch cake

Ingredients:

Crust:
2 Cups Graham Cracker Crumbs
3 Tablespoons Sugar
6 Tablespoons Unsalted Butter, melted

Filling:
32 Ounces Cream Cheese, room temperature
1 Cup Packed Light brown sugar
1/8 Teaspoon Cornstarch
2 Tablespoons Unsalted, melted and cooled
5 Large Eggs
½ Vanilla Bean Pod, split with seeds scraped out
1 Teaspoon Vanilla Extract

Topping:
¾ Cups Granulated Sugar
1½ Tablespoons Water
½ Teaspoon Lemon Juice
½ Cup Heavy Whipping Cream
½ Cup Toffee, chopped

Preheat oven to 350°F. Prepare a 9-inch spring form pan by wrapping the outside with 2-3 sheets of heavy-duty aluminum foil. Spray the inside of the pan with cooking spray.

Prepare the crust by combining graham cracker crumbs, sugar and butter until moistened and resembles the texture of wet sand. Press crumbs into the bottom of the pan and about one inch up the sides. Bake for 8-10 minutes until golden and cool to room temperature.

Prepare the filling by beating cream cheese and sugar in large bowl until smooth. Add in cornstarch and vanilla beans. Beat in butter, then eggs, 1 at a time, until just blended. Beat in vanilla extract. Pour batter over cooled crust. Place spring form pan in large roasting pan. Add enough hot water to come halfway up sides of spring form pan. Bake cake uncovered until filling is puffed around edges and moves slightly in center when pan is gently shaken, about 1 hour. Turn off the oven, remove pan from water, remove foil and return the cheesecake to the oven. Allow the cake to sit in the oven with the door propped open for about 30 minutes. Remove from the oven and transfer to a wire rack.  Allow the cake to cool for an additional 30 minutes.  Wrap well with plastic film and foil. Refrigerate for at least 8 hours.

Prepare the caramel by stirring sugar, water, and lemon juice in large saucepan over medium heat until sugar dissolves. Increase heat; boil without stirring until mixture turns deep amber, occasionally swirling pan and brushing down sides with wet pastry brush, about 9 minutes. Add cream (mixture will bubble). Reduce heat to medium-low. Simmer until reduced to just under 1 cup, stirring occasionally, about 8 minutes. Chill until thickened but still pourable, about 15 minutes.

Spoon caramel over top of cake just to edges (do not allow caramel to drip down sides). Garnish top edges with chopped English toffee. Return to the fridge and chill at least 2 hours and up to 6 hours.

To serve, run a hot knife around pan sides to loosen cake; release pan sides.

 Adapted from Epicurious


Desserts/Pastries

Happy Halloween with Jack Skellington Cake Pops!

Jack Skellington Cake Pops


If you’ve never seen The Nightmare Before Christmas  you simply must go out and rent it. Everything about it is so well done from the production/animation, storyline and music. AND it could be considered a Halloween or a Christmas film—that’s a two-fer!

At the heart of the film is Jack Skellington—the pumpkin king of Halloween Town. I’ve loved Jack’s character and his wish to create change and break the monotony. And although his attempts were a hot mess you got to just love a character who dares to be different.


I carved Jack a few Halloweens ago.

The first time I ever made cake pops covered in white, it immediately reminded me of Jack Skellington’s head. And for this year’s All Hallow’s Eve,  I thought it would be fun to make them. I admit, half of my Jack-Pops looked like him and the other half kind of looked like aliens. But I consoled myself by saying the “alien-Jacks” were him on his bad days. 🙂

Since I’ve already posted tips and the method to making cake pops, I won’t bore you by repeating them. However you can find it here. These Jack-Pops were made with my basic vanilla cake and buttercream.

Jack Skellington Cake Pops


HAVE A HAPPY HALLOWEEN!!!!


ps. Here’s a clip from the film–enjoy!


Desserts/Pastries

Pistachio Biscotti

Pistachio Biscotti


The other day I paid nearly $4 for a small, almond biscotti to dunk into my drip coffee. Sure, it was good—but pricey!


Pistachio Biscotti


My cheapness motivated me to get my lazy butt into the kitchen to bake up my own batch. Not to mention, at a fraction of the cost of what I spent for just one cookie!

My sis suggested I use Alice Waters’ version as it stays the most true to traditional biscotti since there is no butter in it. I did, however, make a few tweaks to it—opting for pistachios instead of almonds and dusting the tops with raw sugar. And, of course, dipping half of the batch in chocolate. YUM.


Pistachio Biscotti


This base recipe also has so much potential for other delish flavoring such as orange zest, dried cranberries and other fruits….so many options! And with the holidays quickly approaching, a tin full of these biscotti would make a wonderful gift.

No more overpriced biscotti for this gal!

________________________________________

Pistachio Biscotti

Ingredients:
1½ Cups Roasted Pistachios, toasted, unsalted, and roughly chopped
2¼ Cups All Purpose Flour
1 Teaspoon Baking Powder
1 Cup Granulated Sugar
1½ Tablespoons Raw Sugar
3 Eggs, at room temperature
1 Teaspoon Lemon Zest
6 Ounces Bittersweet Chocolate, chopped (optional)

Preheat oven to 350 degrees F.

In a bowl, sift together flour and baking powder.  In a mixer, beat together eggs and granulated sugar until the mixture forms a ribbon. Gently stir in the dry ingredients until just incorporated and then fold in pistachios and lemon zest.

On a parchment-lined baking sheet, form the dough into two 3-inch wide loaves.  The dough will be quite sticky. Wet your hands with water and smooth the loaves. Sprinkle the tops with the raw sugar. Bake for 25 minutes and remove from the oven.  Lower the oven temperature to 300 degrees F and let the loaves cool on racks for 10 minutes. Using a serrated knife, cut ½ inch thick cookies on a diagonal. Place the cookies back on the sheet and continue baking on each side for 10-12 minutes until golden brown. Remove from the oven and cool.

Once the cookies have cooled, melt the chocolate in a double boiler. Dip one side of the biscotti into the chocolate and allow to cool on the baking racks.

Adapted from Alice Waters’: The Art of Simple Food

Desserts/Pastries

White Chocolate Macadamia Nut Cookies….it’s Aloha Friday!

White Chocolate Macadamia Nut Cookies

Happy Aloha Friday, Friends!

Since Wednesday, I’ve been blaring my Hawaiian-Island jams just willing the weekend to come faster.

You see, in a former life, I think I must have been Hawaiian. For years I’ve been immersed in the Polynesian culture and have spent the good part of 8 years with hula and producing lū’aus. You can ask any one of my former students and they can confirm what a hot mess I became the weeks leading up to large shows or the annual lū’au. But you know what? I wouldn’t have traded a moment for anything in the world.

White Chocolate Macadamia Nut Cookies

So you can imagine my overwhelming joy and delight when my sister enrolled my niece, Maya, into a hula school (hula hālau). Trust me, I’ve been heavily “hinting” for all the little ones to join a hālau for years, but Maya so far, is the first. Hālaus are more than just a dance school. They are communities that not only instruct on dance but also pass on culture and values.

My baby girl was in her very first lū’au this past Sunday—and I cannot express how much overwhelming pride I had that day for her. Sure, I had to resist every cell in my being from jumping in to take charge of one aspect or another—hey, I’m somewhat of a control freak. But I was just so happy.

Check out Maya (3rd from left) with the other little keiki girls. Adorable, right?

My sis asked if I could bake a little something to donate towards the bake sale. I enlisted the help of my older two nieces and we made a TON of these delish White Chocolate Chip Macadamia Nut Cookies. Totally appropriate, right?

We made a few tweaks from batch to batch on the recipe and I believe, found the ideal proportions. Chewy, crispy and chopped full of nuts and chips.

Maya

Isn’t she just a sweetheart? Now if we can just get her little brother (my god-bebe) Lucas into classes……

Aloooooha!!!!!!!!

__________________________________________

White Chocolate Macadamia Nut Cookies
Makes approximately 1½ Dozen Cookies

Ingredients:

2 Cups All Purpose Flour, plus 1 Tablespoon
½ Teaspoon Baking Soda
½ Teaspoon Salt
¾ Cup Unsalted Butter, melted and cooled to room temperature
1 Cup Packed Light Brown Sugar
¼ Cup Granulated Sugar
1 Tablespoon Vanilla Extract
1 Large Egg plus 1 Egg Yolk
1 Heaping Cup White Chocolate Chips
1 Heaping Cup White Macadamia Nuts (roasted and unsalted), roughly chopped

Preheat the oven to 325 degrees F (165 degrees C). Grease cookie sheets or line with parchment paper.

Sift together the flour, baking soda and salt; set aside.

In a medium bowl, cream together the melted butter, brown sugar and white sugar until well blended. Beat in the vanilla, egg, and egg yolk until light and creamy. Mix in the sifted ingredients until just blended. Stir in the white chocolate chips and the macadamia nuts by hand using a wooden spoon. Drop cookie dough 1/4 cup at a time onto the prepared cookie sheets. Cookies should be about 3 inches apart.

Bake for 14 -15 minutes in the preheated oven, or until the edges are lightly toasted. Cool on baking sheets for a 5 minutes before transferring to wire racks to cool completely.

Adapted from Allrecipes

Desserts/Pastries

Chewy Oatmeal Chocolate Chip Cookies

Oatmeal Chocolate Chip Cookies

When you add oats to a cookie, it becomes totally healthy.

Right?

Or am I having one of my delusional moments again?

Though with 3 cups of oats in these Chewy Oatmeal Chocolate Chip Cookies, they could almost double as a granola bar!

That settles it….I’m still calling them “healthy”. So please, don’t burst my bubble.

____________________________________________

Chewy Oatmeal Chocolate Chip Cookies
Adapted from Quaker Oats via Bakergirl
Makes approximately 20 cookies

1/2 cup (1 stick) + 6 tablespoons butter, softened
1/2 cup granulated sugar
3/4 cup firmly packed brown sugar
2 eggs
1 teaspoon vanilla
1 1/2 cups all-purpose flour
1 teaspoon baking soda
1/2 teaspoon salt
1 1/2 teaspoons cinnamon, optional
3 cups rolled oats
1 cup chocolate chips

Preheat oven to 350°F. Lightly grease two cookie sheets and set aside.
Beat butter, sugar, and brown sugar together on medium speed until smooth and creamy. Add eggs and vanilla and mix until well combined.
In a separate bowl, mix together the flour, baking soda, salt, and cinnamon, then add to the butter mixture and beat until combined. Stir in oats and chocolate chips.
Scoop dough into rounded tablespoons and place on baking sheets about 2 inches apart. Lightly press down to flatten each dough ball. Bake for 9-11 minutes, or until done (these won’t look done at first glance, they’ll have a gooey, dough-y looking centers that sets when they’re cooling, so I baked mine until they were crispy & brown around the edges. You can always poke them with a toothpick if you want to be sure). Cool 1 minute on cookie sheets; remove to wire rack and allow to cool completely.