
Chilaquiles!
Chee – lay- kee – lay…..
Want to know more about this deliciousness? Click here to check out my latest post for our friends at Safest Choice® Eggs.
Absolutely perfect for a weekend brunch— Happy Saturday Folks!!
Chilaquiles!
Chee – lay- kee – lay…..
Want to know more about this deliciousness? Click here to check out my latest post for our friends at Safest Choice® Eggs.
Absolutely perfect for a weekend brunch— Happy Saturday Folks!!

As my nephew, Lucasaurus, would say…..
Oh Yea! Oh Yea! Oh Yea!
The other week I came home to a package on my doorstep from the fabulous Ree Drummond (The Pioneer Woman). Within seconds I ripped it open to find a lovingly signed copy of her new cookbook – The Pioneer Woman Cooks: A Year of Holidays

Over a 100+ lip-smackingly delicious recipes that are just darn gorgeous. And perfect for any holiday from Valentine’s Day to Cinco de Mayo to Turkey Day and heck–even game day!
I was already drooling from the ravishing photos when I came across the page for Sriracha Deviled Eggs. Sriracha? Deviled Eggs? Football Finger Foods? YES, PLEASE!
And let me tell ya……they are darn good and so quick and easy to make! Ree describes them as “with a Spicy Asian kick“—just like me 🙂

In celebration of Ree’s new cookbook, I’m giving away (3) signed copies of it! Yup–you read correctly… THREE COPIES!
There are six (6) different ways to enter (increase those odds, Baby!) To Enter, please be sure to leave a separate comment for each indicating which of the below you did This Giveaway has ended- THANKS!
The deadline to enter is Thursday, November 7th at 5pm (PST) This Giveaway has ended – THANKS! and the winners will be notified the next day. Good Luck!
Thanks so much to The Pioneer Woman for sponsoring this giveaway! And don’t worry Bella, I won’t give away our copy.

___________________________
Sriracha Deviled Eggs
Makes 24
Ingredients:
1 dozen hard-boiled eggs (peeled, sliced open, and yolks removed)
1/4 cup mayonnaise
3 tablespoons Sriracha
1 teaspoon rice vinegar
Salt and pepper to taste
Black sesame seeds, for garnish
Mix the yolks with the mayonnaise and Sriracha. Then add the rice vinegar, salt, and pepper. Mash it and mix it together until the mixture is smooth. It will be a little on the thin side. Spoon the filling into the egg halves. Then sprinkle a few black sesame seeds on top.
Note: I opted to use a piping bag with a decorative tip to fill the eggs and topped them with a sprinkle of paprika and some chives—but the eggs are just as delish as is.
Recipe from The Pioneer Woman Cooks: A Year of Holidays

These past few weeks have been B-A-N-A-N-A-S!
I’ve barely had the chance to catch my breath, let alone spend any quality time cooking. So when I do find a few moments when I can whip something together, I rely on quick dishes that are still yummy but don’t require a lot of effort–and especially those that don’t make too many dirty dishes!
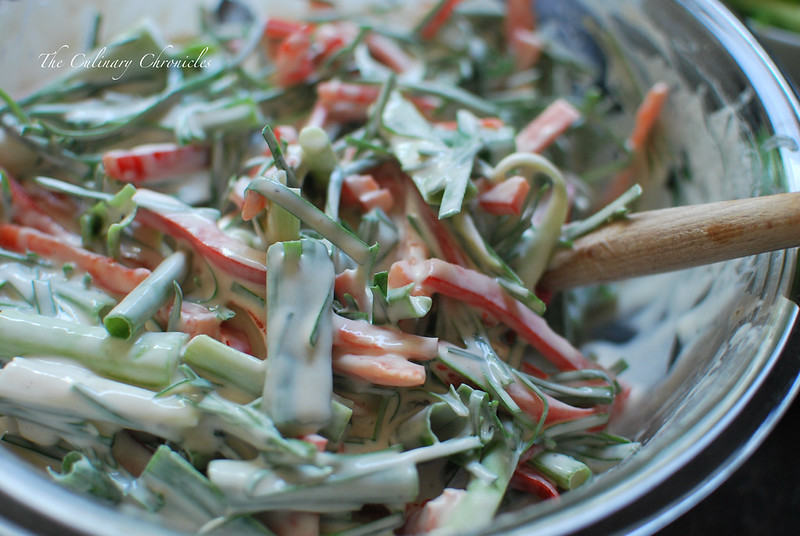
These Vegetable Quinoa Wraps totally fit that bill!

What’s great about a dish like this is that anything goes! You can throw whatever you have on hand in these wraps–veggies, proteins, starches, herbs…whatever tickles your fancy. I like to use quinoa as a base because it is high in protein and packed with fiber. It’s fluffy and pairs well with the crunchy raw veggies.
And you know what? All of this goodness can be done in about 25 minutes! You can maximize your time by chopping the veggies while the quinoa cooks so when it’s done, it’s just a matter of assembly. Plus, the wraps are great in sack lunches or picnics since they are served at room temperature.
Delish? CHECK!
Quick? CHECK!
Minimal mess? ABSOLUTELY!
I’m totally into it.
__________________________________________
Vegetable Quinoa Wraps
Makes 8 wraps
Ingredients:
1 cup dry quinoa
2 tablespoons olive oil
½ cup diced shallots
½ tablespoon minced garlic
½ jalapeno pepper, seeded and finely diced
¼ teaspoon dried thyme
¼ teaspoon red chili flakes
2 cups vegetable stock
½ cup roasted corn
1 small red bell pepper, diced
½ cup edamame beans
¼ cup finely diced red onion
½ cup diced and seeded tomatoes
½ chopped fresh cilantro leaves
kosher salt and black pepper
8 large tortillas
salsa
1 cup shredded pepper jack cheese (optional)
Using a fine mesh strainer, thoroughly rinse the quinoa under cool water. Gently shake the strainer so that the quinoa is drained.
In a medium size pot, heat the olive oil and cook the shallots until softened and translucent. Add in the garlic, jalapeno, thyme, red chili flakes and quinoa. Stir and cook for 1 minute before pouring in the vegetable stock. Turn up the heat and bring the liquid to a boil. Cover and reduce the heat to medium-low. Allow the contents to simmer for about 15-20 minutes until the liquids have all absorbed. Remove the pot from the stove and let sit for an additional 5 minutes. Remove the cover and use a fork to fluff the quinoa.
Add the corn, edamame, bell pepper, red onion, tomatoes and cilantro to the pot. Gently fold the ingredients together and season with kosher salt and pepper as needed.
Begin assembling the wraps. Lay one tortilla on a flat surface. Spoon 1/8 of the quinoa mixture in an even line in the middle of the tortilla. Top with a few spoonfuls of salsa and cheese. Fold in the sides of the tortilla and firmly roll up the wrap. Repeat with the remainder of the tortillas and filling. Enjoy!

For September’s Sunday Family Dinner, we decided to jump back to North America and head down South for our inspiration. Southern American Comfort Food to be exact.
You know….the type of food that kind of sticks to your ribs but is OH-SO-GOOD! Worth every calorie.

So we gathered the fam to my seester T’s house on a September Sunday—which just so happened to be one of the craziest, scorching last days of summer. (Which explains why our hair was done up like fräuleins to combat the heat!)
And how cute are my seesters‘ with their fams?

To combat the heat and toast our monthly Family Dinners, we started off with cold, refreshing cocktails—my version of a Sparkling Hard Lemonade. Freshly made lemonade, vodka, citrus soda, lemon slices, and fresh mint sprigs all in a mason jar….to keep with the Southern theme. 🙂

And what’s a Southern meal without collard greens?

Eldest seester, N, stewed down these green beauties with this lovely ham hock. Salty, porky, slightly bitter and just darn tummy -lovin’!

And since we were dabbling in the South, I had to channel Kathy Bates, Jessica Tandy, Mary Stuart Matherson, and Mary-Louise Parker. Yeah..you know what I’m talking about….
My version was quick, crispy, slightly tart and deep fried.
So. Good.

I also took the lead with our main dish…..Crispy Fried Chicken.
It was a no brainer that I opted for Chef Thomas Keller’s beloved Lemon-Brined Fried Chicken. It’s one of the most popular dishes from his restaurant Ad Hoc and after trying it, I don’t doubt it!
The recipe is not difficult but it does take time. The citrus and herbaceous brine makes the chicken so incredible juicy and aromatic. And the crust–when done well, it becomes surprisingly light and almost feathery!
We did have a little trouble with our chicken as we fried them in Dutch Ovens on the outside barbecue burners. But since the burners couldn’t hold a consistent level of heat, we kept on having to adjust the temperature and move the chicken around. Nothing too crazy but it did take a bit longer than expected.

Unfortunately these photos didn’t do it justice (I went from using my DSLR to my iPhone) but the rest of our dinner was just as scrumptious! Seester T made rich Mac & Cheese and down-home delish Cheddar Biscuits with Sausage Gravy. There was also some grilled corn but I just couldn’t fit it in my tummy!

Now I’m told that original Southern Comfort Food was rich and filling in order to give folks the sustenance and energy to do a full day of hard, physical work. We DEFINITLEY didn’t do any of that after inhaling this goodness but we DID take a 15 minute stroll around the block. 🙂 Better than nothing, right?
And then we came back from our walk to have some dessert….
Caramel Apple Pie a la Mode that was INSANELY good. So good that I actually didn’t feel bad about eating it after our gazillion calorie dinner.
As I said before….Worth Every Calorie.
#fact

And with that dear friends, we wrapped up another successful Sunday Family Dinner!
October’s Theme?
New England Fare! Lobstah’s and shellfish beware! 🙂
This Month’s Family Dinner Menu
Cocktails: Sparkling Hard Lemonade
Appetizers: Fried Green Tomatoes
Entrees: Crispy Fried Chicken, Cheddar Biscuits with Sausage Gravy, Mac & Cheese, Collard Greens
Dessert: Caramel Apple Pie a la Mode

If you’re anything like me, you have a few ingredients in your fridge that dictate your menu. As in, if I don’t use this within the next day or so, I’ll have to throw it out. Like wilting spinach or proteins that you may have prematurely defrosted.
For me, that often occurs with produce or dairy items—and almost always, buttermilk. Sure, some would say, “Why don’t you just freeze it?” or “Mix some whole milk with lemon juice instead of buying buttermilk?”. Now the latter would make sense if I ever had whole milk in the fridge (other than when I bake or make ice creams) and freezing an upwards of 2+ cups of buttermilk seems odd to me.

So when I do find myself with a quart of buttermilk, I’ll deter to my trusted favorite recipes that call for it. Such as Buttermilk Fried Chicken, Red Velvet Banana Pancakes, Blackberry Muffins, or Cheddar Cheese Biscuits.
And of course, this wonderfully quick and easy Buttermilk Bread Loaf. This is one of my go-to recipes for loaf bread as it’s no knead and doesn’t require anytime to bloom the yeast. Sure, it does take a couple of minutes to warm up the buttermilk but other than that, your stand mixer does all the work. And you don’t even need the dough hook!
It’s quite a forgiving dough–perfect for those who are freaked out about yeast recipes. But the end results in a wonderful exterior crust and light interior crumb. Plus, the buttermilk gives a slight tang to the bread.
Start to finish, you’ll have fresh bread in less than 1.5 hours–and that includes proofing time! Can’t beat that!
Recipe from Elinor Klivans via Leite’s Culinara

I had a life changing moment in the kitchen nearly a year ago….
It was the first time I had tried my hand at Cast Iron Skillet Pizzas!
The method allows the dough to bake beautifully–crisp with a slight char. Delicious! And the kicker? The cook time is less than 3 minutes! So flipping fast!

Here’s how to do it:
And here are some things to keep in mind:
And that’s it! Easy Peasy and totally faster than take out.
*In case you’re curious, the pizza shown here is topped with mozzarella, leftover ribeye steak, mushrooms, roasted garlic cloves, a drizzle of herb oil, fresh rosemary chili flakes and goat cheese.

Did you check out our last Sunday Family Dinner?
If you did, you may have said to yourself…. “Huh…something’s missing. Where are the cocktails????”
And rightfully so! Because what’s a Sunday Fam-Din without a specialty cocktail? Not one of ours for sure!

Since Korean fare was the theme for August, I knew I wanted to use soju for our signature cocktail. Soju is a distilled alcohol and is traditionally made from rice. To me, I liken it to the flavors of sake–but I’m no expert. So for all of you soju aficionados–don’t bust my chops!

At a family party last year, my younger cousin NhuMy picked up some fresh watermelon agua fresca and turned it into delish watermelon martinis. My seester T and I loved it so much that I wanted to take the same flavors to make Watermelon Soju-tinis.

Using fresh watermelon that eldest seester, N, had in her fridge (my niece, Nina, is a watermelon-monster), I made a refreshing and light agua fresca. Thrown into a shaker with some lime juice, soju, zest and ice—and we had fantabulous cocktail.
Looking for a mocktail? No worries! The agua fresca chilled with ice is just as delish!
________________________________________________
Watermelon Soju-tinis
Serves 2
Ingredients:
5 cups fresh watermelon, cut into large chunks
1/2 cup chilled water
juice of 1 lime
1-2 tablespoons sugar (optional), depending on sweetness of the watermelon
ice
4 ounces soju
lime zest
watermelon wedges for garnish
In a blender, add the watermelon chunks, water, lime juice and sugar (optional). Blend until smooth. Pour liquid through a sieve to strain.
Fill a large shaker with ice. Add the soju, 5 ounces watermelon agua fresca, and 1-2 pinches lime zest. Shake vigorously for 15-20 seconds and strain the contents between 2 glasses. Garnish with watermelon wedges. Cheers!

My eldest niece, Nina, turns 15 today *gulp*
Don’t ask me how it happened but within a blink of the eye, our super chubby little baby turned into a beautiful and intelligent young woman. The bday gal requested Korean for last week’s Sunday Family Dinner and we willingly obliged.
We LOVE Korean food! And as I’ve shared before, our mom went through an extensive phase where she cooked all types of Korean dishes to dazzle her guests.

As always, we cooked way too much food. But what can we say, we wanted a “little” bit of everything and leftovers are a good thing in our book. A HUGE thanks to Emily Kim, author and founder of Maanchi, whose recipes were heavily used in our menu that night.
As for the menu…..
What’s a Korean meal without some type of Kimchi? Eldest seester started a week before our dinner and prepared a ridiculous amount of Kimchi—and I mean a TON OF KIMCHI! Though I’m not complaining as we each got to take a jar home.

We had crispy, Grilled Pork Belly served with an acidic, vinegar based dipping sauce…….

A huge pot of bubbling Soondubu Jjigae – Soft Tofu Stew with lots of seafood……

Plates of Haemul Pajeon – Seafood Pancake……….

You can see that the there’s definitely more “filling” than batter in these pancakes.
And there was a huge pan of Ddeokbokki – Spicy Rice Cakes which is one of my personal faves. Mimi (my oldest friend/ex-roomie) used to make this all of the time for me in grad school and it’s carboliciously, delicious.

We also had Galbijjim – Braised Beef Short Ribs that just fell off the bone. Slightly sweet and incredibly tender. Man, my mouth is watering just remember this goodness…..

And there was some Kimchi Bokkeumbap – Kimchi Fried Rice.

And last, for dessert, Patbingsu – shaved ice. We adorned ours with sweet red beans, fresh fruits, mochi, tapioca and a drizzle of condensed milk.

And that’s how we roll–Korean style!
Happy 15th Birthday Nina-love!!!! May this year bring you success in school (and tennis), laughter, happiness and adventures (in moderation, of course 🙂 )
xoxo!

This Month’s Family Dinner Menu
Cocktails: Watermelon Soju-tinis
Appetizers: Haemul Pajeon (Seafood Pancake), Homemade Kimchi, Grilled Pork Belly, Soondubu Jjigae
Entrees: Ddeokbokki, Galbijjim, Kimchi Bokkeumbap
Dessert: Patbingsu, Red Velvet Cake

I recently had a two week stint gorging myself on fresh, sweet, summer heirloom tomatoes. I just couldn’t help it–DELICIOUS and so colorful!
I had to take advantage of the few short weeks left of summer when these beauties are best here in San Diego and enjoyed them in salads, over pizzas, as a condiment (pico de gallo), as a light side dish and of course– in sandwiches.

One of my fav go-to “salads” is Insalata Caprese which usually consists of tomato slices, fresh mozzarella, basil leaves and olive oil. I also like to serve them as appetizers by making little caprese skewers and use sweet grape tomatoes instead of tomato slices.

For a light lunch, I grabbed a few heirlooms I had picked up earlier that morning to make Caprese Sandwiches. These sammies have all of the traditional fixins’ of Insalata Caprese with the addition of a rich and thick reduction of balsamic vinegar. The reduction adds a light sweetness and acidity to the sandwich which pairs so well with the cool tomatoes, velvety mozzarella and floral basil.
Total winner and can be whipped up Lickety- Split…..
In a jiffy……
In a blink of the eye……
In the speed of light…..
In no time flat……
……… Really fast. You get the point.
Did I mention these would be FAB for picnics?
______________________________________________________________
Caprese Sandwiches with Balsamic Vinegar Reduction
Serves 2
Ingredients:
1 cup balsamic vinegar
2-3 pinches sugar
1/2 teaspoon red chili flakes
2 ciabatta rolls, toasted (or bread of your choice)
8-10 fresh whole basil leaves, washed and dried
4 ounces fresh mozzarella cheese, sliced
2-3 heirloom tomatoes, sliced
sea salt or kosher salt
In a small sauce pan, add the vinegar, sugar and chili flakes. On medium-high heat, bring to a boil, stirring often. Reduce the heat to a low simmer. Continue stirring and cooking until the liquids have reduced by half and take on the a thick, syrup consistency. Be sure to watch the reduction closely as it can burn quickly. Transfer to a bowl and allow to cool.
Slice each of the toasted rolls in half. Place half of the basil leaves on the bottom piece of bread and top with a few slices of cheese. Drizzle some of the balsamic vinegar reduction over the mozzarella and top with slices of tomato. Lightly sprinkle sea salt over the tomatoes and place the other 1/2 of the roll on top. Enjoy!

Have you all been asking yourself where has the summer flown by? I feel like just a second ago we were celebrating all of the May babies and now Labor Day is just a hop, skip, jump away! Wowsers!
Time is FLYING BY! Where is Hermione and her Time-Turner when you need them?
And although I’ve been struggling to find time to complete my endless to-do lists, I can always pause to say…
TEE-GEE-EYE-EFF!!!!!!
Oh Friday….how I love thee……

To toast off this beautiful Aloha Friday, I would recommend mixing up a few of these bright and refreshing Palomas. I think Palomas are often underrated and can quickly be overlooked for its more popular cousin–the Margarita.
Like Margaritas, Palomas are made up with tequila and fresh citrus juices– though the latter relies mostly on fresh grapefruits and limes. Since I adore the slight sweetness and pretty hue of pink grapefruits, I opt to use them in this delightful cocktail.
In a nutshell? It’s summer in glass!
So when things get crazy, push the pause button because it’s Paloma o’clock somewhere!
Cheers Friends!
__________________________________________
Palomas
Serves 2
Ingredients:
ice
6 ounces fresh pink grapefruit juice
1/2 ounce fresh lime juice
1/2 ounce simple syrup (more if needed depending on the sweetness of the grapefruit)
3 ounces premium tequila
grapefruit soda or soda water
granulated sugar
grapefruit wedges
Fill a cocktail shaker with ice. Add the grapefruit juice, lime juice, simple syrup and tequila. Add the top and shake vigorously for 20-25 seconds. Pour into two glasses that have been rimmed with sugar and filled with ice. Top off with the grapefruit soda or soda water. Stir slightly and garnish each glass with grapefruit wedges. Cheers!
