Desserts/Pastries

World Peace Cookies…Happy Holidays!

World Peace Cookies
It’s been an incredibly busy holiday season so far and things definitely won’t slow down until after the new year. But I couldn’t let Christmas pass without sharing this old favorite….Dorie Greenspan’s World Peace Cookies.

World Peace Cookies
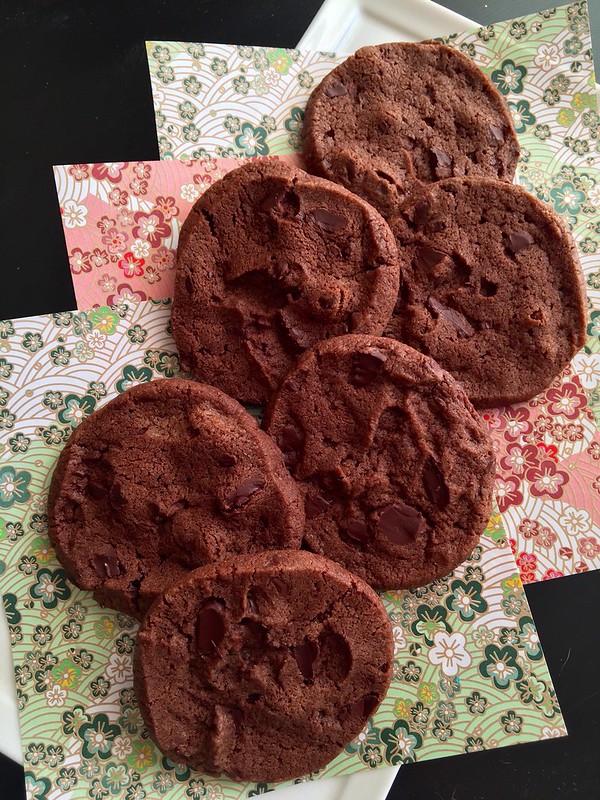
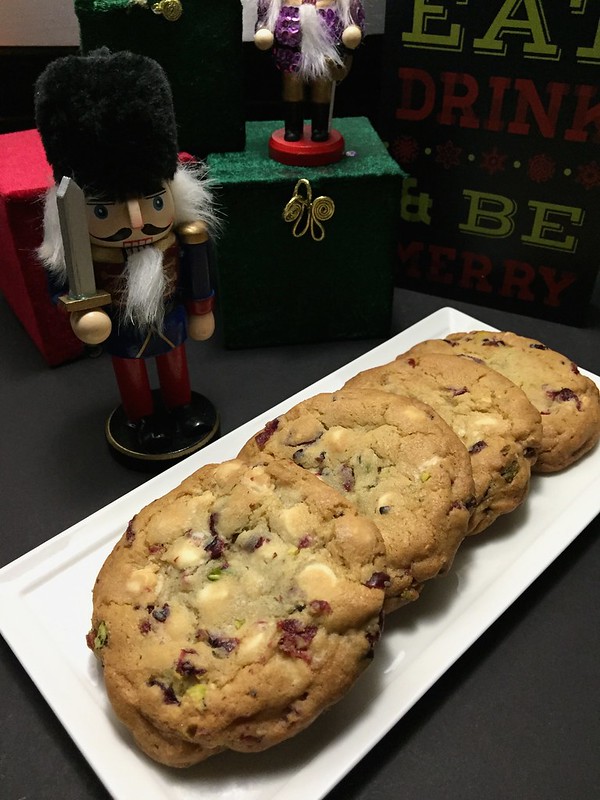
Seester P first made these for me years ago and I was immediately in love. They’re a sablé cookie, a French shortbread.

Buttery, chocolatey and just so darn good!

World Peace Cookies
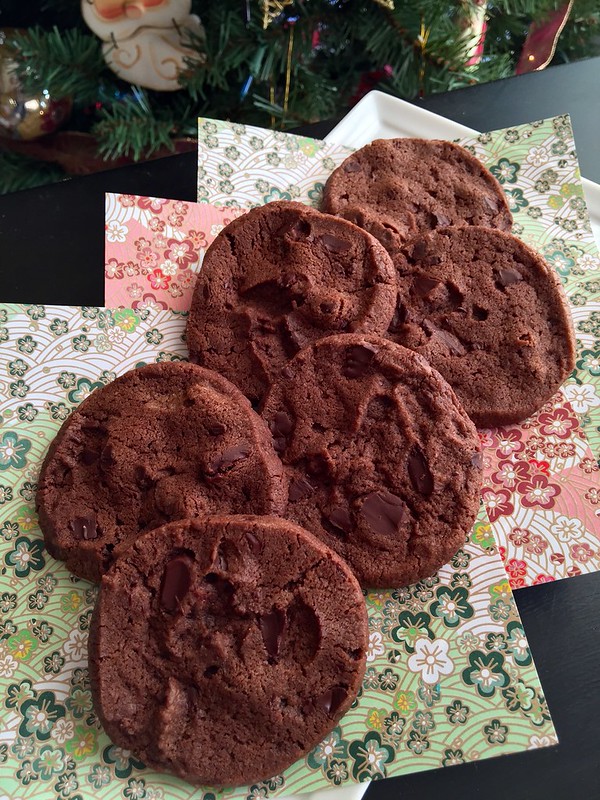
These beauties come together relatively easy so they’ll be fantastic to leave out for the big guy. And trust me, if you do, you’ll definitely be on his rockstar list.

Happy Holidays!!! ❤

____________________________________
World Peace Cookies
Makes about 3 dozen

Ingredients:

1 1/4 cups (170 grams) all-purpose flour
1/3 cup (28 grams) unsweetened cocoa powder
1/2 teaspoon baking soda
1 stick plus 3 tablespoons (11 tablespoons; 5 1/2 ounces; 155 grams) unsalted butter, cut into chunks, at room temperature
2/3 cup (134 grams) packed light brown sugar
1/4 cup (50 grams) sugar
1/2 teaspoon fleur de sel or 1/4 teaspoon fine sea salt
1 teaspoon pure vanilla extract
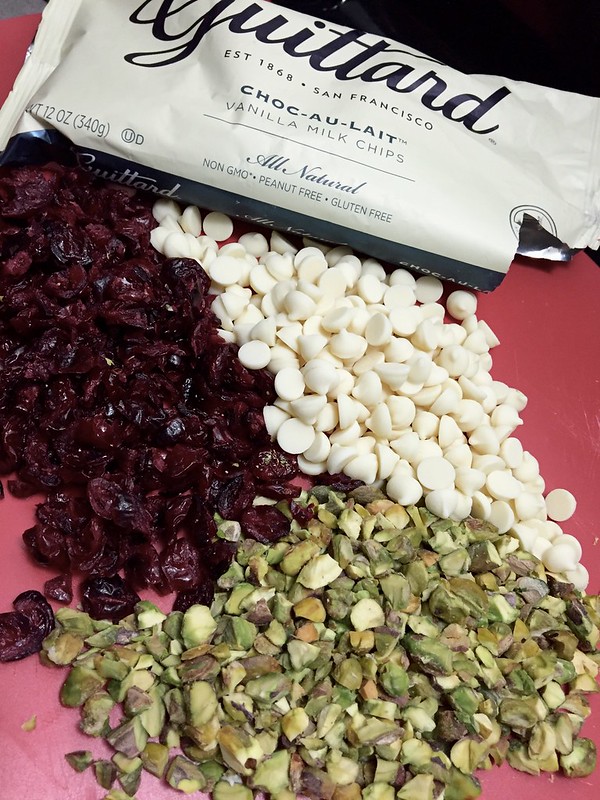
5 ounces (142 grams) best-quality bittersweet chocolate, chopped into irregular sized bits


Sift the flour, cocoa and baking soda together.

Working with a stand mixer fitted with the paddle attachment, or in a large bowl with a hand mixer, beat the butter and both sugars together on medium speed until soft, creamy and homogenous, about 3 minutes. Beat in the salt and vanilla. Turn off the mixer, add all the dry ingredients and pulse a few times to start the blending. When the risk of flying flour has passed, turn the mixer to low and beat until the dough forms big, moist curds. Toss in the chocolate pieces and mix to incorporate. This is an unpredictable dough (see above). Sometimes it’s crumbly and sometimes it comes together and cleans the sides of the bowl. Happily, no matter what, the cookies are always great.

Turn the dough out onto a work surface and gather it together, kneading it if necessary to bring it together. Divide the dough in half. Shape the dough into logs that are 11/2 inches in diameter. Don’t worry about the length — get the diameter right, and the length will follow. (If you get a hollow in the logs, just start over.) Wrap the logs in plastic wrap and freeze them for at least 2 hours or refrigerate them for at least 3 hours.

When you’re ready to bake: Center a rack in the oven and preheat it to 325 degrees F. Line two baking sheets with parchment paper or silicone baking mats.

Working with one log at a time and using a long, sharp knife, slice the dough into 1/2-inch-thick rounds. (The rounds might crack as you’re cutting them — don’t be concerned, just squeeze the bits back onto each cookie.) Arrange the rounds on the baking sheets, leaving about 2 inches between them. (If you’ve cut both logs, keep one baking sheet in the fridge while you bake the other.)

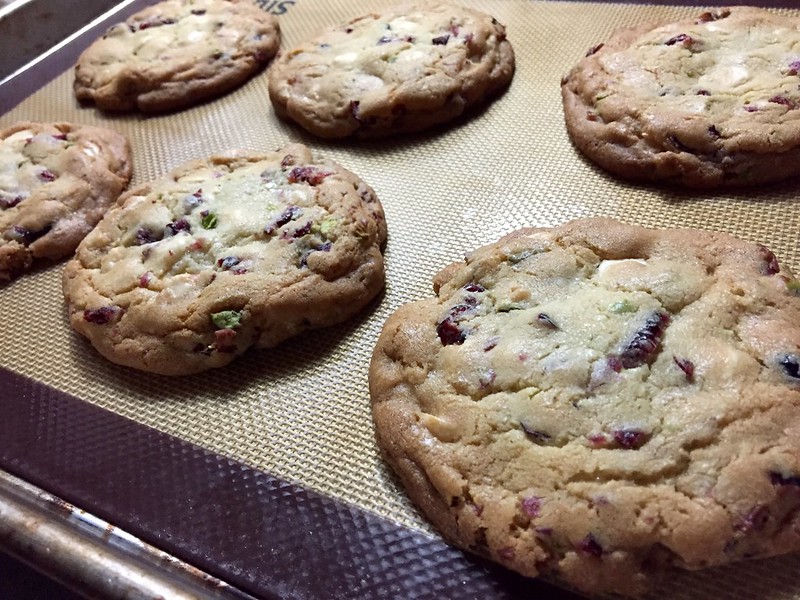
Bake the cookies for 12 minutes — don’t open the oven, just let them bake. When the timer rings, they won’t look done, nor will they be firm, and that’s just the way they should be. Transfer the baking sheet to a cooling rack and let the cookies rest until they are only just warm, at which point you can munch them, or let them reach room temperature (I think the texture’s more interesting at room temperature).

Bake the remaining dough.

From Dorie Greenspan

Desserts/Pastries

White Chocolate, Cranberry, and Pistachio Cookies

White Chocolate, Cranberry, and Pistachio Cookies

It’s no secret folks…I love cookies.

And it’s during this time of year that I like to try out a few new recipes to add to my Holiday Cookie Platters.

White Chocolate, Cranberry, and Pistachio Cookies
The usual suspects are often:

White Chocolate, Cranberry, and Pistachio Cookies
And sometimes I’ll throw in a Mint Chocolate Chip Brownie or a Peppermint Kissed Brownie to stir things up.

White Chocolate, Cranberry, and Pistachio Cookies
For this year, I wanted to use dried cranberries and pistachios together to create a festive sweet treat. And why not add white chocolate chips to the party?

It’s all kind of healthy-ish….right? Like trail mix?

Ok….that may be a stretch.

White Chocolate, Cranberry, and Pistachio Cookies
I opted to adapt the NY Times Best Chocolate Chip Cookie recipe from Jacque Torres because I love the textures of the cookie once baked—crisp on the outside and chewy on the interior.

In lieu of the vanilla extract, I used orange extract and fresh orange zest to pair with the flavors.

White Chocolate, Cranberry, and Pistachio Cookies
Folks were a fan of them! They’re super chunky and filled with lots of different textures from the nuts, chocolate and berries.

Definitely filled with Holiday goodness.

ps. We’re three days away from Christmas even and I still haven’t finished shopping! EEK!

_____________________________________________
White Chocolate, Cranberry, and Pistachio Cookies
Makes approximately 2 dozen

Ingredients:


8.5 ounces cake flour
8.5 ounces bread flour
1 ¼ teaspoons baking soda
1 ½ teaspoons baking powder
1 ½ teaspoons coarse salt
1 ¼ cups unsalted butter
6 ounces light brown sugar
6 ounces granulated sugar
2 large eggs
1 teaspoons orange extract
1 tablespoon fresh orange zest
12 ounces white chocolate chips
1 heaping cup dried cranberries, roughly chopped
1 heaping cup roasted & unsalted pistachios, chopped


Sift flours, baking soda, baking powder and salt into a bowl. Set aside.

Using a mixer fitted with paddle attachment, cream butter and sugars together until very light, about 5 minutes. Add eggs, one at a time, mixing well after each addition. Stir in the orange extract and zest. Reduce speed to low, add dry ingredients and mix until just combined, 5 to 10 seconds. Add the white chocolate chips, dried cranberries and pistachios—mix until just combined. Press plastic wrap against dough and refrigerate for overnight.

When ready to bake, preheat oven to 350 degrees. Line a baking sheet with parchment paper or a nonstick baking mat. Set aside.

Scoop mounds of dough the size of large golf balls onto baking sheet and slightly flatten the dough balls. Bake until golden brown but still soft, 18 to 20 minutes. Transfer sheet to a wire rack for 10 minutes, then slip cookies onto another rack to cool a bit more. Repeat with remaining dough and enjoy!

Adapted from NY Times Chocolate Chip Cookies


Desserts/Pastries

Chocolate Crinkles with Dark Chocolate Mint Truffle Kisses

Chocolate Crinkles with Dark Chocolate Mint Truffle Kisses

Okay, okay….someone was a bit behind this year on their holiday baking.

And that “someone” may be a certain 5’2″ Vietnamese gal we all know and love….

Okay- FINE!

Five foot, 1 inch AND three quarters….

Sheesh!

Chocolate Crinkles with Dark Chocolate Mint Truffle Kisses

But let’s not get stuck in the minutia of things because I’ve got cookies.

Some SERIOUS cookies that will rock your jingle-jangle, holiday socks off. When I saw these crinkle cookies from the Recipe Girl, I knew I had to have them!

Chocolate + Mint = THE BEST PAIRING EVER!!!!!!!

I hadn’t even known that Hershey made these magical little confections in the form of Dark Chocolate Mint Truffle Kisses. These little beauties are, to date — my FAVORITE of the Hershey Kisses.

Truth.

Chocolate Crinkles with Dark Chocolate Mint Truffle Kisses

As for the base cookie, Recipe Girl is completely on point. The cookie is moist, chewy, fudgy and somewhat brownie-like. The only change I made was a splash of additional vanilla extract when the mint extract goes in.

Mo’ flava, mo’ betta!

And the kiss, the KISS just sends things over the top and seals the deal. So if you plan on leaving the Big Guy a plate of cookies next Wednesday night, do yourself a solid and whip up a batch of these beauties because I’m pretty darn sure that it’ll flip you to the “nice” list in a jiffy.

Want the original recipe? It can be found here.

ps. Two quick notes on the recipe. First, you really MUST chill the dough before rolling them out or you’ll have a hot mess on your hands. And second, if you want the cute little point of the kiss to stay intact, definitely chill the cookies on the sheet immediately after you take them out of the oven.

pps. HAPPY BAKE COOKIES DAY!!!!!!!

Desserts/Pastries

Browned Butter Double Chip Cookies

Browned Butter Double Chip Cookies

If there was ever a day of the week that you deserved a cookie, it would be today…..

Monday.

Because Mondays are just darn rough – they don’t call them Manic Mondays for nothing.

Browned Butter Double Chip Cookies

And because you’re amazing, I think you deserve to make yourself some amazing cookies –these Browned Butter Double Chip Cookies to be exact.

Browned Butter….

Dark Chocolate Chips…..

Toffee Chips….

Sprinkled with Sea Salt.

HAVE MERCY!

Browned Butter Double Chip Cookies

Slightly crispy exterior, uber chewy interior and jammed packed with goodness. And the bonus? The dough freezes perfectly. Just scoop the dough onto a baking sheet and freeze them in a single layer for a few hours before bagging them up.

The frozen dough can keep in your freezer for a few months (if they last that long!). And when you get a hankering for warm cookies, bake them frozen (don’t defrost) and add a couple extract minutes to the baking time.

Browned Butter Double Chip Cookies

Here’s to Mondays – now go bake some cookies! 🙂

_______________________________________

Browned Butter Double Chip Cookies
Makes about 18 large cookies

Ingredients:

¾ cups unsalted butter
2 cups all-purpose flour
½ teaspoon salt
½ teaspoon baking soda
½ teaspoon cornstarch
½ cup granulated sugar
1 cup light brown sugar
1 whole egg
1 egg yolk
1½ tablespoons vanilla extract
1½ cups dark chocolate chunks or chips
1 heaping cup baking toffee bits (I used Heath’s)
sea salt flakes

Place the butter in a saucepan and melt over medium heat. Swirl the pan and allow the butter to bubble and foam slightly. Continue browning the butter until it begins to smell nutty and it turns a dark golden brown. Remove it from the heat and allow the butter to cool to room temperature.

Sift together the flour, salt, baking soda and cornstarch. Set the dried ingredients aside.

Place the browned butter and both sugars into the bowl of a stand mixer. Beat for about 1-2 minutes. Add in the egg, egg yolk and vanilla extract until combined. On low, slowly add in the dry ingredients until just combined. Using a wooden spoon, stir in the chocolate chunks and toffee bits.

Chill the cookie dough for about an hour.

Preheat the oven to 325 degrees F. Line baking sheets with parchment paper or silpat mats.

Once chilled, use a cookie scoop (ice cream scoop) and scoop the dough onto the prepared baking sheets about 2-3 inches apart from each other. Sprinkle the tops of each cookie with sea salt.

Bake for about 15 minutes until the edges of the cookies begin to turn golden brown and have set. Allow the cookies to cool on the baking sheets for 5 minutes before transferring to a wire rack to cool completely.


Desserts/Pastries

Molasses Cookies with Gingerbread M&Ms

Molasses Cookies with Gingerbread M&Ms

Have you baked your cookies for Santa yet?

No?

Then you’re in luck because I’ve got a little something for you!

Molasses Cookies with Gingerbread M&Ms

When this gingerbread lovin’ gal got my little hands on a few bags of Gingerbread M&Ms, I knew I had to pair them together with my favorite Molasses Cookies that I bake a ton of around this time of year. The original cookies are slightly chewy and have that wonderful spiced, warm flavor.

The addition of the M&Ms added great texture, and of course, extra gingerbread flavor–always a good thing. I’m pretty sure if you left these cookies out for the Big Guy, you’d score some major points.

Molasses Cookies with Gingerbread M&Ms

And with that, dear Friends, I wish you and your loved ones a very Happy Christmas!

_________________________________________

Molasses Cookies with Gingerbread M&Ms

Ingredients:

3/4 cup unsalted butter, melted
1 cup light brown sugar
1 large egg at room temperature
1/4 cup molasses
1 teaspoon vanilla extract
2 cups all-purpose flour
1 teaspoons baking soda
1/2 teaspoon salt
2 teaspoon ground cinnamon
1 teaspoon ground cloves
1 teaspoon ground ginger
1½ cups Gingerbread M&M candies
1 cup Granulated Sugar (to roll dough in)

In a medium bowl, mix together the melted butter, light brown sugar, and egg until smooth. Stir in the molasses and vanilla extract. In another bowl, combine the flour, baking soda, salt, cinnamon, cloves, and ginger. Mix dry ingredients into the molasses mixture. Stir in 1 cup of the Gingerbread M&M candies. Cover and chill dough for 1 hour.

Preheat oven to 375 degrees. Roll dough into walnut sized balls and roll them in the remaining 1 cup granulated sugar. Place cookies 2 inches apart onto parchment lined baking sheets. Using the bottom of a flat glass, gently press down on the cookies to lightly flatten. With the remaining Gingerbread M&Ms, add a few candies to the top/sides of each cookie dough, pressing them slightly in.

Bake for 7-8 minutes until tops are cracked. Remove from baking sheets and allow the cookies to cool on the sheets for 5 minutes before transferring them to wire racks to cool completely. Store the cookies in an airtight container for up to 3 days.

Desserts/Pastries · Miscellaneous

Lucas’ Galatic Star Wars Birthday Party

Lucas' 4th Birthday

It was my Lucas’ 4th birthday the other week. And as his auntie/godmama, I’ve affectionately nicknamed him Lucasaurus.

Don’t let his charming smile, bright wit and adorable face fool ya. He can be a downright rascal—– a veloci-rascal!

Lucas' 4th Birthday

But I just adore the kid to pieces.

So last year, when I mentioned to my seester (pictured above with her super photogenic fam) that we should throw him a Star Wars themed birthday party–she was all for it.

And that’s where I was in trouble. Now some of you all may have witnessed my tendencies to go overboard with certain things and that my OCD habits can get me in a tough spot. Well–then you have not met my seesters…..and in particular, my over-the-top party planning sister, T.

Star Wars1-001

Nearly 5 months before Lucas’ birthday, she started sending me texts about deals she found on party favors, decorating ideas she found on Pinterest, signage she had created, etc. The next thing I knew it, we were headed warp speed into Star Wars mania.

As for me, I just went along for the ride hoping my desserts would get the stamp of approval by the party planning Jedi.

Lucas' 4th Birthday

But look at this little guy? How could we not get carried away?!

…Wrapped around his finger, he has us….

So then this happened.

Star Wars Dessert Tablescape

A bountiful Star Wars tablescape with desserts and goodies galore. But as much as I wish I could take the credit for all the galactic-goodness, I was only in charge of the desserts.

Seester did all the decor (that she started putting up 2 weeks before the party), cute signs, overflowing swag bags, and all the adorable touches that would have made the Jedi Council proud.

Star Wars5-001

Of course a regular Star Wars themed party wouldn’t cut it, so they upped the ante and arranged a Jedi Training Camp in order for all the padawans to prepare for their path to Jedi Knighthood.

IMG_1200

Lightsabers and Jedi Robes were a must, including cadet boxes to store all their goodies.

Star Wars4-001

To quench our thirst on the beautiful day, we sipped fresh Millennium Margaritas (for Jedi Masters 21+), Yoda Soda and Vader-Ade. Special props to my brother-in-law for hand squeezing the 25+ limes I needed to make the margaritas.

Trust me, we will never scoff again at those who own electric citrus juicers–DOH!

Star Wars2-002

And to fuel our Force, we summoned the Taco Master all the way from Orange County— I mean Tatooine. 🙂

Mouthwatering Carne Asada, Carnitas, Fish, Nachos….ideal nourishment to battle the Empire.

Taco Master from Tattoine

Back at our tablescape, Seester put together these cute Star Wars themed candies. Yoda Treats, Han’s Rolo, Edible Ewoks, & Thermal Detonators.

Star Wars-001

And poor Han.

All he wanted to do was to come wish Lucas a Happy Birthday but then he got himself frozen in carbonite again.

Star Wars3-001

Seester got to employ her knife skills by carving a watermelon Death Star. Lord Vader would have been pleased.

Watermelon Death Star

Lucky for us, Chewbacca was kind enough to guard the goodies from any other Sith Lords.

Lucas' 4th Birthday

Speaking of Sith Lords, I started off my dessert contributions by molding Stormtrooper and Darth Vader chocolates to place on top of the cupcakes. They later received a bit of edible disco dust for a bit of sheen….they are from outer space after all.

Darth Vader & Storm Trooper Chocolates

They perched atop rich Chocolate Cupcakes topped with big swirls of Vanilla Bean-Swiss Meringue Buttercream and sprinkles. Some of the cuppies were also topped with vanilla whipped cream.

Darth Vader & Storm Trooper Cupcakes

I paid additional homage to Darth Vader with these Chocolate Shortbread Cookies made with Valrhona cocoa powder.

Chocolate Darth Vader Cookies

How would it be a party without Master Yoda? These were Citrus Scented Sandwich Cookies filled with a Dark Chocolate Ganache.

Delicious, he was.

Yoda Sandwich Cookies

And to keep Darth Vader company, I made an army of Stormtrooper Sugar Cookies that were decorated with Royal Icing.

They were super fun to make and all of the cutters can be purchased from Williams Sonoma.

Storm Trooper Sugar Cookies

There were also pops for all to enjoy…..

Princess Leia Cake Pops & Death Star Rice Krispy Pops

“That’s no moon-it’s a Space Station!”

Not quite Master Obi-Wan but you’re close. They’re Rice Krispy Pops shaped as Death Stars. Not only a superweapon but super-yummy.

Death Star Rice Krispy Pops

And Princess Leia Cake Pops. Lucas really enjoyed these.

Princess Leia Cake Pops

And what’s a birthday party without a birthday cake?

I just had to make a little cake for our Jedi in training although Seester called it a “gentleman’s cake”. This was a 6 inch, 3-layer chocolate cake frosted with Vanilla Bean-Swiss Meringue Buttercream. I decorated the little cake with a fondant Stormtrooper accented with royal icing, fondant lightsabers, fondant Star Wars banner, Darth Vader molded chocolates, fondant stars and a star sparkler.

Star Wars Birthday Cake

At Jedi Training Camp, there was a Space Pod and stations for the padawans to bottle their own galaxies.

Lucas' Birthday

And then it was time to don their robes because…

Lucas' 4th Birthday

Duh, duh, duh, dum, da-dah, dum, da-dah………..

Darth Vader appeared! He was powerful, all-knowing, and—

Lucas' 4th Birthday

He liked parachutes. Yup, parachutes.

Lord Vader thought it was an integral training tool for the young padawans and can be seen here strategizing with the younglings.

Lucas' 4th Birthday

Heck–Vader even cleaned up after the parachute exercises!

There may still be good in him.

Lucas' 4th Birthday

Then he showed the padawans how to properly yield their sabers and spar.

I think that Lucas is saying– “You look a lot bigger on TV but I still pity the foo’ who messes with me!”

Oh yes, that was a Star Wars–Mr. T crossover moment.

Lucas' 4th Birthday

Cake Time!

Lucas' 4th Birthday

But that sneaky Vader used The Force to make the candles relight after Lucas blew them out.

He’s quite a trickser—when he’s not serving the Emperor and upholding the Dark Side.

Lucas' 4th Birthday

Lucas and Vader. They’re BFFs now.

The Lucasaurus always wins over the Dark Side.

Lucas' 4th Birthday

It was an action packed and exhausting day but the little guy had a blast.

And of course, we prevailed by restoring balance to the Force.

Lucas' 4th Birthday

The Force is strong with this one and I look forward to watching him grow into Jedi greatness.

Until our next Jedi Episode (hopefully for my other nephew, Leonidas’ birthday)— MAY THE FORCE BE WITH YOU!

Lucas' 4th Birthday

Desserts/Pastries

M&M Chocolate Cookies…Happy Holidays!!

M&M Chocolate Cookies


‘Twas the night before Christmas, when all through the house
Not a creature was stirring, not even a mouse;
The M&M Chocolate Cookies were laid out with care,
In hopes that St. Nicholas soon would be there!

HAPPY HOLIDAYS! Wishing you and your loved ones a joyous time filled with endless laughter and Foodventures!

_______________________________________

M&M Chocolate Cookies
Makes 2½ dozen cookies

Ingredients:

5 ounces semisweet or dark chocolate, chopped
½ cup unsalted butter
½ cup cocoa powder
1¾ cups all purpose flour
¾ teaspoon salt
½ teaspoon baking soda
1 ½ cup granulated sugar
2 large eggs
½ tablespoon vanilla extract
1½ cups M&M candies

Preheat oven to 325 degrees F.

In a small bowl, microwave the chocolate and butter together until melted and smooth. This should be done in 15-20 second intervals, stirring in between to avoid scorching the chocolate. Set aside to cool.

In a separate bowl, sift together the cocoa powder, flour, salt and baking soda.  Set aside.

In a mixer fitted with the paddle attachment, beat together the sugar and eggs until combined. Whisk in the chocolate mixture and then slowly add in the dry ingredients. Stir in 1 cup of the M&M candies.

Line a baking sheet with parchment paper. Scoop the cookie dough (about 1½ tablespoons each) and place on the sheet a few inches apart. Flatten the dough balls slightly. With the remaining M&Ms, add a few candies to the top/sides of each cookie dough, pressing them slightly in.

Bake for 12-14 minutes until the cookies begin to slightly crack. Allow the cookies to cool on the baking sheets for 5 minutes and then transfer to wire racks to cool completely.

Desserts/Pastries

Flourless Chocolate Chip Biscoff Cookies + King’s Hawaiian Winner!

Flourless Chocolate Chip Biscoff Cookies

You probably won’t believe me but I actually don’t eat sweets regularly. Not that I don’t want to—but even I try to practice some self restraint. 🙂

But there are times when that little sweet tooth just aches from some goodness. And that’s when I quickly grab a spoon and reach into the kitchen pantry for my jar of Biscoff Spread.

Biscoff Spread (also known as “cookie butter”) is a creamy spread that has the consistency of smooth peanut butter and has chopped up bits of Speculoos Cookies in it. The flavor is reminiscent of gingerbread, which you may recall, I am just crazy about!

Flourless Chocolate Chip Biscoff Cookies

A few months ago I went on a quest to put Biscoff Spread in everything possible. Oh it was a glorious time….

One of the creations that came about were these cookies that were a spin off of my old flourless peanut butter cookies. They’re quick, easy and have a slightly crispy texture. This is also a great recipe for kids to use.

And now for the winner of our King’s Hawaiian Giveaway! Drum Roll please………….

CONGRATS Sarah who said she would fix up some delish Breakfast Sandwiches with her King’s Hawaiian Products…..SUPER ONO! Sarah, please check your email for instructions.

THANK YOU to everyone who participated! And a HUGE MAHALO NUI LOA to our friends at King’s Hawaiian!!!

_________________________________________

Flourless Chocolate Chip Biscoff Cookies
Makes approximately 1½ Dozen

Ingredients:

1 Cup Biscoff Spread, or cookie butter spread
½ Cup Sugar
½ Teaspoon Baking Soda
1/8 Teaspoon Salt
1 Large Egg, lightly beaten
1 Teaspoon Vanilla Extract
¾ Cup Bittersweet Chocolate Chips

Preheat oven to 350 degrees F.

With the exception of the chocolate chips, mix all the ingredients together until thoroughly combined. Stir in the chocolate chips and refrigerate the dough for 10 minutes.

Line a baking sheet with parchment paper. Scoop the chilled dough into rounded tablespoons and place on the sheet a few inches apart. Bake the cookies for 10-12 minutes until lightly browned. Allow the cookies to cool on the baking sheets for 3-4 minutes and then transfer to wire racks to cool completely.

**Although this cookie dough does not add in flour, it is not a gluten free recipe due to the ingredients in the Biscoff Spread/Cookie Butter Spread.

Desserts/Pastries

Nutella Pinwheel Cookies

Nutella Pinwheel Cookies

Dear Santa,

Do you like Nutella?

Surely, you must. You seem like a guy with good taste.

After all, Mrs. Claus is quite the catch.

Nutella Pinwheel Cookies

Nevertheless, I hope you enjoy these Nutella Pinwheel Cookies I’ve set out for you. Hopefully it will give you that little sugar boost to finish all of your deliveries on Christmas Eve.

xoxo,

Nam

ps. And if you happen to have an extra iPad around, I know of a certain blogger who would happily put it to use. Thanks 🙂

___________________________________________

Nutella Pinwheel Cookies
Makes 4 dozen

8 oz unsalted butter, at room temperature
1 cup granulated sugar
2 extra large egg yolks
2 teaspoon pure vanilla extract
2 1/3 cup unbleached all-purpose flour
1/4 teaspoon kosher salt
1/2 cup Nutella, divided

In a small, bowl stir together the flour and salt.  Set aside.

In the bowl of a standing mixer, cream the butter and sugar, about 2-3 minutes.  Add the egg yolks and vanilla and mix until combined.   With the mixer on low, add the flour mixture.  Mix until it forms a soft dough.  Transfer the dough on to a lightly floured surface.  Shape in to square and divide it in half.  Transfer each half to a sheet of plastic wrap.  Wrap tightly and refrigerate for at least 30 minutes.

Unwrap one half of the dough and place on a piece of lightly floured parchment paper.  Cover with a sheet plastic wrap and roll the dough to 1/4-inch thickness, about 10″x8″ rectangle.

Remove the plastic wrap.  Using an off-set spatula,  spread half (1/4 cup) Nutella on to the dough leaving a 1/4-inch edge all around.    Using the parchment as a guide, roll the dough starting from the longest side, in to a tight log.  Wrap the parchment around the log and refrigerate for at least 30 minutes or freeze for 15 minutes.  Repeat with the remaining half.

Preheat the oven to 350 F.  Line a baking sheet with parchment paper.

Unwrap the log and slice into approximately 1/3-inch  slices.  Place the slices on the prepared baking sheet 1-2″ apart (I can fit 15 cookies on a 12×15-inch baking sheet).  Bake for 12-15 minutes or until just golden around the edges.  Remove from the oven and cool on the baking sheet for 2 minutes.  Remove the cookies to a wire rack to cool completely.  Store cookies in an airtight container for 1 week.

From The Gallery Gourmet

Desserts/Pastries

Pistachio Biscotti

Pistachio Biscotti


The other day I paid nearly $4 for a small, almond biscotti to dunk into my drip coffee. Sure, it was good—but pricey!


Pistachio Biscotti


My cheapness motivated me to get my lazy butt into the kitchen to bake up my own batch. Not to mention, at a fraction of the cost of what I spent for just one cookie!

My sis suggested I use Alice Waters’ version as it stays the most true to traditional biscotti since there is no butter in it. I did, however, make a few tweaks to it—opting for pistachios instead of almonds and dusting the tops with raw sugar. And, of course, dipping half of the batch in chocolate. YUM.


Pistachio Biscotti


This base recipe also has so much potential for other delish flavoring such as orange zest, dried cranberries and other fruits….so many options! And with the holidays quickly approaching, a tin full of these biscotti would make a wonderful gift.

No more overpriced biscotti for this gal!

________________________________________

Pistachio Biscotti

Ingredients:
1½ Cups Roasted Pistachios, toasted, unsalted, and roughly chopped
2¼ Cups All Purpose Flour
1 Teaspoon Baking Powder
1 Cup Granulated Sugar
1½ Tablespoons Raw Sugar
3 Eggs, at room temperature
1 Teaspoon Lemon Zest
6 Ounces Bittersweet Chocolate, chopped (optional)

Preheat oven to 350 degrees F.

In a bowl, sift together flour and baking powder.  In a mixer, beat together eggs and granulated sugar until the mixture forms a ribbon. Gently stir in the dry ingredients until just incorporated and then fold in pistachios and lemon zest.

On a parchment-lined baking sheet, form the dough into two 3-inch wide loaves.  The dough will be quite sticky. Wet your hands with water and smooth the loaves. Sprinkle the tops with the raw sugar. Bake for 25 minutes and remove from the oven.  Lower the oven temperature to 300 degrees F and let the loaves cool on racks for 10 minutes. Using a serrated knife, cut ½ inch thick cookies on a diagonal. Place the cookies back on the sheet and continue baking on each side for 10-12 minutes until golden brown. Remove from the oven and cool.

Once the cookies have cooled, melt the chocolate in a double boiler. Dip one side of the biscotti into the chocolate and allow to cool on the baking racks.

Adapted from Alice Waters’: The Art of Simple Food