Seafood

Crispy Black Cod with Uni {Sea Urchin} Risotto

Black Bass with Uni Risotto

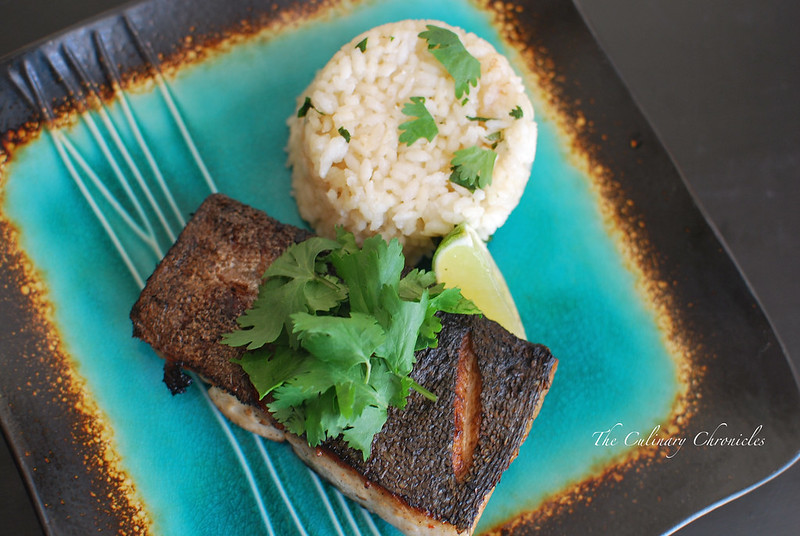
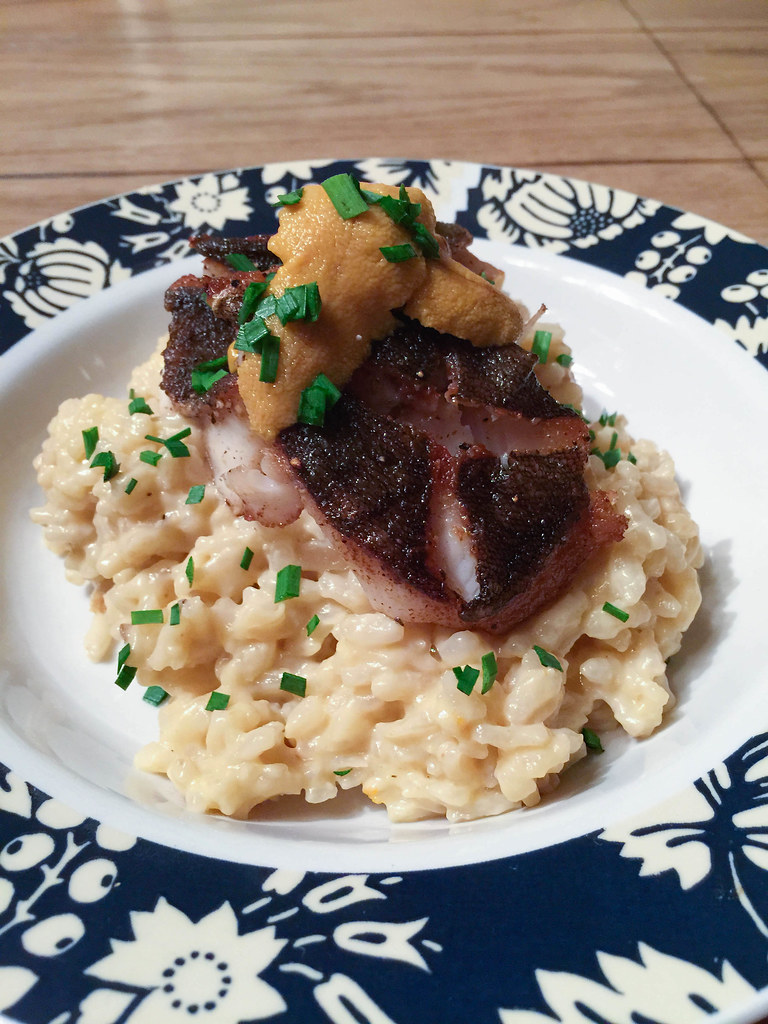
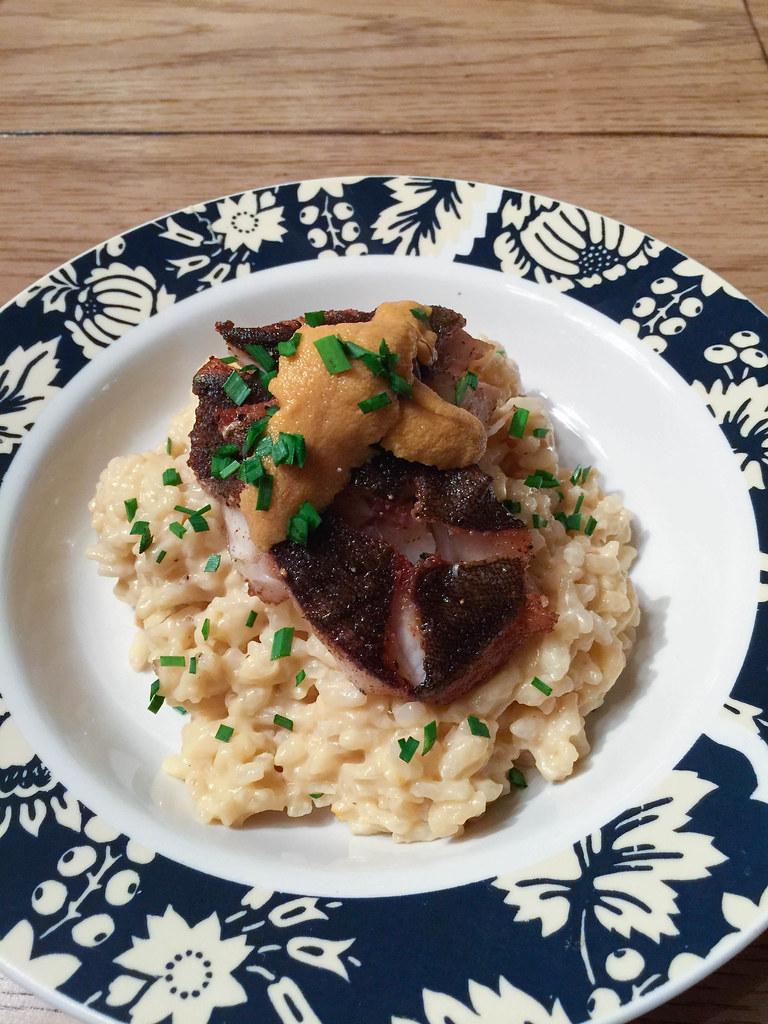
Crispy Black Cod over Uni Risotto.

You need this in your life. You really, REALLY do.

And the truth of the matter is, we made this incredibly decadent dish earlier this year at a Family Dinner though I didn’t post it because I wasn’t a fan of the pictures. But I came across them again while I was digging through my external hard drive and found my mouth watering.

It was so damn good.

Uni (Sea Urchin)

Seeing how we try our darnedest to try and not make the same dish twice for Family Dinner, I knew it would be awhile before I had the chance to rephotograph it. So I apologize for the photo quality but trust me on this, you’ll love this dish.

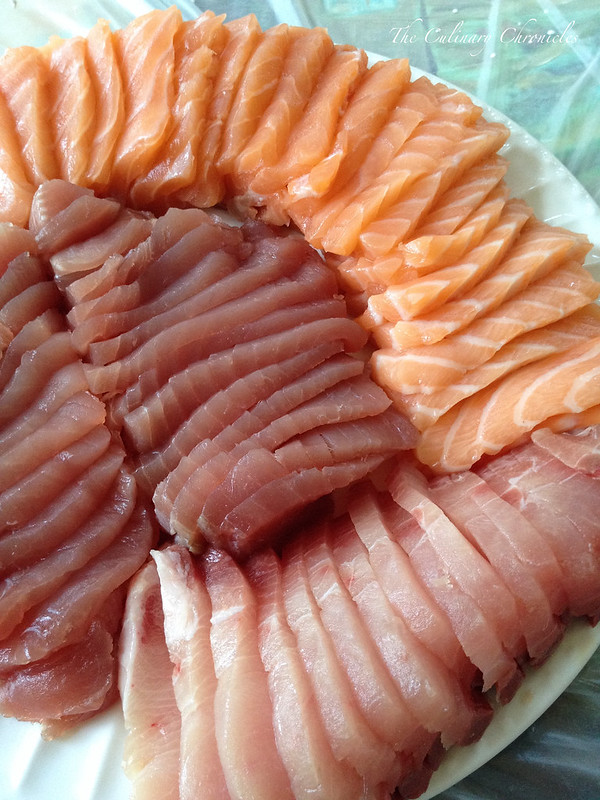
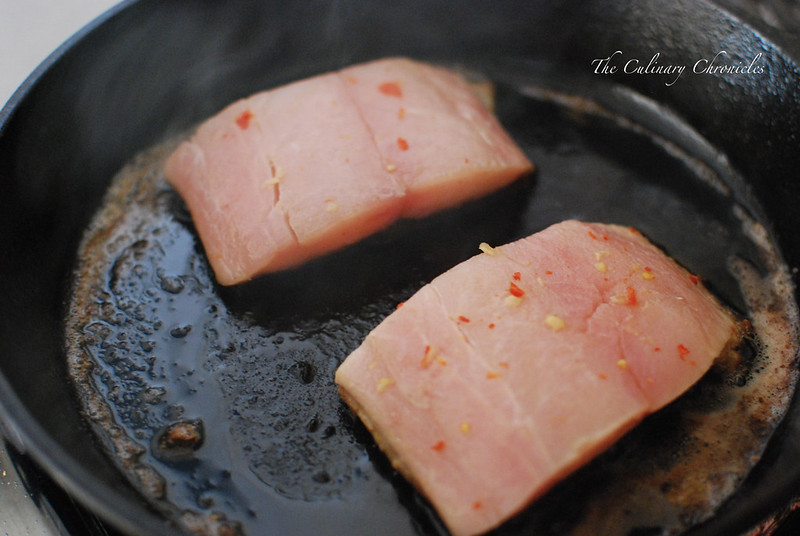
It was a collaboration between my seestrah T and I. She wanted a luscious fish and although we would usually turn to sea bass, we opted for black cod since it’s much more affordable. Sea bass has a very high oil content which keeps it wonderfully moist and almost buttery once cooked. Black cod mirrors the rich and decadent textures of sea bass but there are a TON of bones in them. So make friends with your fish monger and let them do the work for you.

Black Bass with Uni Risotto

I was in charge of the starch component of the dish and thought risotto would be wonderful with the tender fish. To send things over the top, I chose to make uni risotto by using my base risotto recipe but stirred in lots of pureed uni towards the end. The briny, mildly sweet flavor it brought to the rice was such a wicked compliment to the cod.

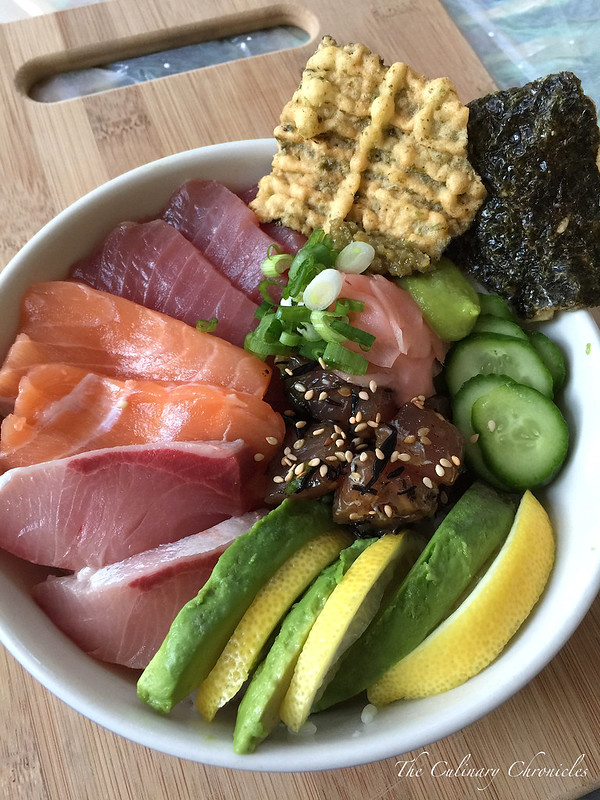
Here in Southern California, shelled uni can be found in the sashimi sections of Japanese and other Asian grocery stores. And if you’re feeling really adventurous, you can buy them whole in their spiny shells and remove them at home. I, for one, am okay with not shanking myself and opt to get them prepackaged.

Black Bass with Uni Risotto

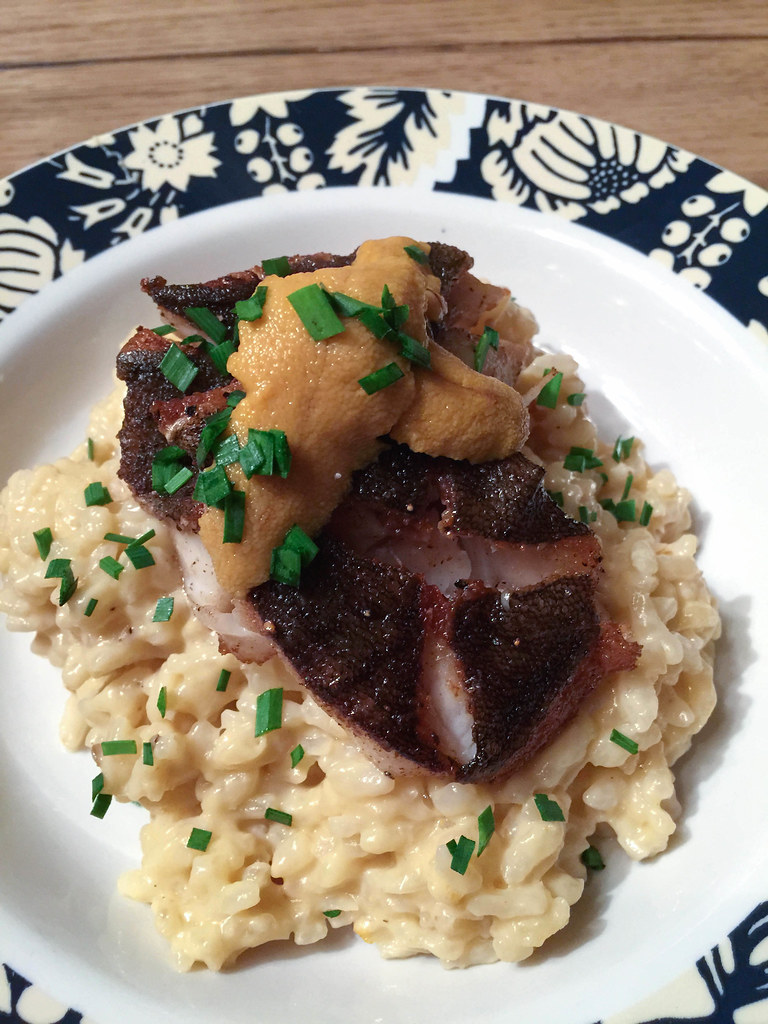
And since more uni is always better in my book, we had to top off the whole thing with 1-2 extra pieces. If you’re going to do it, do it right.

Right?

Right.

____________________________________________

Crispy Black Cod with Uni {Sea Urchin} Risotto
Serves 4

Ingredients:

12 ounces fresh uni (sea urchin )
4¼ cups seafood stock (ie. lobster, shrimp, etc.), divided
2 tablespoons olive oil
2 tablespoons unsalted butter, divided
1 cup diced white onion
1 tablespoon minced garlic
¼ teaspoon red pepper flakes
½ teaspoon fresh thyme leaves
1 cup Arborio rice
½ cup dry white wine
½ cup grated Parmesan cheese
kosher salt
black pepper
4 pieces black cod, skin-on, de-boned (5-6 ounces each)
vegetable oil
chopped chives to garnish

Take all but 4-6 pieces of uni and put it in a blender with ¼ cup seafood stock. Pulse until it becomes smooth and set aside. Alternatively, you can use an immersion blender or hand-whisk the uni into the stock. The latter method will not have as smooth of a finish.

Heat the remaining seafood stock in a medium saucepan and keep warm over low heat.

Heat the olive oil and 1 tablespoon butter in a pot (or large, deep set skillet) over medium heat. Add the onions and sauté until softened and translucent, about 3-4 minutes. Add the garlic, red pepper flakes, thyme leaves, rice and stir quickly until the rice is well coated and opaque—about 1-2 minutes.  Stir in the wine and cook until the liquid is nearly all evaporated.

Ladle in 1 cup of the hot stock into the rice. Simmer and slowly stir over medium-low heat until the rice has absorbed the liquid. Add the remaining stock, 1 cup at a time. Continue to simmer and constantly stir, allowing the rice to absorb each addition of stock before adding more. Once done, the risotto should be slightly firm and creamy–approximately 25 minutes in total. Stir in the pureed uni, cheese and remaining butter. Check for seasonings and adjust with the kosher salt and pepper.

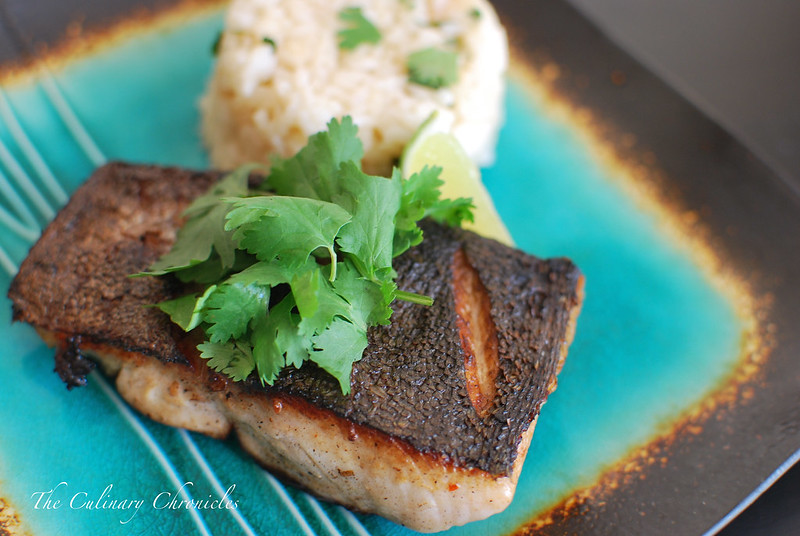
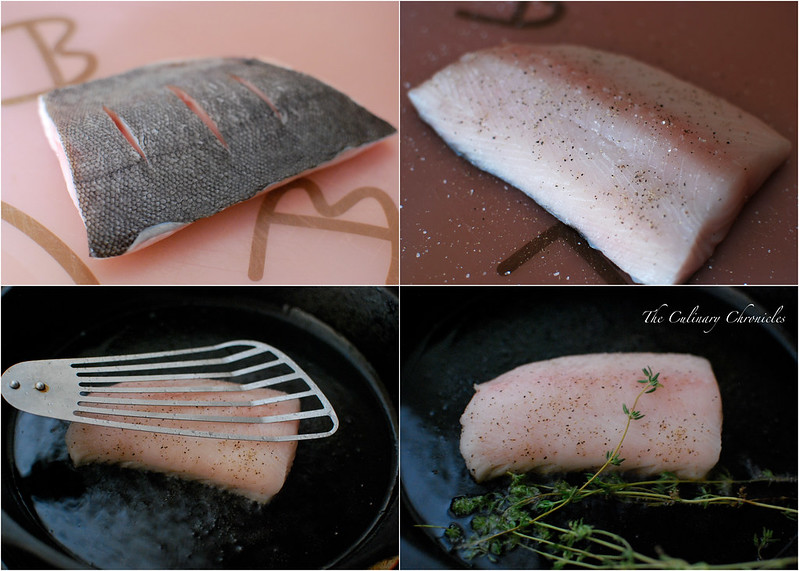
While the risotto cooks, heavily season both sides of the cod with black pepper and salt. Using a sharp knife, score the skin side of the fish. Choose a skillet that can handle a high level of heat (ie. cast iron, stainless steel, etc.) Heat the skillet over high heat so that it becomes screaming hot. Once it reaches the desired temperature, add a few tablespoons vegetable oil and swirl it around the skillet. Carefully place each fish, skin side down into the oil. Using a spatula, gently press down on the fish so that they don’t curl up on the sides. Cook the first side of the cod for about 3 minutes — depending on the thickness. Be careful not to flip the fish before the skin has crisped up and formed a crust. Once the first side has cooked, about 2/3 way through, flip and cook for an additional 2 minutes. Remove the fish from the skillet.

Spoon the risotto into the dishes. Place one piece of cod on top of the risotto and then place 1-2 pieces of uni atop the fish. Sprinkle each plate with chopped chives and serve immediately.


Seafood

Ceviche de Pescado

Ceviche de Pescado

I know y’all must be tired of me complaining about the weather…..

But it’s HAWT IN HERRE!!!!!!!!!!!!!

And muggy.

Bleh.

But I can’t help it! I’m a SoCal wussy when it comes to weather and I am dyyyyiiiiinnnnggg.

Like Dead.

I’ll miss you.

Ceviche de Pescado

But before I pass on to the afterlife, let me pull this oldie but goodie out to share with you that is an absolute MUST during the summer— Ceviche de Pescado.

Ceviche of all sorts is quite popular in my neck of the woods having its roots in Mexican and Latin cuisines. It’s essentially a dish comprised of fish (or other seafood) that is “cooked” in citrus juice and spices. Since the acidity from the citrus “cooks” the fish, there’s no needs to crank on the stove or oven to make this little number—which is one of the reasons it’s perfect for warm days.

This time around I used a basic approach with the ceviche but depending on the region of Latin America, you can add just about anything such as corn, sweet potatoes, plantains, or even a tomato sauce. I also chose to use red snapper for this batch but any fresh, white fish will do……or even shrimp, scallops, octopus–the ocean is the limit!

But one thing is a must…..since you’re not using any heat in the preparation of this dish, you have to use the freshest proteins you can get your hands on.

How can you tell?

Sashimi grade labeled fish or products from a trusted fishmonger is generally a safe bet. But when in doubt—smell it. If it smells fishy–skip it.

Ceviche de Pescado

Oh…in case you were worried, my puggle turned on the air conditioner while I was passed out and I miraculously sprung back to life.

That clever little puppy. ❤

________________________________

Ceviche de Pescado
Servings 4-6

Ingredients:

 1½-2 pounds firm white fish fillets, evenly diced (ie. snapper, tilapia, bass, etc.)
¼ cup fresh orange juice
1 cup fresh lime juice
zest of 1 lime
1 serrano chili, seeds removed and finely diced
½ tablespoon finely minced garlic
1 red bell pepper, diced
½ small red onion, finely diced
¼ cup chopped cilantro
½ cup diced tomatoes
1/8 teaspoon ground cumin
1/8 teaspoon ground coriander
2-3 pinches cayenne pepper
2 tablespoon olive oil
kosher salt
black pepper

 In a large, non-reactive bowl, gently combine the fish, orange juice, lime juice, lime zest, serrano chili, garlic, bell pepper and red onion. Cover the bowl and refrigerate for 60 minutes. The fish should turn white and opaque.

Drain and discard all but ¼ of the liquid from the bowl. Fold in the cilantro, tomatoes, cumin, coriander, cayenne, and olive oil. Adjust seasonings with salt and pepper. Serve immediately with additional lime wedges, hot sauce, diced avocados, and tortilla chips.

Seafood

Chirashizushi {Chirashi} – Fresh Sashimi Rice Bowls

Chirashizushi

Oh Chirashizushi….how do I love thee?

Fresh fish, veggies, pickled ginger, wasabi and perfectly cooked sushi rice—-all mixed up in a bowl. Chirashizushi (ちらし寿司) or chirashi, translates to “scattered” which is one of the beauties about this dish.

Perfection.

As much as I love sushi rolls and nigiris, this gal can get terribly lazy sometimes. So to be able to throw all the ingredients that I love in sushi into one bowl is just genius.

And delicious.

Chirashizushi

I had been up at my seester’s place one weekend when we decided to pop into a local fishmonger we had discovered some time ago– Dry Dock Fish Company. It’s a smaller little shop, tucked away in Fullerton. But if you’re in the area, you must check it out because it’s an absolute gem.

Chirashizushi

I contemplated writing out a recipe for chirashi but I felt kind of silly doing it.

Make-at-home chirashi is all about using whatever types of fish that tickles your fancy. The chirashi pictured above has slices of ahi, hamachi, salmon, spoonfuls of ahi shoyu poke that I whipped up, avocado slices, lemon slices, lightly pickled Persian cucumbers, wasabi paste, scallions, gari (pickled young ginger), yuzu kosho (yuzu paste), nori crackers, and of course–sushi rice.

But again, chirashi can be anything you’d like my Friends. Just be sure to use sashimi grade fish ❤

Happy Saturday!!!

Seafood · Sponsored

Pan-Seared Mahi Mahi with Coconut-Cilantro Rice

Pan-Seared Mahi Mahi with Coconut-Cilantro Rice

So here’s the problem I have after EVERY Thanksgiving.

Do I now try to eat lighter the weeks leading up to Christmas to make up for the gazillion calories I inhaled during Thanksgiving weekend?

Or………

Do I not let leftovers go to waste and continue on with the turkey, potatoes, casseroles, mac n’ cheese, and desserts until they’re all gone?

First world problems.

Pan-Seared Mahi Mahi with Coconut-Cilantro Rice

Eh….let’s be honest. I’m going to continue shoveling in the last of the leftovers and THEN jump over to something lighter and easy to whip up.

Which works out fantastic because our friends at The Saucey Sauce Co. had sent me a care package awhile back with a variety of yummy goodness that can be used as ready-to-go sauces or marinades. They’re a family owned group (yay for family!) that base many of their products on their Asian/Vietnamese heritage. You can find them at their online store but they’re also branching out across the country to some great retailers!


photo-1

I love using the sauces to marinade chicken breasts and fish because it’s all ready to go. I’ve also tossed some chicken wings in rice flour, deep fried it and then tossed them in their Sweet Ginger Sauce — so good!


Pan-Seared Mahi Mahi with Coconut-Cilantro Rice

I happened to pick up some gorgeous mahi mahi fillets while at the store because they looked wonderfully fresh and I like the “heartiness” of the fish. When I got home, I grabbed my trusty bottle of Spicy Garlic Sauce and added some lime zest and ginger for a bit more brightness. (On a side note, I always add a bit of additional fresh herbs or other aromatics when using bottled products. I think it greatly enhances the flavor and adds that needed zing.)

After coating the fish with the marinade, I placed it in the fridge for about an hour so that it could work its magic.

Saucey-sauce magic.


Pan-Seared Mahi Mahi with Coconut-Cilantro Rice

Once the fillets have had its fill of magic, I pan-seared the fish on a screaming hot cast iron skillet to get that super crunchy skin. And like I said on the Pan Seared Black Cod post, do not — and I mean DO NOT, try to flip the fish before it’s ready. It’ll let you know when the time is right when you can slide a spatula underneath it.

Trust me.

To serve with the mahi mahi, I made a fragrant coconut-cilantro rice. The recipe below tells you how to make it on the stove but if you have a rice cooker, just throw it all in machine and let it do its thing.

The fish turned out so delicious! The mahi mahi was able to soak up the slightly sweet, slightly spiced marinade but it wasn’t overpowering at all. And you can definitely use any other fish of your choice if mahi mahi isn’t your thing.

The perfect, easy, scrumptious weeknight meal.

And as always, much thanks to our friends at The Saucey Sauce Co.!!

_________________________________________________

Pan-Seared Mahi Mahi with Coconut-Cilantro Rice
Serves 2

Ingredients:

½ cup The Saucey Sauce Company’s Spicy Garlic Sauce
1 teaspoon finely minced fresh ginger
2 teaspoons fresh lime zest, divided
2 mahi mahi fillets, skin-on, de-boned (5-6 ounces each)
1 cup uncooked jasmine rice
½ cup coconut milk
3/4 cup coconut water (or water)
2 tablespoons minced fresh cilantro
pinch kosher salt
2 tablespoons vegetable oil
whole cilantro leaves and lime wedges for garnish

In a shallow dish, whisk the Spicy Garlic Sauce, ginger and 1 teaspoon lime zest together. Place the fish in the dish and coat both sides. Cover the dish with plastic wrap and marinate for 45-60 minutes in the refrigerator. Take out of the refrigerator about 10 minutes before cooking to take the chill off.

While the fish marinates, prepare the rice. Combine the rice, coconut milk, coconut water (or water) and salt in a heavy bottom pot. Bring the liquids to a boil and then lower the heat to a gentle simmer. Cover the pot and allow to cook for 18-20 minutes. Remove the pot from the heat with the cover still on and allow to sit for about 5 minutes. Once the time is up, add the cilantro and remaining lime zest. Using a fork, fluff the rice and set aside.

Choose a skillet that can handle a high level of heat (ie. cast iron, stainless steel, etc.) Heat the skillet over high heat so that it becomes screaming hot. Once it reaches the desired temperature, add the oil and swirl it around the skillet. Carefully place each fillet, skin side down into the oil. Using a spatula, gently press down on the fillets so that they don’t curl up on the sides. Cook the first side of the fish for about 3 minutes — depending on the thickness of the fillets. Be careful not to flip the fish before the skin has crisped up and formed a crust. Once the first side has cooked, about 2/3 way through, flip and cook for an additional 2 minutes.

Remove the fillets from the skillet. Use paper towels to gently blot any excess grease off of the fillets and plate on two separate plates. Add a large scoop of the rice on each plate and top each fillet and rice with the fresh cilantro leaves. Serve each plate with a piece of lime wedge that should be squeezed over the fish before eating. Serve warm.

Enjoy!


 **Disclosure: I did receive products from The Saucey Sauce Co., but as always, my opinions are my own.**

Seafood

Pan Seared Black Cod with Anchovy-Herb Vinaigrette

Pan Seared Black Cod with Anchovy-Herb Vinaigrette

It’s been non-stop for me over the past few weeks and although I’ve had a fantastic time, this gal was starting to feel a bit run down.

I needed sleep.

I needed to give my party pants a break.

And I needed to get back in my own {tiny} kitchen.

Pan Seared Black Cod with Anchovy-Herb Vinaigrette

And that’s where I was all weekend long.

Well, it was where I was after I went to the store to stock up on fresh produce because I think the only green thing I consumed over our 4-day Vegas trip was the lime in my grey goose tonic.

Gluttony is my name.

Pan Seared Black Cod with Anchovy-Herb Vinaigrette

To fuel up for the weekend of cooking, I wanted something light but fulfilling–definitely some fish. Now my default is usually sushi or fish tacos when I get a hankering for fish but I then remembered a nearby fishmonger that I’ve been wanting to try – Catalina Offshore Products. They get their product every day directly off the boat from the fishermen — cannot get any fresher than that!

So I popped on in….drooled over all of their premium grade uni, oysters, sushi grade fish and chopped it up with some of their staff. AMAZING!!! For all of you folks in the San Diego area who may be wary about seafood—come here! They’ll put to rest any fears that you may have.

I somehow practiced some self restraint and only picked up a few fillets of their gorgeous black cod for lunch. Black cod is a tender fish that is a bit on the fattier side –think of sea bass– and incredibly delish.

I chose to pan sear the fillets because it’s quick and gives the fish a lovely crunchy crust without overcooking the meat. And the secret to pan searing fish? You’ve got to get the skillet/pan screaming hot before adding the oil and do not —let me repeat…DO NOT mess around with trying to flip the fish around a gazillion times. You’ve got to let it crisp up on the first side and then when it’s ready, meaning when you can slide a spatula underneath it without any resistance, then flip it!

Pan Seared Black Cod with Anchovy-Herb Vinaigrette

Because I’m obsessed with anchovy paste lately, I decided to make a quick herby vinaigrette with anchovy paste for that much needed acidity to cut the natural fattiness of the fish. And for all of you anchovy haters — get over it! The paste adds a subtle, salty, sea flavor that I’m sure you wouldn’t guess it was anchovy if I hadn’t told you.

For reals…..

Since I was aiming for a lighter dish, I served my fish with these gorgeous heirloom tomatoes that I also tossed in some of the vinaigrette. They were beautiful and sweet. But if you’re looking for a little starch — a sunchoke puree or even garlic noodles would be the bomb-diggity.

Yeah….I just went there.

The finished dish is a show stopper if I dare say so myself. Crisp and tender fish with bright acidity from the vinaigrette. And guess what? If you get your act together, this beauty can be done in 20 minutes…..25 minutes if you want to take a leisurely approach.

Fantastic if you’re having folks over or just when you want to make yourself something delish. Because let’s face it, I don’t care if you’re just learning how to cook, an intermediate cook or chef extraordinaire —the food you create should make you want to smile and do a little happy dance.

And this little number made me do both….times 100.

________________________________________________

Pan Seared Black Cod with Anchovy-Herb Vinaigrette
Serves 2

Ingredients:

1 tablespoon anchovy paste
2 tablespoons minced shallots
1 garlic clove, roughly chopped
1 cup roughly chopped fresh basil
1 tablespoon roughly chopped Italian parsley
1 teaspoon fresh thyme leaves
1 teaspoon lemon juice
1/4 cup champagne vinegar
1/2 cup extra virgin olive oil
kosher salt
black pepper
2 black cod fillets, skin-on, de-boned (5-6 ounces each)
2 tablespoons vegetable oil
3-4 fresh thyme sprigs
2 cups heirloom cherry tomatoes, quartered

Combine the anchovy paste, shallots, garlic, herbs, lemon juice and vinegar in a blender and blend at medium speed for about 20 seconds. With the blender running on low, slowly drizzle in the olive oil until the vinaigrette has become emulsified. Season with salt and pepper. Set aside.

Score the skin side of each of the fish fillets and use paper towels to pat them dry. Season the fillets with kosher salt and pepper.

Choose a skillet that can handle a high level of heat (ie. cast iron, stainless steel, etc.) Heat the skillet over high heat so that it becomes screaming hot. Once it reaches the desired temperature, add the oil and swirl it around the skillet. Carefully place each fillet, skin side down into the oil. Using a spatula, gently press down on the fillets so that they don’t curl up on the sides. Toss the thyme sprigs into the oil on the side of the fish –this will help flavor the oil.

Cook the first side of the fish for about 3 minutes — depending on the thickness of the fillets. Be careful not to flip the fish before the skin has crisped up and formed a crust. Once the first side has cooked, about 2/3 way through, flip and cook for an additional 2 minutes. Remove the fillets from the skillet.

Toss the tomatoes in a few spoonfuls of vinaigrette. Plate 1/2 of the dressed tomatoes on each plate. Top each mound of tomatoes with a cod fillet. Drizzle the fish with additional vinaigrette. Serve immediately.

Seafood · Vietnamese

Cá Nướng {Vietnamese Roasted Fish}

Cá Nướng {Vietnamese Roasted Fish}

Cá Nướng is a really common Vietnamese dish of roasted fish. And although it’s most often made with catfish because of its firm and somewhat fatty flesh, you can use any fish that can hold up to high heat while still staying moist.

When given the choice, I recommend roasting a whole fish. Not only does it help retain moisture but you’ll almost always get a better flavor when you cook your proteins bone-in.

Cá Nướng {Vietnamese Roasted Fish}

This is when it’s so nifty to have a trusted fishmonger — or in my case, an Asian grocery store, nearby. The latter almost always has live catfish on hand (so you’ll know it’s super fresh) and both options can do the dirty work for you –which I totally appreciate as I hate cleaning fish.

And don’t be surprised to see your once silver/black catfish “turn” white when it comes back cleaned for you. Many fishmongers will scrub the catfish skin to remove the dark outer layer. Although it’s completely edible, the darker skin does make your fish taste a tad “fishier” so the extra scrub down is a good thing.

Cá Nướng {Vietnamese Roasted Fish}

I’ve adopted my eldest seester’s method of preparing Cá Nướng which is not only easy to do but is rather simple when seasoning the fish. A lot of folks will use a variety of aromatics and spices to marinate it. But since you’ll typically dunk the roasted fish into a nước chấm (dipping sauce), you can stick with a minimal preparation before cooking the fish as the sauce will provide the extra flavor punch.

Cá Nướng {Vietnamese Roasted Fish}

Cá Nướng can be served over rice, with vermicelli noodles, inside a bánh mì (sandwich) or how we typically like it —cuốn bánh tráng (wrapped in rice paper).

The rolls are filled with tons of fresh herbs and veggies that when combined with the roasted fish, is absolutely amazing. They have tons of different textures, knock-out flavor and are deliciously light on the tummy.

Cá Nướng {Vietnamese Roasted Fish}

Serving your Cá Nướng as spring rolls is also a fantastic way to entertain family-style and would be a prefect al fresco dining option during the upcoming warm months. Your guests will love making their own rolls and adding their favorite items inside.

And don’t let the ingredients list and recipe fool you. It may seem like a lot of different components but it’s not difficult at all. You can also prepare many of the components in advance to cut down on prep time.

Easy and delish……Total Nguyen-Win!


______________________________________________

Cá Nướng {Vietnamese Roasted Fish}

Ingredients:

¼ cup vegetable oil
¼ cup chopped scallions
1 whole catfish (2-3 pounds), cleaned/scaled with head removed
1 teaspoon garlic powder
¼ teaspoon black pepper
½ teaspoon kosher salt
2 scallions stalks
½ cup fried shallots
¼ cup roughly chopped peanuts
1 cup roughly chopped fresh cilantro leaves

For Nước Chấm dipping sauce:
¼ cup nước mắm (fish sauce)
¼ cup sugar
¼ cup  fresh lime juice,
2 tablespoons warm  water,
1 finely minced garlic clove
1 teaspoon chili paste, more to taste

Serve with:
1 package bánh tráng (dried rice paper sheets)
lettuce leaves
1 small cucumber, thinly sliced
1 cup đồ chua (pickled carrots and daikon slices)
fresh mint leaves
fresh Vietnamese cilantro leaves
fresh Thai basil leaves
whole Thai chiles
lime wedges

Prepare scallion oil (hành mơ):  In a sauté pan, slowly heat the vegetable oil over low. Add the chopped scallions. Cook the scallions until they are wilted but still bright green–approximately 2-3 minutes. Pull from heat and allow the scallion oil to cool until room temperature.

Rinse the fish with cool water and pat dry with paper towels. Coat the fish with the scallion oil and season the exterior and interior with the garlic powder, black pepper and kosher salt. Stuff the fish cavity with the scallion stalks and prop it upwards on a baking tray. Allow the fish to marinate for 20 minutes.

While the fish marinates, prepare the nước chấm.  Whisk all the items together in a small bowl. Add chili paste to taste. Set aside.

Roast the fish in an oven heated to 400 degrees F for approximately 25-30 minutes or until the flesh is opaque and cooked through. Turn on the broiler of your oven and broil the fish for about 60-90 seconds to slightly crisp & brown the skin. Remove the fish from the oven and transfer to a platter. Top the fish with the fried shallots, chopped peanuts and cilantro leaves.

To serve the fish as a spring roll (bánh tráng cuốn), dip one rice paper sheet in warm water and place on a plate/flat surface. The rice paper will slowly become pliable. Lay one piece of lettuce in the middle of the sheet and top with some of the fresh herbs, đồ chua, cucumber slices and pieces of the fish. Spoon some of the peanuts and fried shallots on top. Tightly roll the bottom of the rice paper over the mound and then fold the sides in. Continue rolling the rice paper up until you’ve created a secured roll.

Serve the rolls and fish with the nước chấm. Ăn ngon!


Seafood · Vietnamese

Cá Kho Tộ {Vietnamese Clay Pot Braised Catfish}

Cá Kho Tộ {Vietnamese Clay Pot Braised Catfish}

Growing up, our daily family dinners typically consisted of rice (cơm) served with a stir-fried dish (món xào), a soup dish (món canh), and sometimes a braised dish (món kho). Pretty standard menu for a Vietnamese meal.

Truthfully, I took it for granted back then as I preferred to have lasagna, McDonald’s or even Dairy Queen for dinner. Hey- I was a little kid growing up in Minnesota after all.

But as I get older, those are the dishes I crave the most–even if I don’t make them too often. One of those nostalgic dishes is Cá Kho – braised fish. There’s a ton of variations to Cá Kho and it can change depending on the household. I like it two ways–the first in a very salty broth that you eat with vermicelli noodles or Cá Kho Tộ where the fish is braised in a salty sweet sauce.

Cá Kho Tộ {Vietnamese Clay Pot Braised Catfish}

Cá Kho Tộ is traditionally made with catfish and uses a combination of nước màu (caramel sauce), tons of fish sauce, shallots and coconut juice. Although it’s meant to be cooked in a claypot (tộ), you can use any heavy bottom pot that you have on hand.

We use Coco Rico (coconut soda) in a lot of our kho dishes in lieu of coconut juice but if you can’t find it at your local ethnic grocery store, the latter should work out fine. You can also substitute the catfish for salmon, seabass or any fatty fish that can hold up to braising.

Cá Kho Tộ {Vietnamese Clay Pot Braised Catfish}

Once done, the fish is really tender and I love to spoon the thick, salty/sweet sauce over rice. So good! But just a suggestion, be sure to turn on your kitchen fan while you’re cooking up cá kho because the aroma can be a bit strong. 🙂

Ăn Ngon, Folks!

______________________________________________

Cá Kho Tộ {Vietnamese Clay Pot Braised Catfish}
Serves 4

Ingredients:

salt
2 pounds catfish steaks, washed and patted dried
1 tablespoon palm sugar (or brown sugar)
1/4 cup diced shallots
1 tablespoon minced garlic
1/4 cup chopped scallions, divided
3 tablespoons fish sauce, more to taste
2 tablespoons nước màu, divided
1/2 teaspoon black pepper
2 tablespoons vegetable oil
12 ounces Coco Rico soda
1 tablespoon fresh ginger, cut into matchsticks
3-4 red Thai chiles, more to taste
fresh cilantro leaves

Liberally sprinkle salt over the catfish steaks. Rub the salt all over the fish and rinse off with cool water. Pat the fish dry with paper towels. The salt “exfoliate” is a great way to clean fish and other meats.

Place the washed fish into a large bowl. Add in the palm sugar, shallots, garlic, all but 1 tablespoon of scallions, fish sauce, 1 tablespoon of nước màu and black pepper. Coat the fish well in the marinade and cover the bowl with plastic wrap. Refrigerate the fish and allow to marinate for 45 minutes to an hour.

Heat the oil over medium heat in a large clay pot or other heavy bottom pot. Place the catfish steaks in a single layer and sear 1 minute on each side. Pour all the marinade over the fish, the remaining nước màu and the Coco Rico soda. Add the ginger, chiles and allow the liquids to come to a boil. Lower the heat to medium-low and simmer, covered for about 30 minutes. Gently flip the catfish steaks halfway through the cooking time.

Once the fish has cooked through and the sauce has reduced and thickened, taste and add more fish sauce as needed. Sprinkle the remaining scallions, additional chiles (to taste), and cilantro leaves on top. Serve warm with rice.

Appetizers/Small Plates · Seafood

Thai Fried Fish Cakes

Thai Fried Fish Cakes

Oh…Hey.

So, do you remember when my Fam Bam did a Thai themed Family Dinner? Because if you don’t, let me tell ya it was DEE-LICOUS!

Totes ONE NIGHT IN BANGKOK……

And as I said before, my MVP dish of the night goes to my seester’s fried fish cakes. Although humble at first glance, these scrumptious bites are out of this world. Definitive seafood flavor punched with kaffir and something subtly rich—coconut milk.

I wish I had them right now…..like a dozen of them! These beauties poof up when you them and settle down to an even “fritter like” consistency.  And trust me, double the batch because you’ll want more!

______________________________________

Thai Fried Fish Cakes
From About.com

1 lb (.454 kg) white-fleshed fish fillets
6 kaffir lime leaves, snipped into thin strips
3 tablespoon coconut milk
2 tablespoon fish sauce
1/2 teaspoon shrimp paste or 1 extra tablespoon fish sauce
1/2 tablespoon chili powder
1/3 teaspoon ground cumin
1/4 teaspoon ground coriander
1/2 teaspoon brown sugar
3 green onions, sliced
1 thumb-size piece galangal OR ginger, grated
3 cloves garlic
1 red chili, sliced or 1/2 teaspoon dried crushed chili
1/3 to 1/2 cucumber (to accompany cakes)
oil for high temp. frying
To SERVE: Thai sweet chili sauce, lime wedges, handful fresh coriander

Rinse fish and pat thoroughly dry (if using frozen, the fish will be more moist so be sure to dry it as well as you can). Cut into chunks and place in food processor or large food chopped.

In a cup, combine the coconut milk, fish sauce, shrimp paste, chili powder, cumin, ground coriander, and brown sugar. Stir with a fork to combine, then pour into the processor over the fish.

Add remaining ingredients (kaffir lime leaf strips, green onion, galangal/ginger, garlic, and chili). Pulse to create a thick fish paste.

Picking up a small amount in your hand (about the size of a golf ball) pat the paste into a small cake and set on a clean plate. Note that traditional Thai fish cakes are small (about 2 inches in diameter and 3/4 to 1 inch thick) and not too thick. Tips: If your paste is too wet to easily form into cakes, add a little flour or breadcrumbs to the mix. As you continue making the cakes, it helps to rinse your hands every so often with cool water to prevent paste from sticking.

Set plate of cakes in the refrigerator for 10 minutes to firm up. Meanwhile, prepare your pan for frying as well as your garnishes. Cut the cucumber length-wise, then dice up into small cubes and set aside. Pour oil into a small frying pan or wok (at least 1 inch deep).

Heat oil. When hot enough (a breadcrumb should sizzle and cook immediately when dropped in), gently place cakes in oil. Allow to fry 30 seconds to 1 minute before turning, gently lifting cakes from the bottom of the pan (they may stick a little). Fry until golden-brown and drain on paper towel.

Serve fish cakes immediately with the chopped cucumber and Thai sweet chili sauce drizzled over. Top with fresh coriander and a squeeze of lime juice just before eating. Excellent like this, or served with rice for a main course dish. ENJOY!

Make Ahead Tip: You can make the fish paste up to 24 hours in advance. Cover and set in the refrigerator, then form into cakes and fry.

Seafood · Sponsored

Crispy Fish Sliders + New Foodventures with King’s Hawaiian

Crispy Fish Sliders on Kings Hawaiian Rolls

Happy Earth Day Folks!

I am thrilled to be sharing that I have the honor to join the wonderful o’hana at King’s Hawaiian as one of their Featured Bloggers. As y’all know, I’m OBSESSED with the ono King’s Hawaiian products & since my visit with them back in August, I have gained the utmost respect for the organization and the Taira O’hana.

Check out my first post here where I share my experience with Aloha ‘Aina and a fun recipe for Crispy Fish Sliders.

Stay tuned for more posts to come! Alohas!

Seafood

Fish Tacos with Avocado-Cabbage Slaw

Fish Tacos with Avocado-Cabbage Slaw

I spent a good part of Saturday gallivanting around Old Town San Diego TAH-KEY-LA tasting with some fab friends. The beautiful California sun was shining and we were getting to know the lovely complexities of Blanco, Reposado, and Añejo.

But want to know my little secret? After all that “training” I still don’t know anything and will continue to judge different tequilas based on the following responses I give after tasting it –“Meh“, “ACKK!!”, or “MAKE IT A DOUBLE!”

Totally scientific.

But amidst all the tequila-shenanigans, I did get down on some delish Fish Tacos–a west coast treasure. And I am pretty much obsessed with all types of fish tacos— grilled, blackened, seared, and of course Baja style which is lightly beer battered then fried.

Fish Tacos with Avocado-Cabbage Slaw

This is one of the ways I prepare Fish Tacos when I’m a tad short on time and are in one of my über avocado moods. Which let’s be honest, is all the time.

I make a quick cabbage slaw with a creamy and slightly tangy avocado dressing and pile it on top of fish that has been marinated and broiled. Super crunchy, super bright, super tangy, and SUPER DELICIOSO!!

I may have overdone it with the “supers” but you get the drift. 🙂

_______________________________________

Fish Tacos with Avocado-Cabbage Slaw
Serves 2

Ingredients:

Tacos
½ pound firm white fish fillets, such as cod or tilapia
2 garlic cloves, finely minced
1 teaspoon lime zest
2 tablespoons chopped cilantro, plus more for garnish
¼ teaspoon red pepper flakes
2 pinches ground cumin
2 tablespoons vegetable oil
kosher salt and pepper, to taste
4 flour or corn tortillas
1 cup chunky salsa
lime wedges

Avocado-Cabbage Slaw
1 cup ripe avocado, diced
¼ cup Mexican crema or sour cream
¼ cup fresh cilantro, chopped
½ jalapeno pepper, finely diced and seeded
1 tablespoon lime juice
½ tablespoon agave or honey
kosher salt and pepper, to taste
2 cups shredded cabbage

In a shallow dish, coat the fish with garlic, lime zest, cilantro, red pepper flakes, cumin, and oil. Season with kosher salt and pepper. Allow to marinate for 20 minutes in the refrigerator.

In a blender, puree the avocado, crema, cilantro, jalapeno pepper, lime juice and agave until smooth. Season with salt and pepper. In a large bowl, toss the cabbage with a few spoonfuls of the avocado puree until lightly coated. Cover the bowl with plastic wrap and refrigerate.

Preheat the oven broiler and arrange the marinated fish on a baking sheet. Place the baking sheet a few inches away from the broiler, and broil the fish for 2-3 minutes on each side or until the fish becomes opaque and flakes easily with a fork.

Warm the tortillas. Divide the fish, salsa and slaw amongst the tortillas. Sprinkle each taco with the extra chopped cilantro and serve warm with lime wedges on the side.