Desserts/Pastries

Matcha Chocolate Pocky Cake

August 2015 Family Dinner

It’s Friday gang….so let’s get down with some CAKE!!!

Cake! Cake! Cake! Cake!

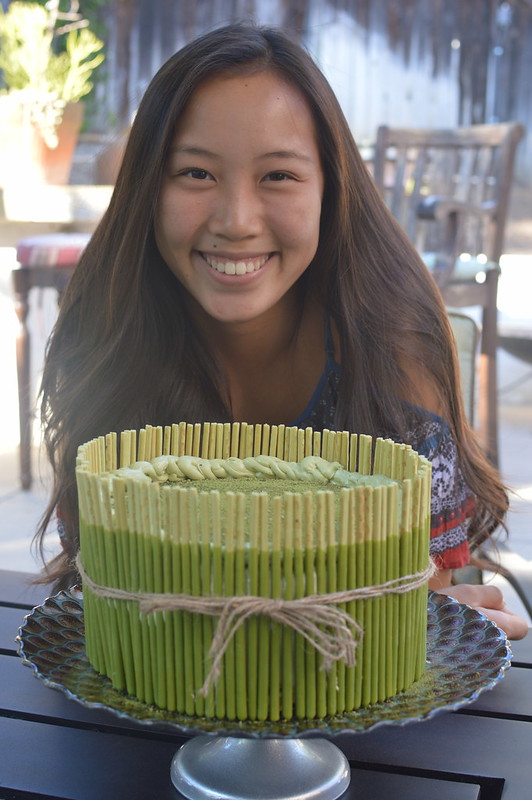
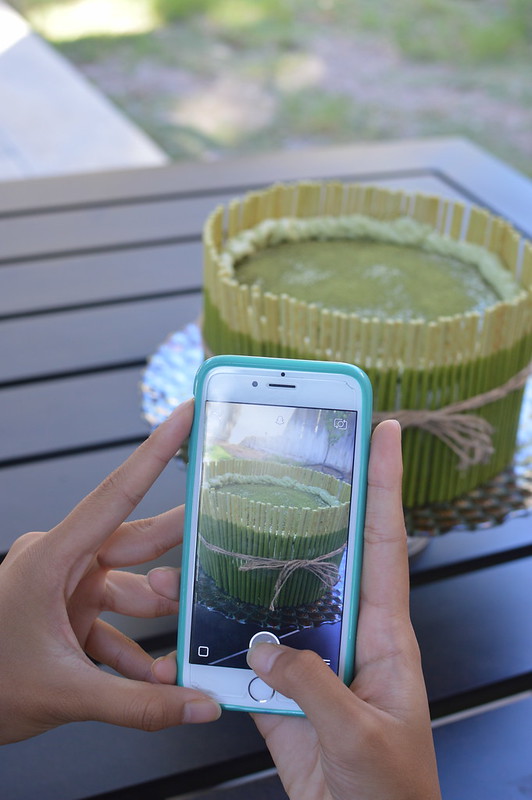
Since I posted a pic of this beauty I made for my beauty of a niece, I’ve been getting lots of love (THANK YOU!) and questions about what went into the cake.

So let me break it down for you…

August 2015 Family Dinner

There was a TON of matcha powder….

LOTS of chocolate….

A gleeful amount of butter and sugar……

And three pinches of fairy dust.

Because if you’re not baking with fairy dust, then you’re doing something wrong.

August 2015 Family Dinner

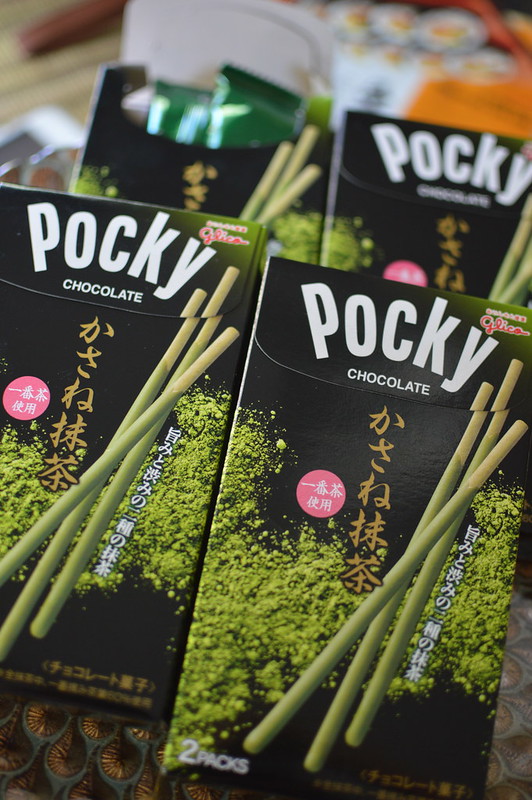
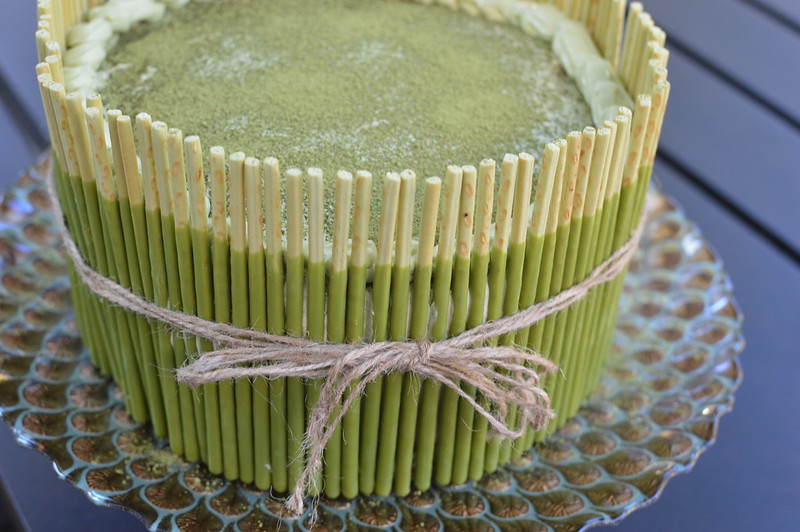
Our Nina loves chocolate and matcha so when it came time to think of a birthday cake for her, I remembered a picture I saw on Pinterest a while back that had a cake adorned with Matcha Pocky Sticks. It was so flipping cute and had her name all over it.

I got down to business. It’s rather impressive in its presentation and surprisingly, not too hard to make. But there are a lot of stages involved—totally worth it in my opinion.

August 2015 Family Dinner

To begin, I turned to my girl Ina Garten and her incredible chocolate cake recipe. Actually she gives credit to “Beatty“…. who is Beatty again? She’s a saint as far as I’m concerned….a Cake Saint {insert sounds of angels singing}.

Seriously, this is THE chocolate cake recipe. We make this all of the time and not only is it near foolproof but it is always a hit whenever we serve it. It’s rich in chocolate flavor (because the hot coffee intensifies the cocoa powder) and wonderfully moist (because of the buttermilk and it’s an oil based batter). Layered cakes, cupcakes, sheet cake—look no further for a base chocolate cake….I’m not exaggerating this time guys.

Pinky swear.

If you’ve never made this cake before (drop EVERYTHING and bake it now!), don’t be concerned if the batter looks really runny before baking. It will come together.

Trust Ina. And Beatty.

August 2015 Family Dinner

I initially had planned to just use buttercream in between the cake layers. But then I thought, why stop there? Let’s add MORE matcha flavor to party!

I ended up making an airy matcha mousse to fill the layers with. The mousse was inspired by the Matcha Cake my seester N made for her hubby’s birthday last year. He, too, loves green tea. Yep, my niece Nina (and her seester Nini) get their love of matcha from their Pops.

August 2015 Family Dinner

After I filled the layers of cake with the mousse, I refrigerated it for an hour or so to allow everything to set up.

While everything was chilling out in the fridge, I turned my attention to the frosting.

August 2015 Family Dinner

These days, I tend to make Swiss Meringue Buttercream to frost almost all my cakes and cupcakes with. I find that it tastes less sweet (though, don’t get me wrong, there’s a hefty amount of sugar in it) and it’s a more stable product to decorate with.

Sure, it is more laborious than an American Buttercream but so much tastier.

To flavor the buttercream, I used… you guess it—- matcha powder!

August 2015 Family Dinner

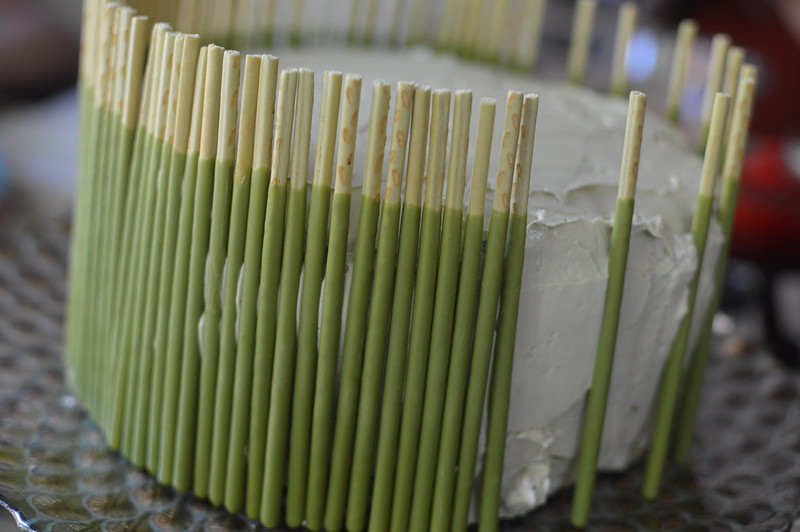
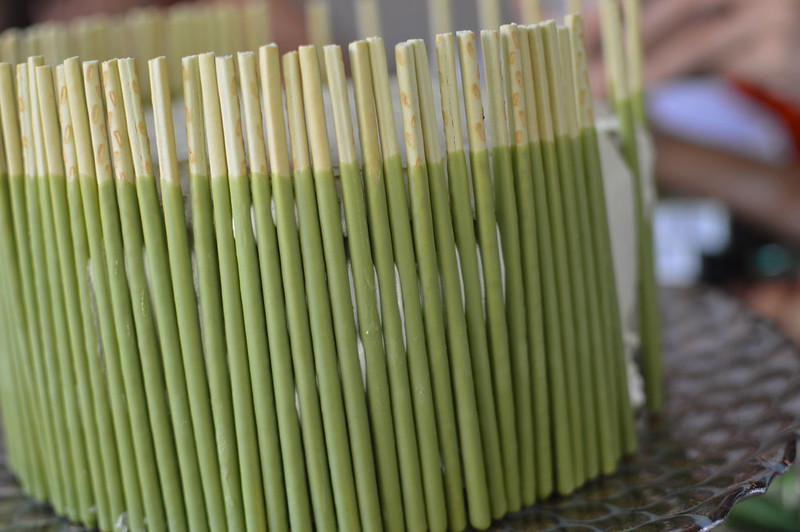
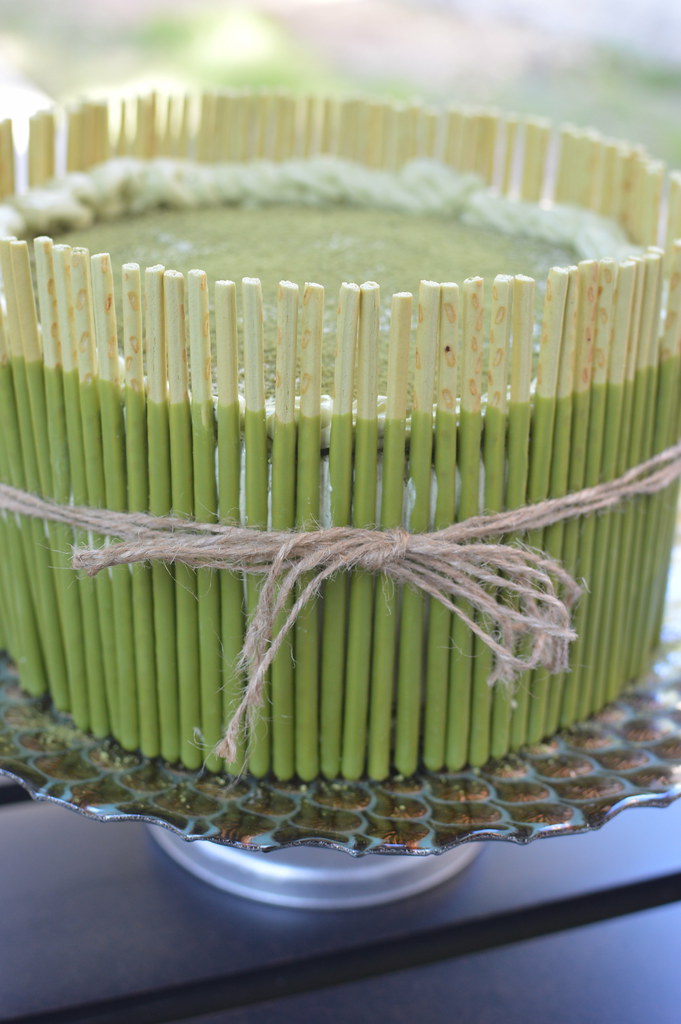
After the cake was frosted, it was time to add the Matcha Pocky Sticks!

I used 4 boxes of Pocky Sticks for this 9-inch round cake and ended up with just a few spare sticks that quickly disappeared –care of the hovering munchkins.

August 2015 Family Dinner

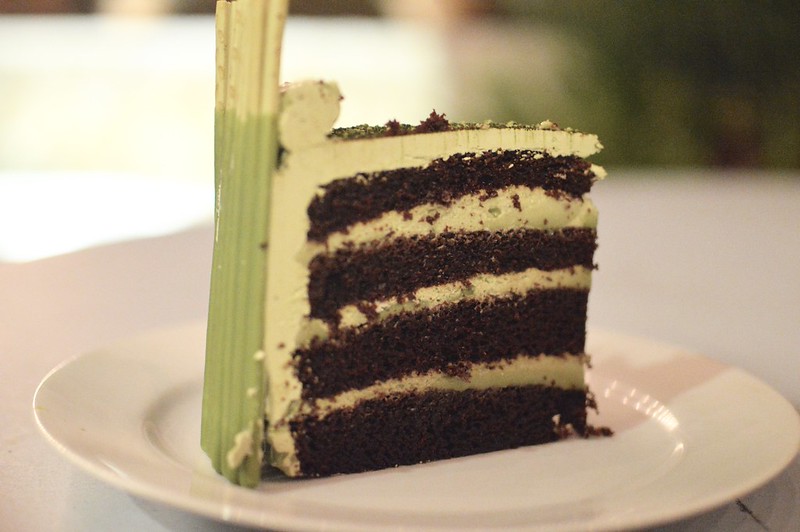
Next time I make this cake, I will definitely take my time to ensure that the layers are evenly cut so I have a nicer presentation once sliced. I also got sloppy with the buttercream because I assumed the Pocky Sticks would cover any imperfections—but unfortunately some of it seeped through the sticks.

Moral of the story = My laziness always gets me in the end

August 2015 Family Dinner

But with that said, the fam – particularly the birthday gal, really enjoyed the cake. Chocolate and green tea pair so well together and when combined with a whimsical presentation –you’ll have a winning cake.

Happy Friday Friends!

________________________________________
Matcha Chocolate Pocky Cake
Makes one 9-inch cake

Ingredients:

Matcha Mousse:
1 cup chilled heavy cream
2 large egg yolks
½ cup sugar
1 tablespoon gelatin powder
7 tablespoons warm water, divided
2 heaping tablespoons matcha green tea powder|
1 cup milk

Cake Batter (From Ina Garten) :
1¾ cups all-purpose flour, plus more for pans
2 cups sugar
¾ cups good cocoa powder
2 teaspoons baking soda
1 teaspoon baking powder
1 teaspoon kosher salt
1 cup buttermilk, shaken
½ cup vegetable oil
2 extra-large eggs, at room temperature
1 teaspoon pure vanilla extract
1 cup freshly brewed hot coffee

Matcha Swiss Meringue Buttercream:
5 large egg whites
1½ cups sugar
1½ pounds unsalted butter, cubed and at room temperature
pinch of salt
1½ heaping tablespoons matcha green tea powder

Garnish:
4 boxes Matcha Pocky Sticks
1 teaspoon matcha powder

Prepare the Matcha Mousse:
Using a stand mixer fitted with the balloon whisk attachment, whip the chilled heavy cream on high until it holds stiff peaks. Cover and place in the refrigerator.

In a medium sized bowl, whisk together the egg yolks, sugar and then set aside. In small bowl, mix the gelatin powder with 4 tablespoons water until dissolved. Dissolve the matcha powder with the remainder of warm water in another small bowl.

Using a small saucepan, heat the milk until it just begins to bubble. While whisking, slowly drizzle the heated milk into the egg mixture until everything has incorporated. Whisk in the liquefied matcha. Place the bowl in a larger bowl that has been filed with ice and water to help chill the contents. Continue stirring the mixture until it cools to room temperature –be careful to not splash any water inside the mixture bowl. Once cooled, take the refrigerated whipped cream and gradually fold it into the matcha custard. Cover the bowl and allow the mousse to refrigerate for a minimum of 6 hours. *This can be done the night before.

Prepare the Cake:
Preheat the oven to 350 degrees. Butter two 9-inch round cake pans. Line with parchment paper, then butter and flour the pans.

Sift the flour, sugar, cocoa, baking soda, baking powder, and salt into the bowl of an electric mixer fitted with a paddle attachment and mix on low speed until combined. In another bowl, combine the buttermilk, oil, eggs, and vanilla. With the mixer on low speed, slowly add the wet ingredients to the dry. With mixer still on low, add the coffee and stir just to combine, scraping the bottom of the bowl with a rubber spatula. Pour the batter into the prepared pans and bake for 35 to 40 minutes, until a cake tester comes out clean. Cool in the pans for 30 minutes, then turn them out onto a cooling rack and cool completely.

Prepare the Buttercream:
Add the egg whites and sugar in a mixer bowl set over a pot of simmering water. The water should not be able to touch the bottom of the bowl. While the bowl sits over the simmering pot, whisk until sugar dissolves and the mixture registers 140 degrees on a candy thermometer. Remove from heat, and attach bowl to a mixer.

Using the whisk attachment, whip on medium speed until the meringue becomes thick and can hold medium peaks. This can take about 8-10 minutes and once done, the sides of the bowl should not feel warm at all. Remove the whisk attachment and replace with the paddle.

With the mixer on low, add a few cubes of butter and beat until it has full incorporated. Add in a few more cubes and continue with the process until all the butter has been added and the frosting has become smooth. If it looks slightly curdled, keep mixing—it will come together! Sprinkle in the salt and on low, slowly add in the matcha powder until it becomes fully incorporated.

Cake Assembly:
Using a serrated knife, slice each of the cake layers in half so that you are left with four thin chocolate cake layers. Place one layer of chocolate cake on a serving platter or cake stand. Spread 1/3 of the matcha mousse, evenly, over the layer. Place another layer of cake on top and evenly spread another 1/3 of the matcha mousse over the layer. Place a third chocolate cake layer on top and spread the remaining amount of matcha mousse evenly over the cake. Top with the final chocolate cake layer. Place the cake in the refrigerator for an hour to set.

Once the cake has set, frost the entire cake with the buttercream—covering the top and sides. Place the Pocky Sticks upright, side by side, all around the side of the cake –pressing them gently into the cake to secure. With the remaining matcha powder, dust the top of the cake. Optional: Tie ribbon around the cake. Refrigerate for one last hour before serving.

Sunday Family Dinner

Our Big Fat GREEK Sunday Family Dinner – OPA!!

June 2014 Sunday Family Dinner

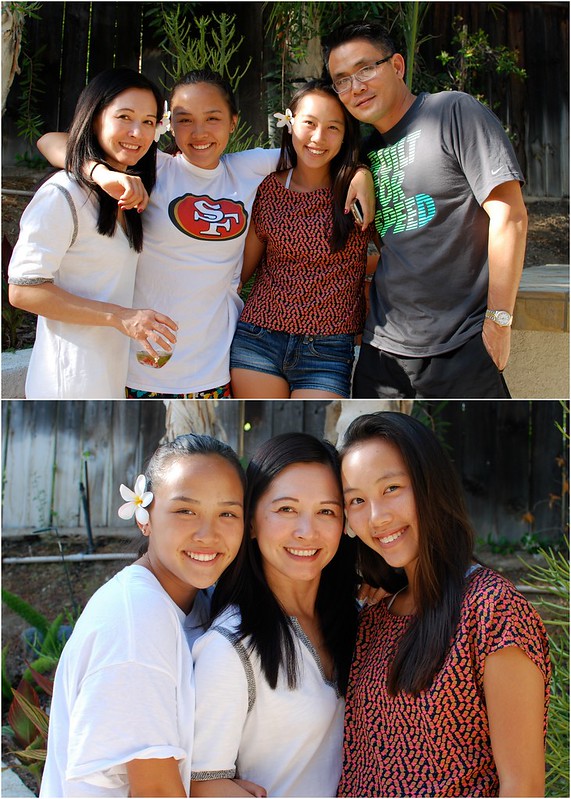
As it turned out, the only Sunday we could have our June Family Dinner was on the same weekend of our big seester and B.I.L.’s wedding anniversary party………..

The same event that we were slated to cook/bake the entire menu as well as prep the decor and floral arrangements.

No big deal right? Good thing we’re robots.

June 2014 Sunday Family Dinner


But our monthly Family Dinners have become a tradition and I was determined to still make it happen without having to add any extra stress.

An easy, low-key menu was a must…..especially if we could prepare things in advance.

June 2014 Sunday Family Dinner

Enter Ina Garten to save the day!

I happened to catch an old episode of hers on TV where she was fixing up a Greek/Mediterranean spread to enjoy at one of her friends’ fabulous new homes. Nearly everything was made in advance and she just carted it over to the house when it was dinner time.

PERFECT!

June 2014 Sunday Family Dinner

And on another note, that woman has some pretty spectacular buddies in some amazing industries! Lighting specialists, florists, chefs, cheese makers,  vintners —I need to run in her crowd!!

But I digress….back to the food.

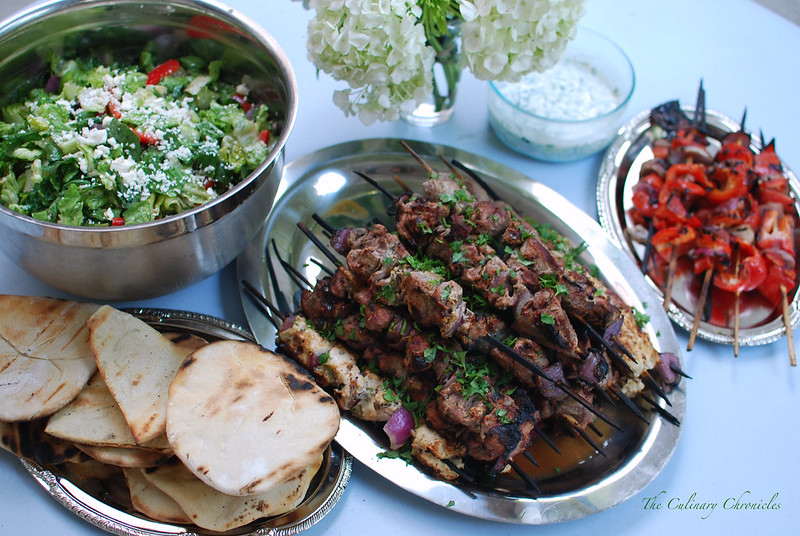
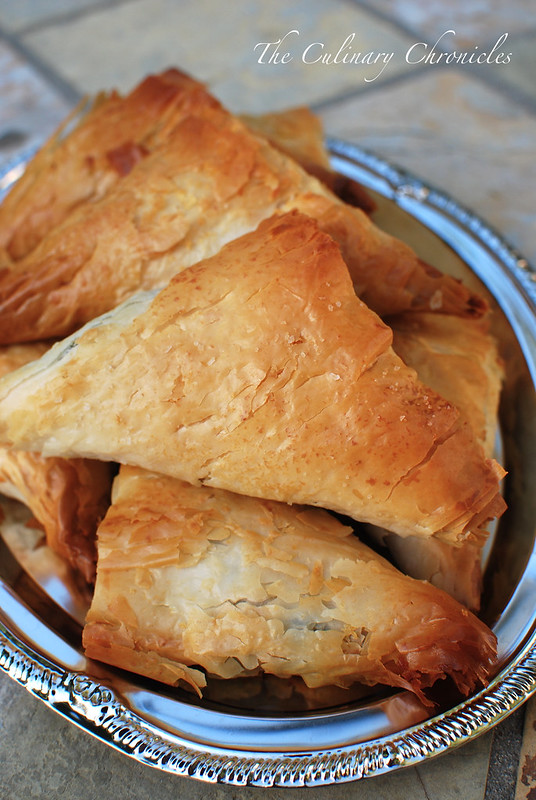
So with a loose Greek themed menu, we were off to the races.  For appetizers, we snacked on flaky, buttery, golden Spanakopita. I actually made them 2 weeks beforehand and stored them unbaked in an airtight container in the freezer. The day of our dinner as we sipped on chilled vino, I put them directly from the freezer into a preheated oven. 35 minutes later, our tummies were doing a happy dance.


June 2014 Sunday Family Dinner

As for the main menu, what’s easier than grilling? Especially if we can task the boys to do the grill work!

MAN LIKE FIRE. <insert curmudgeon caveman voice>

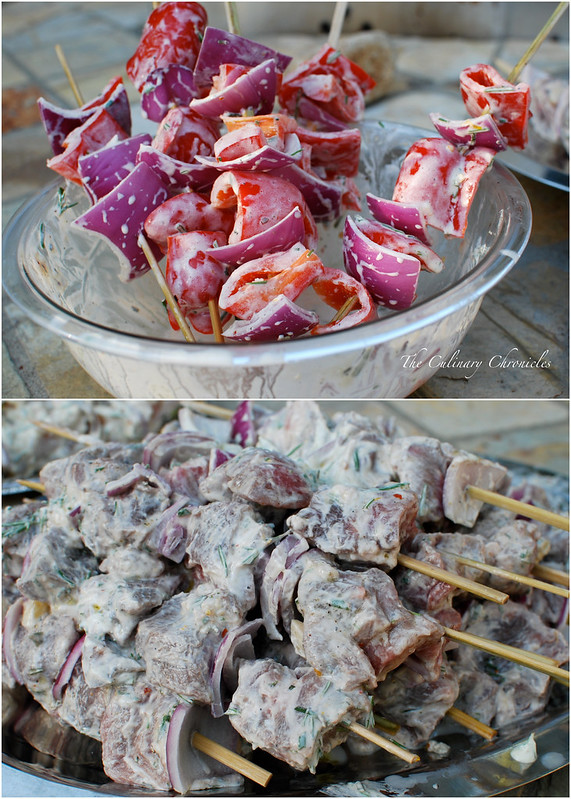
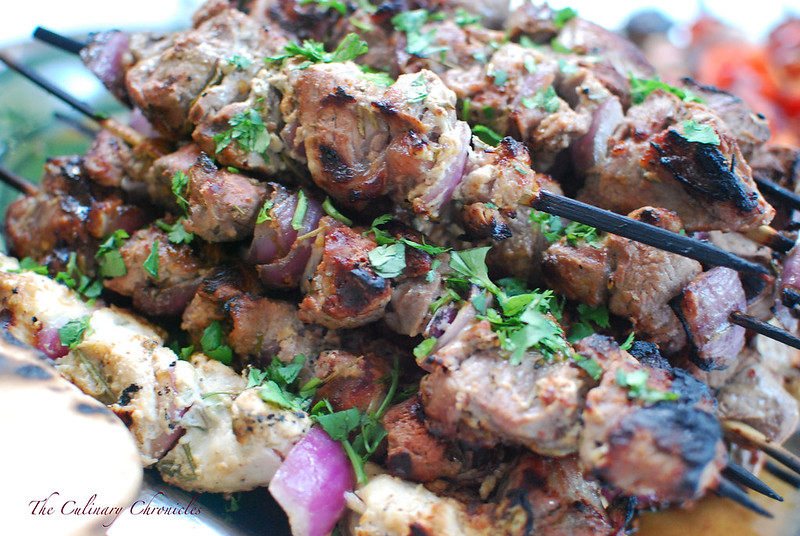
And since we were going Greek, we marinated chunks of lamb and chicken in Greek yogurt with tons of lemon juice, rosemary and garlic. The proteins bathed in the marinade overnight which I think helped to reduce any extra gaminess lamb is known to have as well as keep the meat tender.

Of course, the recipe is Ina’s and can be found here but I added about 1/4 cup of minced garlic to the recipe. No garlic?! Not me!

June 2014 Sunday Family Dinner

We served the chicken and lamb with an easy cucumber and fresh dill tzatziki sauce.


June 2014 Sunday Family Dinner

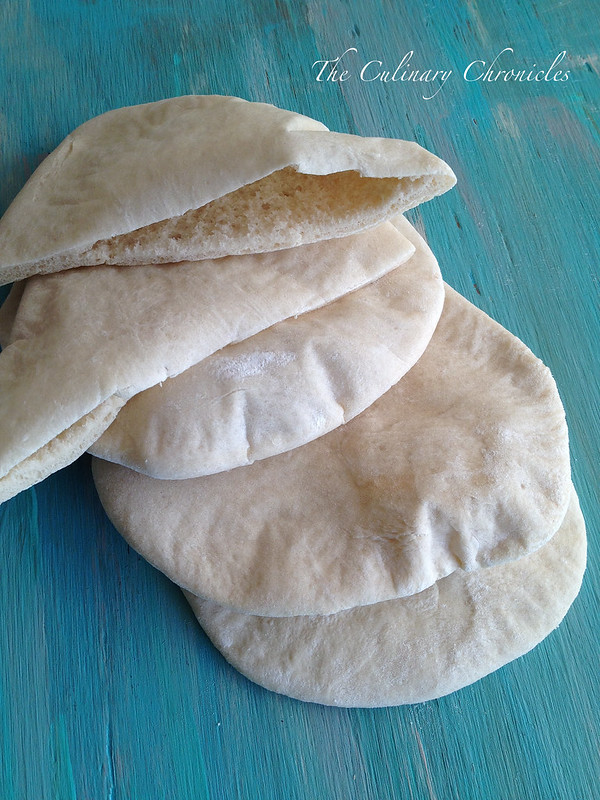
And how could we have a Greek outdoor feast without Pita Bread? Pita is something that is surprisingly easy to make (despite my first apprehension) and also can be made in advance. We ended up grilling the Pita to warm them but I think next time it would be better to toast them lightly in the oven because they got a tad crunchy for my liking. The recipe I used can from The Kitchn  can be found here.

I’d also be doing a disservice to the sis if I didn’t talk about the light Greek Salad she whipped up with feta, cucumbers, olives, fresh dill, tomatoes and red onions –it was our MUCH needed veggies!


June 2014 Sunday Family Dinner

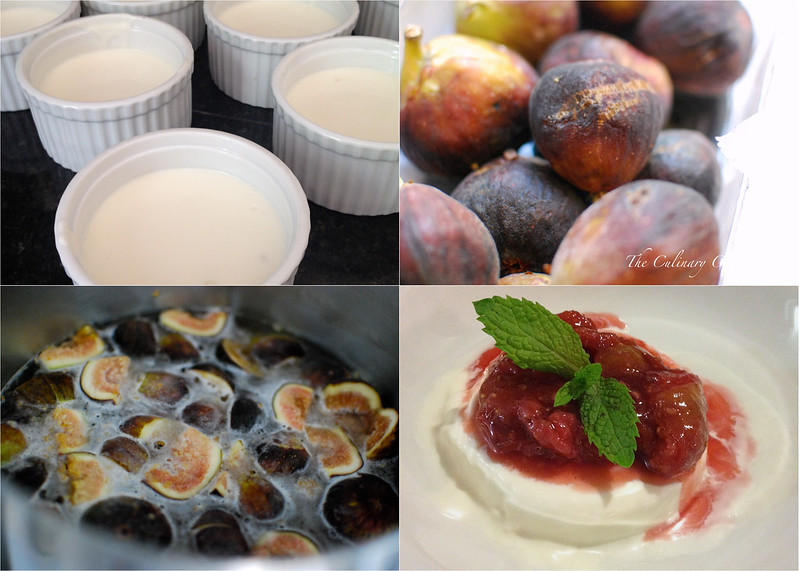
As for dessert, we kept things relatively light –especially since we all inhaled a TON of desserts at the anniversary party the night before. So we opted for a simple Greek Yogurt Panna Cotta and topped it with a fresh fig & berries compote.

The panna cotta was a cinch to make and had similar tart flavors to Vietnamese yogurt. As for the compote, it was nothing more than cooking the figs, strawberries, and raspberries down with about 1/2 cup white wine, sugar and a bit of vanilla.

Truth be told, I was surprised how much I did enjoy dessert considering it was a last minute addition to the plate but it was  yuuuummmmmyy!

June 2014 Sunday Family Dinner

All in all, despite how crazy tired we were from the night before, Sunday Family Dinner was quite the success.

Lounging in the backyard, dangling our toes in the hot tub, sipping on vino, naps in the sun and good food with the family. The perfect way to spend a Sunday FUNday and nothing to it but a bit of work ahead of time.

Until next month – OPA!!!!!!!!!

June 2014 Sunday Family Dinner

This Month’s Family Dinner Menu

Cocktails: Chardonnay and Pinot Grigio
Appetizers: Spanakopita
Entrees: Grilled Lamb and Chicken Kebab with Fresh Dill Tzatziki Sauce, Fresh Pita Bread, Grilled Veggies, Greek Salad
Dessert: Greek Yogurt Panna Cotta with Fresh Fig and Berry Compote

Salads · Side Dish · Vegetables/Vegetarian

Middle Eastern Vegetable Salad

Middle Eastern Vegetable Salad

I’ve received a bunch of recipe inquiries about the salad we gobbled up during our last Family Dinner.

And I can’t blame ya because it was DEE-LISH!

Middle Eastern Vegetable Salad

My niece and seester prepared the dish using Ina Garten’s recipe for a Middle Eastern Vegetable Salad and it was a WINNER! It packed a huge punch of flavor from the abundance of herbs, feta cheese and citrus. It was extremely bright and would be a fab dish to enjoy on a warm day with a glass of pinot grigio and chunk of freshly baked bread. MMMMM!

Middle Eastern Vegetable Salad

We didn’t have fresh basil on hand and ended up omitting it. Truth be told, I didn’t really miss it—but I’m sure it would be wonderful with it.

Oh that Ina…..she knocks it out of the park—AGAIN! Think she needs a new bestie in the form of a quirky Vietnamese gal?

_____________________________________

Middle Eastern Vegetable Salad
Serves 6

Ingredients:

10 scallions, white and green parts, thinly sliced
1 pound ripe tomatoes, seeded, cored, and 1/2-inch-diced
1 hothouse cucumber, halved lengthwise, seeded, and 1/2-inch-diced
1 can or jar (12 to 16 ounces) chickpeas, rinsed and drained
1/3 cup chopped fresh parsley
1/3 cup chopped fresh mint leaves
1/3 cup julienned fresh basil leaves
1/2 cup freshly squeezed lemon juice (4 lemons)
1 tablespoon minced garlic (3 cloves)
Kosher salt and freshly ground black pepper
1/2 cup good olive oil
8 ounces good feta cheese
Place the scallions, tomatoes, cucumber, chickpeas, parsley, mint, and basil in a large salad bowl and toss to combine.
In a small bowl or measuring cup, whisk together the lemon juice, garlic, 2 teaspoons salt, and 1 teaspoon pepper. Slowly whisk in the olive oil to make an emulsion.

Pour the dressing over the salad, tossing gently to coat all the vegetables. Add the feta, sprinkle with salt and pepper, and toss gently.

Recipe from Ina Garten

Desserts/Pastries

Vanilla Bean Crème Brûlée for Leonidas.

Vanilla Bean Creme Brulee


In a Vietnamese family, the Đích Tôn is a position that holds a great deal of honor and duty. He is the eldest grandson by the eldest son and is responsible to not only carry on the family name but also our traditions and history.

And this past December, my parents’ Đích Tôn made his debut in the world– Leonidas Knox Nguyen.


Creme Brulee

Of course, Dad was thrilled beyond belief. And how could he not be? Leo is freaking adorable and such an alert little guy. And those cheeks! I could just squeeze and zerbert them all day!

D7K_6300

A month after his arrival, my brother and his fam came from NYC for an extended stay so that we could all meet Leo and spend time with his big sis, Luna. While they were here, V and L held a small gathering with the immediate family in Leo’s honor. It gave the fam an opportunity to give our blessings, best wishes and words of us advice to Leo.

Admittedly, there’s a lot resting on the little guy’s shoulder. But at just 3 months, I can tell he will far exceed anything we could possibly hope for.


photo2

Oh! And as for the Vanilla Bean Crème Brûlée–I whipped up a few batches for Leo’s gathering. Don’t worry Leo, as soon as those teeth come in, Cô Nam will be stuffing you with goodies. xoxo!

________________________________________

Vanilla Bean Crème Brûlée
Serves 6

Ingredients:

1 Large Egg
4 Large Egg Yolks
½ Cup Sugar, plus 1 tablespoon for each serving
3 Cups Heavy Cream
2 Vanilla Bean Pods, split lengthwise with beans scraped out
1 Pint Fresh Berries, washed and dried

Preheat the oven to 300 degrees F.

In the bowl of an electric mixer fitted with the paddle attachment, mix the egg, egg yolks, and ½ cup of the sugar together on low speed until just combined. Meanwhile, scald the cream in a small saucepan with the emptied vanilla bean pods and beans until it’s very hot to the touch but not boiled. Remove the vanilla bean pods and with the mixer on low speed, slowly add the cream to the eggs. Pour into 6 to 8-ounce ramekins until almost full.

Place the ramekins in a baking pan and carefully pour boiling water into the pan to come halfway up the sides of the ramekins. Bake for 35 to 40 minutes, until the custards are set when gently shaken. Remove the custards from the water bath, cool to room temperature, and refrigerate until firm.

To serve, spread 1 tablespoon of sugar evenly on the top of each ramekin and heat with a kitchen blowtorch until the sugar caramelizes evenly. Allow to sit at room temperature for a minute until the caramelized sugar hardens. Serve with fresh berries on top.

Slightly adapted from Ina Garten