Drinks

Fresh Mango Mojitos

August 2017 Family Dinner
Since I posted the last Fam Din wrap up, I’ve received a few requests to share the recipe for our Fresh Mango Mojitos—and I’m happy to oblige!

Mojitos are one of my favorite cocktails because it mixes the combinations of lots of tart citrus from the limes and freshness from the mint. But I rarely order it out because 9 out 10 times, I’m completely disappointed. Mojitos aren’t difficult to make–but it does take a bit of time to muddle everything together. Plus, I find that places skimp out on the limes and mint (BOO!!) and either use flat club soda or shake the carbonation out of it (DOUBLE BOO!) And that’s just a bad combination!

Fuggetaboutit! Just make your own!

August 2017 Family Dinner
Fresh Mango Mojitos are truly a fantastic spin of the original. I use a combination of ripe mangoes (I prefer ataulfo mangoes) and mango nectar (LOVE the one from Trader Joe’s) to really punch up the floral mango flavor. Plus, since the fruit and nectar bring their own sweetness, there’s no need to add additional sugar or simple syrups in.

They’re perfect, refreshing and just downright delicious. Cheers!! ❤

_______________________________________

Fresh Mango Mojitos
Serves 1

Ingredients:

15-20 fresh mint leaves, more for garnish
½ lime, cut into small wedges
2 ounces light rum
3 ounces mango nectar
3 tablespoons diced ripe and fresh mango
2 ounces club soda
1-2 cups crushed ice

In a cocktail shaker, thoroughly muddle the mint leaves and lime wedges. Add the light rum, mango nectar and fill the shaker with ice. Vigorously shake for 20 seconds and strain the liquids into a tall glass. Add the fresh mangoes and mash them in. Add ice to the glass and top with club soda. Gently stir the liquids together and garnish with additional mint leaves.

Seafood · Vietnamese

Bún Tôm Nướng Sả – Vietnamese Grilled Lemongrass Shrimp over Vermicelli Noodles

Grilled Lemongrass Shrimp
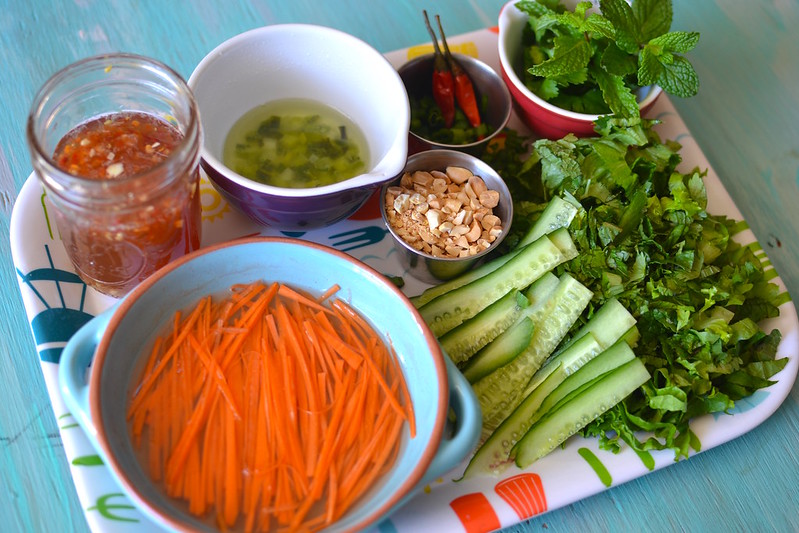
If you follow me on Instagram then you’ve more than once (okaayyy….more like a thousand times!) heard me rant that basic, everyday Vietnamese dishes aren’t really difficult and are often times quick to cook — but it’s the “mise” that will get you.

We love our condiments and dipping sauces and every dish has its own specific ones to compliment them. Tons of different textures? A MUST! Garnishes? We’re OBSESSED! And I’m not referring to the last minute little sprig of parsley you throw on once you’re done plating. I’m talking about pickled veggies, crispy fried shallots, all kinds of fresh veggies, scallion and chili oils, roasted nuts, savory caramel sauces, and tons–and I mean TONS- of fresh herbs!

We take it to a whole new level!

Grilled Lemongrass Shrimp

Which brings me back to my initial statement that the actual “cooking” part of the dish can be about 5 minutes whereas the prep and mise en place could add an additional hour!

Mixing sauces, chopping, mincing, dicing, MORE CHOPPING, roasting–and my least favorite as a kid, washing all the herbs. I know it sounds ridiculous but I really hated being on herb washing duty.

Maybe because we had so much of them all of the time?

Maybe because Mom wanted each leaf perfectly plucked from the stems?

Or maybe because I had to meticulously blot them each dry with a paper towel because wet herbs “watered” things down?

Had I even known that a salad spinner existed, I would have gladly used whatever little money I had at age 8 to buy one. It would have saved me from all the trauma—but I digress……

Vietnamese Mise en Place

I don’t mean to frighten Vietnamese cuisine novices from giving my peeps’ food a try—more of just a heads up. And once you start cooking Vietnamese more regularly, there are a few shortcuts such as:

  • Keep a large jar of basic Nước Chấm (dipping sauce) in your fridge. Just leave out the Sambal and doctor it up to best compliment that particular dish you’re fixing up – ie. fresh chilies instead of Sambal, fresh finely minced ginger, etc.
  • Đồ Chua are the pickled carrots and daikon you’ll find in tons of noodle dishes and bánh mì. My recipe below is a quick method using just carrots as I didn’t have any daikon on hand but if you make a large batch, jarred Đồ Chua can last in the fridge for about 2-3 weeks.
  • Lots of Asian grocery stores these days carry sả bằm (finely minced lemongrass) in their freezer section–often in little plastic tubs or bags. This is perfect for those folks who don’t use lemongrass often or just don’t want to hassle with all the mincing—though a food processor can also address the latter issue.

And of course, if you’ve got some good knife skills, then you’ve just cut the challenge in half (yea, I went there). Since so much prep is about dicing, mincing and slicing—it’ll be a breeze for you.

Grilled Lemongrass Shrimp

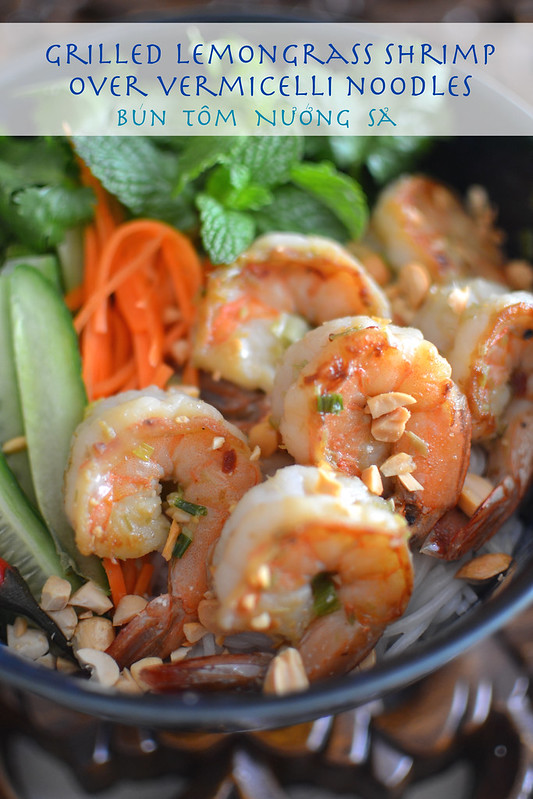
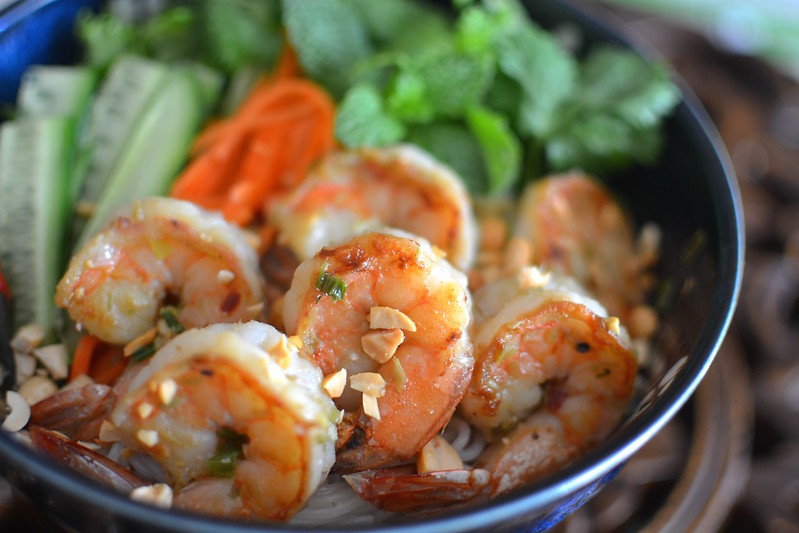
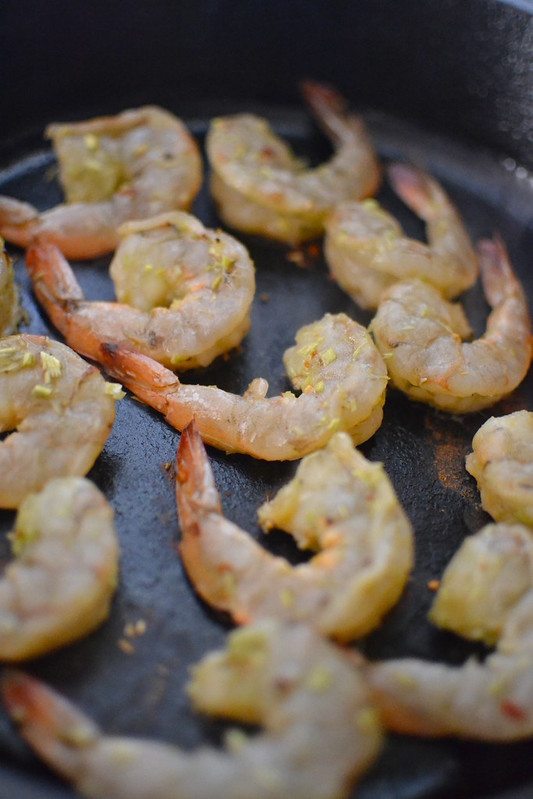
Bún Tôm Nướng Sả is a relatively low fuss dish I make quite often when I get a hankering for a big old bowl of Vietnamese goodness. I marinate a bunch of shrimp with lots of minced lemongrass (yup, I keep a tub in my freezer!), throw them on the grill (or grill pan or in this case, my cast iron skillet) and then nestle them on top of a mound of cool vermicelli noodles along with a hefty amount of veggies/herbs, Đồ Chua, Hành Mơ (scallion oil) and crunchy peanuts.

Grilled Lemongrass Shrimp
The whole thing then gets doused with a generous amount of nước chấm and fresh chilies for an added kicked. The bowl is filled with tons of different textures and crunch, light yet savory with a tremendous amount of freshness from the veggies/herbs and acidity from the nước chấm. If I had some leftover homemade egg rolls in the freezer, I would fry them up and add them to the bowl too! NGUYEN-ing!!!!!

Seriously, my mouth is watering just thinking of it.

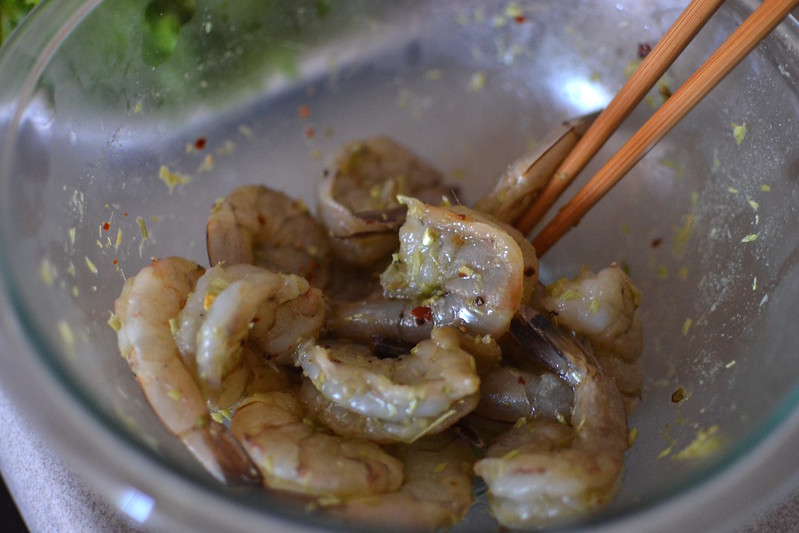
And you betcha’ those are my Yoda lightsabre chopsticks below. Because when it comes to mise, Master Yoda would say “Patience you must have my young padawan!”

Yup…anyway to infuse some Jedi lessons…..

Grilled Lemongrass Shrimp
This would be just as tasty if you used thinly sliced chicken instead of the shrimp–or a combo of both! It’s your world, get a little crazy!

As for the prep time these days, I kind of like doing it now. Maybe it’s nostalgic, maybe 30+ years later I’ve become a little more patient….. But oddly enough, i find it rather relaxing—especially with some good music in the background and a glass of vino within arms reach. Because yes, vino should always be involved.

Ăn Ngon!

_________________________________________________

Bún Tôm Nướng Sả – Vietnamese Grilled Lemongrass
Shrimp over Vermicelli Noodles

Serves 4

Ingredients:

1 pound shrimped, peeled and deveined
quality Vietnamese fish sauce, divided
¼ teaspoon red pepper flakes
2 pinches black pepper
½ teaspoon garlic powder
1 heaping tablespoon finely minced lemongrass
1 cup rice wine vinegar
sugar, divided
1 cup shredded carrots
¼ cup of canola oil
½ cup chopped scallions
2 tablespoons hot water
¼ cup fresh lime juice
2 teaspoons Sambal chili paste, more or less to taste
cooking spray
2 cups chopped lettuce
1 package vermicelli noodles, prepared according to package directions
1 cup thinly sliced cucumbers
1 cup fresh mint leaves
1 cup fresh cilantro leaves
¼ roughly chopped roasted peanuts
fresh chilies

In a large bowl, mix the shrimp, 2-3 dashes fish sauce, red pepper flakes, black pepper, garlic powder and lemongrass. Cover the bowl with plastic wrap and refrigerate for 20 minutes.

In a small bowl or shallow plate, whisk the rice wine vinegar and 2-3 pinches sugar together. Add the carrots and allow to “quick pickle” in the fridge.

Prepare the hành mơ (scallion oil). In a sauté pan, slowly heat the canola oil. Add the chopped scallions. Cook the scallions on very low heat until they are wilted but still bright green. Approximately 2-3 minutes. Pull from heat and set aside.

Prepare the nước chấm (dipping sauce). In a small bowl or jar, mix ¼ cup sugar with the hot water until the sugar starts to dissolve. Stir in ¼ cup fish sauce, lime juice and Sambal chili paste. Set aside.

Remove the shrimp from the refrigerator 5 minutes before cooking to take the chill off. Heat your grill pan/cast iron to medium-high and lightly cover with cooking spray (or prepare outdoor grill). Grill the shrimp for approximately 1-2 minutes on each side until it’s opaque and turns pink. Remove to a large plate.

Divide the lettuce and noodles between four bowls. Add the pickled carrots, cucumbers, mint leaves, and cilantro. Top the bowls with the grilled shrimp and generously brush them with the hành mơ. Sprinkle the bowls with the crushed peanuts and serve with nước chấm and fresh chilies.

Desserts/Pastries

Thin Mints Brownies – Happy St. Patrick’s Day!

Thin Mints Brownies
I know, I know….it’s usually the time of the year where I whip up a few batches of Chocolate Stout Cupcakes with Irish Cream Buttercream. It’s St.Patrick’s Day after all!

But imagine my predicament last night when it not only hit me that St.Patty’s was a mere hours away but I also didn’t have a drop of stout beer in the house.

Blasphemous!

Thin Mints Brownies
Sure — I could have trekked out to the store to pick up some but there was a crazy, blizzard-snow-storm out!!! Trees were flung out of the ground, pigs were flying and I think I even saw Dorothy’s house spinning out of control in the sky!

Ok, ok….that may not be totally accurate.

It was a beautiful 74 degrees in San Diego.

And I was lazy.

Thin Mints Brownies
But I still wanted to bake something festive to share with the staff for St.Patty’s. And guess what? I may not have had any stout beer but I sure as heck had a TON of Girl Scout Cookies!

Thanks to my cookie-slinging-niece Maya (and a little strong-arming from my seester), I have boxes and boxes of GS Cookies. Enough to last me months and months!

…..more like weeks.

….or days….

Those boxes are getting smaller, right? At least that’s what I tell myself when an entire box magically disappears after a day.

Thin Mints Brownies
With Girl Scout Cookies at my disposal, I toyed around with a few ways I could incorporate them into a festive treat. Previously I’ve used the cookies in:

I even threw some in a birthday cake this past weekend. So it was time that I gave brownies that Girl Scouts touch.

Thin Mints Brownies

I took my go-to brownies recipe and added chocolate chips and chopped up Thin Mints Cookies. To amp up the mint, a dash or two of mint extract was added to the batter for good measure. And since we are celebrating St. Patty’s, it only seemed appropriate to cover the tops with more cookies and sprinkles!

SLAINTE dear friends and I wish you a  fantastically HAPPY ST. PATRICK’S DAY!

___________________________________

Thin Mints Brownies
Makes 16 squares

Ingredients:

½ cup unsalted butter
1¼ cups premium chocolate, roughly chopped
¼ cup packed light brown sugar
½ cup white sugar
½ teaspoon vanilla extract
1 teaspoon mint extract
2 eggs
¾ cup flour
2 tablespoon unsweetened cocoa powder
¼ teaspoon salt
¼ teaspoon baking powder
½ cup 60% cacao or semisweet chocolate chips
1¼ cup chopped Thin Mints Cookies, divided
2 tablespoons colorful sprinkles


Preheat oven to 350 degrees. Line a 9 inch square baking pan with parchment paper for easy removal. Cover parchment paper with cooking spray.

In a heatproof bowl, melt the butter and chocolate in the microwave until smooth. Do this in 20 second intervals, stirring in between to ensure that you do not scorch the chocolate. Cool the chocolate mixture until room temperature. Stir in the sugars, vanilla extract and mint extract. Add eggs 1 at a time, beating well after each addition, until mixture is glossy and smooth.

In a separate bowl, sift together the flour, cocoa powder, salt and baking powder. Stir in the dry ingredients into the chocolate mixture until combined. Stir in chocolate chips and 1 cup chopped Thin Mints Cookies. Spread the brownie batter evenly in pan. Sprinkle the remaining Thin Mints Cookies over the top of the brownie batter.

Bake for 25-30 minutes until a toothpick inserted in the center comes out clean. Halfway through the baking process, cover the top of the brownies with the sprinkles and rotate the pan. Bake until done. Allow the brownies to cool in the pan and once at room temperature, cut into 16 squares. ENJOY!


Salads · Side Dish

Watermelon, Feta and Arugula Salad

June 2015 Family Dinner: Watermelon-Feta Salad

Y’all know what today is?

National Watermelon Day!

I swear–I can’t make this stuff up. My Hallmark calendar on the wall says it is— so it must be true.  And since I’m all about celebrating holidays, I wanted to share this delectable and light little number with you…

Watermelon, Feta and Arugula Salad.

June 2015 Family Dinner: Watermelon-Feta Salad

This type of salad appears to be all the rage this summer as I’ve seen various renditions all over the place. And how could it not be?

Peppery arugula leaves mixed with sweet watermelon cubes and piquant flavors of feta cheese. When we made this for our June’s Sunday Family Dinner, I opted to dress the greens with a Mint-Honey-Dijon Vinaigrette but it would also pair nicely with a thick balsamic reduction and extra virgin olive oil.

Need a couple other ways you could celebrate National Watermelon Day?

How about toasting the day with these bright Watermelon Soju-tinis? They are the perfect cocktail for warm summer nights.

Watermelon Soju-tinis

Want something booze-free? Then these Watermelon-Basil Aguas Frescas would be fantastic!

And if you’re looking for extra points, freeze some of it to make popsicles for your munchkins. Bright, refreshing, and you know exactly what’s in it.

Watermelon Basil Aguas Frescas

And with that dear friends, have a wonderful week and have a delicious National Watermelon Day!

_____________________________________________________

Watermelon, Feta and Arugula Salad
Serves 6

Ingredients:

1 tablespoon finely minced shallots
1 tablespoon chopped fresh mint
1 heaping tablespoon Dijon mustard
1 teaspoon honey or agave
2 tablespoons red wine vinegar
½ cup extra virgin olive oil
2 pinches black pepper, plus more to plate
1/8 teaspoon kosher salt
5-6 cups baby arugula leaves, washed and thoroughly dried
¼ cup thinly sliced red onions
15-20 fresh mint leaves, roughly torn
3 cups cubed seedless watermelon
10 ounces feta cheese, crumbled

Prepare the vinaigrette. In a jar, add the shallots, mint, mustard, honey, vinegar, olive oil, pepper and salt. Secure the lid tightly on the jar and shake vigorously for a minute until the items have combined and emulsified. Taste and adjust with salt and pepper as needed.

Place the arugula, red onions and torn mint leaves in a large bowl. Drizzle a few spoons of the vinaigrette over the greens and toss well. Try not to overdress the greens as it will wilt and become too soggy. Plate the dressed greens on a large platter. Top with the watermelon cubes and feta cheese. Sprinkle the platter with additional black pepper and serve.

Desserts/Pastries

Thin Mints Chocolate Cheesecake ….Happy St. Patrick’s Day!

Thin Mints Chocolate Cheesecake

Yeah….I went there.

I just had to do it.

Thin Mints Chocolate Cheesecake

It wouldn’t be a Girl Scouts Cookies season if I didn’t bake something with them. I typically make some type of cupcake with the various cookies like my Thin Mints Cupcakes, Samoa Cupcakes, and Tagalong Cupcakes.

Thin Mints Chocolate Cheesecake

But this year, I wanted to change it up a bit. And since my siblings and I decided to pay tribute to the Emerald Isle for our Sunday Family Dinner yesterday, I knew I had to take the opportunity to use one of my favorites in our dessert– Thin Mints.

This time, in cheesecake form.

Thin Mints Chocolate Cheesecake

It all started with the crust that was made purely from melted butter and ground Thin Mints. Then, I took my standard cheesecake filling recipe and mixed it with melted dark chocolate. I poured a layer of the chocolate cheesecake filling over the crust and then sprinkled in mint & dark chocolate chips (more mint chip flavor, the better!). Another layer of the chocolate cheesecake filling gets poured on top and then a heavy sprinkle of chopped Thin Mints gets topped on that. The remaining chocolate cheesecake filling gets poured in and then it gets baked for about 50 minutes.

photo-61

Once baked, the cheesecake sets and ages overnight. And finally it all gets topped with mint scented whipped cream, even MORE Thin Mints and shamrock sprinkles. It is St. Patrick’s Day, after all!

Thin Mints Chocolate Cheesecake

This beauty was the perfect, decadent end to our Irish inspired Family Dinner. And although it was in honor of St. Patrick’s Day, it would be spectacular for any occasion—birthdays, holidays,…..or just because you’re a Thin Mints monster.

May the luck o’ the Irish be with you today—HAPPY ST.PATRICK’S DAY!!!!!!

____________________________________

Thin Mints Chocolate Cheesecake
Makes one 9-inch Cheesecake

Ingredients:

Crust:
11 ounces Thin Mints Cookies
3 tablespoons unsalted butter, melted
cooking spray

Filling:
8 ounces quality dark chocolate, roughly chopped
24 ounces cream cheese, at room temperature
¼ cup sour cream, at room temperature
1 cup sugar
3 large eggs
½ tablespoon vanilla extract
1 cup dark chocolate and mint chips (or other chocolate mint candies of your choice)
1 cup chopped Thin Mints Cookies

Mint Scented Whipped Cream:
1 cup heavy cream, chilled
2 tablespoons sugar
1 teaspoon mint extract.

Garnish:
Thin Mints Cookies
sprinkles
Preheat oven to 325 ˚F.

Prepare the crust. In a food processor, pulse the Thin Mints Cookies until they are well ground. Pour them into a bowl and mix them with the melted butter until moistened and resembles the texture of wet sand. Cover a 9-inch springform pan with cooking spray and press the crust mixture into the bottom of the pan and about one inch up the sides. Bake for 8-10 minutes until golden and cool to room temperature.

In a heatproof bowl, melt the chocolate in the microwave until smooth. Do this in 20 second intervals, stirring in between to ensure that you do not scorch the chocolate. Cool the chocolate mixture until room temperature.

Using a standing mixer fitted with the paddle attachment, whip the cream cheese and sour cream until its light and fluffy. Gradually mix in the sugar.  Mix in the eggs one at a time, beating well after each addition.  Add  the vanilla extract and melted chocolate. Mix until well combined.

Pour 1/3 of the filling over the cooled crust. Sprinkle the dark chocolate and mint chips over the filling before pouring another 1/3 on top. Sprinkle the chopped Thin Mints Cookies over the top and then cover with the remaining filling. Gentle rap the pan on the counter to release any air bubbles

Place the pan on the middle rack of the oven with a pan half full of hot water on the bottom rack of the oven. Bake for 50-60 minutes or until the center is set. Turn off the oven and allow the cake to sit in the oven with the door propped open for about 30 minutes. (To prop the oven door, I use a wooden handled spoon to keep it ajar a few inches). Remove from the oven and transfer to a wire rack.  Allow the cake to cool for an additional 30 minutes.  Wrap well with plastic film and foil. Refrigerate for at least 8 hours. Carefully remove the sides of the pan by running a hot knife around the outside of the cake.

When you are ready to serve, prepare the whipped cream. Using a standing mixer fitted with the whisk attachment, whip the chilled heavy cream on high until it just holds stiff peaks. Slowly sprinkle in the sugar until you reach a thick consistency. Add in the mint extract and whip until combined.

Pipe the whipped cream on top of the cheesecake and garnish with additional cookies and sprinkles. Enjoy!

Drinks

Day 3 of A Week of Holiday Cocktails – Mint Chocolate Martinis

Mint Chocolate Martinis

Is it a dessert?

Is it a cocktail?

Who the heck cares because it’s ridiculously amazing!

Mint Chocolate Martinis

These decadent martinis are the TRUTH as they combine the rich flavors of chocolate and mint — one of my favorite flavor combos. And with 5 different spirits in it, you know the Holiday spirit will be flowing should you serve these at your upcoming festivities.

Since these martinis are on the sweeter side, you can also opt to serve them as a dessert to avoid any baking or fussy pastries–not a bad idea if you’re trying to avoid unnecessary stress during holiday entertaining.

Mint Chocolate Martinis

We’ve got a bunch of little munchkins in my family so I’m often mixing up cocktails for the adults and mocktails for the kiddos. To make a non-alcoholic spin on these Mint Chocolate Martinis, fill a shaker with chocolate syrup, milk, a splash of heavy cream, dash of vanilla extract and a drop of mint extract. Shake it all up and strain into glasses–but don’t forget the candy cane rims!

Cheers to all!

__________________________________

Mint Chocolate Martinis

Serves 2

Ingredients:

2 candy canes
ice
3 ounces vanilla vodka
2 ounces Bailey’s® Mint Chocolate Irish cream
2 ounces
Kahlúa
1 ounce creme de cacao
splash of peppermint schnapps
1 tablespoon chocolate syrup

In a food processor, grind the candy canes until it becomes the texture of sand. Pour the candy on to a small plate. Wet the rim of each glass with water and roll the edge into the candy canes.

Fill a cocktail shaker with ice and pour in the vodka, Bailey’s®, Kahlúa, creme de cacao and peppermint schnapps. Shake vigorously for 15-20 seconds. Swirl the inside of 2 glasses with the chocolate syrup and strain the contents of the cocktail shaker between the two. Enjoy!

Drinks

Pomegranate Mojitos – A Super Cocktail!

Pomegranate Mojitos

Is it in poor taste that I’m starting off the week with a post on Cocktails?

Nah!!!!!!!!

Especially when the cocktails are these fab Pomegranate Mojitos! Mint + Pomegranate Juice + a little Booziness —how could that be bad?

Pomegranate Mojitos

And aren’t pomegranates a super food? So as far as cocktails go….you could think of this one as being somewhat “healthier” for you.

Yup. You’re welcome.
_____________________________

Pomegranate Mojitos
Serves 1

Ingredients:

15-20 Fresh Mint Leave
½ lime, cut into small wedges
½ tablespoons sugar
2 ounces light rum
4 ounces pomegranate juice
2 ounces club soda
1-2 cups crushed ice

In a cocktail shaker, thoroughly muddle the mint leaves, lime wedges and sugar. Add rum, pomegranate juice and fill the shaker with ice. Vigorously shake for 20 seconds and strain the liquids into a tall glass filled with ice. Top off glass with club soda. Garnish with lime slices and mint leaves.

Drinks

Toasting the Oscars with a “Sparkling Tangerine Tiger”

Sparkling Tangerine Tiger

I adore Oscars Season. The movies, the glitz, the fashion, the glamor, the festivities….

And like the Superbowl, I usually do a spread of my picks for the awards.

Sparkling Tangerine Tiger

At this point, I’ve watched 7 out of the 9 nominees for Best Picture. Not too shabby right?

And since I’m having a little shindig at mi casa to watch the event, my pals and I attempted to create a menu as an homage to some of the films:

Sparkling Tangerine Tiger

To pair with our Oscars bites, I wanted to serve my guests with a cocktail…..or two, or three.

As my nod to Life of Pi, I’ll be shakin’ up a refreshing cocktail using Bombay Sapphire Gin, fresh tangerines, limes, raw sugar, mint and a good dose of sparkling wine. Peppery, bright, refreshing, and just plain lovely. After much consultation from my cocktail lovin’ peeps, I’ve dubbed this concoction, the Sparkling Tangerine Tiger.

Rawwwrrr……

However you choose to cerebrate, hope y’all enjoy the Oscars tomorrow—I know we will!

____________________________________________

Sparkling Tangerine Tiger Cocktail
Serves 2

Ingredients:

1/2 tangerine, cut into small wedges
1/2 lime, cut into small wedges
10 fresh mint leaves
1 tablespoon raw sugar
2 1/2 ounces Bombay Sapphire
ice
6 ounces sparkling wine
*garnish with additional mint leaves, lime wedges and tangerine wedges

In a shaker, muddle the tangerine, lime, mint and sugar. Add the gin and shake well.

Fill two glasses with ice. Strain and divide the liquids amongst the two glasses. Top each glass with 1/2 of the sparkling wine. Garnish with citrus wedges and mint leaves.

Desserts/Pastries

Thin Mint-Chocolate Cupcakes for St. Paddy’s Day!

Thin Mint-Chocolate Cupcakes


This is the time of year when I stock up on bottles of Guinness, Baileys and well…..all things Green.

To make dozens and dozens of Guinness and Baileys Cupcakes, of course!

But this year, I wanted to go a different route and since my niece (alright, more like my sister) was selling Girl Scout Cookies, utilizing the beloved Thin Mint® Cookies was a no brainer!


Thin Mint-Chocolate Cupcakes

These cuppies were a great alternative to celebrate St. Patrick’s Day. Rich and moist chocolate cake filled with chunks of  Thin Mint® Cookies and topped with a lightly minty buttercream and cookie. DEE-LISH!

But if you aren’t big on Thin Mints® (which may be slightly CRAZY!), try one of these other GREEN LOVING cuppies!

Chocolate Stout Cupcakes with Irish Cream Buttercream

Chocolate Stout Cupcakes with Irish Cream Buttercream

Fluffy Lime Cupcakes with Lime Whipped Cream

Fluffy Lime Cupcakes with Lime Whipped Cream

But no matter which sweet treat you choose, have a Happy St. Patrick’s Day!!!!

_______________________________________

Thin Mint-Chocolate Cupcakes
Makes 2 Dozen Cupcakes

Ingredients:

Cupcakes:
½ Cup Unsweetened Cocoa Powder
2 Cups All Purpose Flour
1½ Teaspoons Baking Soda
½ Teaspoon Baking Powder
½ Teaspoon Salt
1¼ Cups Granulated Sugar
5 Ounces Dark Chocolate, finely chopped
1 Cup Buttermilk
1 Cup Strong Brewed Hot Coffee
2/3 Cup Vegetable Oil
2 Large Egg
1 Teaspoon Vanilla Extract
2 Cups Thin Mint® Cookies (or other chocolate mint cookies), roughly chopped

Buttercream:
4 to 5 Cups Confections Sugar, sifted
2 Cups Unsalted butter, at room temperature
4 to 5 Tablespoons Milk
½ Teaspoon Mint Extract

Garnish:
1 Dozen Thin Mint® Cookies, cut in half
Shamrock Sprinkles

Preheat oven to 350 degrees. Place paper liners in muffin pans and put one cookie on the bottom.

Place finely chopped chocolate in a bowl and pour hot coffee over it. Cover bowl with plastic wrap and allow to sit for a few minutes. Remove plastic and stir until smooth. Sift together cocoa powder, flour, baking soda, baking powder, sugar, and salt into a large bowl. In a mixing stand, beat egg for a few minutes until it becomes pale yellow. Beat in oil, buttermilk, and vanilla extract.  Scrape down the sides of the bowl and slowly add the chocolate. Slowly add dry ingredients and mix until just incorporated. Fold in chopped Thin Mint® Cookies. Scoop batter into the lined cups–about 3/4 way. Bake for 20 minutes or until a toothpick inserted in the center comes out clean. Allow cupcakes to cool in the pans for 10 minutes before removing to cooling racks.

Prepare the frosting: In a large mixer bowl, whip the butter for several minutes until very light and fluffy. Slowly add about half of the powdered sugar a few spoonfuls at a time until incorporated. Slowly drizzle in the milk and whip until combined. Mix in the mint extract. Add the rest of the powdered sugar until your desired consistency has been achieved.

Fill a pastry bag and pipe frosting on top of cooled cupcakes. Garnish with ½ a cookie and sprinkles.

ENJOY!

Desserts/Pastries

Mojito Cookies……Havana is Calling.

Mojito Cookies


I know I should be a little more humble about this but…….

I make amazing Mojitos.

As in so freaking good, you would think you were being whisked away to the streets of Havana.


Mojito Cookies


So when I saw that my beloved neighborhood Cuban patisserie, Azúcar offered mojito cookies, I felt compelled to try my hand at making some!

Using a sugar cookie base from Baking Illustrated , I incorporated a “mint sugar” I made and fresh lime zest to give that bright kick that mojitos are so known for.


Mint Sugar


Chewy, crispy, slightly sweet, and minty.


Mojito Cookies

Now if there was only some subtle way I could sneak the rum into them…….. 🙂

_____________________________________

Mojito Cookies
Makes approximately 2 dozen
Adapted from Baking Illustrated Soft and Chewy Sugar Cookies

Ingredients:

2 Cups All Purpose Flour
½ Teaspoon Baking Powder
½ Teaspoon salt
1 Cup Unsalted Butter, softened but still cool
1 Cup Granulated Sugar, plus ½ cup for rolling dough
1 Tablespoon Light Brown Sugar
1 Large Egg
1½ Cups Loosely Packed Mint Leaves, washed and thoroughly dried
1 Tablespoon Lime Zest
1½ Teaspoons Vanilla Extract

Adjust the oven racks to the upper- and lower-middle positions and heat the oven to 375 degrees F. Line 2 large baking sheets with parchment paper or spray them with nonstick cooking spray.

In a food processor, pulse one cup of granulated sugar and mint leaves until the leaves have been ground down and combined with the sugar (see photo).

Whisk the flour, baking powder, and salt together in a medium bowl; set aside.

Cream the butter, the mint sugar, and the brown sugar at medium speed until light and fluffy, about 3 minutes, scraping down the sides of the bowl with a rubber spatula as needed. Add the egg, lime zest and vanilla; beat at medium speed until combined, about 30 seconds. Add the dry ingredients and beat at low speed until just combined, about 30 seconds, scraping down the bowl as needed.

Place the ½ cup sugar for rolling in a shallow bowl. Fill a medium bowl halfway with cold tap water. Dip your hands in the water and shake off any excess (this will prevent the dough from sticking to your hands and ensure that the sugar sticks to the dough). Roll a heaping tablespoon of dough into a 1½-inch ball between moistened palms, roll the ball in the sugar, and then place it on the prepared baking sheet. Repeat with the remaining dough, moistening your hands as necessary and spacing the balls about 2 inches apart (you should be able to fit 12 cookies on each sheet). Butter the bottom of a drinking glass and then dip the bottom of the glass in the remaining sugar. Flatten the dough balls with the bottom of the glass until they are about ¾ inch thick, dipping the glass in sugar as necessary to prevent sticking (after every 2 or 3 cookies).

Bake until the cookies are golden brown around the edges and their center are just set and very lightly colored, 15 to 18 minutes, rotating the baking sheets front to back and top to bottom halfway through the baking time. Cool the cookies on the baking sheets about 3 minutes; using a wide metal spatula, transfer the cookies to a wire rack and cool to room temperature. Store in an airtight container at room temperature.