Pork · Vietnamese

Cơm Sườn Nướng {Vietnamese Grilled Pork Chops with Rice}

Cơm Sườn Nướng - Vietnamese Grilled Pork Chops
I’ve been craving a lot of Vietnamese foods lately. It’s comforting, nostalgic and just damn tasty.

I’ve said it many times before but I didn’t realize how good we had it growing up with all of that deliciousness around us all of the time. I definitely took it for granted.

And now when I want good quality Vietnamese food, I have to make the haul up to Orange County where I beg my family to feed me or resort to swinging by one of the gazillion Việt spots in Little Saigon.

Cơm Sườn Nướng - Vietnamese Grilled Pork Chops

But then there are times where I’m home in San Diego and have to fend for myself.

Don’t get me wrong–I do like cooking Vietnamese foods, I’m just not the best at it. For sure, Mom reigned supreme and the aunties too. And nowadays, I’d say big seester N and our cousies A and T are right up there. That alone makes the idea of ever moving back to OC palatable because they’ve got skills!

There are a few Việt dishes I’m happy to make and feel pretty good about.

Cơm Sườn Nướng - Vietnamese Grilled Pork Chops
Seestrah T posted a pic the other week of her grilling up some Vietnamese style pork chops which made me think of two things. First — hey! She never makes that for me! And second –sheesh, now I’m really hankering for some pork chops!

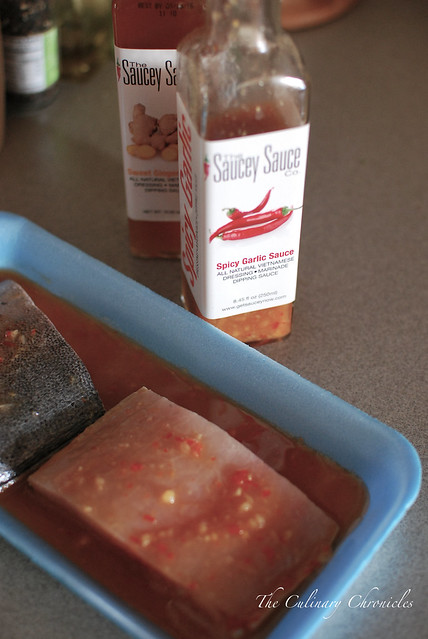
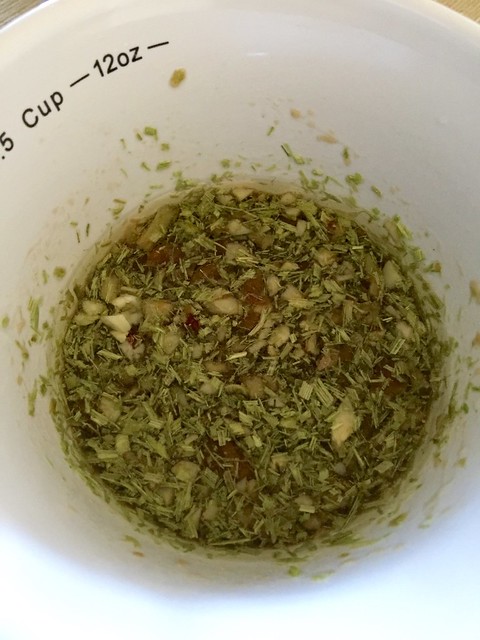
It was time to take matters into my own hands and luckily, I had all the ingredients already! My version of the marinade has staples like fish sauce, soy, sugar, shallots, lemongrass, garlic, ginger and chilies. Our cousin T that lives in Đà Nẵng makes the most EPIC sườn nướng (grilled pork chops). Years ago she told us what she marinated them with but I think the woman is holding out on us because mine never taste the same! And maybe it has to do with the fact that she grills them over this teeny-tiny charcoal grill on her patio floor and perhaps that’s where the essence of Việt Nam somehow creeps in and flavors it.

Who knows….

Cơm Sườn Nướng - Vietnamese Grilled Pork Chops
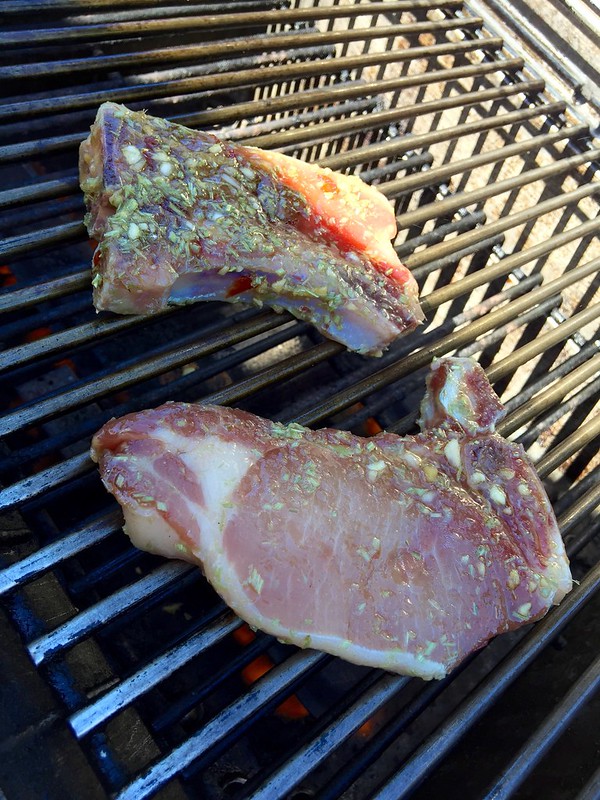
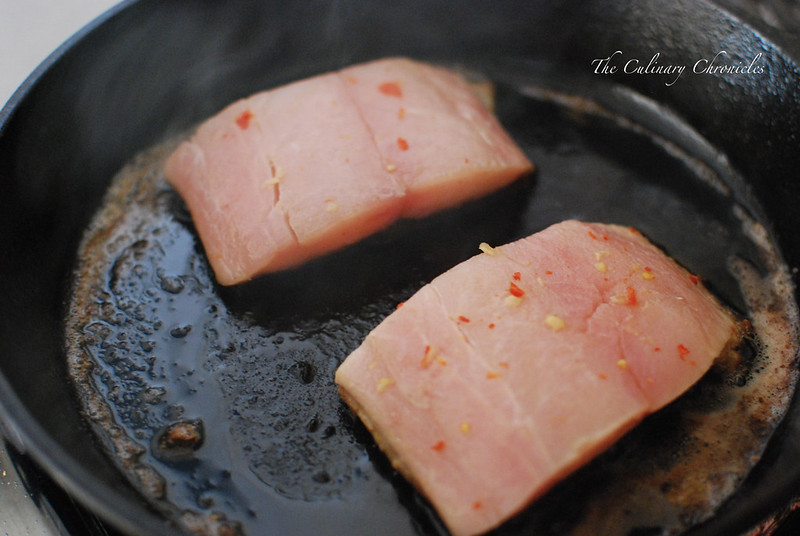
For these chops, I generally prefer to use a thinner cut—about 3/4 inch thickness. They remind me more of how we have them in Việt Nam or at the restaurants here. But if you prefer a thicker cut, go for it! Just be sure to marinate them overnight or at least for 6-8 hours.

Next, I throw them on a screaming hot grill and they cook up for 1-2 minutes on each side. Easy peasy! Keep in mind that the grilling time will increase if you choose thicker cuts.

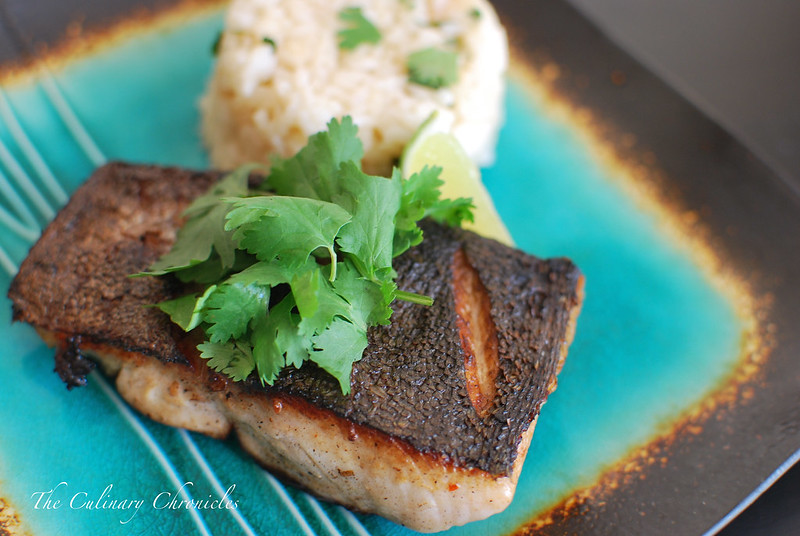
Once finished, you’ll get all of these lovely charred bits from the sugar in the marinade. It’s at that point that you’ll want to quickly brush them with hành mơ — scallion oil.

Cơm Sườn Nướng - Vietnamese Grilled Pork Chops
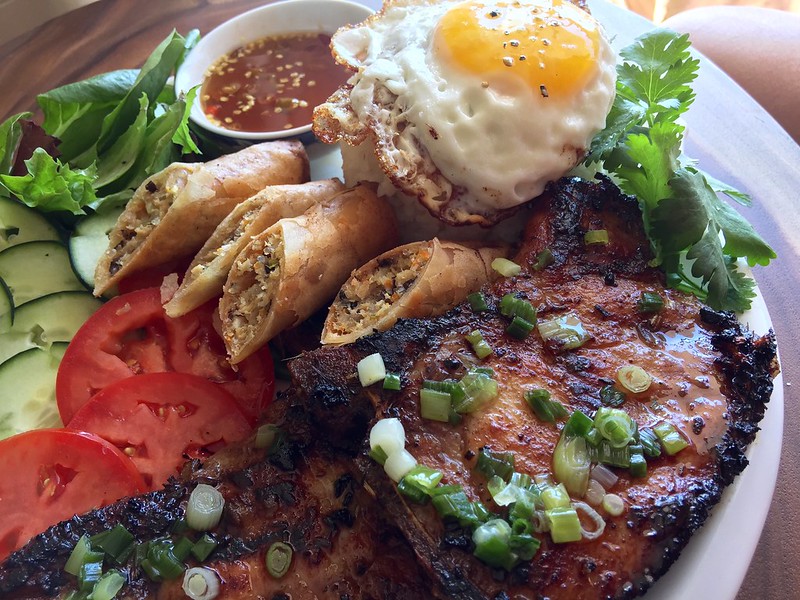
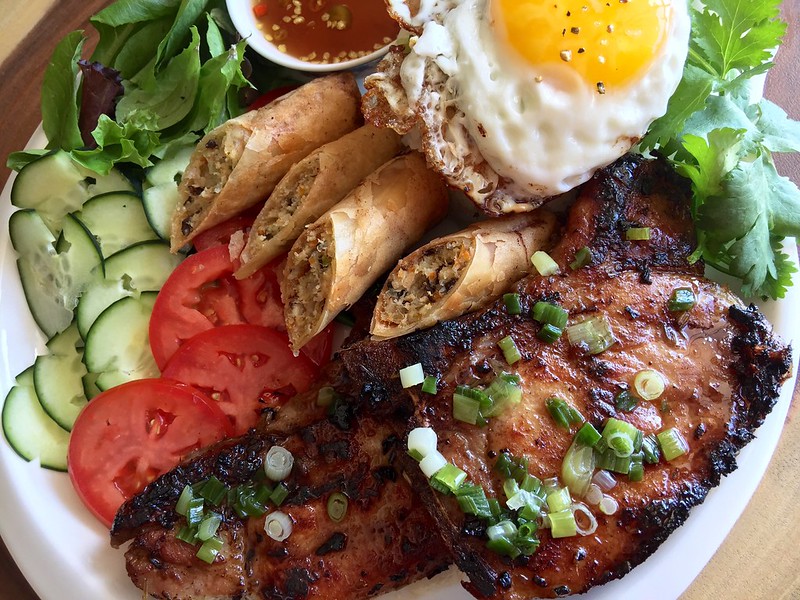
I serve these pork chops pretty traditionally with a heaping scoop of steamed rice, sliced cucumbers & tomatoes, lots of spicy nước chấm (dipping sauce) and of course – a sunny side up fried egg with crispy edges. Now I know these days, some frown upon crispy edges on eggs. Quite frankly, I don’t know when that became out of fashion—but dang it! It’s darn tasty that way and adds texture.

If you order this dish out, you may also find that instead of a fried egg it will be served with Chả Trứng which is like a steamed egg meatloaf. It may sound strange to you but trust me, it’s awesome. Honestly, I was too lazy to make it (though it’s not difficult) but I promise I will someday soon and will share it with y’all.

Cơm Sườn Nướng - Vietnamese Grilled Pork Chops

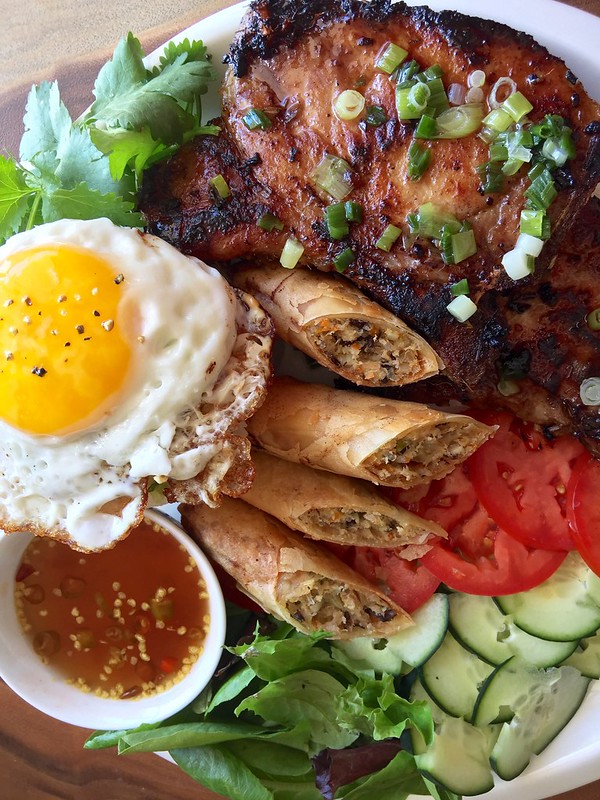
On this particular day, I plated them with a few Chả Giò . It’s not something I always do but seeing how I had a stash in my freezer, it seemed like the proper occasion to bust them out.

And with that dear peeps, Ăn Ngon!

_____________________________________________________________________________
Cơm Sườn Nướng {Vietnamese Grilled Pork Chops with Rice}
Serves 4

Ingredients:

Sườn Nướng – Grilled Pork Chops:
3 tablespoons fish sauce
2 tablespoons olive oil
1 tablespoon soy sauce
2 tablespoons sugar
2 tablespoons finely minced shallots
1 tablespoon finely minced fresh lemongrass
1 tablespoon finely minced garlic
½ tablespoon finely minced fresh ginger
2 Thai chili peppers, minced
½ teaspoon black pepper
4 bone-in pork chops

Nước Chấm –Spicy Dipping Sauce:
¼ cup sugar
2 tablespoons hot water
¼ cup fish sauce
¼ cup fresh lime juice
2 Thai chili peppers, minced
½ tablespoon Sambal chili paste, more or less to taste

Hành Mơ – Scallion Oil:
½ cup light olive oil
1 cup chopped scallions

Serve With:
steamed rice
4 crispy fried eggs
sliced cucumber
sliced tomatoes
lettuce or mixed greens

In a bowl, whisk together the fish sauce, oil, soy sauce and sugar together until the latter has dissolved. Stir in the shallots, lemongrass, garlic, ginger, chili peppers and black pepper. Place the pork chops in a shallow dish or large resealable plastic bag. Pour the marinade over the pork, ensuring that the meat is well coated. Cover the dish (or seal the bag) and allow the pork to marinate in the refrigerator for 4-6 hours. (If using thick chops, marinade overnight.)

Prepare the nước chấm (spicy dipping sauce). In a small bowl or jar, mix ¼ cup sugar with the hot water until the sugar starts to dissolve. Stir in ¼ cup fish sauce, lime juice, chili peppers and Sambal chili paste. Set aside.

Prepare the hành mơ (scallion oil). In a small sauté pan, slowly heat the canola oil. Add the chopped scallions. Cook the scallions on very low heat until they are wilted but still bright green. Approximately 2-3 minutes. Pull from heat and set aside.

Remove the pork chops from the refrigerator 30 minutes before cooking to take the chill off. Bring your grill to medium-high heat and lightly grease the grates with oil or cooking spray. Grill the pork chops for 1-2 minutes on each side until browned and slightly charred. If using thick chops, add an additional 2-3 minutes per side—depending on thickness. Remove the pork chops from the grill and generously brush them with the hành mơ. Cover and set aside while 4 plates are prepared.

On each plate, place a generous mound of rice and brush it with the hành mơ. Place one fried egg over the rice and add a few slices of cucumbers, tomatoes and lettuce/greens on the plate. Add one pork chop along with a small bowl of nước chấm.

Serve immediately.


Side Dish

Zesty Cilantro-Lime Rice

Cilantro-Lime Rice

Usually when I make a side dish for tacos or fajitas, I whip up a version of my Spanish Rice. It’s a straight forward method with tomato sauce, chiles and a few other aromatic and spices.

But when I want a bit of a lighter flavor, I make a pot of Zesty Cilantro-Lime Rice.

Cilantro-Lime Rice

It also starts off with onions, garlic, and chicken stock for a rich flavor. But then it’s all finished off with bright citrus-y notes with lots of lime juice, zest of fresh cilantro.

Oh, and there may be a tab of butter or so for added richness.

Definitely a good thing.

Cilantro-Lime Rice

If you’re a bit shy about making rice on the stove top and prefer a rice cooker, just follow the initial steps below. Before adding in the stock, put the rice, cooked onions/garlic into the pot of your rice cooker. Pour in the stock, salt and then follow your machine’s directions. Once done, just follow the rest of the directions to finish it off.

Easy Peasy.

Happy Taco Tuesday!

________________________________________

Zesty Cilantro-Lime Rice
Serves 2-3

Ingredients:

1 tablespoon olive oil
2 tablespoons unsalted butter, divided
½ cup diced white onion
½ tablespoon minced garlic
1/8 teaspoon red pepper flakes
1 cup white rice (long grained preferred)
2 cups low sodium chicken stock or vegetable stock
¼ teaspoon kosher salt
½ cup chopped cilantro
2 tablespoons fresh lime juice
zest of 1 lime

In a small pot that has a lid, heat the olive oil and one tablespoon of butter over medium heat. Once melted add the white onions and cook for 2-3 minutes until softened. Add the garlic, pepper flakes and cook for an additional minute. Stir in the rice and cook for one more minute.

Add the chicken stock, kosher salt and bring to a boil. Cover the pot and reduce the heat to low. Simmer until all the liquids have evaporated and the rice is tender—about 18-20 minutes. Once done, remove the pot from the stove and let sit, covered for 5 minutes.

Remove the lid and add the remaining butter, cilantro, lime juice and zest. Use a fork to fluff the rice grains.

Enjoy!

Seafood · Sponsored

Pan-Seared Mahi Mahi with Coconut-Cilantro Rice

Pan-Seared Mahi Mahi with Coconut-Cilantro Rice

So here’s the problem I have after EVERY Thanksgiving.

Do I now try to eat lighter the weeks leading up to Christmas to make up for the gazillion calories I inhaled during Thanksgiving weekend?

Or………

Do I not let leftovers go to waste and continue on with the turkey, potatoes, casseroles, mac n’ cheese, and desserts until they’re all gone?

First world problems.

Pan-Seared Mahi Mahi with Coconut-Cilantro Rice

Eh….let’s be honest. I’m going to continue shoveling in the last of the leftovers and THEN jump over to something lighter and easy to whip up.

Which works out fantastic because our friends at The Saucey Sauce Co. had sent me a care package awhile back with a variety of yummy goodness that can be used as ready-to-go sauces or marinades. They’re a family owned group (yay for family!) that base many of their products on their Asian/Vietnamese heritage. You can find them at their online store but they’re also branching out across the country to some great retailers!


photo-1

I love using the sauces to marinade chicken breasts and fish because it’s all ready to go. I’ve also tossed some chicken wings in rice flour, deep fried it and then tossed them in their Sweet Ginger Sauce — so good!


Pan-Seared Mahi Mahi with Coconut-Cilantro Rice

I happened to pick up some gorgeous mahi mahi fillets while at the store because they looked wonderfully fresh and I like the “heartiness” of the fish. When I got home, I grabbed my trusty bottle of Spicy Garlic Sauce and added some lime zest and ginger for a bit more brightness. (On a side note, I always add a bit of additional fresh herbs or other aromatics when using bottled products. I think it greatly enhances the flavor and adds that needed zing.)

After coating the fish with the marinade, I placed it in the fridge for about an hour so that it could work its magic.

Saucey-sauce magic.


Pan-Seared Mahi Mahi with Coconut-Cilantro Rice

Once the fillets have had its fill of magic, I pan-seared the fish on a screaming hot cast iron skillet to get that super crunchy skin. And like I said on the Pan Seared Black Cod post, do not — and I mean DO NOT, try to flip the fish before it’s ready. It’ll let you know when the time is right when you can slide a spatula underneath it.

Trust me.

To serve with the mahi mahi, I made a fragrant coconut-cilantro rice. The recipe below tells you how to make it on the stove but if you have a rice cooker, just throw it all in machine and let it do its thing.

The fish turned out so delicious! The mahi mahi was able to soak up the slightly sweet, slightly spiced marinade but it wasn’t overpowering at all. And you can definitely use any other fish of your choice if mahi mahi isn’t your thing.

The perfect, easy, scrumptious weeknight meal.

And as always, much thanks to our friends at The Saucey Sauce Co.!!

_________________________________________________

Pan-Seared Mahi Mahi with Coconut-Cilantro Rice
Serves 2

Ingredients:

½ cup The Saucey Sauce Company’s Spicy Garlic Sauce
1 teaspoon finely minced fresh ginger
2 teaspoons fresh lime zest, divided
2 mahi mahi fillets, skin-on, de-boned (5-6 ounces each)
1 cup uncooked jasmine rice
½ cup coconut milk
3/4 cup coconut water (or water)
2 tablespoons minced fresh cilantro
pinch kosher salt
2 tablespoons vegetable oil
whole cilantro leaves and lime wedges for garnish

In a shallow dish, whisk the Spicy Garlic Sauce, ginger and 1 teaspoon lime zest together. Place the fish in the dish and coat both sides. Cover the dish with plastic wrap and marinate for 45-60 minutes in the refrigerator. Take out of the refrigerator about 10 minutes before cooking to take the chill off.

While the fish marinates, prepare the rice. Combine the rice, coconut milk, coconut water (or water) and salt in a heavy bottom pot. Bring the liquids to a boil and then lower the heat to a gentle simmer. Cover the pot and allow to cook for 18-20 minutes. Remove the pot from the heat with the cover still on and allow to sit for about 5 minutes. Once the time is up, add the cilantro and remaining lime zest. Using a fork, fluff the rice and set aside.

Choose a skillet that can handle a high level of heat (ie. cast iron, stainless steel, etc.) Heat the skillet over high heat so that it becomes screaming hot. Once it reaches the desired temperature, add the oil and swirl it around the skillet. Carefully place each fillet, skin side down into the oil. Using a spatula, gently press down on the fillets so that they don’t curl up on the sides. Cook the first side of the fish for about 3 minutes — depending on the thickness of the fillets. Be careful not to flip the fish before the skin has crisped up and formed a crust. Once the first side has cooked, about 2/3 way through, flip and cook for an additional 2 minutes.

Remove the fillets from the skillet. Use paper towels to gently blot any excess grease off of the fillets and plate on two separate plates. Add a large scoop of the rice on each plate and top each fillet and rice with the fresh cilantro leaves. Serve each plate with a piece of lime wedge that should be squeezed over the fish before eating. Serve warm.

Enjoy!


 **Disclosure: I did receive products from The Saucey Sauce Co., but as always, my opinions are my own.**

Vegetables/Vegetarian

Spring Risotto – Spring has Sprung!

Spring Risotto

Spring has sprung–and boy do I have a plateful of deliciousness that screams of spring flavors.

Creamy, cheesy risotto with leeks, peas and asparagus. The whole plate is then showered with parmesan and bright lemon zest.

Mega drools….

Spring Risotto

You could really throw whatever fresh veggies that your local market or farmers’ stands may have available. Zucchinis, mushrooms, chard and spinach would be rad options. As for cooking liquids, I opted to use some white wine and chicken stock in the risotto but if you want to go with a purely vegetarian route, a well flavored vegetable stock would also work well.

Spring Risotto

Have a delectable weekend, Folks!

____________________________________

Spring Risotto
Serves approximately 4

Ingredients:
4 cups chicken stock
2 tablespoons olive oil
1 tablespoon unsalted butter
1 cup chopped leeks, thoroughly washed and dried
1 tablespoon minced garlic
¼ teaspoon red pepper flakes
½ teaspoon fresh thyme leaves
1 cup Arborio rice
½ cup dry white wine
½ cup grated Parmesan cheese, more to garnish
1 cup peas
1 cup blanched asparagus tips
kosher salt
black pepper
fresh lemon zest

Heat the chicken stock in a medum saucepan and keep warm over low heat.

Heat the olive oil and butter in a pot over medium heat. Add the leeks and sauté until softened and translucent, about 3-4 minutes. Add the garlic, red pepper flakes, thyme leaves, rice and stir quickly until the rice is well coated and opaque—about 1 minute.  Stir in the wine and cook until the liquid is nearly all evaporated.

Ladle in 1 cup of the chicken broth into the rice. Simmer and slowly stir until the rice has absorbed the liquid. Add the remaining broth, 1 cup at a time. Continue to simmer and stir, allowing the rice to absorb each addition of broth before adding more. The risotto should be slightly firm and creamy–approximately 25 minutes in total.

Stir in Parmesan cheese until the cheese has melted. Gently fold in the peas and asparagus tips. Check for seasonings and adjust with the kosher salt and pepper.

Spoon the risotto into dishes. Grate additional parmesan cheese on top and sprinkle fresh lemon zest over each dish. Serve immediately.


Poultry · Soups/Stews

Thai Red Curry Chicken

Thai Red Chicken Curry


A few weeks ago, my sister labored in the kitchen with her version of Vietnamese Chicken Curry (Cà Ri Gà). The next day, Pioneer Woman posted her version of Red Thai Duck Curry.

It was a Sign.

The Kitchen Gods were telling me to make Curry.

And I don’t mess with Kitchen Divinities. That’s just bad Ju-Ju.


Thai Red Chicken Curry


I haven’t had Thai in awhile so I opted to give the Pioneer Woman’s recipe a spin. I heart PW. She wouldn’t steer me wrong.


Thai Red Chicken Curry


I took a few liberties and slightly modified PW’s original recipe. First–I used chicken instead of duck since it was what I had on hand. I also added a few more tablespoons of the curry paste for an added oompf of flavor. Since I do not like the taste of cooked pineapples (BLEH!), I totally omitted it. I found that the curry had natural sweetness from the coconut and didn’t need to add any sweeteners to compensate for it.

And because this gal loves heat, I threw in a few Thai Bird Chilies. But if you don’t like your curries too spicy, skip it. Finally, I added some scallions and cilantro at the very end with the Thai basil.

It was D-E-L-I-C-I-O-U-S! Rich, savory, herbaceous—and just yummy! For next time, I’d like to throw in a few kaffir leaves for an added layer of citrus flavor.  Note to self: Smuggle a few leaves off my auntie’s kaffir lime tree next time I go visit.

If you want a seafood option, I think prawns would also be fantastic in this curry. Just wait until the last few minutes to throw them in because overcooked prawns is no bueno.


Thai Red Chicken Curry


And for the record, I did end up making my own curry paste. I contemplated using the jarred stuff but then I heard my sister’s voice in my head asking “So…..did you make your own curry paste?”  Sheesh…..That woman always keeps me honest in the kitchen 🙂

______________________________________________

Thai Red Curry Chicken
Slightly modified from The Pioneer Woman Cooks
Serves 5 – 6

Ingredients:

1½ Pounds Boneless Chicken Thighs
4 Tablespoons Olive Oil, divided
3 Cloves Garlic, minced
8 Tablespoons Thai Red Curry Paste
14 Ounces Coconut Milk
2 Cups Hot Water
4 Tablespoons Fish Sauce
3 Tablespoons Fresh Ginger, minced
½ Whole Red Onion, sliced
3-4 Thai Bird Chilies, minced (optional)
1 Whole Red Bell Pepper, cored and sliced
1 Cup Grape Tomatoes
1 Cup Fresh Thai Basil, chopped
½ Cup Fresh Cilantro, chopped
½ Cup Scallions, chopped
Serve with Jasmine Rice Cooked

Heat 1 tablespoon olive oil and 1 tablespoon butter in a large skillet over medium high heat. Place chicken skin side down and cook for several minutes, or until skin is crisp and golden brown. (Don’t worry about cooking the chicken at this point. You just want to give the skin some great color.) Remove from the skillet and cut into slices. I also removed the skin but that’s completely up to you. Set aside.

Reduce heat to medium low. If oil isn’t overly brown, go ahead and add the minced garlic to the pan. (If oil is to brown, pour it off and add some new oil.) Add red curry paste to the pan and stir. Cook paste for several minutes to release the flavors. Pour in the coconut milk, hot water, fish sauce, and minced ginger. Stir and allow to cook over low heat for 10 to 15 minutes while you prepare the other ingredients.

In a separate pot heat 2 tablespoons oil over medium high heat. Add sliced onions and bell pepper and cook for several minutes. Make sure the pan is hot, then add sliced chicken and stir. Cook for 3 to 4 minutes. Add tomatoes and cook for 2 minutes.

Taste curry sauce, which should be slightly thickened by now. Add more spice if needed.  Pour curry sauce into the pot with the veggies, chilies, and chicken. Stir to combine and allow to bubble and simmer for a good 10 to 15 minutes. Add a little hot water if it seems too thick, or allow to bubble longer if it needs more thickening. Remove from heat and add scallions. Allow to sit for 5 minutes. At the last minute, stir in lots of chopped basil and cilantro. Serve immediately over jasmine rice.


Vegetables/Vegetarian

Mushroom Risotto

Mushroom Risotto


Over the years, I have grown a deep adoration for risotto. Creamy, rich and perfect as a side dish or entrée. The slow cooking and continual stirring of the rice assists in developing the starch—which helps in the wonderful “unctuousness” of the dish. Pair that with my love for mushrooms and BADA-BING-BADA-BOOM—-you’ve got a happy tummy!

Earthy, rich, savory, and satisfying. All that’s missing is a nice glass of Sauvignon Blanc—and as luck would have it, I just happened to have an open bottle of it since the recipe called for white wine.

Now if that’s not “divine kitchen intervention”, I don’t know what is. 🙂

Cheers, Friends!


Mushroom Risotto

_______________________________

Mushroom Risotto
Adapted from Tyler Florence
Serves 2-3

Ingredients:

4 Cups Low Sodium Chicken Broth
2 Tablespoons Olive Oil, divided
½ Cup White Onion, diced, divided
2 Garlic Cloves, minced, divided
½ Pound Fresh Sliced Mushrooms (crimini, portobello, trumpet, oyster, etc.)
1 Bay Leaf
1 Tablespoon Fresh Thyme Leaves
2 Tablespoon Fresh Italian Parsley, chopped, divided
1 Tablespoon Unsalted Butter
Salt and pepper
½ Ounce Dried Porcini Mushrooms
½ Cup Warm Water
1 Cup Arborio Rice
¼ Cup Dry White Wine
½ Cup Parmesan Cheese, grated

Heat the chicken broth in a medium saucepan and keep warm over low heat.

Heat 1 tablespoon of oil in a large skillet over medium heat. Add 1/2 onion and 1 clove garlic, cook, stirring, until translucent, about 5 minutes. Add the fresh mushrooms, thyme, bay leaf, 1 tablespoon of parsley, and butter. Sauté for 3 to 5 minutes until lightly browned, season with salt and pepper. Add the dried porcini mushrooms that were reconstituted in warm water, saving the liquid. Season again with salt and fresh cracked pepper. Sauté 1 minute then remove from heat and set aside.

Coat a saucepan with remaining 1 tablespoons of oil. Sauté the remaining 1/2 onion and garlic clove. Add the rice and stir quickly until it is well-coated and opaque, 1 minute.  Stir in wine and liquid that the porcini was reconstituted in–careful not to add in the mushroom grit/sand. Cook until it is nearly all evaporated.

Now, with a ladle, add 1 cup of the warm broth and simmer, stirring, until the rice has absorbed the liquid. Add the remaining broth, 1 cup at a time. Continue to simmer and stir, allowing the rice to absorb each addition of broth before adding more. The risotto should be slightly firm and creamy, not mushy–approximately 20 minutes in total. Transfer the mushrooms (reserving about 2-3 tablespoons of them) to the rice mixture. Stir in Parmesan cheese, cook briefly until melted. Check for seasonings and adjust with salt and pepper if needed. Spoon risotto into dishes and top with a few mushrooms and chopped parsley before serving.

Breakfast/Brunch · Pork

SPAM….The True American Offal

Folks are always asking me if we ever eat “regular” food. That question always puts a smile on my face because the BF and I have a vast array of eating/cooking habits. For one meal we may spend an entire day prepping and cooking dishes that are complex and laborious. But then there are those nights that all we eat for dinner is ice cream. True Story.

So what is one of our favorite “regular” dishes? I am proud to say it is SPAM, Eggs, and Rice….The Breakfast of Champions. Easy, quick, nostalgic, and just darn good. And it makes perfect sense since we were both raised on this goodness (I was born in the midwest and the BF is Hawaiian).

Sure, it’s somewhat questionable to what SPAM is really made of. Hormel says that it is a combination of pork and other stuff but this is one example of when I don’t question the contents and just enjoy the goodness. Come to think of it, this may be the only kind of offal that I will eat 🙂 Folks can’t even agree to what the acronym stands for though some have come up with some clever versions. My favorites that I have heard are: “Something Posing As Meat”, “Specially Processed Artificial Meat”, “Spare Parts Animal Meat” and “Special Product of Austin Minnesota”. Hilarious.

This gal prefers her SPAM sliced thinly and prepared crispy (kind of like bacon). The BF likes his sliced thicker and just lightly fried. Add rice, a fried egg, and a sprinkle of furikake and I am a happy camper! Though I also won’t pass up a good SPAM Musubi, either.

SPAM…you can’t get any more “regular” than that. But I do have one last question…..Anyone want to meet me at the SPAM Museum?

Until next time Friends, SPAM Fanatic signing off!