Sunday Family Dinner

Unicorn Cakes and Magical Pugs….

February 2018 Family Dinner

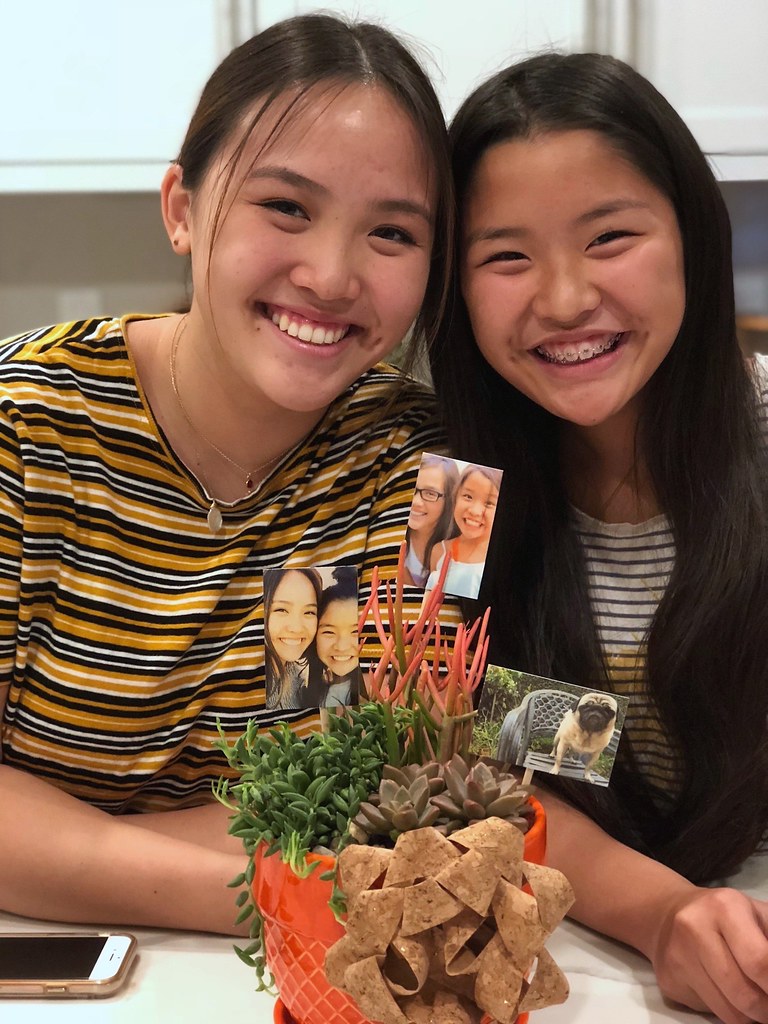
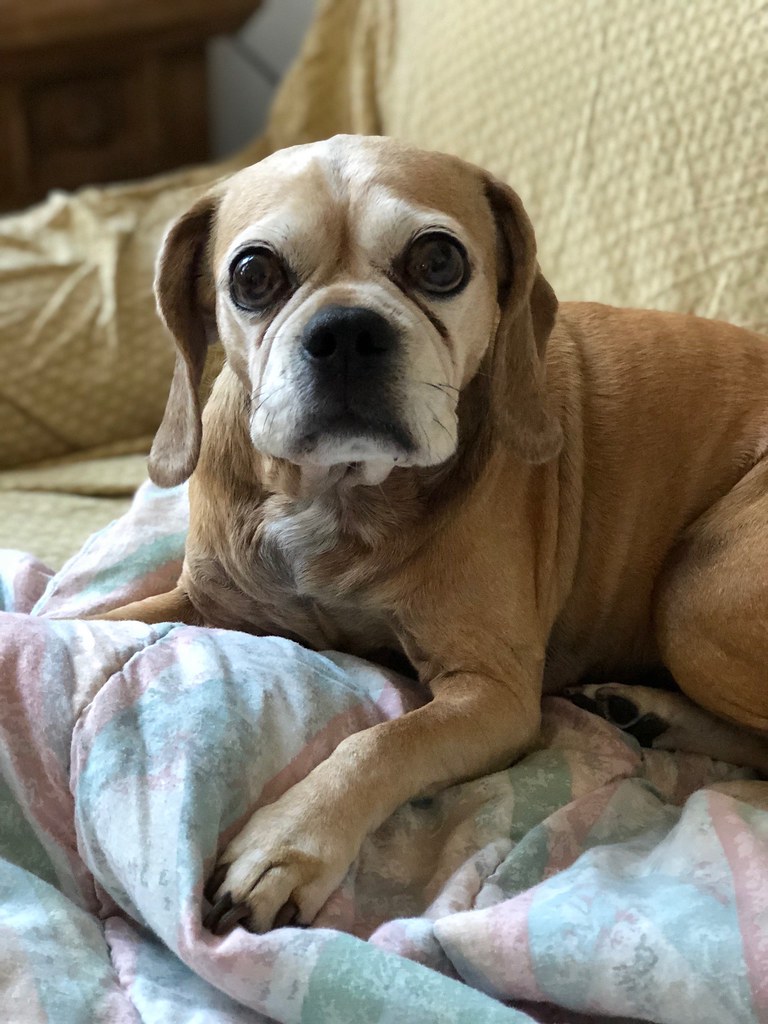
If you think the above photo is just too darn adorable, than scroll down and check out the one below.

Amazing right?

Keep scrolling.

February 2018 Family Dinner

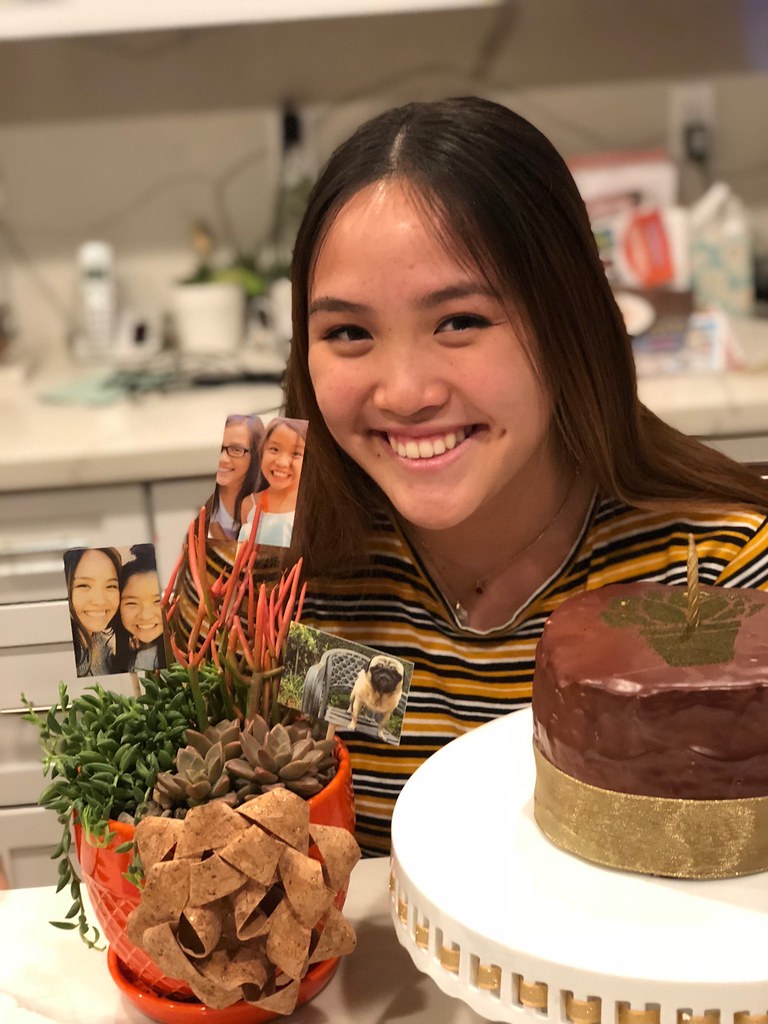
They are just too much. I want to freeze time so that they both will stay like this forever.

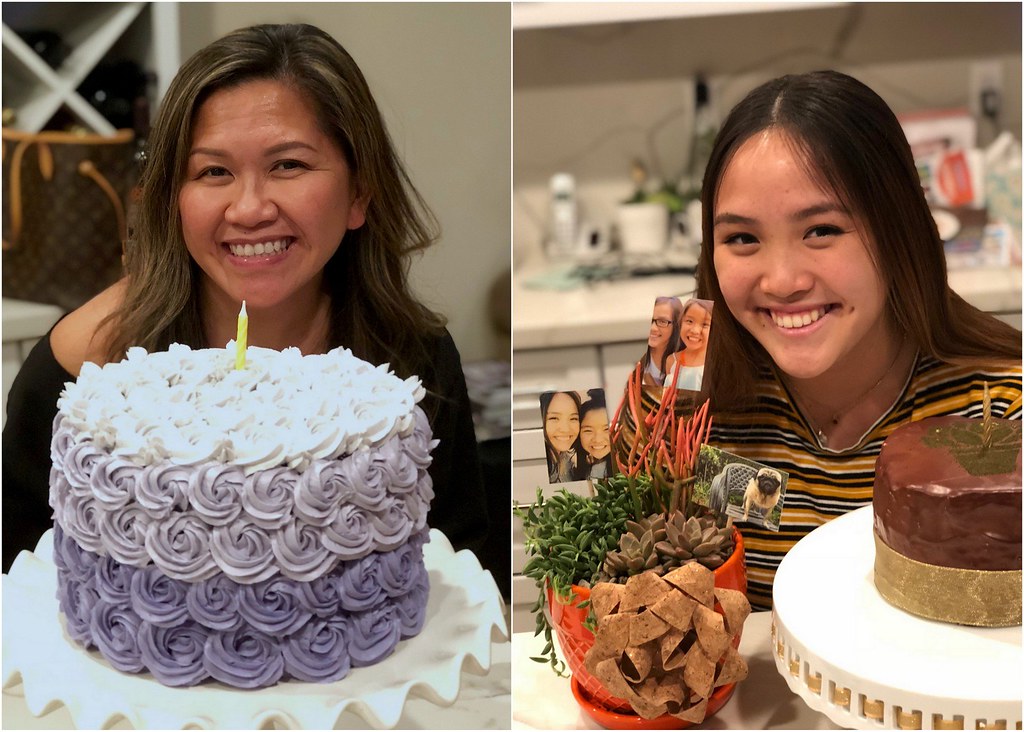
Our February Babies.

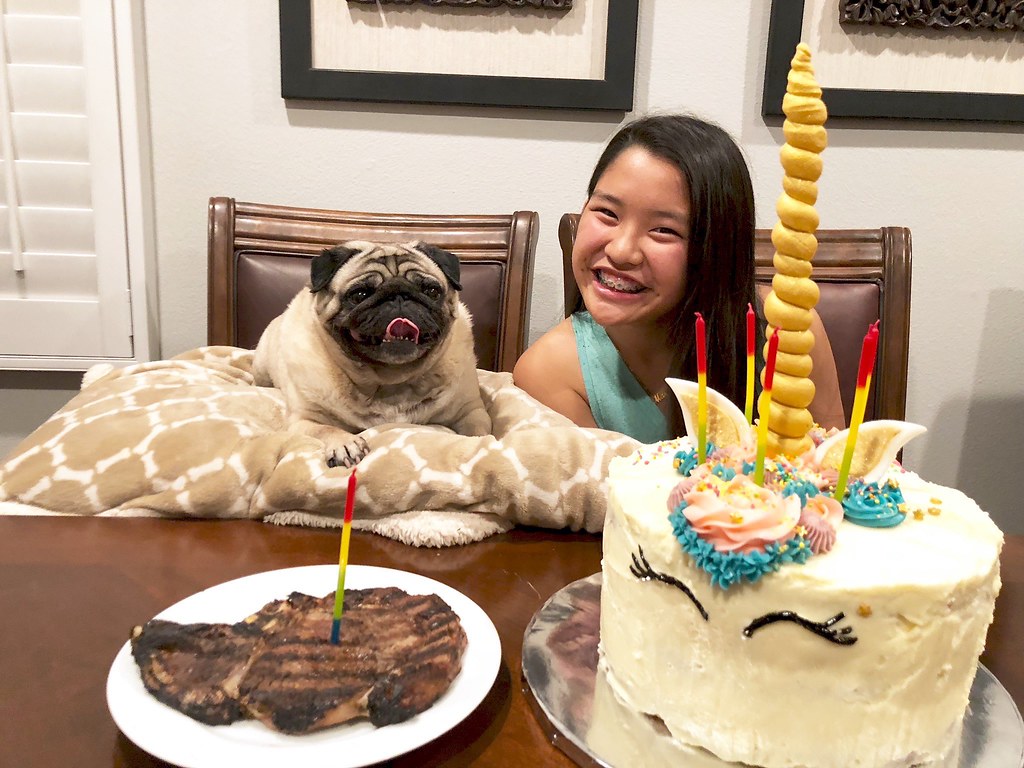
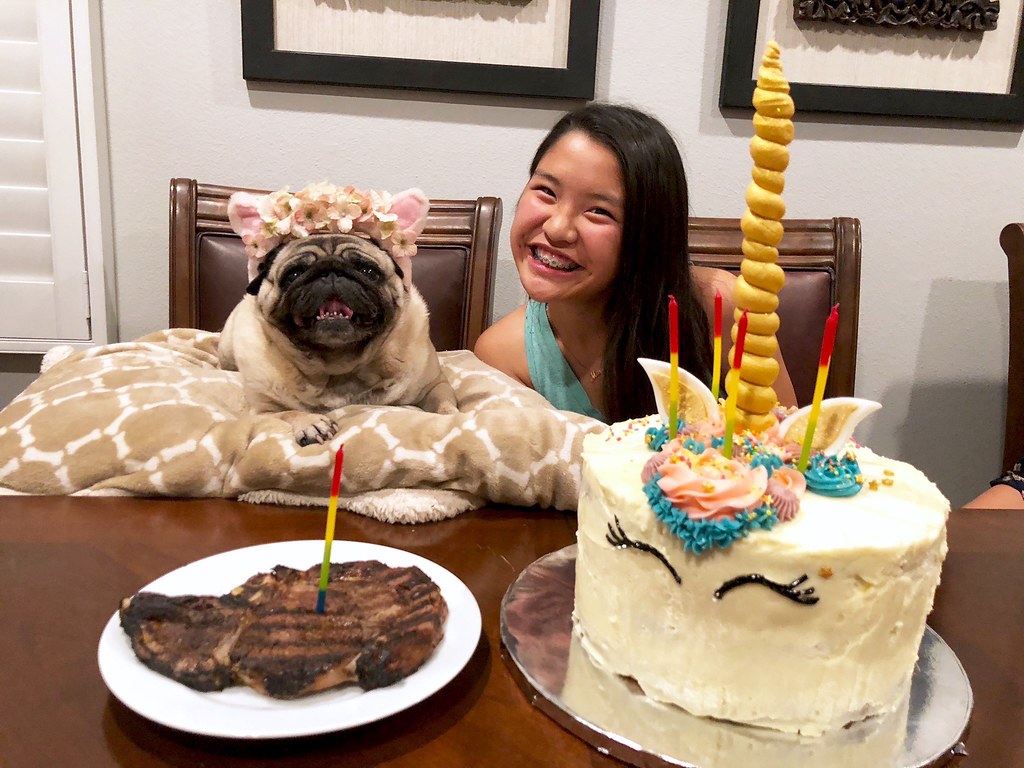
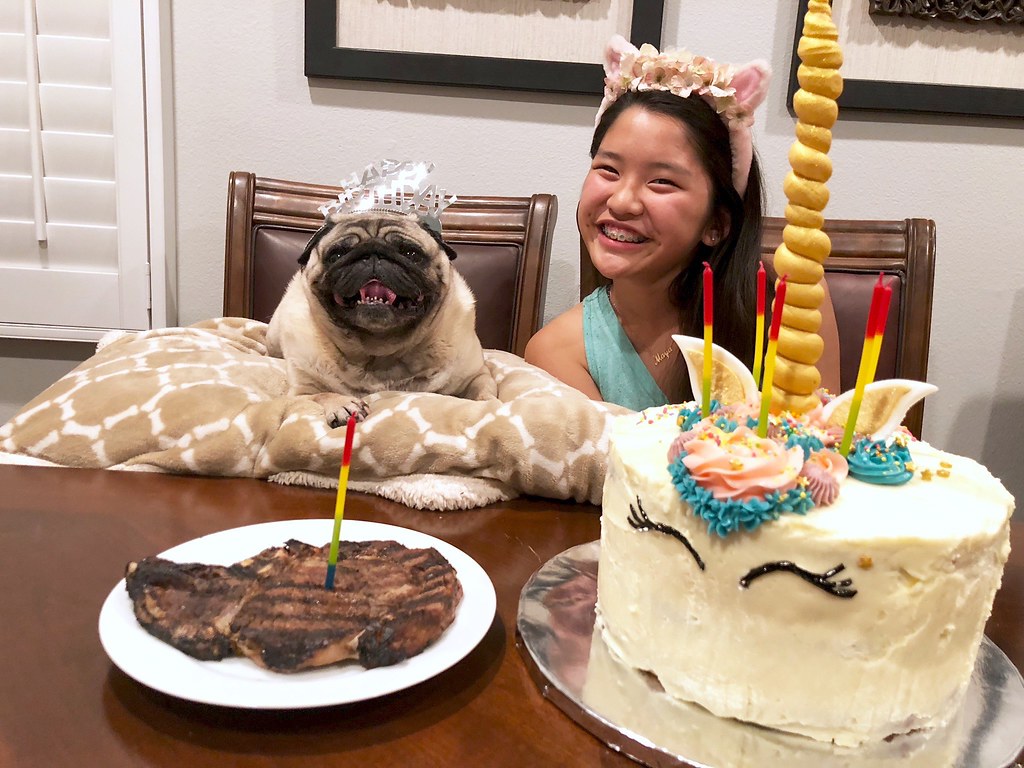
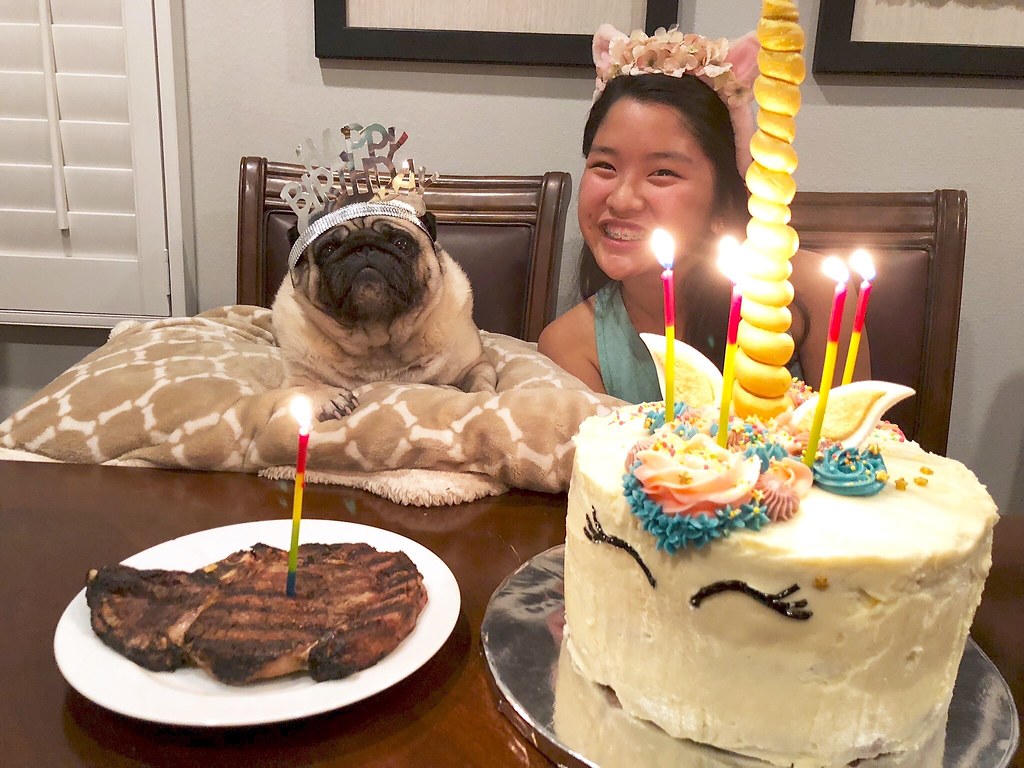
Oh yes, this time Princess Leia got in on the Family Dinner Birthday celebrations too. After all, she was turning double digits…the big 1-0! (Or I guess, 70 in her case….)

So her fur-less cousin Maya was happy to be sharing her bday fam din with her. And as for our sweet Maya, she turned 13.

THIRTEEN!!!

I can’t…I seriously just can’t with the munchkins growing up so quickly.

February 2018 Family Dinner

Usually for your birthday, you get to choose what you’d like your dessert to be.

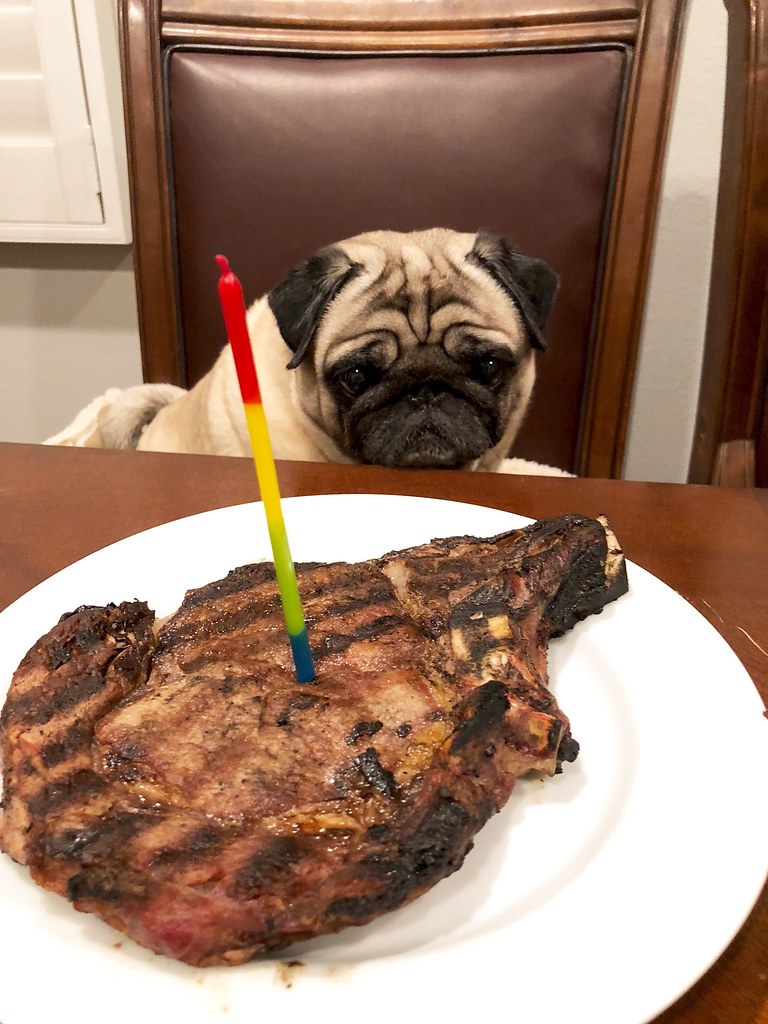
For Leia, it was a no-brainer. She’d be getting candles in a big ol’ steak like her cousin Bella.

But for Maya, I wanted to surprise her and told her “trust me, you’ll like it.” More on that later.

February 2018 Family Dinner
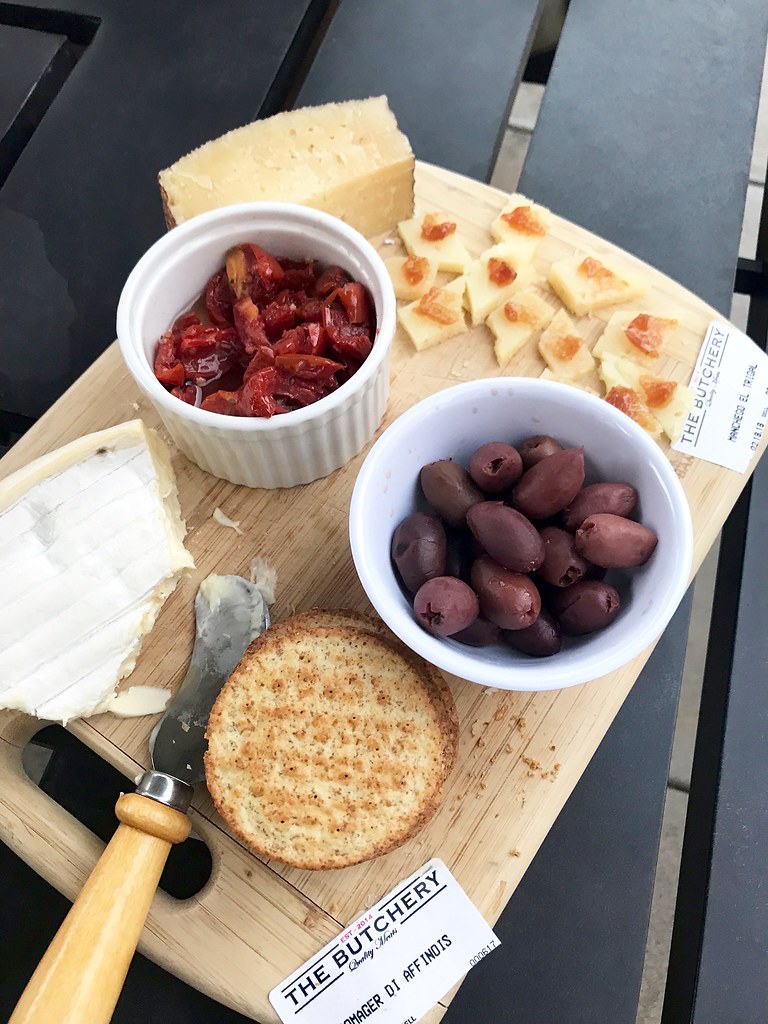
While we were milling around getting things prepped, we noshed on a Cheese Board that L assembled. It had Manchego with apricot preserves, Fromager d’Affinois, Picholine olives, marinated peppers and crackers.

February 2018 Family Dinner
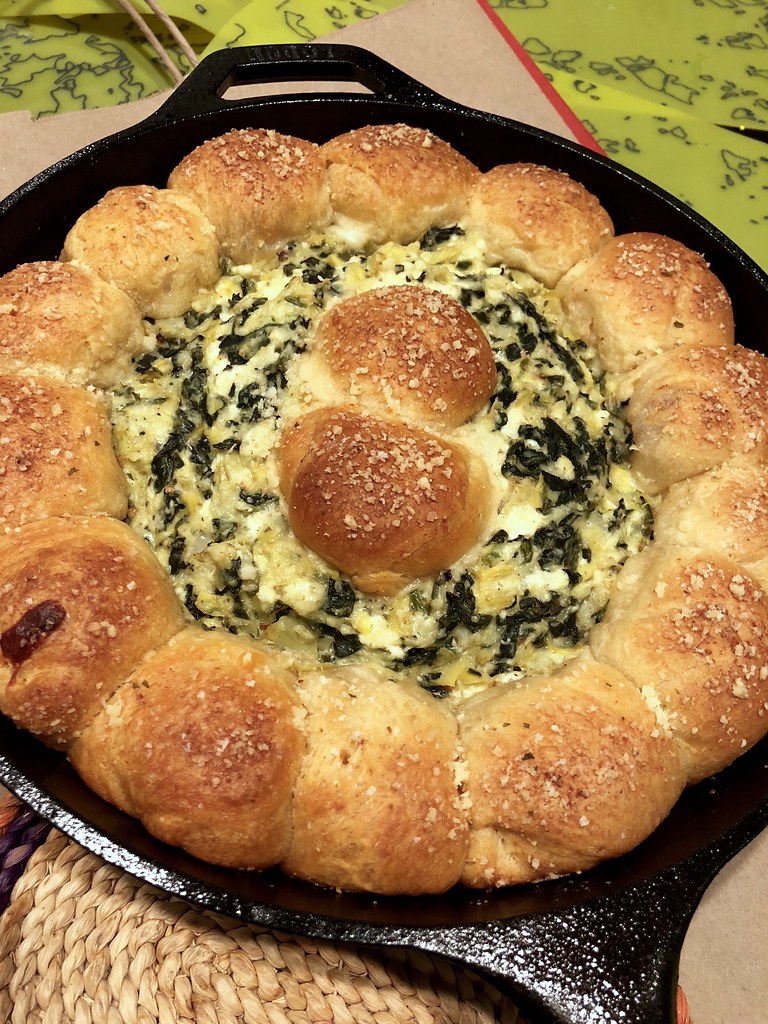
N made the second appetizer. Truthfully, I can’t remember what it’s called but it’s like a Cheesy Spinach-Artichoke Bread Ring Dip. Picture this….take crescent roll dough and form little balls. Line a cast iron skillet with them and then fill the center with a super cheesy spinach-artichoke mixture. Bake it up and BOOM.

Cheesy goodness.

YES PLEASE!

February 2018 Family Dinner

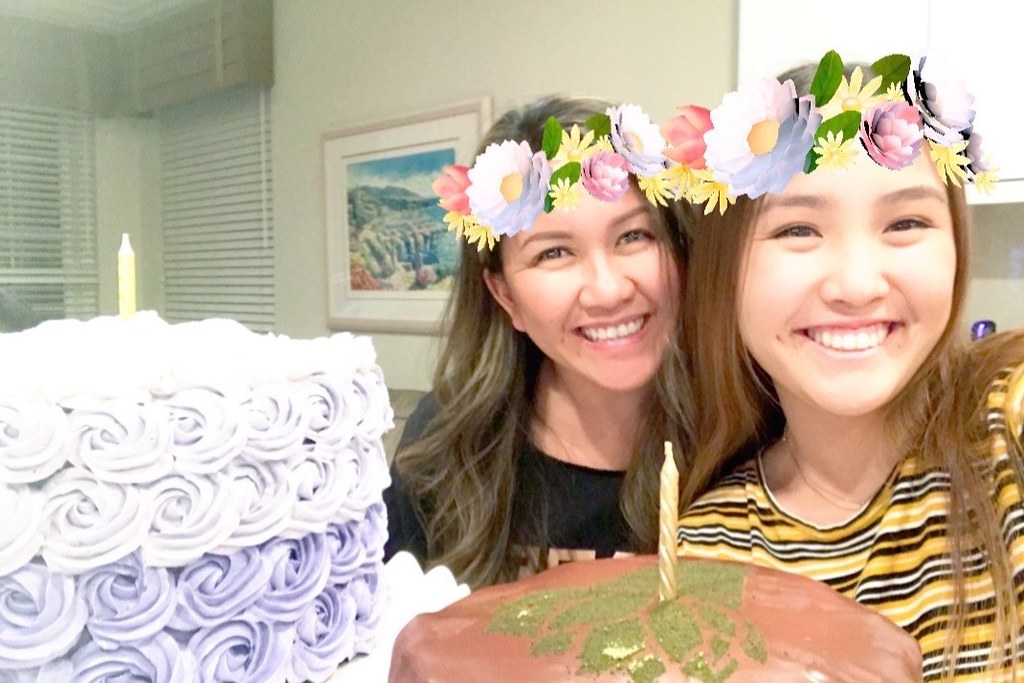
Spotted: Unicorn Herd in their natural environment.

I think they were congregating because they knew it was DINNER TIME!!

February 2018 Family Dinner

Miss Maya was very relaxed about her whole birthday menu. This was pretty much our convo:

Me: What would you like to have for dinner?

Maya: Um….

Me: Seafood? Sushi? Pasta —

Maya: PASTA!

Me: Ok…what kind of pasta? Chicken? Shrimp? Steak —

Maya: STEAK!

And that was it! She’s pretty low maintenance.

February 2018 Family Dinner
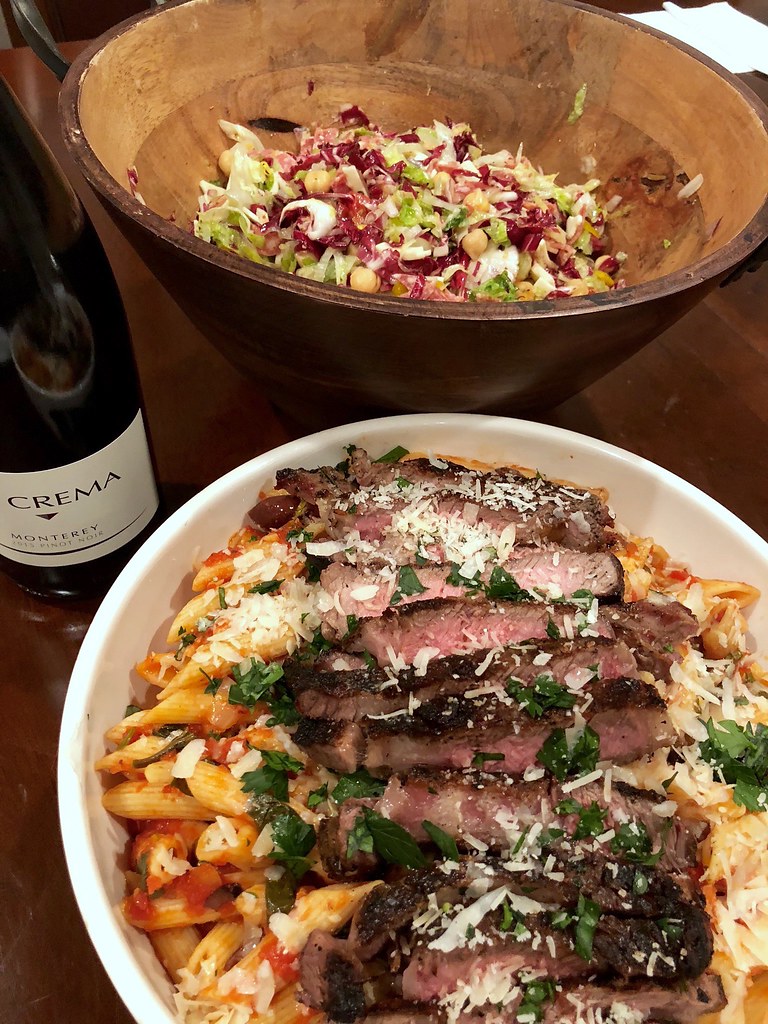
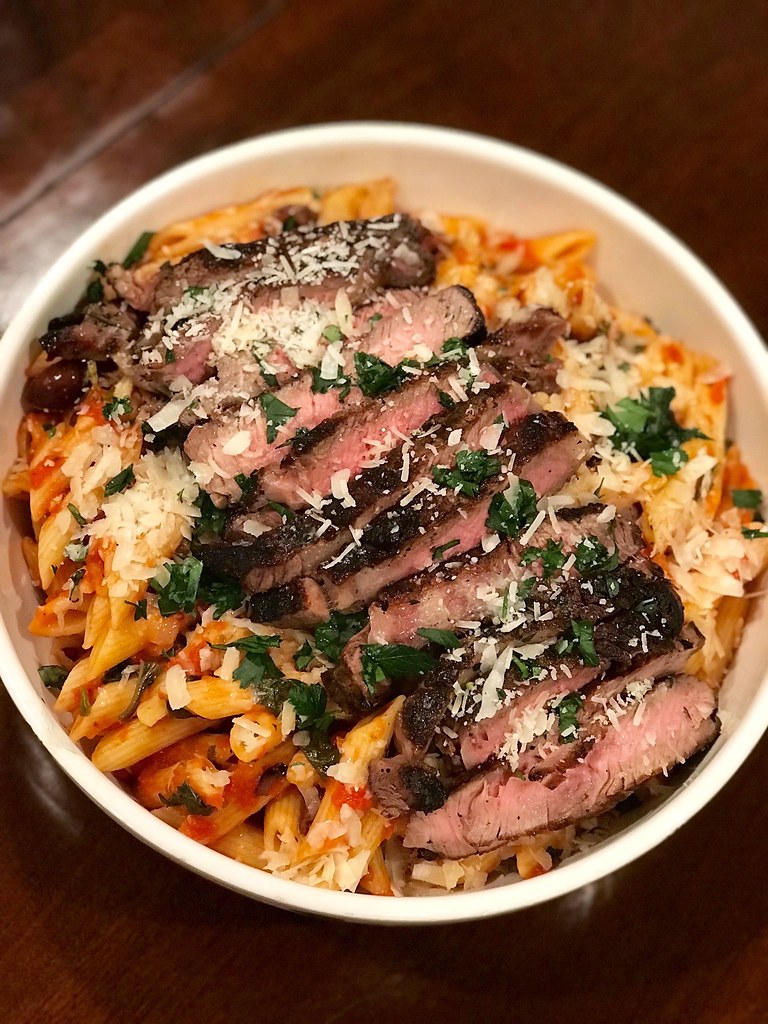
V and T put their heads together and came up with this Grilled Steak over Puttanesca dish. It was hearty, flavorful and combined some of my most favorite things –steak, cheese and carbs.

February 2018 Family Dinner
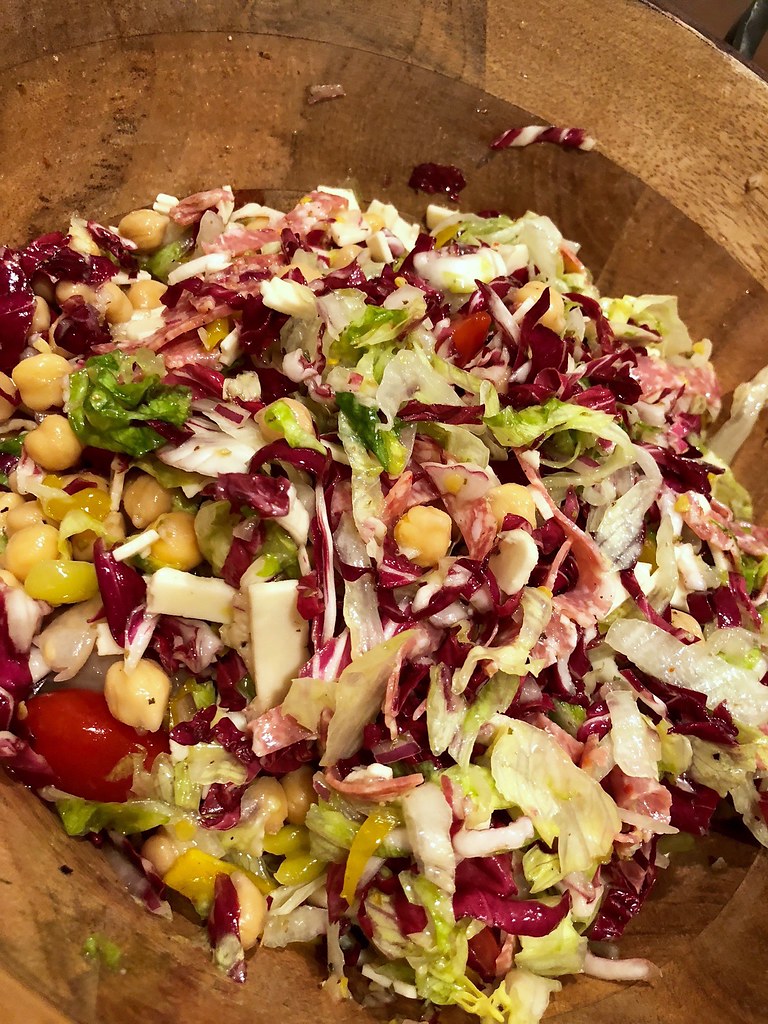
And since Maya loves salads, seester T decided to make the Chopped Salad from Pizzeria Mozza.

Have you had it before? If not, you’ve got to try it!

It has all kinds of goodness like radicchio, lettuce, tomatoes, chickpeas, salami, pepperoncini and provolone. And it’s actually quite hearty that you could have it as a stand alone meal with perhaps some warm toasted baguette on the side.

February 2018 Family Dinner
And then before we knew it, it was dessert time!

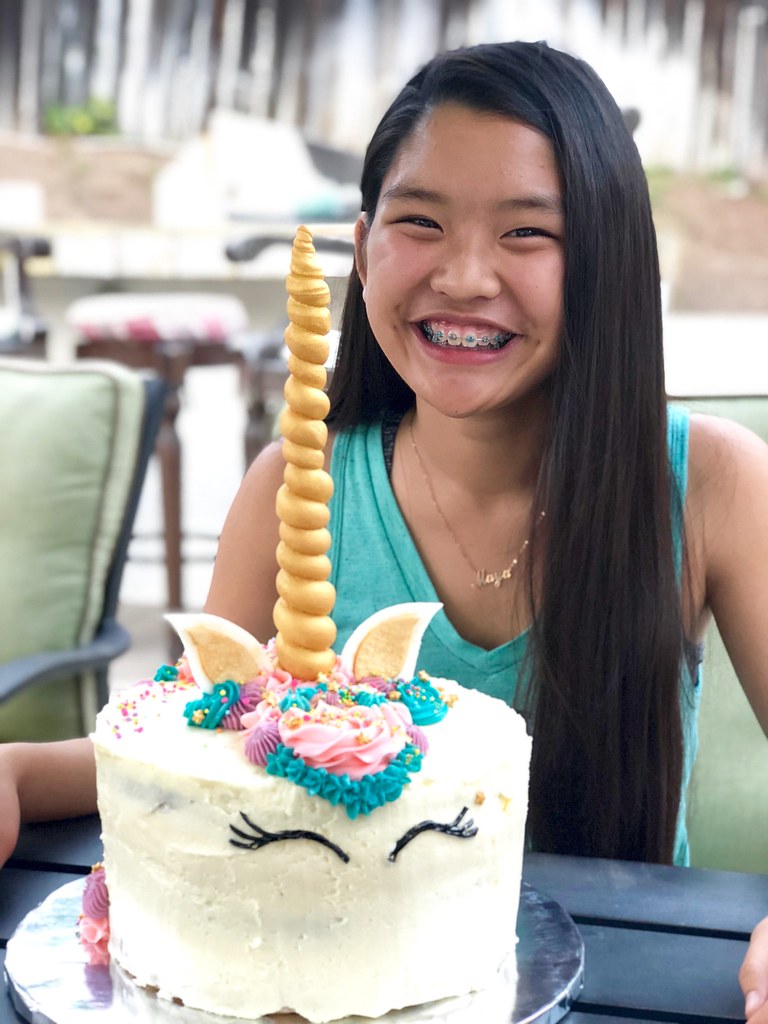
I’ve always wanted to make a unicorn cake…blame it on Instagram I suppose. So when I was thinking of what to bake for Maya, Nini suggested a unicorn cake because it would be something that the birthday girl would absolutely love. And if anyone knows Maya, it’s definitely her big cousie Nini.

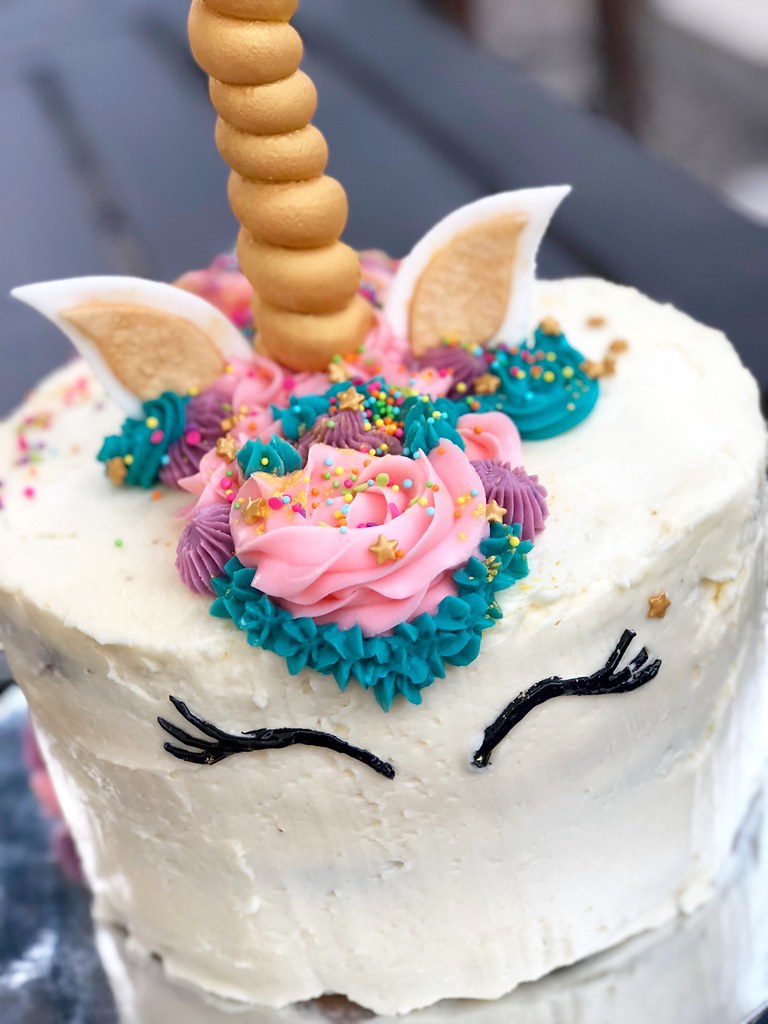
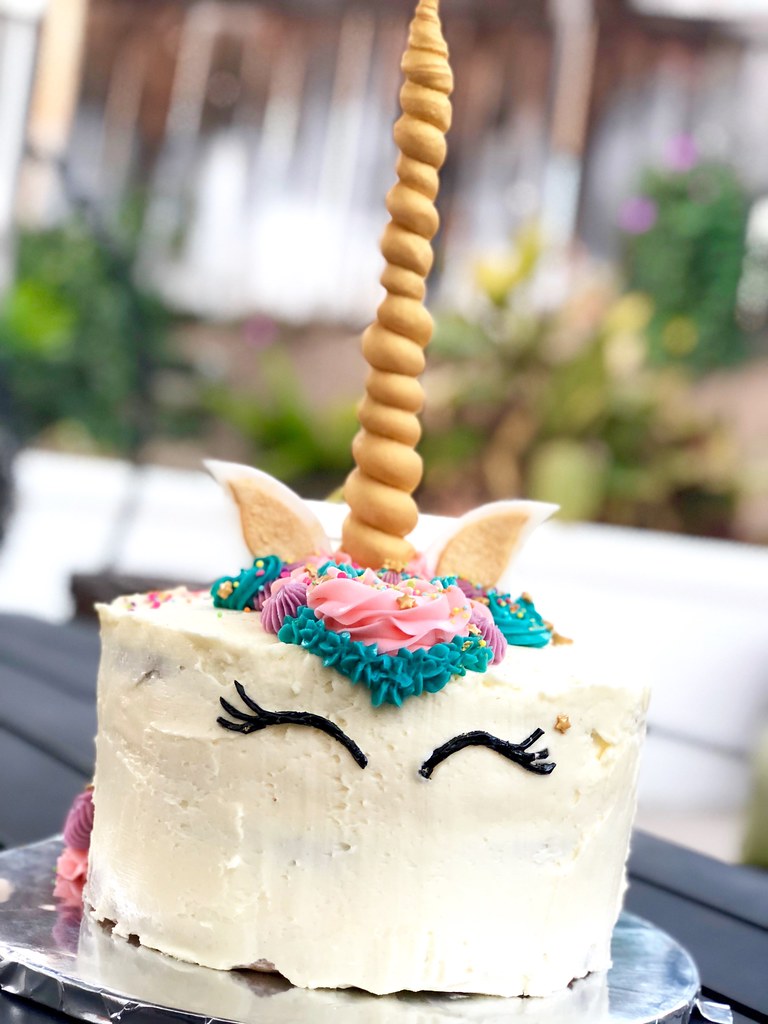
I realize that Buttercup’s horn (yes, Maya named the unicorn) is a bit excessive, but heck–I’m not sure when the next unicorn cake will come around again so I might as well GO BIG!

February 2018 Family Dinner

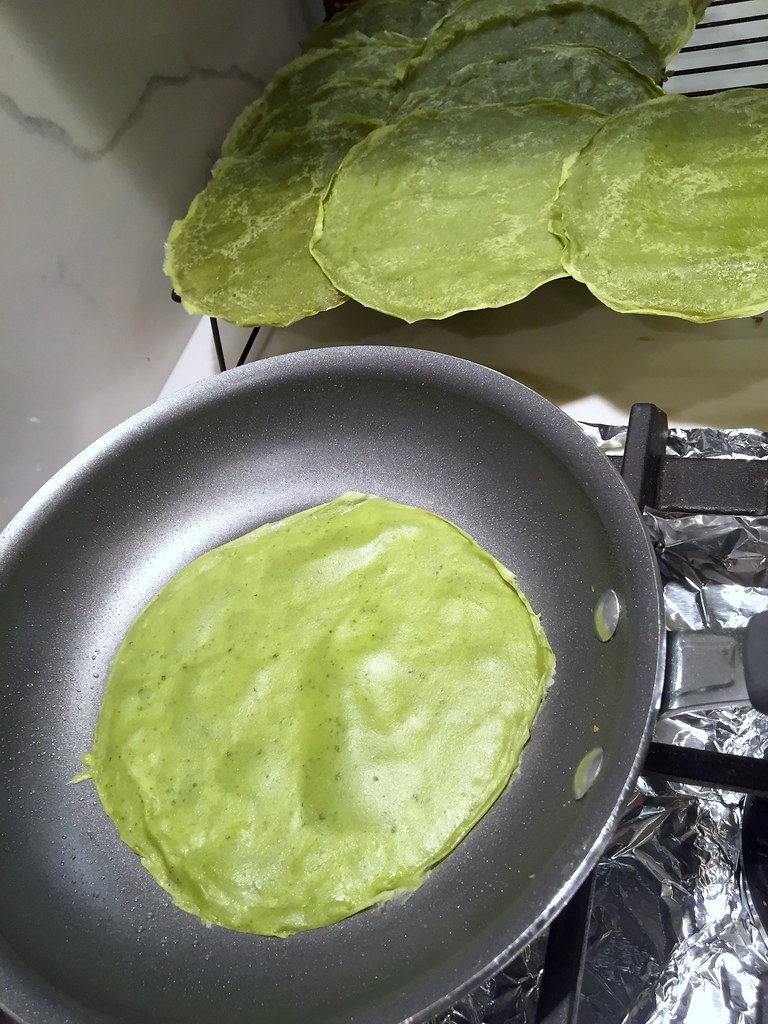
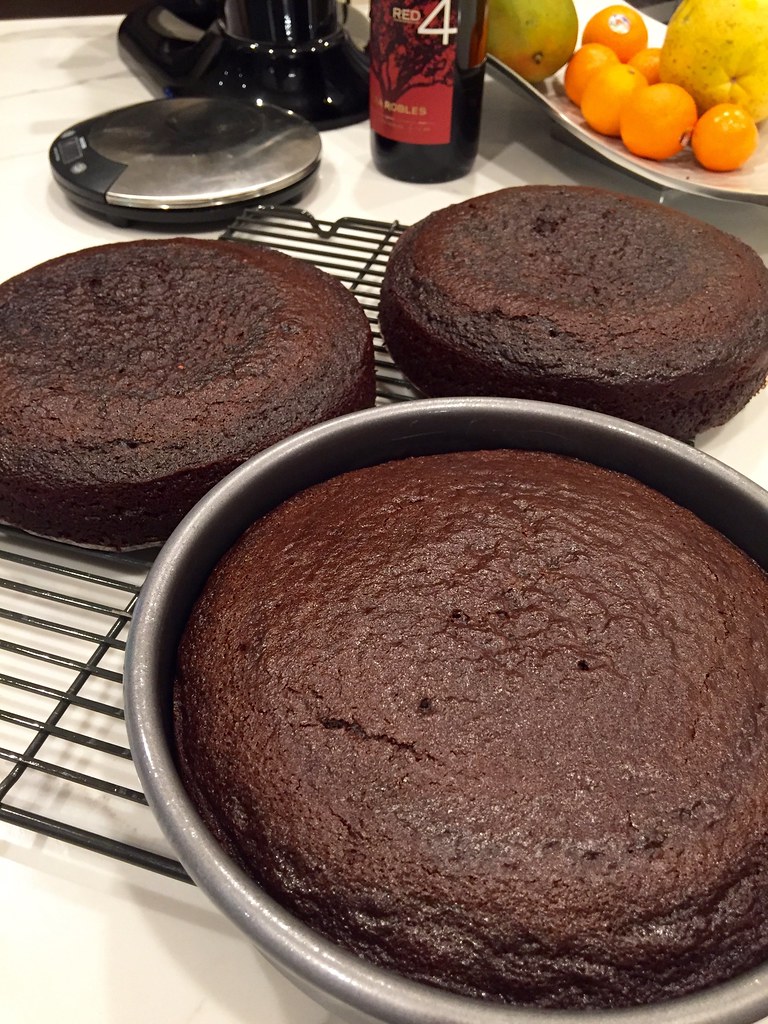
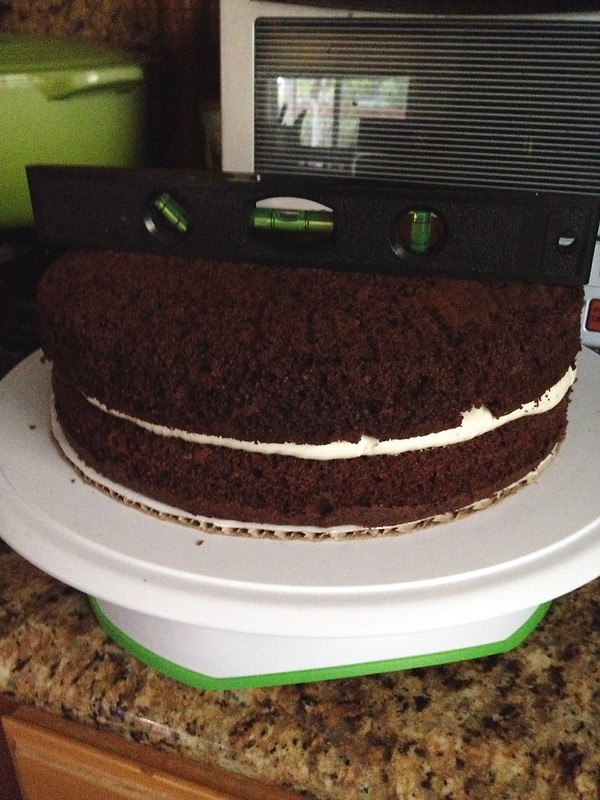
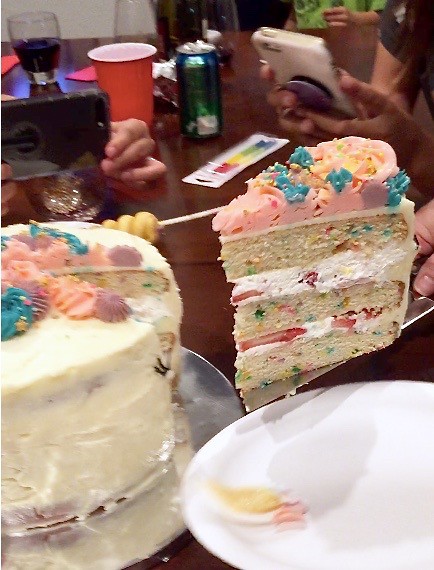
I first started off with the sponge and ended up choosing funfetti. Because c’mon, unicorns love rainbows and sprinkles right?

After I baked the three layers of cake, I took a taste and thought hmm…..it kind of just tasted like vanilla cake.

For those of you that like funfetti, this may not be a surprise. But I actually think that it may have been my first time tasting it. Don’t judge me…I’m a chocolate fan myself.

February 2018 Family Dinner

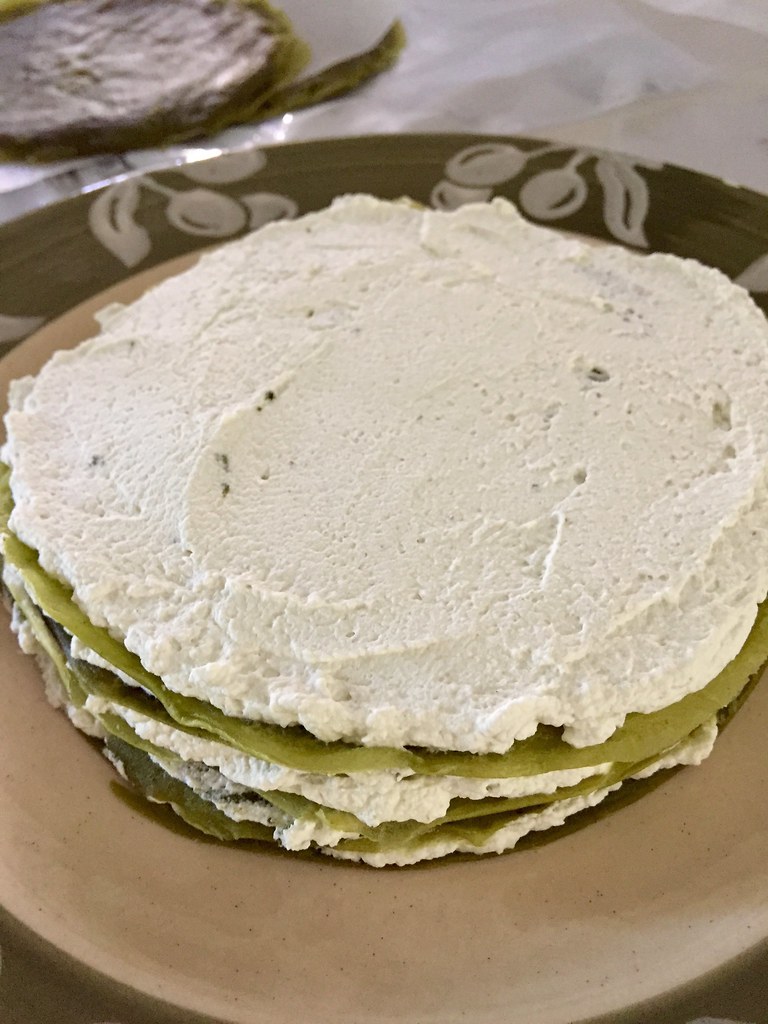
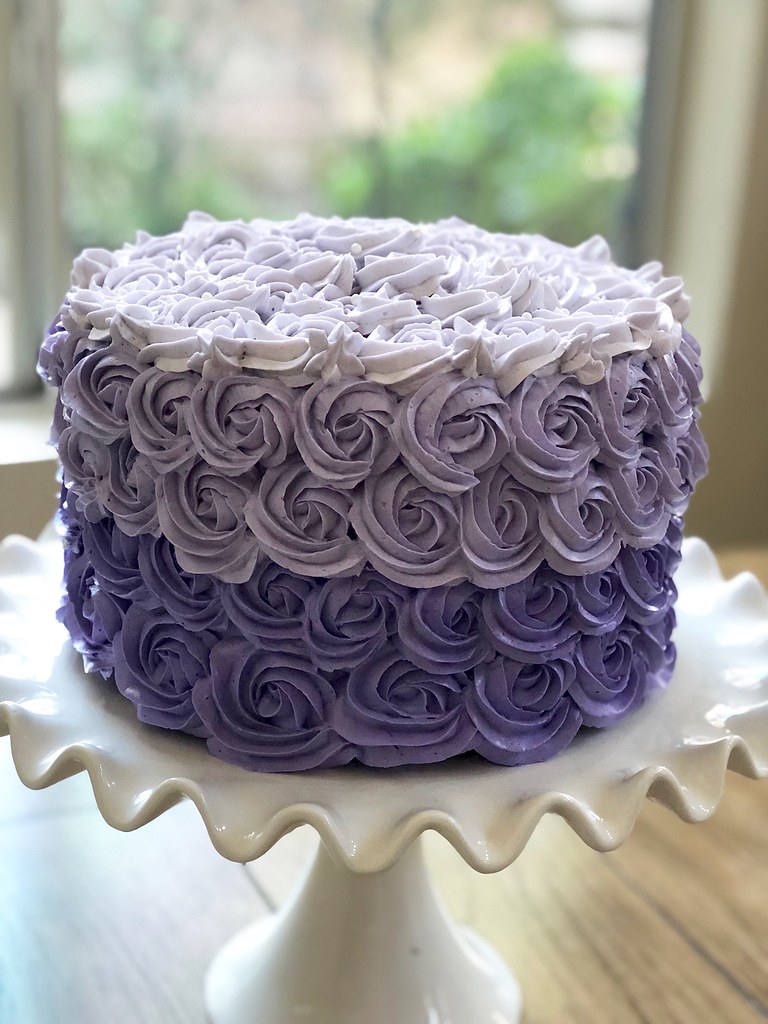
So to OOMPHF up the flavor, I decided to fill the layers with fresh whipped cream and strawberries –two things that I know for certain the bday girl also adores. And I’m totally glad that I did because it really brought something fresh to the cake.

Hey- if you’re going to be extra when baking a cake, it might as well be fore a unicorn cake!

February 2018 Family Dinner

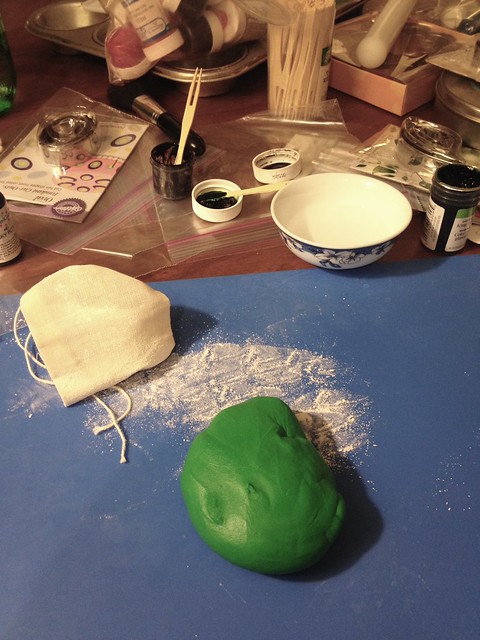
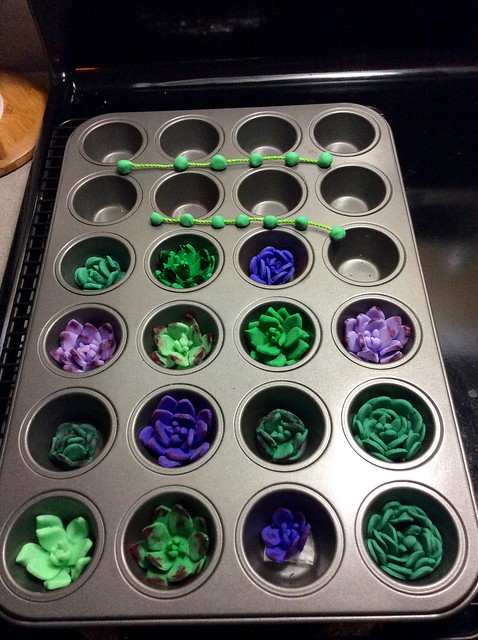
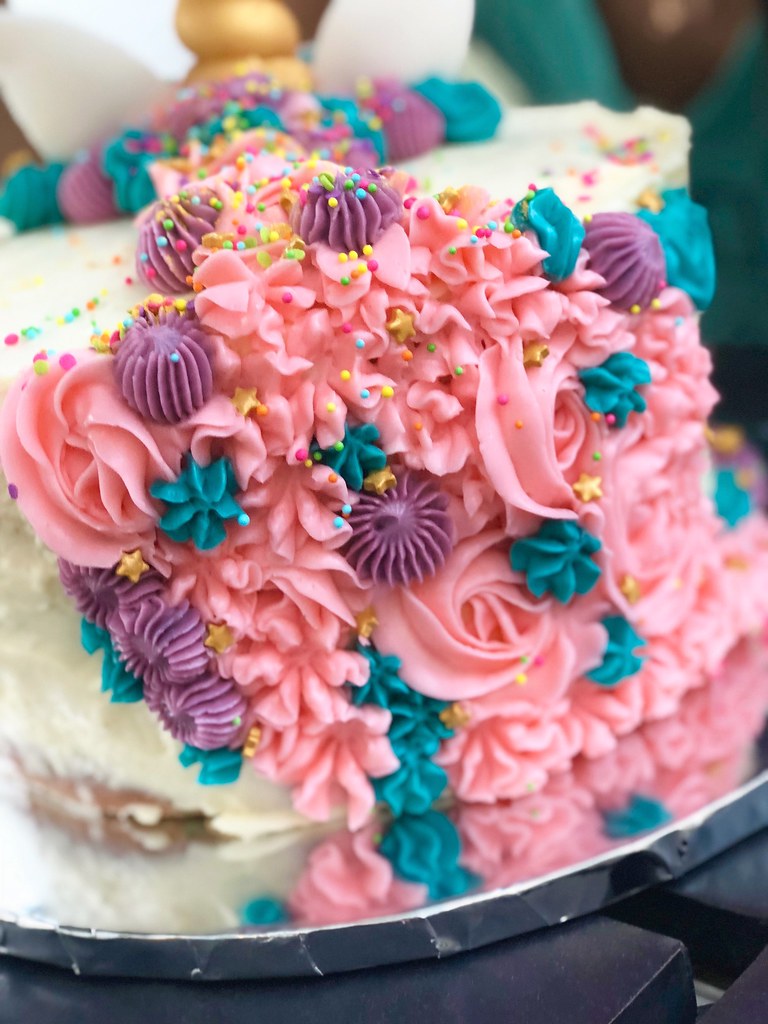
The whole thing was then covered with a light layer of vanilla Swiss meringue buttercream (always my buttercream of choice) and then I went nuts decorating Buttercup with three shades of buttercream using various piping tips.

I used standard fondant to shape her horn, ears and eyes. And for the golden sheen, I used edible gold spray for the inner ear accents as well as her magical horn.

Cute right? I wish my eyelashes were as on-point as Buttercup.

February 2018 Family Dinner

And of course, because she’s so magical, she was dusted with lots of different sprinkles and edible gold stars.

To be honest, I had a lot of fun making this cake!

February 2018 Family Dinner
And let’s not forget the other birthday girl!

Princess Leia got a bone-in ribeye steak that V grilled.

Seriously, look at that face.

And unlike her food-mongering puggle cousin, she sat patiently waiting while we sang and took pictures before diving in. What a good puppers!

February 2018 Fam Din

It’s fair to say that the birthday girls thoroughly enjoyed their family dinner in their honor.

Princess Leia wearing a crown while seated on a plush thrown…..

Maya wearing a floral-kitty headband from when she was about 1 or 2….

Heart-melty….

February 2018 Family Dinner

Yes, we’re a bit over-the-top kind of family. But if you’ve been with me for awhile, you’ve likely come to that conclusion already. It’s how we roll….

¯\_(ツ)_/¯

February 2018 Family Dinner

Happy Birthday Maya and Leia!

____________________________________________________

This Month’s Family Dinner Menu

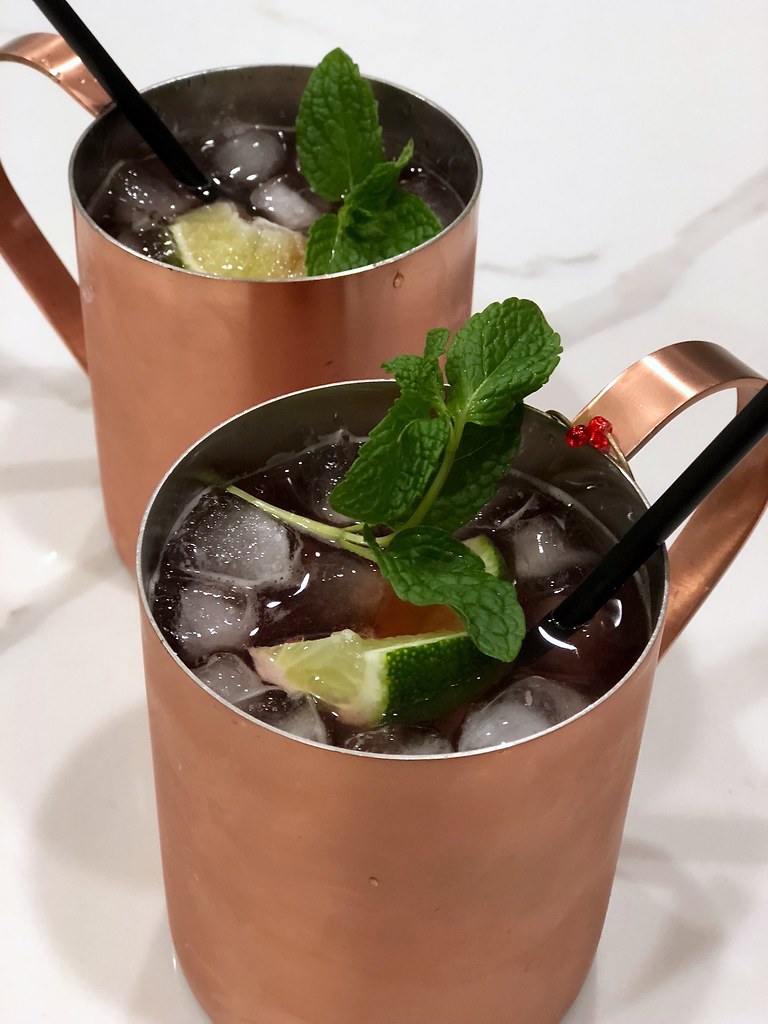
Cocktails: Various Wine
Appetizers: Cheese Board, Cheesy Spinach-Artichoke Bread Ring Dip
Sides: Chopped Salad à la Pizzeria Mozza
Entrees: Grilled Steak over Puttanesca
Dessert: Funfetti-Strawberries and Cream Unicorn Cake (And a Steak for the fur babies!)

Sunday Family Dinner

Family Dinner Celebrates the January Babies!

January 2018 Fam Din
Seester T and  Nini are our January Babies! So with all birthday Fam Dins, it was all about them!

January 2018 Fam Din
The evening included some of their favorite foods and of course, succulents. My Fam are somewhat succulents-obsessed….to put it mildly. And T and Maya put this adorable pot together for Nini that just had her written all over it.

Orange is her fav color.

And so are pugs—particularly Princess Leia.

And she also has been known to say that Maya is her Spirit Animal….so there’s that.

January 2018 Fam Din
While we were admiring their handy work, I put my efforts towards that night’s cocktail – Pomegranate Moscow Mules!

We’re big fans of mules with its gingery, citrus punch—and the addition of pomegranate juice was the perfect kick to update the classic.

January 2018 Fam Din
Then it was time to get down on some appetizers! Nini asked her mama to make pork belly baos.

Seester N marinated the pork belly overnight with soy, sugar, rice wine, garlic, ginger and a few other goodies. Once it was ready, she handed it over to me and I sous vide the belly for 10ish hours.

After the belly finished its bath, we placed it in the fridge for a few hours so it was easier to slice.

January 2018 Fam Din
When we were about ready to eat, she took the slices of pork and seared it up on each side.

I wish you could have smelled the house when she did this. It was simply intoxicating.

January 2018 Fam Din
A few hours beforehand, she made the dough for the baos and had it proof for a bit.

January 2018 Fam Din

Then it was time to roll it out.

Super adorbs rolling pin, right?

January 2018 Fam Din
Here they were before she placed them in the steamer.

And now here’s a confession……

Although everything looked perfect up to this point, the baos did not rise after they had steamed. It was the strangest thing!! We did taste a small piece of it and it was great! But we were looking for a smooth, puffed, mini-dome and somehow ended up with a pancake.

BUMMER!!!

January 2018 Fam Din
Luckily Seestrah N thought ahead and was prepared for any potential mishaps. You know, in case we “pulled a Monica”. Please tell me someone got that reference….

While at the Asian market, she swung by the freezer section and picked up a few packages of pre-steamed frozen bao dough. Think of it like the frozen dinner rolls you can buy and just throw in the oven.

They just needed a few minutes in the steamer and they were perfect!! Then it was assembly time.

January 2018 Fam Din
Get a look at these beauties!!

Sis also pickled up some thin cucumber slices earlier on in the week and stuffed them inside the baos along with freshly sliced cucumbers, carrots and a few sprigs of cilantro.

January 2018 Fam Din
They were insanely good — as delish as any I’ve had in restaurants! The pork belly was tender and succulent. The glaze was salty and sweet. And the veggies were the perfect offset for freshness, acidity and texture.

Sous Vide Pork Belly Baos — I highly, highly recommend them!

January 2018 Fam Din
Next up — OYSTERS!!!

To be honest, T had requested those crazy, 10 feet tall seafood towers for dinner. But c’mon now…that would be, as my nieces say, “very extra”.  Brother V got her to compromise and go with a Swan Oyster Depot-esque theme.

Which really just means HELLA seafood.

January 2018 Fam Din
V picked up a gazillion of fresh oysters and clams from our local Dry Dock Fish Company. Birthday gal got to work and was shucking away! I’m telling you, Nini is a Shucking Queen.

January 2018 Fam Din

I whipped up a quick mignonette for them but they were just as delish with a squeeze of lemon and tabascco.

January 2018 Fam Din
And then it was time for a GINORMOUS platter of these babies – DUNGENESS CRAB!!!!!

LOOK AT ALL THAT ROE! HOLY MOLY!

Brother also picked up a few dozen clams too. He meant to have us enjoy them raw, but dang it! Those suckers were tough as heck to shuck!

January 2018 Fam Din
So I did a little quick inventory of what N had in her pantry and decided to whip up a 20 minute dish – Seafood Squid Ink Pasta!

I sauteed some aromatics and threw in some crushed Roma tomatoes, clam juice and white wine. I then added the clams and some calamari N had in the freezer. Once the clams opened up, I tossed in some al dente squid ink pasta. Hey–we were going for seafood overload, right?

It was quite tasty and for a dish on the fly, we were pretty happy with it!

January 2018 Fam Din
Then it was time for us to do a little clean up before dessert.

Which for Leia, that means commandeer her fur cousin’s crate for a post dinner nap.

January 2018 Fam Din
Which is 100% okay for Bella because she prefers the couch with blankets.

January 2018 Fam Din
Then it was dessert time!

And of course, I had to make one for each birthday girl.

Nini loves all things green tea so when I asked her what she’d like for her bday dessert, she quickly said Matcha Mille Crêpes Cake! She’s a fancy one….

January 2018 Fam Din
It all started with matcha crêpes. And I’ve got to admit, they were the bane of my existence…well, while I was making them at least. I hadn’t made crêpes in YEARS and it took a while to get the hang of it down again.

It probably didn’t help that I started making the crêpes at 11pm the night before Fam Din but at least there was wine!

When all was said and done, I made 25 crêpes with the batter.

January 2018 Fam Din
The next day, I made a matcha flavored whipped cream and began assembly.

One crêpe, then a thin layer of the whipped cream.

And repeat.

January 2018 Fam Din

Once I was done, I had a total of 50 layers. But since I wanted to cover the whole cake in ganache, I used the whipped cream and covered everything in a thin layer before chilling it for a few hours.

January 2018 Fam Din
While I was glazing the chilled cake in a layer of ganache, I put birthday girl to work by having her cut out a stencil of a succulent.

Yes, I know. We’re obsessed.

January 2018 Fam Din

And VOILA!!

Nini’s Matcha Mille Crêpes Cake!

January 2018 Fam Din
And here’s a peak inside.

All.

Of.

Those.

Layers.

January 2018 Fam Din
Pretty, right?

I’ve got to admit, it was quite delicious too!

January 2018 Fam Din
And then it was seestrah’s turn!

After texts upon texts of me pestering her, she finally said she wanted a traditional chocolate cake. Now usually for us, that means Ina Garten’s version of Beatty’s Chocolate Cake.

Man, that is a damn good cake. But as good as it is, it’s not a great cake if you’re looking for a solid crumb for decorating.

January 2018 Fam Din

So I chose a sponge that I used for Maya’s cake a few years ago. It’s really chocolately and delish too–but just sturdier.

January 2018 Fam Din
And then I did this to it.

Because purple is seester’s favorite color.

It’s mine too.

And mama’s.

January 2018 Fam Din
Chocolate Layered Cake with Ombre Swiss Buttercream Rosettes.

January 2018 Fam Din
I actually kind of loved how it turned out in the end.

Now that I think of it, they kind of remind me of Sterling Roses that seestrah really loves.

I mean–I didn’t just think of it. I meant to do it that way all along!

*not

January 2018 Fam Din

Now here’s the thing about us. As much as we love desserts and as much as we bake….we’re not really into eating a lot of frostings or buttercreams. It’s just too sweet or too much most of the time!

Since I figured we’d get our fix of buttercream via the rosettes, I only used a thin amount between each of the cake layers.

Trust me, it was still plenty!

January 2018 Fam Din

And I just had to include this picture because Lucas and Maya’s expressions have be DYING.

January 2018 Fam Din
And that’s a wrap!

Happy Birthday January Babies!!!!

xoxo ❤

January 2018 Fam Din
___________________________________________________________

This Month’s Family Dinner Menu

Cocktails: Pomegranate Moscow Mules, Various Wine
Appetizers: Sous Vide Pork Belly Baos, Fresh Oysters
Entrees: Steamed Dungeness Crab, Seafood Squid Ink Pasta
Dessert: Matcha Mille Crêpes Cake, Chocolate Layered Cake with Ombre Swiss Buttercream Rosettes

Desserts/Pastries

Nini’s Sweet 16 Surprise Party

Nini's Sweet 16

On Saturday we somehow managed to successfully throw my niece, Nini (aka Stephanie), a surprise Sweet 16 Birthday Party. It was quite a covert operation since the birthday gal lives in the house where the party was to be held and all of the decorations and prep items were hidden in various nooks and crannies.

But we pulled a fast one on her.

Nini's Sweet 16
It all actually started with her big seester – my eldest niece, Nina. We had been brainstorming ideas for her upcoming birthday but nothing stuck. At one point when Nini was out of the room, Nina suggested that we throw her a surprise party with all of her favorite things. What a good big seester!

Delish Food…..

Her Near and Dear Friends…..

Succulent Plants…..

All things Gold and Copper…..

Photo Booth…..

Her Fav Candies…..

Nini's Sweet 16

Come to think of it, I’m not sure if Nina had “family” on that list…but I’m going to say it was a given.

With a date and theme in mind, we were off to the races — full party planning mode.

Eldest seester gave the thumbs up to have the meal catered to give us a little breathing room. We brought in our local taco caterers who set a taco and nachos station in the backyard. The spread was full of pollo, carne asada, carnitas, bright yellow nacho cheese, guacamole, rice, beans and ALL of the fixings.

Nini's Sweet 16

This freed up our time a bit to focus on a dessert bar….because let’s face it, apparently we can’t throw a party these days without one.

Capitalizing on her recent macaron lesson with me a few weeks ago, Nina made a bunch of Matcha Macarons filled with Chocolate Ganache. Nini loves green tea and loves chocolate–and we all love macs so it was a no-brainer.

Eldest seestrah baked up several batches of New York Times Chocolate Chip Cookies –another one of the birthday gal’s favorites.

Nini's Sweet 16

The dessert bar included her favorites candies such as Peppermint Patties, Reese Peanut Butter Cups, Sour Gummy Straws and Red Vines that guests filled their goodie bags with.

As for me, I was tasked with the birthday cake (more on that later) and even whipped up a couple dozen cake pops at the last minute.

Nini's Sweet 16
And before we knew it, it was time for the birthday girl to come home to her party. I think you can tell from the look on her face below that she was truly surprised! Success!

Version 2

The night was filled with lots of food, laughter, a few games, LOTS of sweets, presents and endless–and I’m talking ENDLESS selfies!

Oh those teenagers….

We even set up a photo “booth” that was well taken advantage of by the dozens and dozens of teenagers. But get this—they would still take selfies while they were having their pictures taken! I kept asking if they wanted me to take the photos for them but they politely declined. Perhaps normal poses just aren’t cool…. I may never understand it.

Nini's Sweet 16

Let’s talk a bit about the cake.

For years, Nini has been obsessed with succulents —she’s absolutely nuts about them!  So when it came time to talk about cakes, the design choice was already made.

Which meant it was time to bust out the fondant. When I mold fondant decorations, I like to start at least a week out before the event to allow ample time for them to air-dry and harden a bit. This helps to keep the figures’ shapes as well as sets the color of the dye.

Below are a few of my previous fondant works:

Nini's Sweet 16
I’ve always kind of enjoyed playing with fondant—it’s essentially Play-Doh! I just wished it tasted better than it does but at least it’s fun to mold.

Nini's Sweet 16

My succulents were not 100% botanically correct, but I think they ended up pretty cute. In addition to coloring the actual fondant, I used powdered food color to paint the tips and edges of some of the leaves for some added depth.

Nini's Sweet 16

As for the cake itself, or “sponge”, I opted for a dense chocolate cake. For stacked cakes, I’ve always had issues with sponges that were too light (chiffon cakes, etc.) or if they were too moist. I find that they just don’t have the structure to hold up to the stacking weight which leads to a giant hot mess.

After the cakes were baked and cooled (I do this the night before I decorate the cake), it became time to level and tort them. And to be honest, this is my least favorite part. It’s tedious and time consuming but if you don’t do it properly, your cakes will be lopsided. Grab a handy leveler to help your cause out.

To fill and frost the cakes, I opted for the tried and true Swiss Meringue Buttercream. Not only is it delicious but it’s a good stable frosting. The layers were filled with a coffee flavored buttercream and the exterior of the cakes were frosted with vanilla buttercream to keep the color white.

Nini's Sweet 16

And if all goes well, all of your hard work and patience while torting will yield beautiful clean layers and lines in the cake.

Nini's Sweet 16

Once each cake layer was frosted and smoothed out, I placed the top tier slightly off centered for a bit of whimsy. I then took a Wilton 2A round tip to pipe an quick pearl pattern at the base of each tier.

Nini's Sweet 16
Next, as my seester said, came the fun part – figuring out the placement of the succulents. This is where I wanted to go a bit nuts and throw them all on. But my inner voice and my eldest seester talked me out of it.

Nini's Sweet 16
All in all, I was quite pleased with the final look of the cake and Nini really loved it –which if that doesn’t earn me the auntie of the year award, I don’t know what will……

Nini's Sweet 16
Happy Sweet Sixteen, Nini Love! ❤

Nini's Sweet 16

Desserts/Pastries

Matcha Chocolate Pocky Cake

August 2015 Family Dinner

It’s Friday gang….so let’s get down with some CAKE!!!

Cake! Cake! Cake! Cake!

Since I posted a pic of this beauty I made for my beauty of a niece, I’ve been getting lots of love (THANK YOU!) and questions about what went into the cake.

So let me break it down for you…

August 2015 Family Dinner

There was a TON of matcha powder….

LOTS of chocolate….

A gleeful amount of butter and sugar……

And three pinches of fairy dust.

Because if you’re not baking with fairy dust, then you’re doing something wrong.

August 2015 Family Dinner

Our Nina loves chocolate and matcha so when it came time to think of a birthday cake for her, I remembered a picture I saw on Pinterest a while back that had a cake adorned with Matcha Pocky Sticks. It was so flipping cute and had her name all over it.

I got down to business. It’s rather impressive in its presentation and surprisingly, not too hard to make. But there are a lot of stages involved—totally worth it in my opinion.

August 2015 Family Dinner

To begin, I turned to my girl Ina Garten and her incredible chocolate cake recipe. Actually she gives credit to “Beatty“…. who is Beatty again? She’s a saint as far as I’m concerned….a Cake Saint {insert sounds of angels singing}.

Seriously, this is THE chocolate cake recipe. We make this all of the time and not only is it near foolproof but it is always a hit whenever we serve it. It’s rich in chocolate flavor (because the hot coffee intensifies the cocoa powder) and wonderfully moist (because of the buttermilk and it’s an oil based batter). Layered cakes, cupcakes, sheet cake—look no further for a base chocolate cake….I’m not exaggerating this time guys.

Pinky swear.

If you’ve never made this cake before (drop EVERYTHING and bake it now!), don’t be concerned if the batter looks really runny before baking. It will come together.

Trust Ina. And Beatty.

August 2015 Family Dinner

I initially had planned to just use buttercream in between the cake layers. But then I thought, why stop there? Let’s add MORE matcha flavor to party!

I ended up making an airy matcha mousse to fill the layers with. The mousse was inspired by the Matcha Cake my seester N made for her hubby’s birthday last year. He, too, loves green tea. Yep, my niece Nina (and her seester Nini) get their love of matcha from their Pops.

August 2015 Family Dinner

After I filled the layers of cake with the mousse, I refrigerated it for an hour or so to allow everything to set up.

While everything was chilling out in the fridge, I turned my attention to the frosting.

August 2015 Family Dinner

These days, I tend to make Swiss Meringue Buttercream to frost almost all my cakes and cupcakes with. I find that it tastes less sweet (though, don’t get me wrong, there’s a hefty amount of sugar in it) and it’s a more stable product to decorate with.

Sure, it is more laborious than an American Buttercream but so much tastier.

To flavor the buttercream, I used… you guess it—- matcha powder!

August 2015 Family Dinner

After the cake was frosted, it was time to add the Matcha Pocky Sticks!

I used 4 boxes of Pocky Sticks for this 9-inch round cake and ended up with just a few spare sticks that quickly disappeared –care of the hovering munchkins.

August 2015 Family Dinner

Next time I make this cake, I will definitely take my time to ensure that the layers are evenly cut so I have a nicer presentation once sliced. I also got sloppy with the buttercream because I assumed the Pocky Sticks would cover any imperfections—but unfortunately some of it seeped through the sticks.

Moral of the story = My laziness always gets me in the end

August 2015 Family Dinner

But with that said, the fam – particularly the birthday gal, really enjoyed the cake. Chocolate and green tea pair so well together and when combined with a whimsical presentation –you’ll have a winning cake.

Happy Friday Friends!

________________________________________
Matcha Chocolate Pocky Cake
Makes one 9-inch cake

Ingredients:

Matcha Mousse:
1 cup chilled heavy cream
2 large egg yolks
½ cup sugar
1 tablespoon gelatin powder
7 tablespoons warm water, divided
2 heaping tablespoons matcha green tea powder|
1 cup milk

Cake Batter (From Ina Garten) :
1¾ cups all-purpose flour, plus more for pans
2 cups sugar
¾ cups good cocoa powder
2 teaspoons baking soda
1 teaspoon baking powder
1 teaspoon kosher salt
1 cup buttermilk, shaken
½ cup vegetable oil
2 extra-large eggs, at room temperature
1 teaspoon pure vanilla extract
1 cup freshly brewed hot coffee

Matcha Swiss Meringue Buttercream:
5 large egg whites
1½ cups sugar
1½ pounds unsalted butter, cubed and at room temperature
pinch of salt
1½ heaping tablespoons matcha green tea powder

Garnish:
4 boxes Matcha Pocky Sticks
1 teaspoon matcha powder

Prepare the Matcha Mousse:
Using a stand mixer fitted with the balloon whisk attachment, whip the chilled heavy cream on high until it holds stiff peaks. Cover and place in the refrigerator.

In a medium sized bowl, whisk together the egg yolks, sugar and then set aside. In small bowl, mix the gelatin powder with 4 tablespoons water until dissolved. Dissolve the matcha powder with the remainder of warm water in another small bowl.

Using a small saucepan, heat the milk until it just begins to bubble. While whisking, slowly drizzle the heated milk into the egg mixture until everything has incorporated. Whisk in the liquefied matcha. Place the bowl in a larger bowl that has been filed with ice and water to help chill the contents. Continue stirring the mixture until it cools to room temperature –be careful to not splash any water inside the mixture bowl. Once cooled, take the refrigerated whipped cream and gradually fold it into the matcha custard. Cover the bowl and allow the mousse to refrigerate for a minimum of 6 hours. *This can be done the night before.

Prepare the Cake:
Preheat the oven to 350 degrees. Butter two 9-inch round cake pans. Line with parchment paper, then butter and flour the pans.

Sift the flour, sugar, cocoa, baking soda, baking powder, and salt into the bowl of an electric mixer fitted with a paddle attachment and mix on low speed until combined. In another bowl, combine the buttermilk, oil, eggs, and vanilla. With the mixer on low speed, slowly add the wet ingredients to the dry. With mixer still on low, add the coffee and stir just to combine, scraping the bottom of the bowl with a rubber spatula. Pour the batter into the prepared pans and bake for 35 to 40 minutes, until a cake tester comes out clean. Cool in the pans for 30 minutes, then turn them out onto a cooling rack and cool completely.

Prepare the Buttercream:
Add the egg whites and sugar in a mixer bowl set over a pot of simmering water. The water should not be able to touch the bottom of the bowl. While the bowl sits over the simmering pot, whisk until sugar dissolves and the mixture registers 140 degrees on a candy thermometer. Remove from heat, and attach bowl to a mixer.

Using the whisk attachment, whip on medium speed until the meringue becomes thick and can hold medium peaks. This can take about 8-10 minutes and once done, the sides of the bowl should not feel warm at all. Remove the whisk attachment and replace with the paddle.

With the mixer on low, add a few cubes of butter and beat until it has full incorporated. Add in a few more cubes and continue with the process until all the butter has been added and the frosting has become smooth. If it looks slightly curdled, keep mixing—it will come together! Sprinkle in the salt and on low, slowly add in the matcha powder until it becomes fully incorporated.

Cake Assembly:
Using a serrated knife, slice each of the cake layers in half so that you are left with four thin chocolate cake layers. Place one layer of chocolate cake on a serving platter or cake stand. Spread 1/3 of the matcha mousse, evenly, over the layer. Place another layer of cake on top and evenly spread another 1/3 of the matcha mousse over the layer. Place a third chocolate cake layer on top and spread the remaining amount of matcha mousse evenly over the cake. Top with the final chocolate cake layer. Place the cake in the refrigerator for an hour to set.

Once the cake has set, frost the entire cake with the buttercream—covering the top and sides. Place the Pocky Sticks upright, side by side, all around the side of the cake –pressing them gently into the cake to secure. With the remaining matcha powder, dust the top of the cake. Optional: Tie ribbon around the cake. Refrigerate for one last hour before serving.

Desserts/Pastries

We just turned F-O-U-R + Strawberry Shortcake Cupcakes!

Strawberry Shortcake Cupcakes

It’s our B-I-R-T-H-D-A-Y!!!!!

That’s right Friends, The Culinary Chronicles turns four this week and we’re all grown up now!

Um, ok…kind of.

Not really, but you get my drift.

Strawberry Shortcake Cupcakes

This past year has been filled with tons of incredible milestones for the site from new partnerships with fantastic brands, recognition from respected media and of course, the release of my cookbook this past summer.

Phew!

What a ride!!!

Strawberry Shortcake Cupcakes

A huge— GINORMOUS THANKS to you all for the continued support and readership. I know I can be quite random and silly at times. So….

Mahalo!

Grazie!

Merci!

Cảm ơn!

Hannad! …………That’s elvish btw. #LOTRnerd

Strawberry Shortcake Cupcakes

If I could, I’d send each of y’all a big slice of birthday cake to celebrate our blogiversary. But until I can figure out the logistics behind all of that, I’d like to virtually share with you these Strawberry Shortcake Cupcakes.

A vanilla chiffon cake filled with a slightly tart, fresh strawberry compote and topped with mounds and mounds of strawberry swiss meringue buttercream.

They’re light, flirty, and just Pretty in Pink.

Strawberry Shortcake Cupcakes

And with that folks, I can’t wait to see what crazy and delicious Foodventures this upcoming year has in store for us. Here’s to many, MANY more to come!

Cheers!

_______________________________

Strawberry Shortcake Cupcakes
Makes 24 cupcakes

Ingredients:

Filling:
2 cups fresh strawberries, roughly chopped
¼ cup sugar
1 tablespoon cornstarch
1 tablespoon lemon juice
¼ cup water
2 pinches of salt

Batter:
2¼ cups cake flour
1 tablespoon baking powder
½ teaspoon salt
1¼ cups buttermilk
4 large egg whites, at room temperature
1½ cups sugar
½ cup unsalted butter, at room temperature
1 vanilla bean, split and scraped
1 teaspoon vanilla extract

Strawberry Swiss Meringue Buttercream (from Martha Stewart):
4 large egg whites, room temperature
1¼  cups sugar
1½ cups unsalted butter, softened, cut into small pieces
1½ cups fresh strawberries, pureed

Garnish:fresh strawberry slices
sprinkles, nonpareils, etc.

Preheat oven to 350˚ F.  Line cupcake pans with paper liners.

Prepare the filling. Place the strawberries and sugar in a small pot and cook over medium low heat until the juices begin to release. In a small bowl, whisk together the cornstarch, water and lemon juice. Add the mixture to the strawberries and stir in to combine. Continue cooking and stirring the strawberries until it’s thickened to the consistency of a jam. Remove from the heat and stir in the salt. Allow to cool completely.

In a bowl, sift together the cake flour, baking powder and salt. Whisk together the buttermilk and egg whites in another bowl. Put the sugar and butter in the bowl of a stand mixer. With the paddle attachment, beat at medium speed until ingredients are light and fluffy. Beat in the vanilla extract, vanilla bean seeds, then add one third of the flour mixture, still beating on medium speed. Mix in half of the milk-egg mixture, then beat in half of the remaining dry ingredients until incorporated. Add the rest of the milk and eggs, mixing until the batter is well mixed, then add the last of the dry ingredients. Continue beating the mixture for another few minutes to ensure that the batter is thoroughly mixed. Divide the batter evenly between the prepared liners, filling each about ¾ full. Bake for 18-22 minutes, or until the cupcakes are well risen and springy to the touch and a toothpick inserted in the center comes out clean.  Allow to cool in the pans for five minutes, and then transfer the cupcakes to a wire rack to cool completely.

While the cupcakes are cooling, prepare the buttercream.  Place whites and sugar in a heatproof mixer bowl set over a pot of simmering water. Whisk until sugar dissolves and mixture registers 160 degrees on a candy thermometer. Remove from heat, and attach bowl to a mixer. Whisk on medium speed for 5 minutes. Increase speed to medium-high, and whisk until stiff, glossy peaks form, about 6 minutes. Reduce speed to medium, and add butter, 1 piece at a time, whisking well after each addition. Switch to a paddle attachment. With mixer on low, add strawberry puree, and beat until smooth, 3 to 5 minutes.

Begin assembling the cupcakes. Using a pairing knife, piping tip, apple corer, or very small round cookie cutter (I used a small biscuit ring), cut out a small cavity in the cupcake. Take a pairing knife to help pop out the center. Fill each of the cupcakes with a heaping teaspoonful of the strawberry compote. Replace the small piece of cake to cover the filled centers.

Fit a piping bag with a decorative tip and fill with the buttercream. Top each of the cupcakes with large swirls of buttercream and adorn with berry slices, sprinkles or other decorative pieces.

Desserts/Pastries · Miscellaneous

Lucas’ Galatic Star Wars Birthday Party

Lucas' 4th Birthday

It was my Lucas’ 4th birthday the other week. And as his auntie/godmama, I’ve affectionately nicknamed him Lucasaurus.

Don’t let his charming smile, bright wit and adorable face fool ya. He can be a downright rascal—– a veloci-rascal!

Lucas' 4th Birthday

But I just adore the kid to pieces.

So last year, when I mentioned to my seester (pictured above with her super photogenic fam) that we should throw him a Star Wars themed birthday party–she was all for it.

And that’s where I was in trouble. Now some of you all may have witnessed my tendencies to go overboard with certain things and that my OCD habits can get me in a tough spot. Well–then you have not met my seesters…..and in particular, my over-the-top party planning sister, T.

Star Wars1-001

Nearly 5 months before Lucas’ birthday, she started sending me texts about deals she found on party favors, decorating ideas she found on Pinterest, signage she had created, etc. The next thing I knew it, we were headed warp speed into Star Wars mania.

As for me, I just went along for the ride hoping my desserts would get the stamp of approval by the party planning Jedi.

Lucas' 4th Birthday

But look at this little guy? How could we not get carried away?!

…Wrapped around his finger, he has us….

So then this happened.

Star Wars Dessert Tablescape

A bountiful Star Wars tablescape with desserts and goodies galore. But as much as I wish I could take the credit for all the galactic-goodness, I was only in charge of the desserts.

Seester did all the decor (that she started putting up 2 weeks before the party), cute signs, overflowing swag bags, and all the adorable touches that would have made the Jedi Council proud.

Star Wars5-001

Of course a regular Star Wars themed party wouldn’t cut it, so they upped the ante and arranged a Jedi Training Camp in order for all the padawans to prepare for their path to Jedi Knighthood.

IMG_1200

Lightsabers and Jedi Robes were a must, including cadet boxes to store all their goodies.

Star Wars4-001

To quench our thirst on the beautiful day, we sipped fresh Millennium Margaritas (for Jedi Masters 21+), Yoda Soda and Vader-Ade. Special props to my brother-in-law for hand squeezing the 25+ limes I needed to make the margaritas.

Trust me, we will never scoff again at those who own electric citrus juicers–DOH!

Star Wars2-002

And to fuel our Force, we summoned the Taco Master all the way from Orange County— I mean Tatooine. 🙂

Mouthwatering Carne Asada, Carnitas, Fish, Nachos….ideal nourishment to battle the Empire.

Taco Master from Tattoine

Back at our tablescape, Seester put together these cute Star Wars themed candies. Yoda Treats, Han’s Rolo, Edible Ewoks, & Thermal Detonators.

Star Wars-001

And poor Han.

All he wanted to do was to come wish Lucas a Happy Birthday but then he got himself frozen in carbonite again.

Star Wars3-001

Seester got to employ her knife skills by carving a watermelon Death Star. Lord Vader would have been pleased.

Watermelon Death Star

Lucky for us, Chewbacca was kind enough to guard the goodies from any other Sith Lords.

Lucas' 4th Birthday

Speaking of Sith Lords, I started off my dessert contributions by molding Stormtrooper and Darth Vader chocolates to place on top of the cupcakes. They later received a bit of edible disco dust for a bit of sheen….they are from outer space after all.

Darth Vader & Storm Trooper Chocolates

They perched atop rich Chocolate Cupcakes topped with big swirls of Vanilla Bean-Swiss Meringue Buttercream and sprinkles. Some of the cuppies were also topped with vanilla whipped cream.

Darth Vader & Storm Trooper Cupcakes

I paid additional homage to Darth Vader with these Chocolate Shortbread Cookies made with Valrhona cocoa powder.

Chocolate Darth Vader Cookies

How would it be a party without Master Yoda? These were Citrus Scented Sandwich Cookies filled with a Dark Chocolate Ganache.

Delicious, he was.

Yoda Sandwich Cookies

And to keep Darth Vader company, I made an army of Stormtrooper Sugar Cookies that were decorated with Royal Icing.

They were super fun to make and all of the cutters can be purchased from Williams Sonoma.

Storm Trooper Sugar Cookies

There were also pops for all to enjoy…..

Princess Leia Cake Pops & Death Star Rice Krispy Pops

“That’s no moon-it’s a Space Station!”

Not quite Master Obi-Wan but you’re close. They’re Rice Krispy Pops shaped as Death Stars. Not only a superweapon but super-yummy.

Death Star Rice Krispy Pops

And Princess Leia Cake Pops. Lucas really enjoyed these.

Princess Leia Cake Pops

And what’s a birthday party without a birthday cake?

I just had to make a little cake for our Jedi in training although Seester called it a “gentleman’s cake”. This was a 6 inch, 3-layer chocolate cake frosted with Vanilla Bean-Swiss Meringue Buttercream. I decorated the little cake with a fondant Stormtrooper accented with royal icing, fondant lightsabers, fondant Star Wars banner, Darth Vader molded chocolates, fondant stars and a star sparkler.

Star Wars Birthday Cake

At Jedi Training Camp, there was a Space Pod and stations for the padawans to bottle their own galaxies.

Lucas' Birthday

And then it was time to don their robes because…

Lucas' 4th Birthday

Duh, duh, duh, dum, da-dah, dum, da-dah………..

Darth Vader appeared! He was powerful, all-knowing, and—

Lucas' 4th Birthday

He liked parachutes. Yup, parachutes.

Lord Vader thought it was an integral training tool for the young padawans and can be seen here strategizing with the younglings.

Lucas' 4th Birthday

Heck–Vader even cleaned up after the parachute exercises!

There may still be good in him.

Lucas' 4th Birthday

Then he showed the padawans how to properly yield their sabers and spar.

I think that Lucas is saying– “You look a lot bigger on TV but I still pity the foo’ who messes with me!”

Oh yes, that was a Star Wars–Mr. T crossover moment.

Lucas' 4th Birthday

Cake Time!

Lucas' 4th Birthday

But that sneaky Vader used The Force to make the candles relight after Lucas blew them out.

He’s quite a trickser—when he’s not serving the Emperor and upholding the Dark Side.

Lucas' 4th Birthday

Lucas and Vader. They’re BFFs now.

The Lucasaurus always wins over the Dark Side.

Lucas' 4th Birthday

It was an action packed and exhausting day but the little guy had a blast.

And of course, we prevailed by restoring balance to the Force.

Lucas' 4th Birthday

The Force is strong with this one and I look forward to watching him grow into Jedi greatness.

Until our next Jedi Episode (hopefully for my other nephew, Leonidas’ birthday)— MAY THE FORCE BE WITH YOU!

Lucas' 4th Birthday

Desserts/Pastries

Strawberry Cupcakes and a Surprise 70th Birthday Party

Strawberry Cupcakes with Strawberry Swiss Meringue Buttercream

The month of May has always been busy for my family — completely filled with TONS of birthdays, weddings, graduations, etc.

This May in particular marked a milestone for our family as our parents turned 70! And although our mom is no longer with us we wanted to be sure to have a big celebration for our dad.

Strawberry Cupcakes with Strawberry Swiss Meringue Buttercream

This past weekend, my siblings and I successfully threw a surprise birthday party for our dad filled with tons of family, delish food, and good times. Needless to say, Dad was pretty darn surprised when he opened the door to what he thought was going to be a small birthday dinner at my sister’s place. It took him a few minutes to realize that the house filled with people were there to celebrate his birthday!

Strawberry Cupcakes with Strawberry Swiss Meringue Buttercream

As one of the desserts for the night, I decided to bake Martha Stewart’s Strawberry Cupcakes. They have been on my “must try” list for a long time and this was the perfect opportunity to give them a roll.

Truth be told, the cupcake itself was just “ok”. But the frosting was TO DIE FOR!!!!!!!! As in OH….MY….GAWD!

It was the first time I had made a true Swiss meringue buttercream and was a bit thrown off at how long it took to make—at least 30 minutes!!! But my patience truly paid off because after one taste, I was in heaven. The texture was so beautifully smooth and silky and it literally tasted like a Strawberry Shake!!! Not the least bit overly sweet and absolutely delicious. All night long I kept on saying, “It tastes like an In-N-Out Strawberry Shake!” Clearly, the cupcake is just a vessel for this amazing buttercream.

If you do decide to give this buttercream a whirl, be sure to take your time with it. Some reviewers say that their buttercream looked curdled or didn’t come together. Luckily I didn’t have this issue but I believe you’ve just got to be patient and definitely use room temperature butter. When all else fails—keep on whipping it!

And on another note, I would be scolded if I didn’t disclose that my sister was the one who added the strawberries on top! 🙂

As for Dad, he thoroughly enjoyed himself. After so many years of taking care of his family, it was nice to have a shindig just for him. In fact, he told everyone he cannot wait to see what we do for his 71st birthday!!!! 🙂

HAPPY BIRTHDAY DAD!!!!


__________________________________________________________

Strawberry Cupcakes with Strawberry Swiss Meringue Buttercream
From Martha Stewart
Makes 34 Cupcakes

Ingredients:

Cupcakes:
2¾ cups all-purpose flour
½ cup cake flour, (not self-rising)
1 tablespoon baking powder
1 teaspoon salt
8 ounces (2 sticks) unsalted butter, softened
2¼ cups sugar
3 large eggs
1 large egg white
1 cup whole milk
1½ teaspoons pure vanilla extract
2 cups finely chopped strawberries, plus small strawberries for garnish

Buttercream:
4 large egg whites, room temperature
1¼  cups sugar
1½ cups unsalted butter, softened, cut into small pieces
1½ cups fresh strawberries, pureed

To make the cupcakes, preheat the oven to 350˚ F.  Line cupcake pans with paper liners.  In a medium bowl, combine the all-purpose flour, cake flour, baking powder and salt; whisk to blend. In the bowl of an electric mixer, combine the butter, sugar and vanilla.  Beat on medium-high speed until light and fluffy, about 3 minutes.  Beat in the eggs and egg white one at a time, mixing well after each addition and scraping down the sides of the bowl as needed.  With the mixer on low speed, add the flour mixture in two additions alternating with the milk, mixing each addition just until incorporated.  Gently fold in the chopped strawberries with a spatula. Divide the batter between the paper liners, filling each about ¾-full.  Bake until light golden and a toothpick inserted in the center comes out clean, about 20 minutes, rotating the pans halfway through baking.  Allow to cool in the pans a few minutes, and then transfer to a wire rack to cool completely.

While cupcakes are cooling, prepare the buttercream.  Place whites and sugar in a heatproof mixer bowl set over a pot of simmering water. Whisk until sugar dissolves and mixture registers 160 degrees on a candy thermometer. Remove from heat, and attach bowl to a mixer. Whisk on medium speed for 5 minutes. Increase speed to medium-high, and whisk until stiff, glossy peaks form, about 6 minutes. Reduce speed to medium, and add butter, 1 piece at a time, whisking well after each addition. Switch to a paddle attachment. With mixer on low, add strawberry puree, and beat until smooth, 3 to 5 minutes. Fill a piping bag with a fitted tip. Pipe on the buttercream on top of cooled cupcakes. Garnish with fresh strawberry slices.

 Note: For these cuppies, I used an open-star Wilton 4B Tip to pipe the buttercream. I also chose to use a slightly larger than standard cupcake liner for a fuller look. As a result I increased the baking time by 2-3 minutes.