Appetizers/Small Plates · Pork

The Ultimate Baked Potato Dip for Game Day!!

The Ultimate Baked Potato Dip

Man, oh man—I’m ready for some football!

And pizza….and hoagies…and dip…and nachos…and wings…and cocktails…and……..

Yea…I’m ready for a lot of goodness!!!

The Ultimate Baked Potato Dip

If you’re looking for some ehr-my-gawd deliciousness to whip up for Game Day, you’re going to LOVE this Ultimate Baked Potato Dip.

This crowd pleaser is jammed pack with your classic baked potato toppings and is just begging for a crunchy ‘tater chip to scoop it all up. And once your peeps take a bite, they will be so overcome by your awesomeness that they’ll be wearing jerseys with your name on it and cheering you on for days. True Story.

Need some more ideas for game day? Check out these goodies here

Laters, Taters!

________________________________________

The Ultimate Baked Potato Dip

Ingredients:

24 ounces sour cream
1 packet ranch dressing mix
½ teaspoon black pepper
½ teaspoon paprika
¼ teaspoon cayenne powder
1-2 tablespoons hot sauce
1 heaping cup chopped scallions
1½ cups shredded sharp cheddar cheese
½ cup shredded pepper jack cheese
1½ heaping cups chopped crispy bacon

In a large bowl, stir together the sour cream, ranch dressing mix, pepper, paprika, cayenne and hot sauce until combined. Fold in the scallions, cheeses, and bacon. Cover and refrigerate for a minimum of 4 hours.

15 minutes before serving, remove from the refrigerator and stir to take off some of the chill. Garnish with additional cheese, scallions and serve with your choice of chips. Enjoy!

Breakfast/Brunch · Pork · Sponsored

Bacon Egg Cups—Oh Me, Oh My!

Bacon Egg Cups

I absolutely ADORE breakfast foods but I am the grumpiest person in the morning. Which is why brunch is so fantabulous!

Check out my guest post here for our friends at Safest Choice® Eggs where I sing the praises of easy Brunch Entertaining. And the bonus? I share this delicious and no-fuss recipe for Bacon Egg Cups.

Trust me. Your guests will love you.

Happy Brunching!

DIY

DIY – Tahitian Vanilla Extract

DIY-Vanilla Extract

Last month I was bottling Vanilla Extract like a mad woman.

Why?

Because it’s RAD!

Not only are you able to control exactly what goes into your product but it’s simple and yields wonderful results. It’s quite cost effective, especially if you go through as much vanilla as I do. And these super cute bottles make great gifts, too!

I used Tahitian vanilla beans for my extracts but you can opt for pods from Madagascar or Mexico if you prefer. Buying them in bulk (I get mine online) will also get you the best bang for your buck.

After your extracts have been bottled, you’ll want to age them for a minimum of 2 months before use. And once your bottle runs low, just fill it up with more vodka to restart the process.

Happy DIY-ing!

___________________________

DIY Vanilla Extract
Makes (2) 4-Ounce Bottles

Ingredients:

2 4-ounce resealable bottles
4 Vanilla Bean Pods, split lengthwise
8 ounces Vodka

Wash and dry the bottles.

Place two of the split vanilla beans in each of the bottles. Fill each bottle with 4 ounces of vodka and seal tightly. Gently shake the bottles and store in a cool, dark location.

Shake the bottles every few days for 2 months. The vanilla extract is ready to use as early as 2 months, however 3+months is recommended.

Drinks

Green Smoothies & Eggs-ellent News

Green Smoothies

Well Friends, with all of the festivities and celebrations from the holidays it’s high time for me to return to my regular workout schedule and pump up the less indulgent meals. Sometimes that can be easier said than done but I find that instead of trying to completely overhaul one’s diet, you can take small steps towards healthier eating.

You may recall my obsession with juicing. It really is delicious and is a great way to supplement your veggies intake. But often times the challenge with juicing is that you need a large bulk of produce to get a small glass of goodness. That can be kind of pricey this time of year so instead of my Green Juices I switch over to Green Smoothies. I’m still able to use spinach which is quite cost effective in my area year round and add frozen berries, Greek Yogurt and other goodies. I love making these quick Green Smoothies for breakfast or prior to a run.

And now I’m happy to share my EGGS-ellent news….


dsc_0026

Beginning this month I’ll be blogging for our friends over at Safest Choice® Eggs!

Safest Choice® Eggs are all natural and are pasteurized “in-shell” through a water bath method. Since this process helps to eliminate the risk of Salmonella, I use them in my recipes where eggs are purposely undercooked or raw. And the great news for my fellow Southern California peeps is that Safest Choice® Eggs are now carried in Albertsons stores.

So keep an eye out as I’ll be contributing monthly eggs-ellent recipes and posts over at Safest Choice® Eggs!

And with that Friends, Eat well!

__________________________

Green Smoothies
Serves 2

Ingredients:

4 cups spinach leaves
1 cup frozen berries
1 ripe banana
1 cup Greek Yogurt
1/2 cup crushed ice
2 tablespoons chia seeds

Add all ingredients to a blender. Pulse several times to break down the frozen berries and continue blending until smooth.

Desserts/Pastries

Sweet Treats from 2012 and Happy New Year!!

Alice in Wonderland Chocolate Cupcakes

With just a few hours left in 2012, I wanted to wish you and your loved ones Happiness, Joy, Endless Laughter and epic Foodventures! May 2013 be everything you wish it to be and more.

I also wanted to show some sweet treats that I pulled together in 2012 but didn’t get a chance to share with you before.

Alice in Wonderland Chocolate Cupcakes

Alice in Wonderland  themed cupcakes for my niece’s Birthday Tea Party. Chocolate Cupcakes frosted with Vanilla Buttercream with toppers that were molded from fondant and edible markers

Mini White Chocolate-Brownie Chunk Cheesecake

Mini White Chocolate-Brownie Chunk Cheesecakes

Chiffon Cupcakes w/ Strawberry Swiss Meringue Buttercream

Chiffon Cupcakes with Strawberry Swiss Meringue Buttercream

Chocolate Malt Cupcakes

Chocolate Malt Cupcakes

Chocolate Soccer Cupcakes

Soccer Themed Chocolate Cupcakes for my nephew’s 3rd birthday

Chocolate Soccer Cupcakes

Toppers made with fondant and painted with gel food colors, royal icing and edible markers

Chiffon Cupcakes w/ Swiss Meringue Buttercream

Vanilla Bean Chiffon Cupcakes with Swiss Meringue Buttercream topped with handmade White Chocolate Shell Candies for a Beach Themed Bridal Shower

Chiffon Cupcakes w/ Lemon Curd & Swiss Meringue Buttercream

4 layer Vanilla Bean Wedding Cake filled with Lemon Curd and frosted with Swiss Meringue Buttercream in a “ribbon” pattern

Vanilla Cake Pops

Vanilla Cake Pops for a Bridal Shower

Chocolate Raspberry Petal Cake

3 layer rich Chocolate Cake filled with Raspberry Coulis and frosted with Chocolate Buttercream in a “petal” pattern for my niece’s birthday party

Chocolate Raspberry Petal Cake

Creating a “petal” pattern with Chocolate Buttercream

And with that, I’m off to the countdown with friends and bubbly. Here’s to a delicious 2012 and Cheers to all of the wonderful things to come in 2013! HAPPY NEW YEAR!!!

Pork · Sunday Family Dinner

Crispy Roasted Porchetta for Sunday Family Dinner

Porchetta

I was first introduced to Porchetta by the beloved San Francisco truck, Roli Roti. A regular at the Ferry Building Farmer’s Market, Roli Roti draws throngs of followers by the delicious scents of their slow cooked, free range rotisserie chickens. As the chickens spin on the rotisseries, the juices drip down on trays of roasted potatoes. Drools….

Bruschetta

And of course, they have the most mouthwatering Porchetta – an Italian pork roast scented with herbs and enveloped in crispy, crackling skin. They serve their Porchetta on rolls piled high with arugula leaves and needless to say, it’s heavenly.

Porchetta

We were feeling quite ambitious for last month’s Sunday Family Dinner and attempted our own version of Porchetta. We did have a little challenge deciding on which cut of pork to use as some recipes call for whole pork belly with the skin on and other recipes list boneless pork shoulders.

We ended up using both pork belly and pork shoulder rubbed with a TON of herbs and garlic. To cook the Porchetta we enlisted my sister’s rotisserie oven but were not able to fit all the pork in at once. As such, we cooked a portion of it in the oven. As I would imagine that most folks do not own a rotisserie, the recipe below lays out a traditional oven cooking method. The oven Porchetta really is delicious but if you can get your hands on a rotisserie, I would highly recommend it.

Chocolate Raspberry Cake

The pork was extremely tender and the crackling—OH THE CRACKLING! Deliciously crispy and juicy! Just forget about your cholesterol for the day because it’s so worth it! We served ours on ciabatta slices with a ton of arugula and Italian pickled veggies. The peppery, slight bitterness of the greens with the tang of the veggies helped balance out the richness of the Porchetta. To accompany our Porchetta sammies we served a fennel salad with citrus and roasted potatoes.

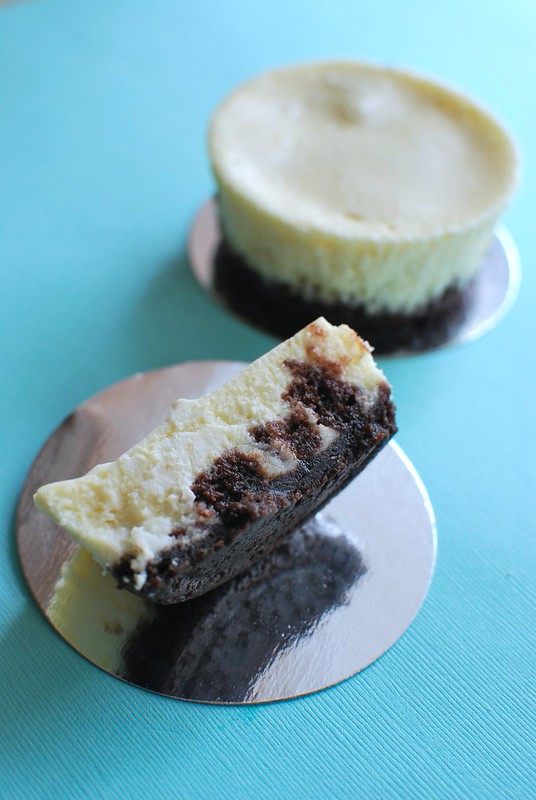
For appetizers, my sis T whipped up some Bruschetta and my niece made her infamous Raspberry Chocolate Cake.

Sunday Family Dinner

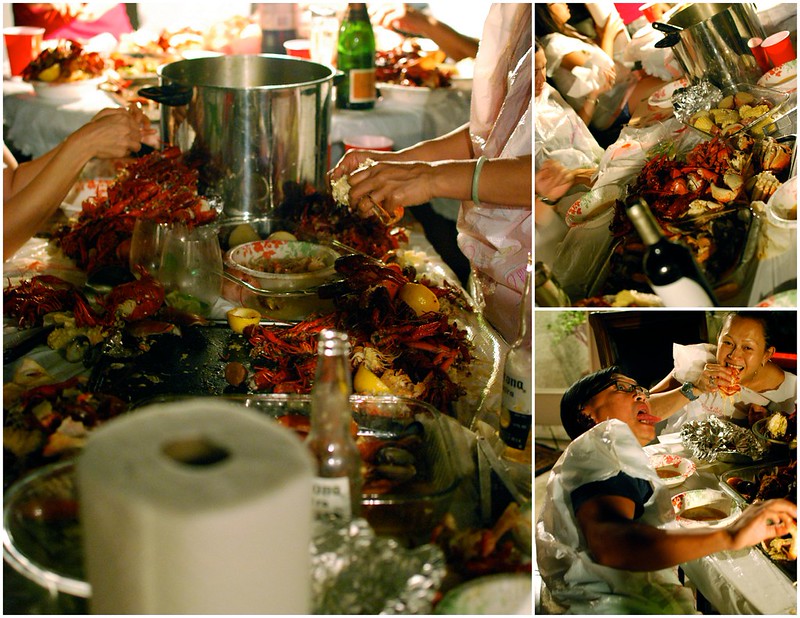
We were definitely pleased with how everything turned out and Dad even gave his stamp of approval. And although I’m a little hesitant to admit it, we even had a bit of excitement with a small little fire that occurred in the rotisserie oven. But don’t worry, it was quickly contained.

After all, it’s not a Sunday Family Dinner without a little adventure. 🙂

This Month’s Family Dinner Menu

Cocktails: Various Vino
Appetizers: Bruschetta
Entrees: Crispy Porchetta with Ciabatta and Arugula, Fennel Salad with Citrus, Roasted Potatoes
Dessert: Chocolate Cake with Fresh Raspberries

_____________________________________
Crispy Roasted Porchetta

Ingredients:

1 cup fresh rosemary
10 sprigs oregano
10 sprigs thyme
1/2 cup Italian parsley
20 large garlic cloves
1/2 tablespoon red pepper flakes
zest of 2 lemons
kosher salt
black pepper
olive oil
5 pounds boneless pork shoulder (skin on) or pork belly with rib meat still attached (skin on)
2 pounds new potatoes, quartered
2 cups white wine or chicken stock

In a food processor, pulse together the rosemary, oregano, thyme, parsley and garlic. Add in red pepper flakes, lemon zest, 1 tablespoon kosher salt, 1/2 tablespoon black pepper and 1/2 cup olive oil. Pulse until a loose paste is formed.

If using pork shoulder, take a sharp knife and slice the pork open so that it lays flat. For both cuts of meat, score the skin of the pork. Heavily season the pork with salt and pepper. Rub the herb paste all over the inside of the pork, ensuring that you are able to get inside all the parts. Tightly roll up the pork and use kitchen twine to hold the roll together. Let the pork marinate in the refrigerator for at least 6 hours–but overnight would be best.

Preheat your oven to 425 degrees F. In a large roasting pan, add the potatoes and toss with olive oil, salt, pepper and then pour the white wine over them. Place a roasting rack on top of the potatoes. Rub the exterior skin of the porchetta with oil and season with additional kosher salt. Place the porchetta on the rack and roast for about 30 minutes until the skin becomes crispy and brown. Lower the heat to 375 degrees F, tent the the porchetta with aluminum foil and continue to roast for approximately 2 1/2 hours. Remove the foil, raise the temperature back to 425 degrees F and continue roasting the porchetta until internal temperature of the pork reaches 155-160 degrees.

Remove the porchetta to a cutting board and tent for 10 minutes. Meanwhile, turn on the broiler and roast the tops of the potatoes until they are crispy. Thinly slice the porchetta and serve warm with your choice of accoutrements.

Desserts/Pastries

M&M Chocolate Cookies…Happy Holidays!!

M&M Chocolate Cookies


‘Twas the night before Christmas, when all through the house
Not a creature was stirring, not even a mouse;
The M&M Chocolate Cookies were laid out with care,
In hopes that St. Nicholas soon would be there!

HAPPY HOLIDAYS! Wishing you and your loved ones a joyous time filled with endless laughter and Foodventures!

_______________________________________

M&M Chocolate Cookies
Makes 2½ dozen cookies

Ingredients:

5 ounces semisweet or dark chocolate, chopped
½ cup unsalted butter
½ cup cocoa powder
1¾ cups all purpose flour
¾ teaspoon salt
½ teaspoon baking soda
1 ½ cup granulated sugar
2 large eggs
½ tablespoon vanilla extract
1½ cups M&M candies

Preheat oven to 325 degrees F.

In a small bowl, microwave the chocolate and butter together until melted and smooth. This should be done in 15-20 second intervals, stirring in between to avoid scorching the chocolate. Set aside to cool.

In a separate bowl, sift together the cocoa powder, flour, salt and baking soda.  Set aside.

In a mixer fitted with the paddle attachment, beat together the sugar and eggs until combined. Whisk in the chocolate mixture and then slowly add in the dry ingredients. Stir in 1 cup of the M&M candies.

Line a baking sheet with parchment paper. Scoop the cookie dough (about 1½ tablespoons each) and place on the sheet a few inches apart. Flatten the dough balls slightly. With the remaining M&Ms, add a few candies to the top/sides of each cookie dough, pressing them slightly in.

Bake for 12-14 minutes until the cookies begin to slightly crack. Allow the cookies to cool on the baking sheets for 5 minutes and then transfer to wire racks to cool completely.

Pastas/Noodles · Sunday Family Dinner

Homemade and Hand Rolled Tagliatelle

Fresh Tagliatelle

When my sibs and I brainstormed our menu for October’s Sunday Family Dinner, we thought it would be delicious to create a meal that was hearty and celebrated the flavors of Fall. But when the day finally arrived, instead of chilly weather we were greeted with a sunny, 85 degree afternoon. That’s Southern California for you…….

We put together a simple antipasti platter of delicious cheeses, cold cuts, olives and bread to munch on while we were prepared dinner. And for dessert, my sis, N, made fruit tarts with pears and apples.

Anti Pasti

My sis, T, was in charge of the main course– slow braised Osso Bucco. Due to the hours of slow cooking, the shanks broke down into rich, meaty goodness with a wonderfully, savory sauce. Once plated, we topped the Osso Bucco with spoonfuls of gremolata—a condiment made from tons of chopped garlic, lemon zest and Italian parsley. The gremolata brought brightness to the dish and also helped cut some of the richness.

To serve with the Osso Bucco, I was inspired to try my hand at homemade, hand rolled/cut pasta. Why hand rolled instead of employing a hand crank or KitchenAid attachment? Simple…I don’t own either. (Hint! Hint!)

Osso Bucco with Fresh Tagliatelle

I used Mario Batali’s recipe for the dough and have one recommendation–beat the eggs first before pouring them into the “well” of flour. It may not be traditional but it’ll reduce any potential “leaks” that may occur. Trust me, you should have heard the shrieks coming out of me when the walls of my “well” started oozing eggs. I was a mess for a hot second! And I have to admit, I was working up a sweat from all the rolling that was going down—those Italian grandmas must be buffer than they look!

In the end, I think the Tagliatelle turned out well and was worth the effort. I do wish I could have gotten it a little thinner but I guess I’ll need to work out my biceps a little more in preparation for next time.

Happy Friday Friends!


This Month’s Family Dinner Menu

Cocktails: Mumm Napa Brut Rose
Appetizers: Antipasta
Entrees: Osso Bucco over Fresh Tagliatelle and Gremolata
Dessert: Apple and Pear Tart

————————————

Recipe from Mario Batali via Joy the Baker

Appetizers/Small Plates · Sunday Family Dinner

N’awlins Seafood Boil for Sunday Family Dinner & Cajun Crab Puffs

Cajun Crab Puffs

In May, we began our new tradition of Sunday Family Dinners. And although each month has been wonderful, September was a milestone as it was the first dinner that all of my siblings and their families were in attendance. My brother and his family were in from NYC and my sister from SF came down….it was a full house!

Sunday Family Dinner

With all the sibs in attendance, we needed to have an epic Sunday Family Dinner. The theme for our dinner was a N’awlins inspired Seafood Boil! Crabs, Lobsters, Prawns, Crawfish, Calamari, Clams, Oysters— OH MY! We seriously threw down over 50 pounds of seafood!

Sunday Family Dinner

For dessert, my sister P, whipped up fresh beignets showered with powdered sugar and served with homemade Vietnamese Coffee Ice Cream. The beignets were so beautifully tender and crispy…. and the ice cream was To Die For.

Sunday Family Dinner

My contribution for the night were these little appetizers that I was initially going to call Baby Po’Boys but have since changed the name to Cajun Crab Puffs. These little buggers were TASTY! The crab was wonderfully sweet and paired well with the spicy aioli. The tomato and scallions gave a bright, fresh note and c’mon…who doesn’t love flaky, butter puff pastry?!

Sunday Family Dinner

But as decadently delicious as everything was, it was just incredible to have everyone under one roof again. The kids were running around and they even made personalized “seafood bibs” for each of us out of trash bags. Adorable and quite useful!

And although it was a bit chaotic (c’mon, what family shinding isn’t?), it was the epitome of why we started Sunday Family Dinners in the first place.

Cajun Crab Puffs

ps. These Cajun Crab Puffs were really yummy and easy to pull together. With the holidays now in full swing, they would be a great appetizer for any party you may be having.

This Month’s Family Dinner Menu

Cocktails: Endless Prosecco and Vino
Appetizers: Cajun Crab Puffs
Entrees: Cajun Seafood Boil–Lobster, Shrimp, Crawdads, Shrimp, Shellfish
Dessert: Beignets with homemade Vietnamese Coffee Ice Cream

__________________________________

Cajun Crab Puffs

Ingredients:

½ tablespoon minced garlic
1 large egg yolk
½ tablespoon lemon juice
½ cup extra virgin olive oil
½ tablespoon hot sauce
1 teaspoon Old Bay seasoning
Kosher Salt and Black Pepper
1 sheet puff pastry, thawed
6 ounces lump crab
2-3 pinches cayenne powder
1 cup cherry tomatoes, thinly sliced
¼ cup chopped chives (although I used scallions)

Prepare the aioli. Add garlic, egg yolk, and lemon juice into a blender. Pulse several times until the items have blended together. Turn the blender on low and slowly stream in the olive oil. Continue to blend until all of the oil has been used and the consistency reaches a thick consistency. Blend in the hot sauce and Old Bay. Check for seasonings and adjust with kosher salt and pepper as needed. Refrigerate for at least 30 minutes.

Preheat oven to 400 degrees F.

Take the sheet of puff pastry and cut squares about 1½ inch in diameter. Bake the squares for 18-20 minutes or until golden brown. Remove from the oven and allow to cool on wire racks. Once cooled, slice each square in half.

Season the lump crab with cayenne powder.

Begin assembling the puffs. Take one half of a puff pastry square and top with a slice of tomato and a spoonful of crab. Drizzle some of the aioli on top of the crab and then garnish with chives. Top with the other half of the puff pastry square. Repeat with the remaining ingredients and serve.

Miscellaneous

Bella’s Golden Birthday & Peanut Butter-Carob PUPcakes!

Bella's 5th Birthday

My Bella turns 5 today! Woo Hoo!

Yes, my little puggle can be quite mischievous and well–rather rascally. But at the end of the day she’s my super cuddly and loving little gal. Yup. She’s the Best Pup Ever. True Story.

Peanut Butter-Carob PUPcakes

To celebrate her golden birthday, I wanted to make her a few PUPcakes! After all, a mama has to indulge her little one from time to time….and well, because I somehow became one of those obsessed puppy parents 😉

Since chocolate is a definite no-no for dogs, I opted for both melted and whole carob chips in the batter along with peanut butter, honey, shredded carrots, and jarred baby food. That’s right–baby food! Organic chicken to be exact. It may sound odd but it’s a hit with the pups. And lastly, I dipped the pupcakes into a carob “ganache” and topped them with carrot sprinkles.

Bella's 5th Birthday

Needless to say, Bella loved them! Although I must admit that it was torture for her to wait until her mama finished snapping pics before she could dive into the pupcakes. She is much less concerned with documenting her Foodventures than I am but was such a good sport nonetheless.

And with that….HAPPY BIRTHDAY BELLA! Love ya to pieces!

________________________________________

Peanut Butter-Carob PUPcakes
Makes 1/2 dozen pupcakes

Ingredients:

Batter
½ cup carob chips, divided
1 tablespoon honey
1 cup whole wheat flour
1 teaspoon baking soda
1 large egg
2 tablespoons vegetable oil
4 ounces organic pureed baby food (chicken or beef)
¼ cup smooth peanut butter
¼ cup shredded carrots

“Ganache”
½ cup carob chips
2 tablespoons smooth peanut butter
1 tablespoon honey

Garnish
shredded carrots
carob chips

Preheat oven to 350 degrees F. Place cupcake liners in a muffin pan.

In a small bowl, combine ¼ cup carob chips and honey. Using 15 second intervals, microwave the chips and honey until melted and smooth. Be sure to stir every 15 seconds to avoid burning the carob. Set aside to cool slightly.

In a mixing bowl, whisk together the flour and baking soda. In another bowl, whisk the egg, vegetable oil, baby food, peanut butter and melted carob until thoroughly combined. Stir in the dry ingredients and then the carrots and ¼ cup carob chips. Spoon the batter into the cupcake liners until they are about 2/3 filled. Bake the pupcakes for 18-20 minutes or until a toothpick inserted in the center comes out clean. Cool on racks.

While the pupcakes are cooling, prepare the “ganache”. In a bowl, combine ½ cup carob chips, peanut butter and honey. Using 15 second intervals, microwave the items until melted and smooth. Check and stir every 15 seconds to avoid burning the “ganache”. Working with 1 pupcake at a time, carefully dip each cake top in the warm “ganache”, twisting your wrist as needed to ensure the pupcake top gets completely coated. Allow the “ganache” to set 1-2 minutes and decorate with shredded carrots and carob chips. Repeat with the remaining pupcakes.

Pupcakes can be stored in the refrigerator for up to 3 days.