Sunday Family Dinner

The Pacific Northwest and East Asia Blend at Family Dinner

April 2016 Fam Din
We’ve got two birthday boys in April — Lucas and Curtis! And as Family Dinner protocol dictates, when it’s your birthmonth, you call the theme for the menu.

Now with our Lucasaurus, he’s pretty laid back. If there’s something yummy and he gets ice cream at the end, well–he’s all set. So it was up to my BIL, Curtis, to give us some direction.

April 2016 Fam Din
Curtis
is all about seafood and generally loves Japanese cuisine. He mentioned that he wanted crab and the next thing I knew it, we were in crab boil planning mode. We’ve done crab Boils quite often. Remember this time? Or how about this time?

Can you blame us? Seafood boils are freaking D-E-L-I-C-I-O-U-S!!!

But this time, since we wanted to use dungeness crab (they’re back in season–YAHOO!), we thought we’d take a different spin. We ditched our beloved spicy Cajun seasoning packets and headed for the Pacific Northwest for inspiration.

April 2016 Family Dinner
But first–one small order of business.

A few months ago, we decided that while we were prepping/cooking/enjoying Fam Din, everyone would stay off their cellphones or tablets and spend some QT with each other. Only exception? You could use it briefly to snap pics of food or family.

The girls even made a sign for our “docking” station that would rotate from house to house each month.

April 2016 Fam Din
So what did we do while off our phones?

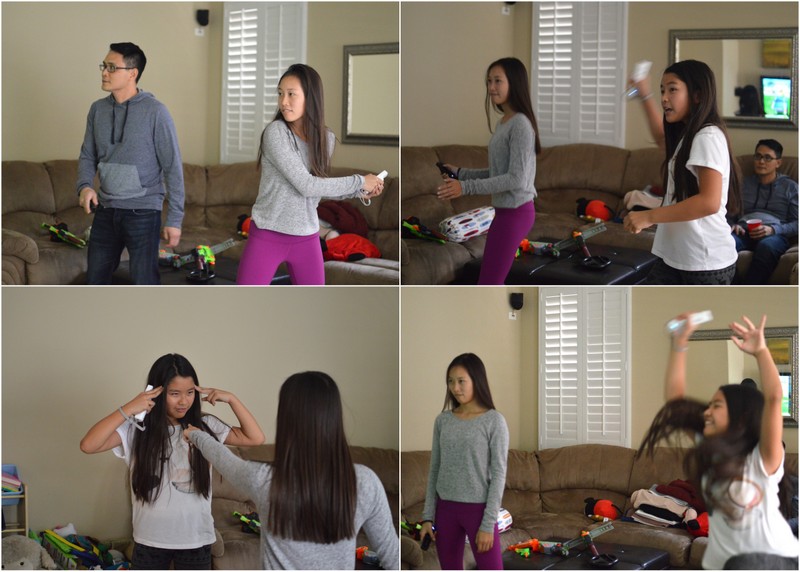
We play tennis of of course! Well….Wii Sports but that’s nearly as good.

The pics below may not be as clear as I’d like but I love them. Look at their intense facial expressions.

GAME ON!

April 2016 Fam Din
Speaking of GAME ON–check out Lucasaurus. One moment he’s all “sweet face” and the next “100% slugger”.

He’s such a playah’ that he even squeezed in a fast T-Ball game with the homies before dinner was ready.

Stud.

April 2016 Fam Din
And what did my seestrahs and I do in between the cooking?

Drank some draannnnkkks of course!

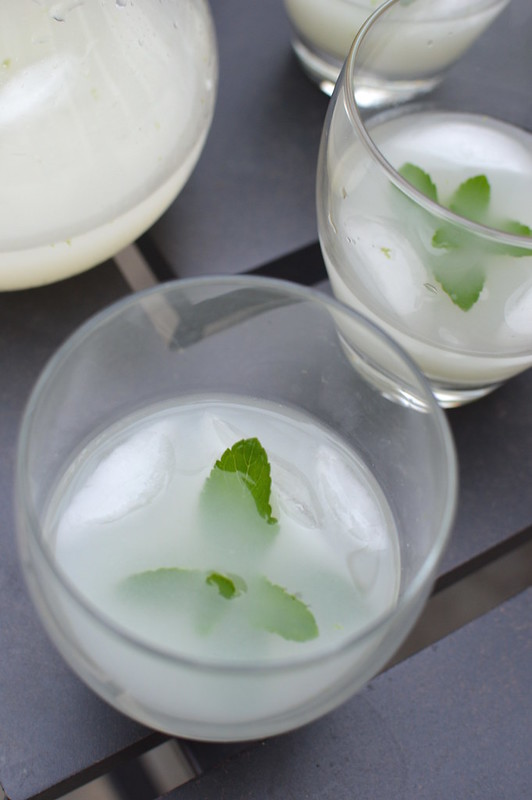
Our cocktail of choice was a concoction that seester T had with her friends one night – Pomegranate Soju with Sparkling Korean Grapefruit Rice Brew.

What does a “sparkling rice brew” taste like? Think of a less sweet, more carbonated wine cooler but a gazillion times better. The whole thing was floral, fruity, and went down dangerously smooth.

April 2016 Fam Din
At this point, you may be wondering how this cocktail fits the Pacific Northwest theme.

Well…..that’s where the East Asia meets the Pacific Northwest. At least, the first time for the night.

April 2016 Fam Din
Oh–and of course we took a minute or two to snap a few pics.
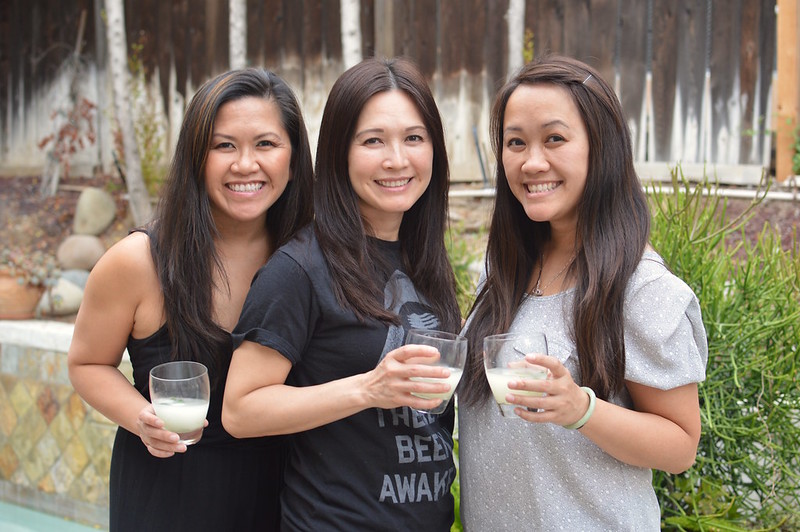
April 2016 Fam Din

CHEERS!

April 2016 Fam Din
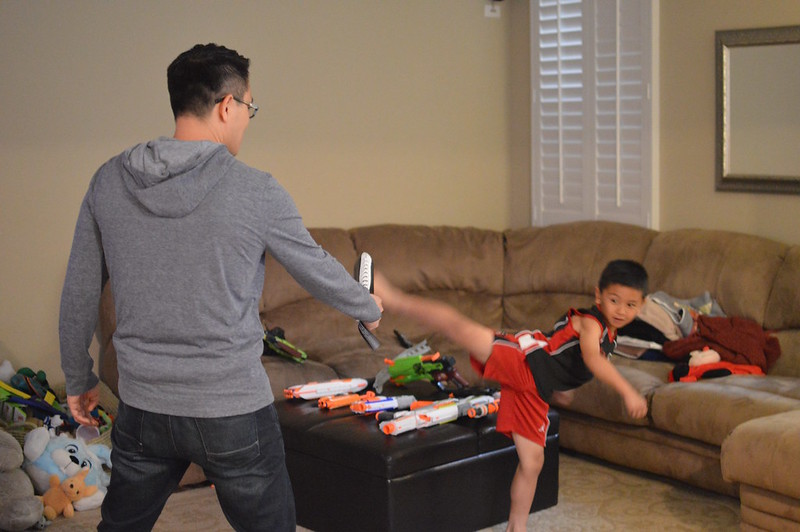
Meanwhile, Lucas had come back from his game, showered and then decided to show his uncle some of his badass roundhouse kicks.

Did I mention our little man just passed his Tae Kwon Do black back examination?

Yeah…I keep him around as my personal security these days.

April 2016 Fam Din
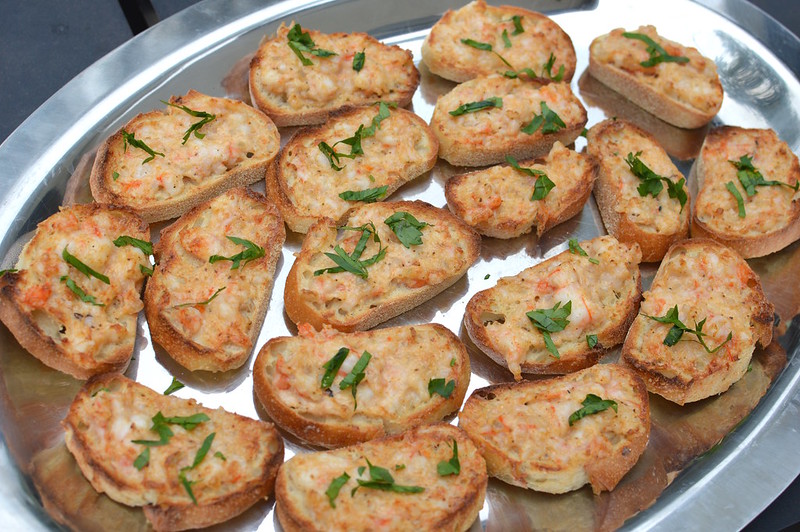
Then at some point throughout the shenanigans, big sis whipped out some appetizers – Shrimp Crostinis!!

April 2016 Fam Din
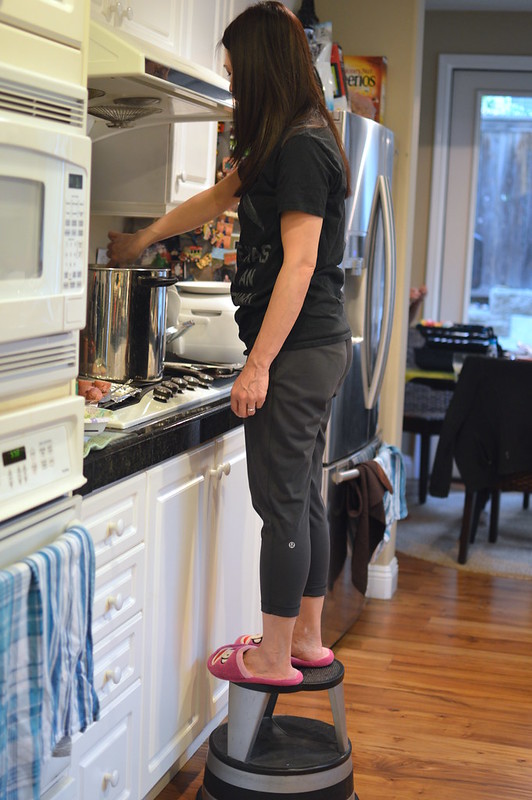
And then we got down to some serious cooking.

How serious?

So serious we had to break out the step stools.

#ShortPeopleProblems

April 2016 Fam Din
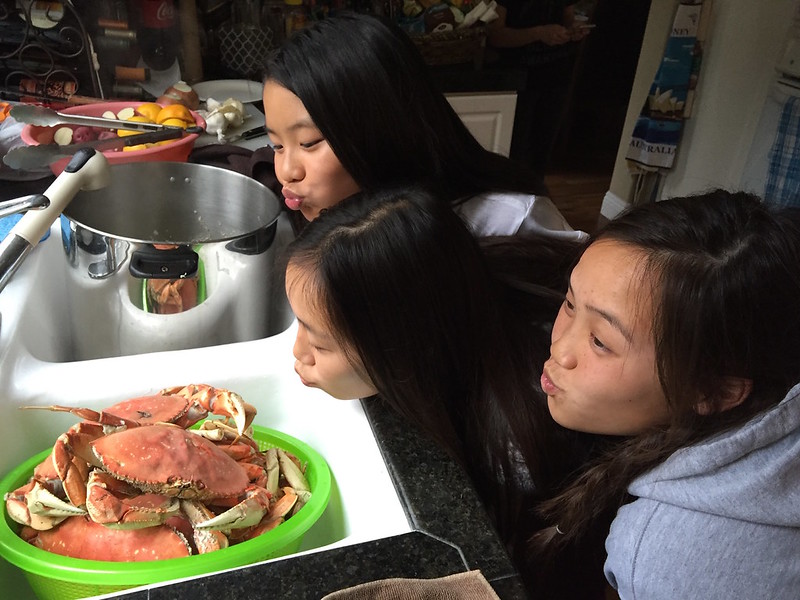
And then the girls started getting all kinds of silly.

Not sure if they were getting hypoglycemic from all the waiting or if it’s just their true nature.

You’re right….. it’s the Aliens.

April 2016 Fam Din

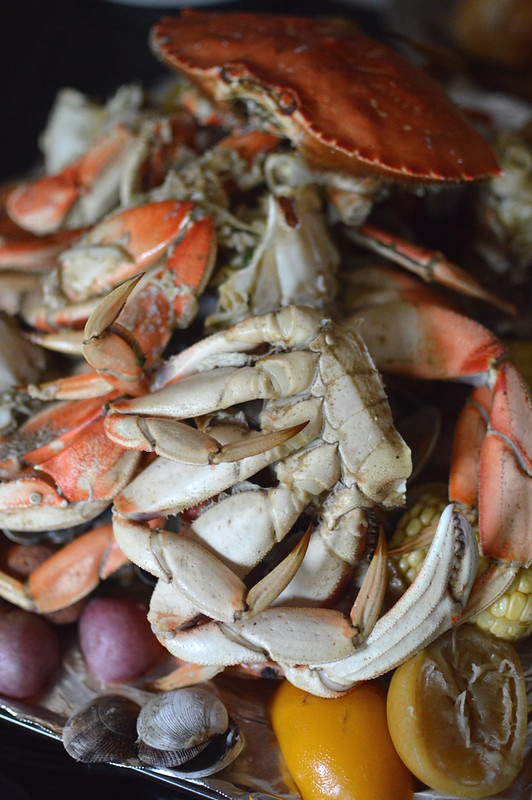
Grab the bibs, refill the drinks, plunk yourselves down in a chair because it was finally DINNER TIME!!!

April 2016 Fam Din
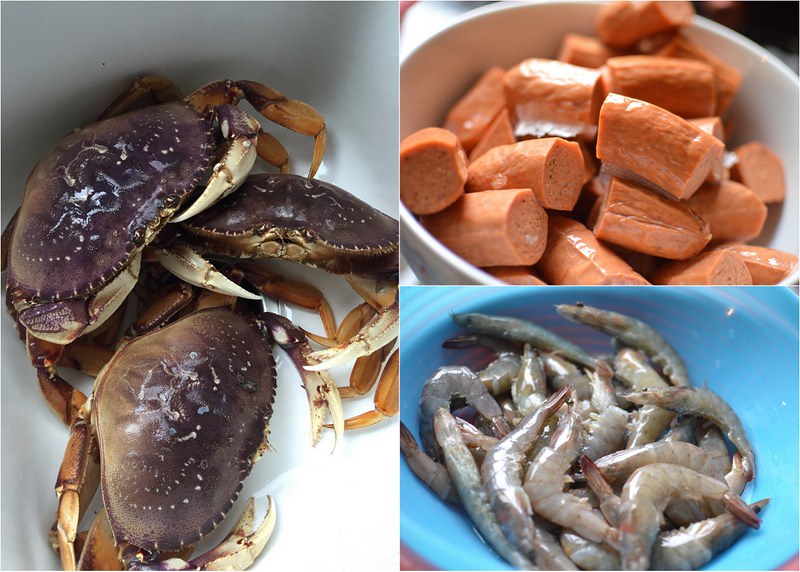
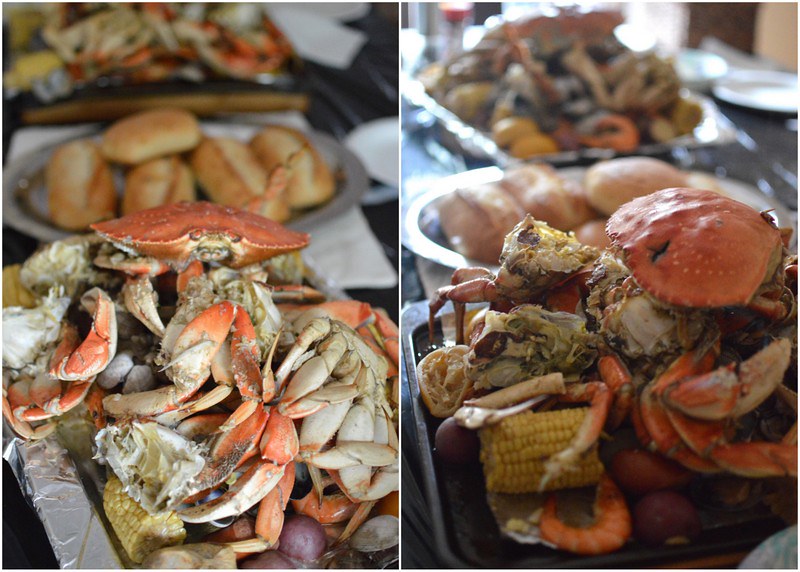
Sweet dungeness crab, prawns, clams, corn, new potatoes and crusty bread. The “boil” was made from crab stock, lemons, garlic and an insane amount of fennel and coriander seeds. Very, very aromatic.

Oh–and tons, and I mean TONS of garlic butter to dip it all in.

LET’S GET SEAFOOD WASTED!!!!

April 2016 Fam Din
And you bet we sure as heck did! Totally natural–birthday celebrations and all.

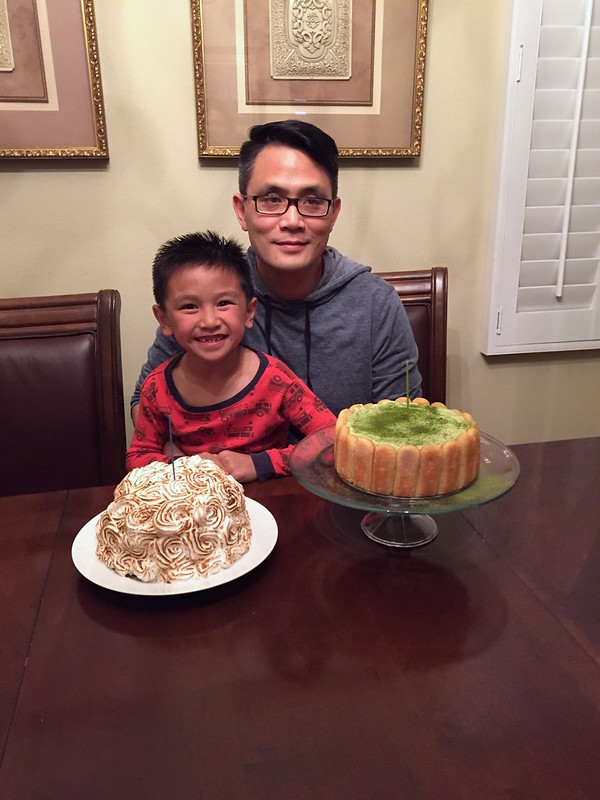
Though no matter how full we are, there must be dessert! And with two birthday boys, we had to have TWO desserts. One made specifically for each of boys’ favorite flavors.

April 2016 Fam Din
With Curtis, we went for the East Asian flavors because the man loves him some green tea! And after all these years, it’s become quite the challenge to make him a different green tea dessert. We’ve done Matcha Green Tea Icebox Cheesecake, Green Tea Souffles, and Matcha Green Tea Layered Cake filled with Matcha Mousse and the list goes on and on.

Hey–at least he’s consistent.

April 2016 Fam Din
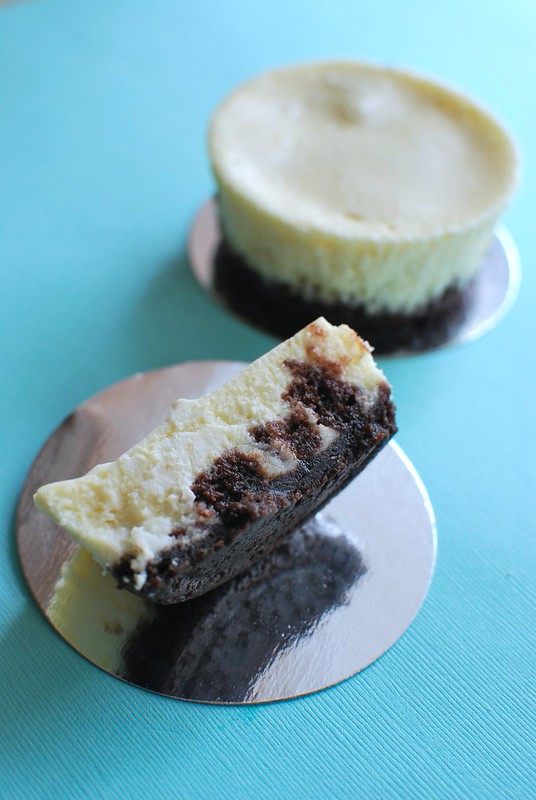
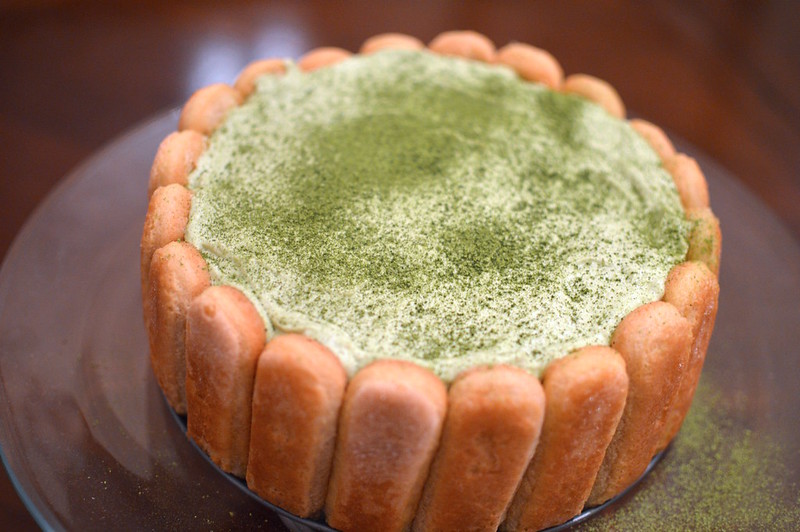
So after squeezing my brain to the core, I decided to make him a Green Tea Tiramisu–also known as a Matchamisu!

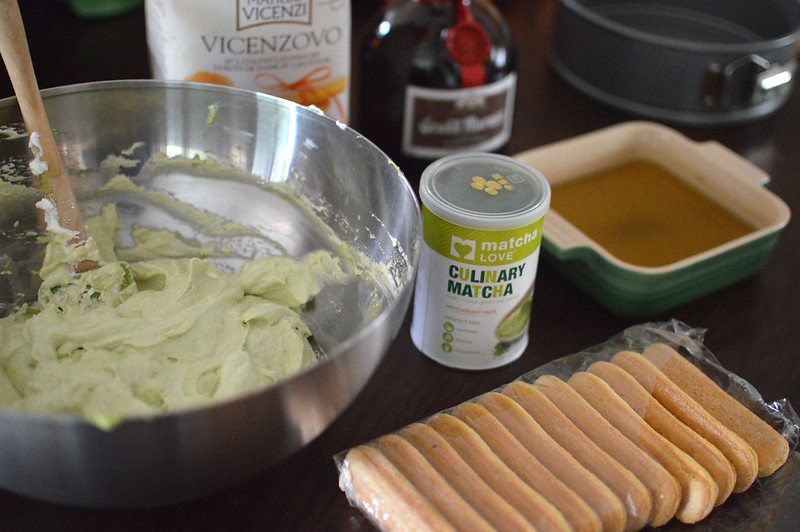
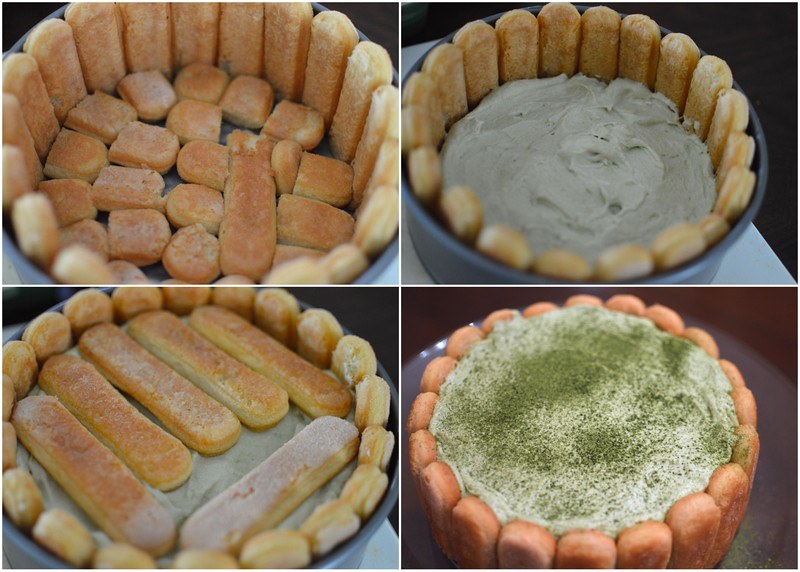
I used this recipe to make the fantastically easy and light dessert. I took packaged lady finger cookies and dipped them in a mixture of honey and a strongly brewed green tea. It was then layered with a fluffy filling of whipped mascarpone cheese, egg yolks, sugar, clouds of whipped cream and of course, matcha powder.

Oh! Did I mention that I threw in a few splashes of Grand Marnier? It is a type of tiramisu after all.

April 2016 Fam Din
It was a WINNER!

Not only was it crazy easy to pull together but it was so well flavored and light. Birthday boy gave me the stamp of approval! So much in fact, that I’m making a bunch of individual sized Matchamisus for his big birthday bash this weekend.

PHEW!

Better start thinking about his next year’s green tea dessert!

April 2016 Fam Din
As for Lucas’ dessert – my nephew being MY nephew, LOVES ice cream — mint chocolate chip ice cream. And like me, if it’s isn’t green mint chip then we want nothing to do with it.

So as a nod to the “Pacific Northwest”, I made our little guy a Baked Alaska — something I’ve never attempted before. And guess what? It was really easy too!

First off, I used store bought ice cream (I know, I know–but I was short on time!) and let it set out for about 30-45 minutes to soften. I lined a large metal bowl with plastic wrap (for easy removal) and packed the ice cream in it. Then, I pressed a layer of brownie on top to form the base.

Lukey doesn’t like cake—we’re all a work in progress.

April 2016 Fam Din
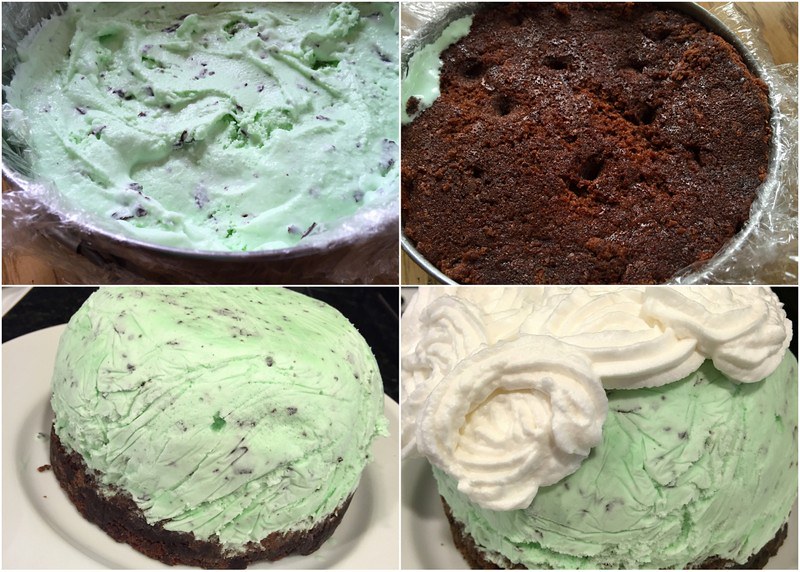
I covered the top with more plastic wrap and then let the whole thing freeze for several hours. When it was about time to serve, I took the bowl out of the freezer and set it on the counter while we got to making the meringue.

In a stand mixer with the balloon whisk attachment, I whisked up 2 large egg whites, 1/2 cup sugar, 1-2 pinches cream of tartar and 1/2 teaspoon vanilla extract and until stiff peaks formed.

We then inverted the bowl onto a plate, piped meringue rosettes all over and then brought out the torch.

April 2016 Fam Din
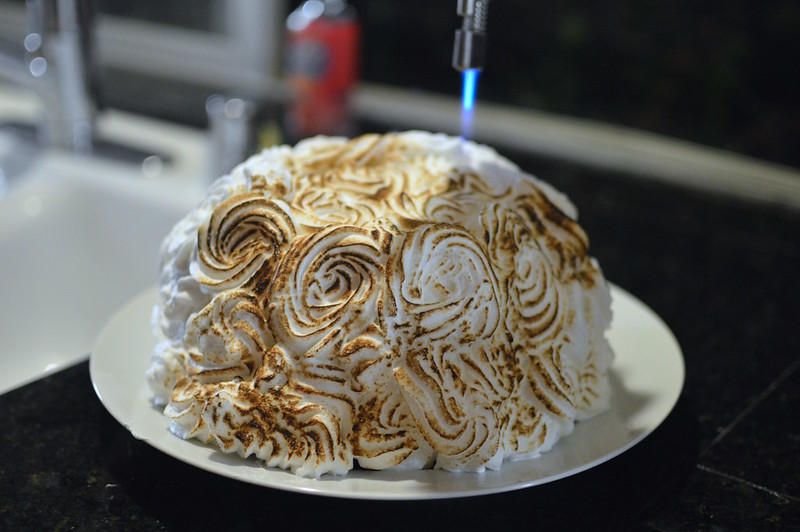
Most Baked Alaskas, well—are baked. But instead of placing the whole thing in a high heat oven, I opted to use a kitchen torch. I felt more comfortable with this method for a more even browning.

I think it all came out beautifully well. Fluffy-marshamllowly meringue, VERY green ice cream and a chocolately brownie base.

April 2016 Fam Din
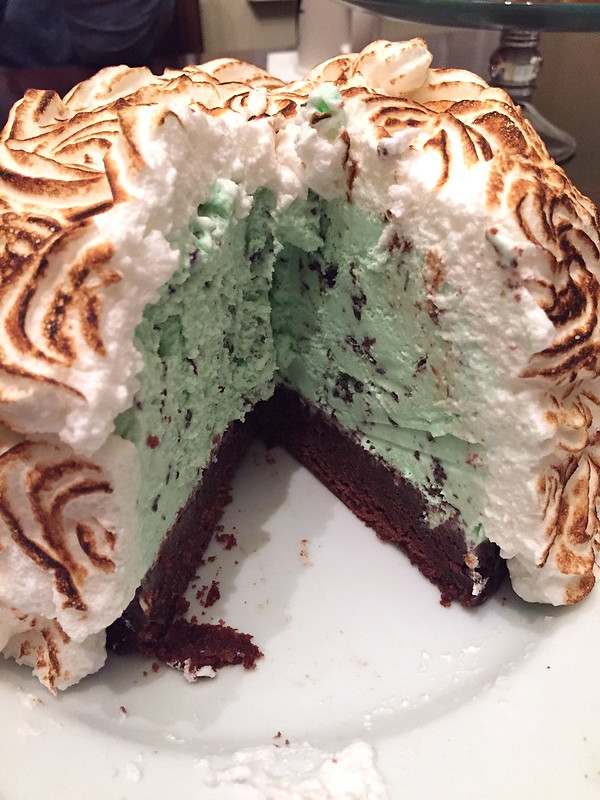
It got a thumbs up from this adorable birthday boy….

And if you follow me on Instagram, then you would have saw a video of Lucas face planting into his dessert plate–on his own volition!!!

Silly boy.

April 2016 Fam Din
Another delish and FUN Family Dinner in the books!

Happy Birthmonth Curtis and Lucas!

_____________________________________________

This Month’s Family Dinner Menu
Pacific Northwest – East Asian

Cocktails: Pomegranate Soju with Sparkling Korean Grapefruit Rice Brew
Appetizers: Shrimp Crostini
Entrees: Pacific Northwest Dungeness Crab Boil with Prawns, Clams, Sausage, Potatoes & Corn
Sides: Toasted Ciabatta and French Bread
Dessert: Matcha Tiramisu and Baked Alaska with Mint Chocolate Chip Ice Cream and Brownie Base

Desserts/Pastries

Thin Mints Brownies – Happy St. Patrick’s Day!

Thin Mints Brownies
I know, I know….it’s usually the time of the year where I whip up a few batches of Chocolate Stout Cupcakes with Irish Cream Buttercream. It’s St.Patrick’s Day after all!

But imagine my predicament last night when it not only hit me that St.Patty’s was a mere hours away but I also didn’t have a drop of stout beer in the house.

Blasphemous!

Thin Mints Brownies
Sure — I could have trekked out to the store to pick up some but there was a crazy, blizzard-snow-storm out!!! Trees were flung out of the ground, pigs were flying and I think I even saw Dorothy’s house spinning out of control in the sky!

Ok, ok….that may not be totally accurate.

It was a beautiful 74 degrees in San Diego.

And I was lazy.

Thin Mints Brownies
But I still wanted to bake something festive to share with the staff for St.Patty’s. And guess what? I may not have had any stout beer but I sure as heck had a TON of Girl Scout Cookies!

Thanks to my cookie-slinging-niece Maya (and a little strong-arming from my seester), I have boxes and boxes of GS Cookies. Enough to last me months and months!

…..more like weeks.

….or days….

Those boxes are getting smaller, right? At least that’s what I tell myself when an entire box magically disappears after a day.

Thin Mints Brownies
With Girl Scout Cookies at my disposal, I toyed around with a few ways I could incorporate them into a festive treat. Previously I’ve used the cookies in:

I even threw some in a birthday cake this past weekend. So it was time that I gave brownies that Girl Scouts touch.

Thin Mints Brownies

I took my go-to brownies recipe and added chocolate chips and chopped up Thin Mints Cookies. To amp up the mint, a dash or two of mint extract was added to the batter for good measure. And since we are celebrating St. Patty’s, it only seemed appropriate to cover the tops with more cookies and sprinkles!

SLAINTE dear friends and I wish you a  fantastically HAPPY ST. PATRICK’S DAY!

___________________________________

Thin Mints Brownies
Makes 16 squares

Ingredients:

½ cup unsalted butter
1¼ cups premium chocolate, roughly chopped
¼ cup packed light brown sugar
½ cup white sugar
½ teaspoon vanilla extract
1 teaspoon mint extract
2 eggs
¾ cup flour
2 tablespoon unsweetened cocoa powder
¼ teaspoon salt
¼ teaspoon baking powder
½ cup 60% cacao or semisweet chocolate chips
1¼ cup chopped Thin Mints Cookies, divided
2 tablespoons colorful sprinkles


Preheat oven to 350 degrees. Line a 9 inch square baking pan with parchment paper for easy removal. Cover parchment paper with cooking spray.

In a heatproof bowl, melt the butter and chocolate in the microwave until smooth. Do this in 20 second intervals, stirring in between to ensure that you do not scorch the chocolate. Cool the chocolate mixture until room temperature. Stir in the sugars, vanilla extract and mint extract. Add eggs 1 at a time, beating well after each addition, until mixture is glossy and smooth.

In a separate bowl, sift together the flour, cocoa powder, salt and baking powder. Stir in the dry ingredients into the chocolate mixture until combined. Stir in chocolate chips and 1 cup chopped Thin Mints Cookies. Spread the brownie batter evenly in pan. Sprinkle the remaining Thin Mints Cookies over the top of the brownie batter.

Bake for 25-30 minutes until a toothpick inserted in the center comes out clean. Halfway through the baking process, cover the top of the brownies with the sprinkles and rotate the pan. Bake until done. Allow the brownies to cool in the pan and once at room temperature, cut into 16 squares. ENJOY!


Desserts/Pastries

Mint Chocolate Chip Brownies

Mint Chocolate Chip Brownies

When I saw Nestle’s Dark Chocolate & Mint Morsels, I knew I just had to have them—in my brownies 🙂

Mint Chocolate Chip Brownies

I started these little goodies with my basic brownie batter and added mint extract along with the morsels. It’s really a no fuss recipe and the flavors were scrumptious. Chocolate and mint are a classic winning combo.

Mint Chocolate Chip Brownies

And since they’re such a quick dessert to whip up, they are the perfect last minute addition to your holiday events.

_____________________________________

Mint Chocolate Chip Brownies

Ingredients:

½ cup unsalted butter
1½ cups chocolate, roughly chopped
¾ cup packed light brown sugar
½ teaspoon vanilla extract
1 teaspoon mint extract
2 eggs
¾ cup flour
2 tablespoon unsweetened cocoa powder
¼ teaspoon salt
¼ teaspoon baking powder
1 cup dark chocolate and mint chips (or other chocolate mint candies of your choice)
½ tablespoon powdered sugar

Preheat oven to 350 degrees. Line a 9 inch square baking pan with parchment paper for easy removal. Cover parchment paper with cooking spray.

In a heatproof bowl, melt butter and chocolate in the microwave until smooth. Do this in 20 second intervals, stirring in between to ensure that you do not scorch the chocolate. Cool the chocolate mixture until room temperature. Stir in brown sugar, vanilla extract and mint extract. Add eggs 1 at a time, beating well after each addition, until mixture is glossy and smooth.

In a separate bowl, sift together the flour, cocoa powder, salt and baking powder. Stir in the dry ingredients into the the chocolate mixture until combined. Stir in 3/4 cup of the dark chocolate and mint chips. Spread the brownie batter evenly in pan. Sprinkle the remaining dark chocolate and mint chips over the top of the brownie batter.

Bake for 25-30 minutes until a toothpick inserted in the center comes out clean. Cool the brownies completely before dusting the tops with the powdered sugar. Cut into squares and serve.

Desserts/Pastries

Sweet Treats from 2012 and Happy New Year!!

Alice in Wonderland Chocolate Cupcakes

With just a few hours left in 2012, I wanted to wish you and your loved ones Happiness, Joy, Endless Laughter and epic Foodventures! May 2013 be everything you wish it to be and more.

I also wanted to show some sweet treats that I pulled together in 2012 but didn’t get a chance to share with you before.

Alice in Wonderland Chocolate Cupcakes

Alice in Wonderland  themed cupcakes for my niece’s Birthday Tea Party. Chocolate Cupcakes frosted with Vanilla Buttercream with toppers that were molded from fondant and edible markers

Mini White Chocolate-Brownie Chunk Cheesecake

Mini White Chocolate-Brownie Chunk Cheesecakes

Chiffon Cupcakes w/ Strawberry Swiss Meringue Buttercream

Chiffon Cupcakes with Strawberry Swiss Meringue Buttercream

Chocolate Malt Cupcakes

Chocolate Malt Cupcakes

Chocolate Soccer Cupcakes

Soccer Themed Chocolate Cupcakes for my nephew’s 3rd birthday

Chocolate Soccer Cupcakes

Toppers made with fondant and painted with gel food colors, royal icing and edible markers

Chiffon Cupcakes w/ Swiss Meringue Buttercream

Vanilla Bean Chiffon Cupcakes with Swiss Meringue Buttercream topped with handmade White Chocolate Shell Candies for a Beach Themed Bridal Shower

Chiffon Cupcakes w/ Lemon Curd & Swiss Meringue Buttercream

4 layer Vanilla Bean Wedding Cake filled with Lemon Curd and frosted with Swiss Meringue Buttercream in a “ribbon” pattern

Vanilla Cake Pops

Vanilla Cake Pops for a Bridal Shower

Chocolate Raspberry Petal Cake

3 layer rich Chocolate Cake filled with Raspberry Coulis and frosted with Chocolate Buttercream in a “petal” pattern for my niece’s birthday party

Chocolate Raspberry Petal Cake

Creating a “petal” pattern with Chocolate Buttercream

And with that, I’m off to the countdown with friends and bubbly. Here’s to a delicious 2012 and Cheers to all of the wonderful things to come in 2013! HAPPY NEW YEAR!!!

Desserts/Pastries

Peppermint Kissed Brownies

Peppermint Kissed Brownies


My last peppermint related post of the year—I promise!

But with half a bag of Hershey’s Candy Cane Kisses left from our Candy Cane “Kissed” Nutella Cookies, I needed an excuse to use them all up. And of course, Brownies seemed like the perfect answer.

Quick, easy, fudgy, and minty.

Not a bad way to use up holiday candy. 🙂

————————————————————————–

Peppermint Kissed Brownies

Ingredients:

½ Cup Unsalted Butter
1½ Cups Chocolate, chopped
¾ Cup Packed Light Brown Sugar
½ Tablespoon Vanilla Extract
2 Large Eggs
¾ Cup All-Purpose Flour
1 Tablespoon Unsweetened Cocoa Powder
¼ Teaspoon Salt
¼ Teaspoon Baking Powder
½ Cup Hershey’s Candy Cane Kisses, roughly chopped

Preheat oven to 350 degrees. Line a 9 inch square baking pan with parchment paper for easy removal. Cover parchment paper with cooking spray.

In a heatproof bowl, melt butter and chocolate in the microwave until smooth. Do this in 20 second intervals, stirring in between to ensure that you do not scorch the chocolate. Cool the chocolate mixture until room temperature. Stir in brown sugar and vanilla. Add eggs 1 at a time, beating well after each addition, until mixture is glossy and smooth.

Whisk together remaining ingredients and combine with chocolate mixture. Spread batter evenly in pan.

Bake for 25 minutes. Remove from the oven and quickly sprinkle the Candy Cane Kisses all over the top. Lightly press the Kisses into the brownies and return to the oven. Bake for an additional 3 minutes. Cool brownies in pan for about 20 minutes, then lift brownies in the paper out of the pan and place on a wire rack to cool completely before slicing.

Desserts/Pastries · Miscellaneous

“Ad Hoc at Home” Winners & Decadent Brownies

Brownies from "Ad Hoc at Home"

Thanks to everyone who entered the giveaway for Thomas Keller’s “Ad Hoc at Home“. The response was truly overwhelming—so much so that I was convinced to pick TWO winners!

Drum roll please…..

Congrats to Xochitl M. (Fallon, Nevada) and Virginia R. (Artesia, California)! WOOT! Hope you both enjoy this lovely book and are inspired to try out some of Keller’s delish delights!

And in the spirit of “Ad Hoc at Home“, I decided to make the utterly decadent Brownies from the book. Honestly, you can’t go wrong with these bad boys. And in truth, “decadent” doesn’t even begin to describe them!  So ridiculously choco-licous that you’ll just have to whip them up yourself.

You won’t regret it. For reals.

And if you have a few extra minutes, check out the video link at the end of this post with Chef Keller as he dicusses “Ad Hoc at Home”.

Hope you all have a fabulous weekend! (I know I will—Harry Potter comes out today!!) 🙂

____________________________________________

Brownies from Ad Hoc at Home
From Chef Thomas Keller

Ingredients:

¾ Cup All-Purpose Flour
1 Cup Unsweetened Alkalized Cocoa Powder
¾ Pound (3 sticks) Unsalted Butter, cut into 1-tablespoon pieces
1 Teaspoon Kosher Salt
3 Large Eggs
1¾ Cups Granulated Sugar
½ Teaspoon Vanilla Paste
6 Ounces 61 to 64% Chocolate, chopped into chip-sized pieces
Powdered Sugar for dusting


Preheat the oven to 350F. We use a 9-inch square silicone mold, because it keeps the edges from overcooking; if you use a metal or glass baking pan, butter and flour it. Set aside.

Sift together the flour, cocoa powder, and salt; set aside.

Melt half the butter in a small saucepan over medium heat, stirring occasionally. Put the remaining butter in a medium bowl. Pour the melted butter over the bowl of butter and stir to melt the butter. The butter should look creamy, with small bits of unmelted butter, and be at room temperature.

In a bowl of a stand mixer fitted with the paddle, mix together the eggs and sugar on medium speed for about 3 minutes, or until thick and very pale. Mix in the vanilla. On low speed, add about one-third of the dry ingredients, then add one-third of the butter, and continue alternating the remaining flour and butter. Add the chocolate and mix to combine. (The batter can be refrigerated for up to 1 week.)

Spread the batter evenly in the pan. Bake for 40 to 45 minutes, until a cake tester or wooden skewer poked into the center comes out with just a few moist crumbs sticking to it. If the pick comes out wet, test a second time, because you may have hit a piece of chocolate chip; then bake for a few more minutes longer if necessary. Cool in the pan until the brownie is just a bit warmer than room temperature.

Run a knife around the edges if not using a silicone mold, and invert the brownie onto a cutting board. Cut into 12 rectangles. Dust the tops with powdered sugar just before serving.

Desserts/Pastries

Milk Chocolate-Peanut Butter-Toffee Brownies


There are very few American desserts in my opinion that are more iconic than the brownie (yeah-yeah….some would say Apple Pie but that’s just too cliche 🙂 )

Now the texture of a Brownie can truly vary from one person to the next. Some prefer the cake-like approach, whereas I enjoy the dense-chewy brownie. I also love the crunchy bits that the corner squares offer—mmm, good!

So, when the BF and I decided to make a triple feature at the drive-in movies one evening, I immediately began whipping up a batch of brownies to pack with us. I decided to kick up my “go-to” milk chocolate brownie batter by adding some toffee chips and peanut butter. Because as my girl Ina Garten would say, “How bad could that be?” 🙂

And they were OH-SO-GOOD!! Gooey, chocolatey, decadent…..and the bits of toffee added such a great texture. I’m wondering why I didn’t think of this earlier! But at least we’ve got it now and I’m more than happy to share the goodness.

So friends, pour yourself a nice icy-cold glass of milk and tuck into one of these brownies. You won’t regret it! 🙂


______________________________________________

Milk Chocolate-Peanut Butter-Toffee Brownies
Makes 9, 3 inch Brownies

Ingredients:
½ Cup Unsalted butter
1½ Cups Milk Chocolate Chips, plus ¼ Cup reserved (I used Ghirardelli Chips)
½ Cup Toffee Chips
½ Cup Smooth Peanut Butter, plus1Tablespoon Water
¾ Cup Packed Light Brown Sugar
½ Tablespoon Vanilla Extract
2 Large Eggs
¾ Cup All-Purpose Flour
1 Tablespoon Unsweetened Cocoa Powder
¼ Teaspoon Salt
¼ Teaspoon Baking Powder

Preheat oven to 350 degrees. Line a 9 inch square baking pan with parchment paper for easy removal. Cover parchment paper with cooking spray.

In a heatproof bowl, melt butter and 1½ cups milk chocolate chips in the microwave until smooth. Do this in 20 second intervals, stirring in between to ensure that you do not scorch the chocolate. Cool the chocolate mixture until room temperature. Stir in brown sugar and vanilla. Add eggs 1 at a time, beating well after each addition, until mixture is glossy and smooth.

Whisk together remaining ingredients and combine with chocolate mixture. Stir in remaining ¼ cup chocolate chips and toffee chips. Spread batter evenly in pan. Mix peanut butter and water in a heatproof bowl. Microwave for 15 seconds to thoroughly incorporate both ingredients. Drizzle peanut butter mixture on top of the brownie batter. Using the tip of a pairing knife, create swirls of the peanut butter. Do not over mix, as you want to keep the peanut butter visible.

Bake for 25 to 30 minutes or until a toothpick inserted comes up mostly clean.  Cool in pan for at least 10 minutes and cut into 3 inch squares.