Desserts/Pastries · Sunday Family Dinner

Seester’s Creamy Rum Flan

Creamy Rum Flan

WOW — who knew that you all loved flan so much?!

After I posted the Fam Din about V’s birthday flan, I got flooded with requests for the recipe! I don’t blame you, it really was quite lusciously delicious.

November 2017 Fam Din
I consulted with Big Seestrah, since the original recipe was her F.I.L.’s and she obliged saying that she had tweaked it enough to make it her own.

Now a quick forewarning for all of you Vietnamese Flan (“kem flan” or bánh flan”) aficionados. This recipe does not contain any condensed milk or coconut milk like many traditional Vietnamese versions do. And quite frankly, I think that’s one of the reasons why I like it so much since it’s not too sweet. Plus I have a theory that the consistency of both coconut milk and condensed milk make for a heavier flan that’s more likely to cause large bubbles.

I have no scientific backing on that theory…just a hunch.

November 2017 Fam Din
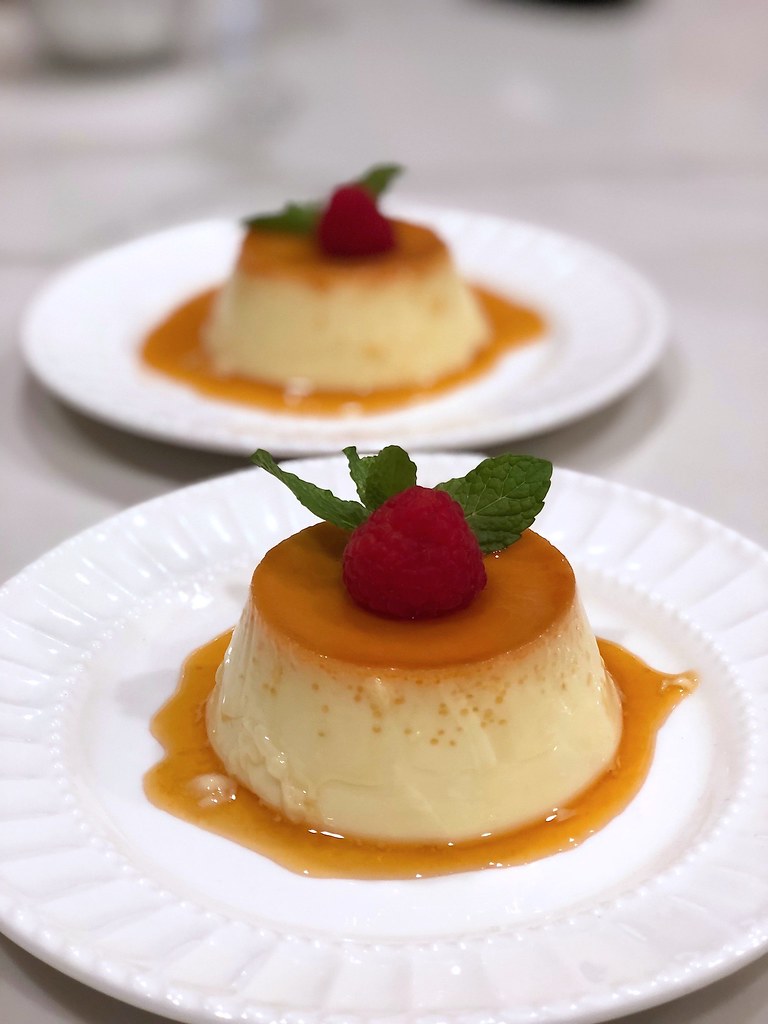
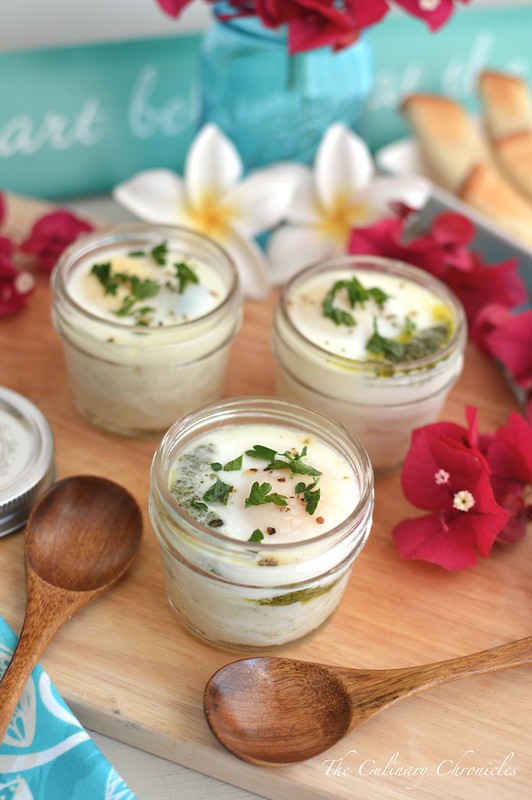
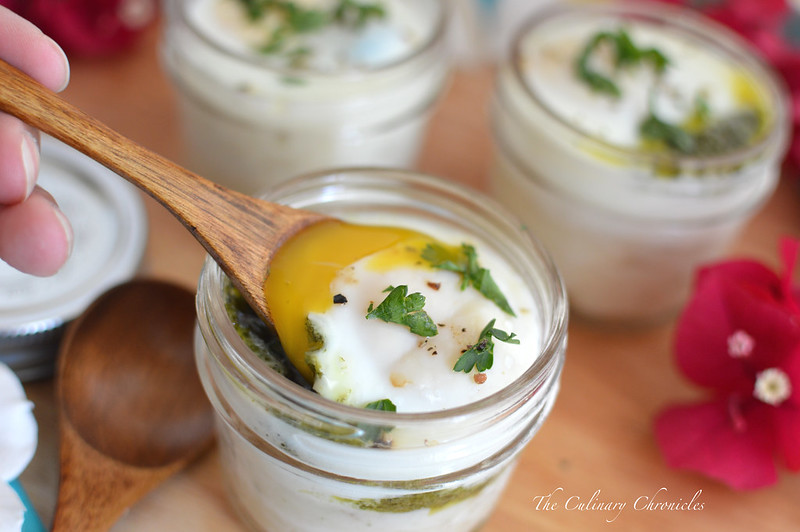
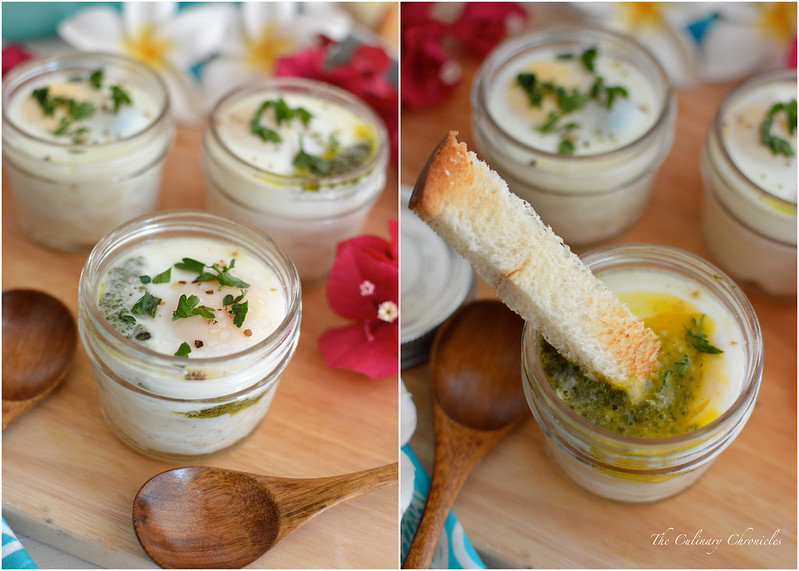
You can choose to make larger dishes of flan or individual sized ones like seester did above. Just be sure to adjust for baking time depending on the vessel. But either way, super delish.

Oh! And if you’re not a rum fan, you can sub with any booziness you’d like — or just skip it! But as for me, I say HECK YES to rum as it pairs so well with the caramel.

Thanks for sharing Seester N!!!

______________________________________
Creamy Rum Flan
Serves approximately 10

Ingredients:

2½ cups granulated sugar, divided
5 cups whole milk
5 large eggs
3 ounces dark rum*

Place 10 ramekins (4-6 ounces) or 2 baking dishes in 2 roasting pans. You’ll need the roasting pans to create a water bath later.

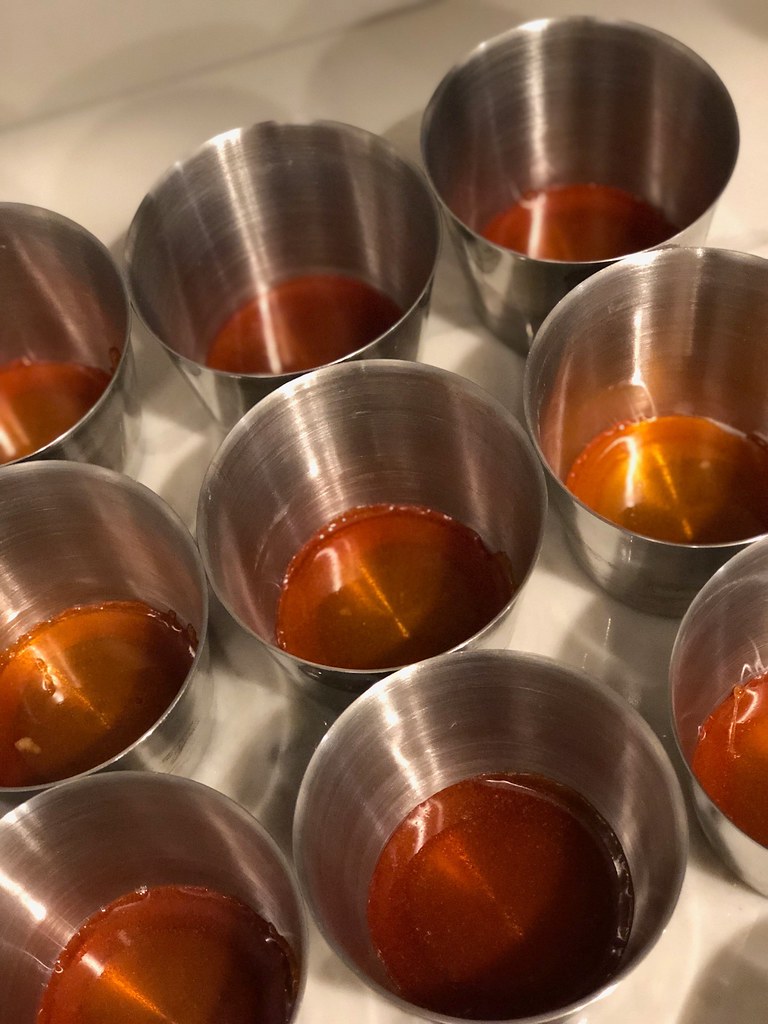
In a small, heavy bottomed pot, add in 1½ cups sugar. Over medium heat, cook the sugar until it caramelizes and becomes golden brown. Be sure to stir often. Once the sugar has reached the desired color, quickly pour the caramel into the bottoms of each ramekin/dish. Swirl each so that it completely covers the bottom of each vessel. Set aside and allow the caramel to cool.

In another pot, whisk the milk and remaining sugar over medium heat. Continue whisking until the sugar has dissolved and the liquids come to a soft boil. Remove the pot from the heat and allow to cool.

In a separate bowl, whisk the eggs and rum together until combined. Slowly whisk the milk mixture into the eggs. Pour the custard into the prepared ramekins/dish and cover with aluminum foil. Place the roasting pans in the middle rack of a preheated 380 degrees F oven. Carefully fill the roasting pans with boiling water to come halfway up the sides of each ramekin/dish.

Bake the flan for approximately 45-60 minutes or until the center has just barely set. The length of cook time will depend on the sizes of your ramekins/baking dishes. Once done, remove the flan from the water bath and allow to cool on racks until they reach room temperature. Cover each the flan with plastic wrap and refrigerate overnight.

Once you’re ready to serve, carefully run a hot pairing knife around the edge of the flan. Place a rimmed plate or serving platter on top and quickly invert. Serve with fresh berries, whipped cream, etc.

*You can add less or more rum to taste. However, if you choose to omit you can substitute with 1 tablespoon of pure vanilla extract.


Poultry · Sponsored

Basil Chicken and Egg Lettuce Wraps

Lettuce Wraps2

I’m all about easy to make meals these days…..

Ok, let’s be honest. I’ve always been enamored with low fuss meals–particularly during the weekdays when I’m always short on time. And when those dishes are savory, fulfilling AND on the health conscious then it’s a NGUYEN-WIN!!!

I’ll tell ya, these Basil Chicken and Egg Lettuce Wraps fit that bill perfectly!

And guess what?

It’s PALEO!!! Yup, you read correctly!

Lettuce Wraps3

Partnering again with our friends at Safest Choice® Eggs, I took quality ground chicken and stir fried it with classic South East Asian aromatics.  After a few splashes of fish sauce (there are tons of fantastic paleo fish sauces out there), I topped the chicken with ribbons of Safe Eggs. Tons of lean protein, packed with flavor and yet still light on the tummy.

Click here to read my post on Paleo Basil Chicken and Egg Lettuce Wraps and here for the recipe.

Have a fantastic week!

Davidsons-Dozen-Blogger-Badge

Breakfast/Brunch · Sponsored

Huevos Rancheros …..Be EGGS-ellent

Huevos Rancheros

Brunch is my Spirit Animal.

In fact, if I had it my way, we would be allotted a few leisurely hours every day to create and enjoy brunch. Without a worry in the world….other than what delectable dishes we’d have and if there are enough mimosas….

Or Bloody Marys….

Who am I kidding–it’s your Brunch World…have both!

Huevos Rancheros

Sadly, with summer winding down, many of y’all with munchkins have either already sent them off to start a new school year or will be doing so shortly. And when that happens, daily brekkies become less elaborate and more about efficiency and time saving.

Heck–I totally get it.

I only have a fur-child and between getting her walked and my own act together before work, I can barely manage to guzzle down some coffee in the morning.

And thus, my brunch heart weeps.

Huevos Rancheros

So do yourself a favor….and your kiddos too!

Make them something a little special Monday morning to get them jumping out of bed….like Huevos Rancheros! Huevos Rancheros are easily one of my favorite dishes to have for brunch. Packed with flavor, various textures and all smothered with a beautiful runny fried egg.

Good lawd…I’m a sucker for eggs.

Wait–maybe runny eggs are my Spirit Animal?

Suddenly, EVERYTHING makes sense….

Huevos Rancheros

These Huevos Rancheros are the perfect addition to this month’s  Safest Choice™ Darling Dozen. Not only does it affirm my adoration for the remarkable egg but it is sure to have your loved ones waking up with a pep in their step.

The whole process from start to finish takes about 30 minutes since I use some short cuts like canned refried beans and store bought enchilada sauce for the Huevos Rancheros “sauce”. But if you precook the sausage and prep everything ahead of time, you can have these gorgeous Huevos Rancheros on the table in about 15 minutes. Not bad for breakfast “cooking” during the weekday.

Much thanks to our friends at Safest Choice™ and to learn more about them and their pasteurization process to eliminate salmonella, please click here.

Have an EGGS-ellent weekend!

____________________________

Huevos Rancheros
Serves 2

Ingredients:

½ cup sour cream
½ tablespoon Tapatío Hot Sauce or hot sauce of your choice
½ tablespoon fresh lime juice
¼ teaspoon garlic powder
8 ounces breakfast sausage
vegetable oil, divided
4 small corn or flour tortillas
2 large Safest Choice™ pasteurized eggs
kosher salt
8 ounces refried beans, warmed
1 cup shredded Monterey jack or Mexican blend shredded cheese
8 ounces enchilada sauce, red or green, warmed
1 cup grape tomatoes, halved
¼ cup thinly sliced radishes
½ cup chopped cilantro leaves
¼ cup pickled red onions, optional
½ small avocado, sliced
½ tablespoon gochugaru or other ground chili pepper
2 lime wedges

In a small bowl, mix together the sour cream, hot sauce, lime juice and garlic powder. Cover and refrigerate.

In a skillet, add the breakfast sausage and cook over medium heat. Use a wooden spoon to crumble the sausage and break into small pieces. Cook the sausage until browned — transfer to a plate and keep warm.

Take a paper towel to wipe out the grease left from the sausage. Return the skillet to the stove over medium heat. Add two tablespoons of vegetable oil. Fry the tortillas in the oil until both sides are crispy and brown. Add more oil when needed. Drain the crispy tortillas on plates lined with paper towels. Set aside.

Take another paper towel to wipe out the majority of the oil left and place the skillet on the stove over medium-low heat. Crack 2 Safest Choice™ pasteurized eggs in the skillet and fry until the center has set and the whites are opaque. Sprinkle each egg with salt. Transfer the fried eggs to a plate and keep warm.

Begin assembly. Place one crispy tortilla on a plate. Spread a thin layer of the warmed beans over the top. Sprinkle cheese over the beans and add a few spoons of the browned sausage over the top. Spoon some of the warmed enchilada sauce over the items and top with some tomato halves, radish slices and cilantro leaves. If you choose to, also add a few slices of pickled red onions.

Top the stack with another crispy tortillas and repeat the layering process. Once done, top the stack with a fried egg, avocado slices and drizzle some of the spiced sour cream over the mound. Top with cilantro and gochugaru (or other ground chili pepper) and serve with lime wedges.

npe_darlingdozenbadges

*DISCLOSURE: As a brand ambassador for the Safest Choice™ Darling Dozen, I was compensated for the creation of this recipe and post. However, as always, all opinions are my own.*

Seafood · Sponsored

B.L.E.A.T.S. Sandwiches

B.L.E.A.T.S.

This week we’re giving one of my favorite ingredients some love.

Something so versatile, quick to prepare and that can send almost anything over the top.

Yep……

The beloved Egg.

B.L.E.A.T.S.

Pizza? Throw an egg on it…..

Pasta? Throw an egg on it…..

Sandwiches? Throw an egg on it…..

Salads? Throw an egg on it…..

Ramen Noodles? DEFINITELYThrow an egg on it…..

B.L.E.A.T.S.

Eggs have that magical ability to bring almost anything it touches to the next level. When adding a poached or runny fried egg to a dish, it becomes something so decadently transcendent—unctuous, sinful, delicious.

All that with just an egg!

B.L.E.A.T.S.

To close out National Sandwich Month and for my next contribution to Safest Choice™ Darling Dozen, I thought I would whip out a hearty and fun sandwich…. B.L.E.A.T.S.

B-acon

L-ettuce

E-gg

A-vocado

T-omato

S-almon

Oh yes…I went there.

B.L.E.A.T.S.

It all starts with an easy sriracha mayo I mix up to hold everything together or you can use any other spread that suits your fancy.

Wasabi mayo, pesto, garlic aioli, dijon mustard……

You get the gist….

B.L.E.A.T.S.

Next comes the salmon that is simply seasoned with kosher salt and then pan seared until it’s crispy on the exterior but still moist and tender in the middle. I happened to have a large fillet here but if you can’t find one big piece, just grab a couple smaller fillets.

Then, I cracked a few Safest Choice™ pasteurized eggs in the skillet and fried them until the edges were crisp and the yolks had just barely set.

I’m all about an ooey-gooey egg yolk…..it makes it seem a bit sinful—but don’t feel guilty. I sure as heck don’t.

B.L.E.A.T.S.

Once that’s all done, everything gets layered in between some hamburger buns or rolls. It truly is a behemoth of a sandwich and incredibly messy to eat.

But so wonderfully worth it!

And if you can’t get a little messy at home while enjoying some B.L.E.A.T.S. then you’re just not living life.

B.L.E.A.T.S.

Want to learn more about our friends from Safest Choice™? Then head on over here and while you’re at it, check out some more egg-a-licious recipes on their site!
_
__________________________________________________
B.L.E.A.T.S. (Bacon, Lettuce, Egg, Avocado, Tomato & Salmon) Sandwiches
Serves 4

Ingredients:

½ cup mayonnaise
1 tablespoon sriracha chili sauce
1 teaspoon sesame oil
1 garlic clove, finely minced
kosher salt
1 pound fillet salmon, skinned and deboned
3 tablespoons vegetable oil, divided
4 large Safest Choice™ pasteurized eggs
½ small lemon
1 small tomato, sliced
1 small avocado, sliced
8 strips cooked bacon
4 lettuce leaves
4 hamburger buns or rolls

In a small bowl, whisk together the mayonnaise, sriracha, sesame oil, garlic and 2-3 pinches of kosher salt. Cover and refrigerate the sriracha mayonnaise.

Liberally season the salmon fillet with salt on both sides. Heat a large skillet over medium-high heat. Add 2 tablespoons of oil and swirl it around to coat the bottom of the skillet. Carefully lay the salmon fillet into the skillet. Allow the salmon to sear, undisturbed, for about 4-5 minutes depending on the thickness of the fillet. The salmon should be about ¾ cooked through. Gently flip the fillet and allow it to brown on the other side for another 2-3 minutes until the center is barely pink. Remove from the skillet and transfer to a large plate to rest.

Use paper towels to wipe the interior of the skillet. Heat ½ tablespoon of the oil over medium-low heat. Crack 2 Safest Choice™ pasteurized eggs in the skillet and fry until the center has set and the whites are opaque. Sprinkle each egg with salt. Transfer the fried eggs to a plate and repeat with the remaining oil and eggs.

Squeeze the lemon over the rested salmon fillet and cut into four even pieces.

Assemble the sandwiches by spreading sriracha mayonnaise inside each of the hamburger buns/rolls. Top the bottom of each bun/roll with lettuce, avocado slices, tomato slices, bacon strips, salmon piece and then a fried egg. Place the top of each bun/roll on and serve.

npe_darlingdozenbadges


*DISCLOSURE: As a brand ambassador for the Safest Choice™ Darling Dozen, I was compensated for the creation of this recipe and post. However, as always, all opinions are my own.*

Appetizers/Small Plates · Beef · Sponsored

Kimbap – Korean Seaweed Rice Rolls

Kimbap – Korean Seaweed Rice Rolls

We have been non-stop grilling this summer and it has been fantastic!!!

Burgers (all types!), skewers, seafood, ribs, veggies……

And with this crazy heat and humidity we’ve been having these past few weeks it’s been the perfect way to escape the hot kitchen.

Kimbap – Korean Seaweed Rice Rolls

Most of our BBQs have been in the backyard so I’ve been sorely missing out on all of the summertime beach and park picnics. Delish sammies, salads, and fried chicken. SOOOO GOOD!

But if you’re anything like me, I often can’t decide what I want to make to bring for picnics. I strive to fix up dishes that are a bit out of the norm but still delish at room temperature. And since they’re outdoor events, I try to think of items that don’t have ingredients that will spoil easily.

Kimbap – Korean Seaweed Rice Rolls

Thank goodness that onigiris and seaweed rice rolls are ALWAYS a hit when I bring them out. Onigiris (also often referred to as musubis) are a Japanese treat consisting of sticky rice shaped into balls or triangles and wrapped in toasted seaweed. They often are filled with seafood, pickled veggies or meat.

What’s my favorite onigiri? SPAM MUSUBIS!!!!!

Yes, the all-caps were a must.

Kimbap – Korean Seaweed Rice Rolls

As for seaweed rice rolls — think of sushi maki rolls. But, if you opt to make them for outdoor events or if you don’t plan on serving them right away, I’d recommend staying clear of filling them with raw seafood. Korean style seaweed rice rolls, Kimbap, are perfect because of it.

Kim = Seaweed

Bap =  Rice

Ever since I was first introduced to kimbap in elementary by my Korean friends, I have been inhaling these little buggers like crazy. There are so many variations but the standard filling usually consists of bulgogi (or seasoned protein of your choice), shredded carrots, cooked spinach, strips of cooked eggs and danmuji (pickled daikon). However, you can really use just about anything you have in your fridge. I often swap out the daikon for cucumbers and use leftover meat I may have such as grilled chicken, shrimp or imitation crab.

The other distinct difference between kimbap and Japanese maki is the rice. Normally, kimbap will only have sesame oil seasoned rice whereas Japanese sushi rice will have sake, rice wine vinegar and some sugar. But since I like the flavor, I use a combo of sesame oil and rice wine vinegar for my kimbap.

Kimbap – Korean Seaweed Rice Rolls

So for my latest contribution to the  Safest Choice™ Darling Dozen I thought I would share with you a basic version of Kimbap. Once you get all the pieces together, assembly takes barely any time at all. And since you don’t have to serve it right away, you can make it the morning of a picnic or outing and have it on hand whenever you’re ready for it.

I’ve also included my recipe for the bulgogi marinade below but feel free to use a store bought marinade as there are TONS of great ones out there as well. However, keep in mind one note about the preparation of the eggs or “omelet”. Cook the eggs low and slow so that it doesn’t brown and retains its bright yellow color.

Much thanks to our friends at Safest Choice™ and to learn more about them and their pasteurization process to eliminate salmonella, please click here.

HAPPY PICNICKING!

_____________________________________________

Kimbap – Korean Seaweed Rice Rolls
Makes 4 rolls

Ingredients:

½ cup bulgogi marinade, homemade* or store bought
¼ pound thinly sliced ribeye beef
1 tablespoon vegetable oil, divided
3 large Safest Choice™ pasteurized eggs, beaten
2 cups cooked short grain-sticky rice, heated
½ tablespoon sesame oil
½ tablespoon rice wine vinegar
4 toasted seaweed sheets
½ cup finely julienned carrots
½ cup danmuji – Korean pickled daikon (or cucumbers), cut into long strips
½ cup blanched spinach

In a small bowl, mix the bulgogi marinade and beef together. Cover and refrigerate for 30 minutes.

Heat a small nonstick skillet with ½ tablespoon vegetable oil over medium-low. Pour in the beaten eggs and turn down the heat to low. Cook the eggs until they have just set on top and you see tiny bubbles forming over the surface. Carefully flip over the “omelet”. Allow the eggs to cook for an additional minute and slide the omelet onto a cutting board. Cut the omelet into long strips approximately ½ inch wide. Set aside.

Use a damp paper towel and wipe the interior of the nonstick skillet. Heat the remaining vegetable oil over medium high. Add the marinated beef to the skillet and stir-fry until the meat has browned and cooked through. Set aside.

In a medium size bowl, combine the rice with the sesame oil and rice wine vinegar.

Place one piece of toasted seaweed (shiny side down) on a bamboo sushi mat or piece of parchment paper. Dip your hands into a bowl of water (to help keep the rice from sticking). Spread and press ¼ of the rice mixture into an even, thin layer on top of the seaweed. You’ll want to leave about 2 inches from the top and bottom of the seaweed sheet uncovered.

Place ¼ of the beef, eggs, carrots, daikon, and spinach horizontally along the center of the rice. Hold the bottom of the bamboo mat (or parchment), and use an upwards motion to roll the kimbap. As you’re rolling, you’ll want to gently squeeze the kimbap to ensure that it’s firmly sealed and enclosed into the shape of a log. Unroll the bamboo mat (or parchment) and set the rolled kimbap aside. Repeat the process with the remaining ingredients.

Using a sharp knife, cut each roll into ½ inch pieces. You may need to wipe down the knife periodically as the rice can cause the blade to become sticky. Serve the kimbap at room temperature.

*To make your own bulgogi marinade, add the following ingredients into a food processor/blender and puree. Makes approximately 1 cup.

1/3 cup low sodium soy sauce
1 tablespoon honey or agave
1 tablespoon mirin
juice of one small orange
1 tablespoon sesame oil
1 teaspoon Gochugaru (Korean red chili pepper powder)
½ teaspoon toasted sesame seeds
½ teaspoon kosher salt
¼ teaspoon black pepper
½ tablespoon brown sugar
½ small Asian pear, quartered
2 large garlic cloves
1 inch piece fresh ginger
2 scallions, cut into 2 inch pieces

NPE_DarlingDozenBadges

*DISCLOSURE: As a brand ambassador for the Safest Choice™ Darling Dozen, I was compensated for the creation of this recipe and post. However, as always, all opinions are my own.*

Breakfast/Brunch

Breakfast Tacos — Change Up Your Taco Tuesday!

Breakfast Tacos

You know what my favorite Tuesday is?

Taco Tuesday!

Seriously. It’s a legitimate kind of day. Well…at least if you’re in Southern California.

The other day while I was rummaging around my fridge checking out all of the random things I had in there, it came to me.

I love Tacos. I love Breakfast.

So why the heck have I never make Brekkie Tacos?

Two words. Brain Fart.

Oh no. Y’all are going to leave me now that I used the f-word in a food post.

Eek….. Sorry!

Breakfast Tacos

But in all seriousness gang…this is the real deal. If you’ve never made Breakfast Tacos before, get on it! And if you have been making them for years—why the heck didn’t you tell me to before?!

No recipe here but I will say that there are 4 MUSTS:

  • Tortillas –and while you’re at it…why not make these homemade Flour Tortillas? They are a game changer.
  • Taters’ –any type as long as they’re crispy and potato-licious! French fries, hashbrowns, or even these Crispy Oven Roasted Herb Potatoes would be rad.
  • Shalsha— or “salsa” if you’re not Cindy Brady. You can use some homemade Oven Roasted Tomato Salsa, that jarred salsa from New York city–or heck, just plain old hot sauce.
  • Fried Egg— the runnier the better. I’m talking crispy edges and an ooey-gooey center that makes it all seem just a bit sinful.

As for the pic’ above, I added some thinly sliced radish, diced yellow tomatoes, cucumbers, cilantro and pickled red onions. So satisfying and so quick that you won’t have any excuse to not make it today.

HAPPY TACO TUESDAY PEEPS!

Breakfast/Brunch · Sponsored · Vegetables/Vegetarian

Coddled Eggs with Pesto and Potato-Parsnip Purée

Coddled Eggs with Pesto and Potato-Parsnip Puree

We’ve officially entered “shower” season. And by that, I don’t mean April Showers but Wedding Showers and Baby Showers!

My next two months will be weekends filled with shower games, presents galore, tea sandwiches, little bite sized desserts, and sparkling cocktails (I hope!).

Coddled Eggs with Pesto and Potato-Parsnip Puree

What can I say? Love is in the air and my dear friends and loved ones have a lot to be celebrating over these next few months.

So for my latest contribution to Safest Choice™ Darling Dozen, I thought I would make something that would go well on a menu for both bridal and baby showers.

Coddled Eggs with Pesto and Potato-Parsnip Puree

I’ve always been a huge fan of choosing brunch to host parties and celebrations. It’s the perfect time of day where you can serve a variety of foods to please all palates. A few desserts, sandwiches. croissants, scones, preserves, charcuterie boards, and of course–there has to be eggs!

And these adorable coddled eggs served in mason jars will be an absolute hit at your showers.

Coddled Eggs with Pesto and Potato-Parsnip Puree

They start with a luscious, smooth layer of a potato-parsnip purée….which truthfully, are one of my faves these days. They’re a bit lighter than traditional mashed potatoes but are just as delectable.

Next, comes a layer of savory, herbaceous pesto. And c’mon now–who doesn’t love pesto? But for this particular dish, it really does add some much needed brightness to offset the rich, coddled egg and purée. You can also add some sauteed greens as well.

Finally, the whole thing is topped off with a beautiful egg. Heaven.

Coddled Eggs with Pesto and Potato-Parsnip Puree

Your guests will just love these little jars when served. The yolks are unctuous and runny — perfect to dunk toasted little soldiers into. And since Safest Choice™ uses an all-natural egg pasteurization process to eliminate the risk of salmonella, feel at ease when serving them to mamas-to-be.

Want to find out more about their pasteurization process? Click here

Coddled Eggs with Pesto and Potato-Parsnip Puree

These little cuties can be assembled hours before your parties (even the night before!) to give you even more time to spend with your guests.

Adorable? Check! Easy to assemble? Check! Delicious? Check!

Sounds like a slam dunk dish to me. Happy Shower Season, Friends! ❤

______________________________________________________________

Coddled Eggs with Pesto and Potato-Parsnip Purée
Serves 4

Ingredients:

kosher salt
½ pound russet potatoes, peeled and cut into 1 inch chunks
1 medium sized parsnip, peeled and cut into 1 inch chunks
¼ cup heated heavy cream
2 tablespoons unsalted butter, room temperature, divided
1 teaspoon garlic powder
black pepper
4 tablespoons pesto
4 large Safest Choice™ pasteurized eggs
sea salt flakes
chopped parsley
serve with soldiers or other bread of your choice

Prepare the potato-parsnip purée by bringing a medium sized pot of water to a boil. Add ½ tablespoon salt, potatoes and parsnips. Boil until they are tender—about 20 minutes. Drain the root vegetables and either run them through a food mill or ricer. Stir the hot heavy cream, 1 tablespoon butter, and garlic powder into the potato-parsnip mixture. Season with additional salt and black pepper as needed. Set aside.

Take 4 small mason jars or ramekins and use the remaining butter to grease the inside of each jar. Divide and spoon the potato-parsnip purée into the bottom of each of the jars. You can also use a small piping bag to do this. Spread one tablespoon pesto on top of each potato-parsnip purée and then carefully top each with an egg.

Fill a large pot with about 2-3 inches of water and bring to a simmer. Place a steam rack inside of the pot of water and carefully place the filled jars/ramekins on top. Cover the pot and steam the eggs for 8-10 minutes until the whites are set but the yolks are still soft. Alternatively, if using mason jars, screw on the lids of each jar and place directly into the pot to simmer for about 10-12 minutes. If the jars/ramekins that I’m using aren’t very high, I prefer to place them on top of a steam rack.

Once done, top each coddled egg with sea salt flakes and chopped parsley. Serve with soldiers or other bread of your choice.

NPE_DarlingDozenBadges

*DISCLOSURE: As a brand ambassador for the Safest Choice™ Darling Dozen, I was compensated for the creation of this recipe and post. However, as always, all opinions are my own.*

Breakfast/Brunch

Down and Dirty Breakfast Fries

Down & Dirty Breakfast Fries

Sometimes a gal has got to throw frou-frou out the door and just get down and dirty….. for breakfast that is.

I’m talking about turning to premade pantry items that can be thrown together in about 15 minutes to create a gritty, gut bomb breakfast. Something so darn good that you should actually feel a tinge bad about inhaling.

But don’t…. in fact, I’ll like you more for it.

Down & Dirty Breakfast Fries

C’mon now... we’re talking fries with a runny egg. It’s a no brainer.

If you’re aiming for extra credit, you could go the extra mile to fry up your own potatoes and pull together homemade salsa. Heck, I usually would but this dish is all about channeling your old 3am college days. And y’all know I’m not a morning person so the AM is my perfect “out” for taking shortcuts. No guilt here 🙂

Happy Sunday FUN-Day everyone!

___________________________________________

Down and Dirty Breakfast Fries
Serves 1

Ingredients:

2 cups uncooked frozen french fries (or homemade if you want a gold start)
cooking spray
3-4 ounces breakfast sausage
1 egg
2-3 heaping tablespoons salsa
black pepper and kosher salt
chopped cilantro

Place a large piece of aluminum foil over a baking sheet. Spread the french fries in a single layer over the foil and lightly cover with cooking spray. Bake until crispy according to package decorations.

In a skillet, add the breakfast sausage and cook over medium heat. Use a wooden spoon to crumble the sausage and break into small pieces. Cook the sausage until browned and transfer to a plate. Take a paper towel to wipe out the majority of the grease left from the sausage. Return the skillet to the stove over medium low heat.

Crack the egg into the skillet and fry it until the yolk has just set. Plate the baked fries onto a dish and top with the browned sausage, salsa and then fried egg. Add a pinch or two of both pepper and salt over the egg. Sprinkle the plate with the chopped cilantro and enjoy warm.


Breakfast/Brunch · Pizzas · Pork · Sponsored

Potato-Egg-Prosciutto Pizza

Potato-Egg-Prosciutto Pizza

The thing is, I rarely ever have any true vested interest with the Super Bowl. Because although my beloved Vikings may be full of heart, we don’t seem to be able to get our act together to make a showing in the big game.

Well, not since the 70’s at least. Ughh…..

Potato-Egg-Prosciutto Pizza

But that’s not to say that I don’t love to partake in all the Super Bowl festivities.

And by festivities, I mean gluttonous food and adult beverages. Hey, it would be un-American not too!

My loved ones and I typically like to get our Super Bowl parties started early so we can have a full day of indulgence. To kick-off the AM shenanigans, I wanted to come up with something that married the spirit of brunch and football. And what does that better than gorgeous eggs and pizza?!

Potato-Egg-Prosciutto Pizza

Which is fantastic because I’ve been tapped this year to be one of the twelve ambassadors for Safest Choice™ Darling Dozen and thought it was the perfect time to whip up a few recipes featuring their delicious and all natural pasteurized eggs.

I’ve sung their praises before but you can rest easy when using their eggs since their pasteurization process eliminates salmonella. Check out more healthful info about their eggs here.

Potato-Egg-Prosciutto Pizza

In my opinion, this pizza really does have all the necessary components for a savory brunch.

Cheese? CHECK!

Potatoes? CHECK!

Runny eggs? CHECK!

Pork? CHECK!

It even has some greens to make us feel a little better.

A Win-NGUYEN for sure….even if my Vikings don’t. Bleh….

___________________________________________________

Potato-Egg-Prosciutto Pizza
Serves 2

Ingredients:

1 whole garlic head
2 tablespoons olive oil, divided
1 cup thinly sliced new potatoes
½ tablespoon minced fresh rosemary
1/8 teaspoon red pepper flakes
¾ teaspoon kosher salt, divided
6 ounces fresh pizza dough, rested and at room temperature
2 tablespoons all-purpose flour
½ tablespoon corn meal
2 large Safest Choice™ pasteurized eggs
1/8 teaspoon black pepper
2 thin slices prosciutto, torn into small pieces
2 ounces goat cheese
1 cup fresh arugula leaves

Prepare the garlic paste by preheating the oven to 400 degrees F. Peel and discard the outer skin from the garlic head. Cut off the very top part of the garlic head so that the cloves are just barely exposed. Place the garlic head on a piece of aluminum foil and drizzle 1 tablespoon of olive oil over it. Bunch the foil together to cover the garlic and roast for about 30 minutes until the cloves are golden brown. Once cooled, squeeze the cloves out of their skins into a small bowl. Using a fork, mash up the garlic so that it becomes a paste. Set aside.

While the garlic roasts, mix the potato slices, rosemary, pepper flakes and ½ teaspoon kosher salt in a small bowl. Set aside.

Once the garlic has roasted and has been removed from the oven, turn up the oven heat to 500 degrees F. Place a baking sheet on the middle rack of the oven while it preheats.

Take the pizza dough and flatten it with your hands on a floured surface. Use a floured rolling pin to gently roll the crust about 1/8 of an inch. Transfer the rolled out dough to a pizza paddle or lightly floured cutting board. Spread a thin layer of the roasted garlic over the entire pizza dough. Place the potato slices, slightly overlapped, over the top of the pizza. You’ll want to leave two small spaces uncovered where the eggs will rest.

Carefully remove the preheated baking sheet from the oven and sprinkle it with the cornmeal. Slide the pizza onto the baking sheet and bake for 20 minutes. Take the pizza from oven and crack 1 egg into each of the predetermined spots. Place the pizza back into the oven and bake for another 5-7 minutes or until the eggs have set and the crust has become golden brown.

Slide the pizza onto a large cutting board and season with the remaining kosher salt and black pepper. Top with the prosciutto pieces, goat cheese and arugula. Serve immediately.


NPE_DarlingDozenBadges

*DISCLOSURE: As a brand ambassador for the Safest Choice™ Darling Dozen, I was compensated for the creation of this recipe and post. However, as always, all opinions are my own.*