Pork

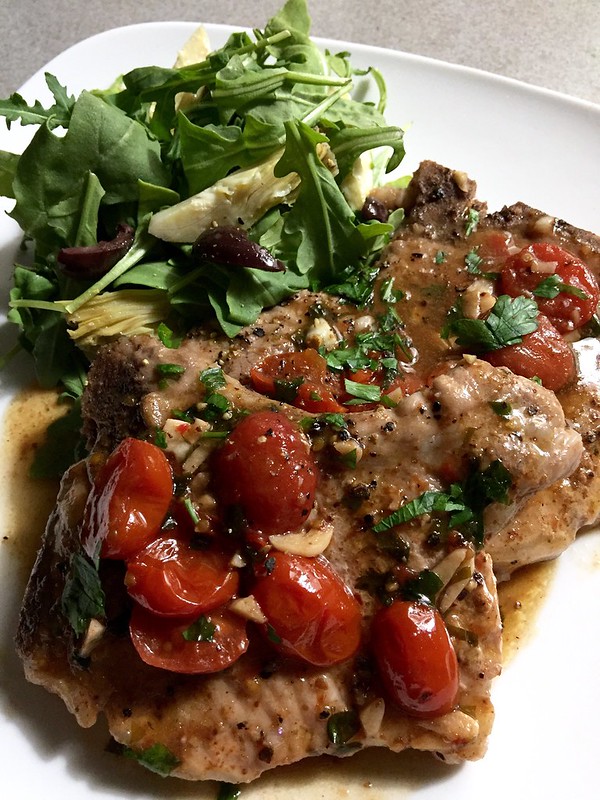
Pan Seared Pork Chops with Tomatoes & White Wine-Garlic Sauce

Pan Seared Pork Chops in White Wine-Garlic Sauce
I’m not sure if I’ve told you but I have had a crazy bout of insomnia….of some serious epic proportions. And before you ask — YES, I’ve tried everything. (But THANK YOU!)

And my poor co-workers and loved ones have been subjected to my deliriousness. Trust me, I’ve been the hottest mess in all of the land. It’s not pretty.

In conversations I vacillate between speed talking (think of Six from Blossom), slow-motion speech and then just blank stares when I forget my train of thought mid-sentence.

I repeat, it’s not pretty. Ugh.

Pan Seared Pork Chops in White Wine-Garlic Sauce

How have I been filling my time?

Through a questionable amount of binge watching shows (how have I never watched Into the Badlands before?!?!), Podcasts (I’m crushin’ on Pod Save America) and reading everything I can get my hands on (any recommendations?).

There’s also been a good amount of QT in the kitchen. If you’ve been following me on Instagram, you know that I’m obsessed with using my Anova Precision Cooker. Yup, I pretty much want to sous vide everything I can get my hands on.

But I still love my quick meals….ones like this little number.
Pan Seared Pork Chops in White Wine-Garlic Sauce
One of my go-to proteins for weeknights are pork chops–particularly these really thin cuts sometimes sold as “breakfast pork chops”. They generally are about ½ – ¾ inch thick and are bone-in. Not only do they have great flavor but they’re super quick to cook up in a skillet.

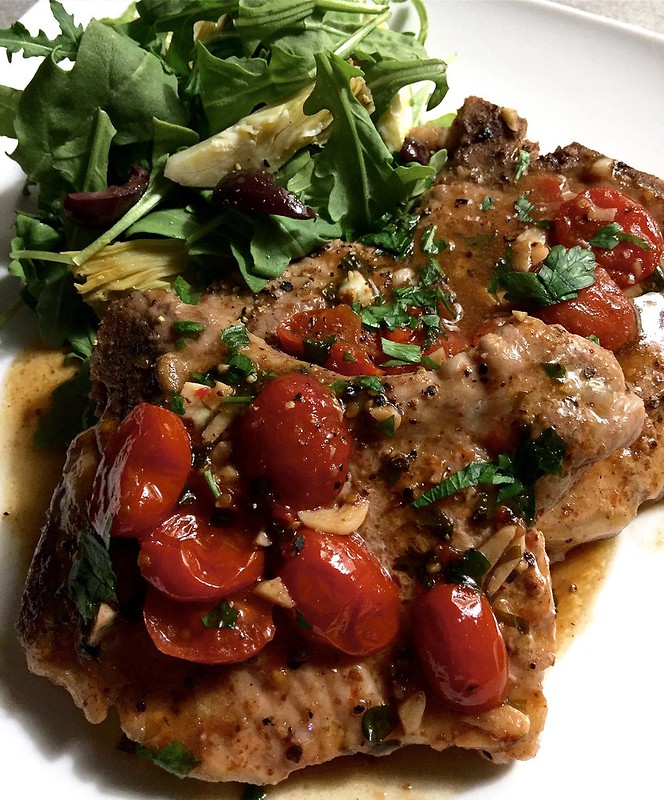
These Pan Seared Pork Chops with Tomatoes & White Wine-Garlic Sauce can be whipped up in under 20 minutes. After a light seasoning, they’re browned up in a skillet before white wine and stock are added to deglaze the pan. Finally, lots of garlic, herbs, tomatoes and butter join the party to make a light sauce that the chops are simmered in for an additional few minutes. The chops are wonderfully savory and there’s great acidity from the wine and tomatoes along with brightness from the fresh herbs.

Total winner.

And I’m not just saying that because I’m half asleep as I type this. 😴

_____________________________________________________________________
Pan Seared Pork Chops with Tomatoes & White Wine-Garlic Sauce
Serves 4

Ingredients:

4 thin bone-in pork chops, ½ – ¾ inch thick
black pepper
kosher salt
1 teaspoon garlic powder
1 teaspoon onion powder
2 tablespoons olive oil
3 tablespoons unsalted butter, divided
1 tablespoon minced fresh garlic
1 cup dry white wine
½ cup chicken stock
½ teaspoon red pepper flakes
3-4 sprigs fresh thyme
1½ cups grape tomatoes, halved
1 heaping tablespoon chopped fresh parsley, more for garnish

Make 4-5 notches around the edges of each chop with a sharp pairing knife about ⅓ inch deep. This will help prevent the edges of the pork chops from curling up. Season each side of the chops with pepper, salt, garlic powder and onion powder.

Bring a large, heavy bottom skillet up to medium-high heat. Melt 1 tablespoon butter into the olive oil and swirl it around the skillet. Sear the chops for about 2 minutes on each side and remove them from the skillet—this can be done in batches if they do not fit all it once in the skillet.

Lower the heat to medium and add the minced garlic to the skillet. Stir around for 45 seconds to a minute –be careful not to burn the garlic or let it get too dark. Pour in the white wine, chicken stock and use a wooden spoon to scrape off the browned bits off the bottom of the skillet. Once the liquids come to a boil, add the red pepper flakes, fresh thyme, tomatoes and allow the liquids to reduce by about a third. Stir in and melt the remaining butter and add all the pork chops back into the skillet. Allow the pork to cook in the sauce for an additional 3-5 minutes, spooning the sauce over the chops every so often so that they are well coated.

Fold in the chopped parsley. Taste the sauce and add additional salt and pepper as needed. Plate the pork chops and spoon the sauce with tomatoes generously over each serving. Garnish with additional parsley and serve with your choice of salad, roasted veggies, rice, potatoes, etc.

Appetizers/Small Plates · Poultry

Game Day Garlicky-Parmesan Chicken Wings

IMG_7316.JPG
There’s no hiding it, I’ve been seriously MIA. With the holidays and the craziness of the Death Eaters overtaking the Ministry, I desperately needed a break to recharge. Trust me, there’s been a TON of cooking with the winter holidays, family dinners, both Western & Lunar New Year, and endless sporting events—-all of which I plan to share with you all soon.

But I needed something to kick start me back into the writing game….and that, my friends, is Football.

IMG_7309.JPG
Truthfully I don’t have a pony in tomorrow’s Super Bowl Game.

Falcons? BLEH!

Patriots? Patooey!

But football, oh–for the love of FOOTBALL! Nothing can beat the frenetic craziness when it’s a good game.

And although I don’t have much stake in the game tomorrow, let me tell you of a game where my whole being was on the line….the 2017 Rose Bowl Game!!!

Did you smell those Roses?!?!

IMG_7307.JPG
Yes Friends…it was the GAME of GAMES where my USC Trojans battled Penn State. Both teams had undergone years of drama, leadership changes, team changes, injuries. But both fought and somehow they found themselves battling it off at one of the most iconic collegiate bowl games–the Rose Bowl.

Despite weeks of endless indulgence, we convened at big seestrah’s house to watch the game. And when it’s game day, there MUST be game day eats!!!

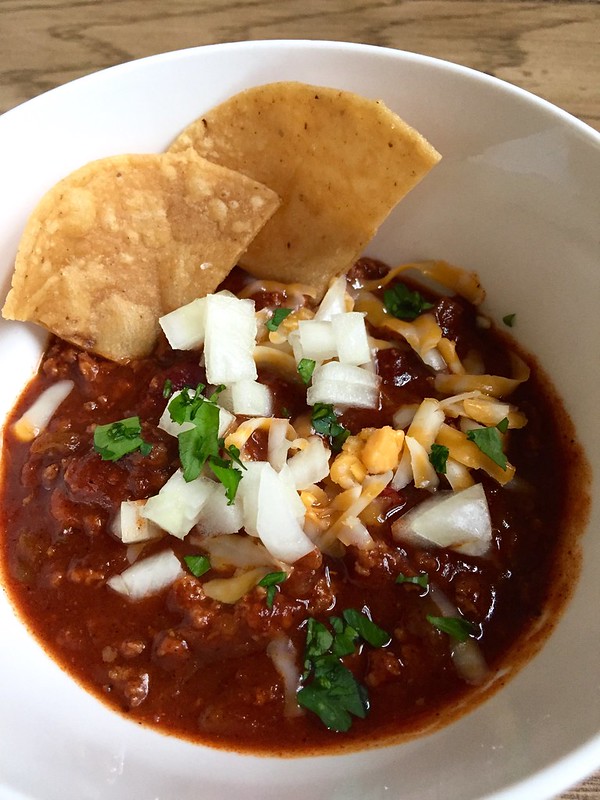
Seester T made a huge pot of rich and comforting Beef and Beans Chili. Her chili is way better than mine which is somewhat unnerving because she just throws things into the pot and poof–amazing chili.

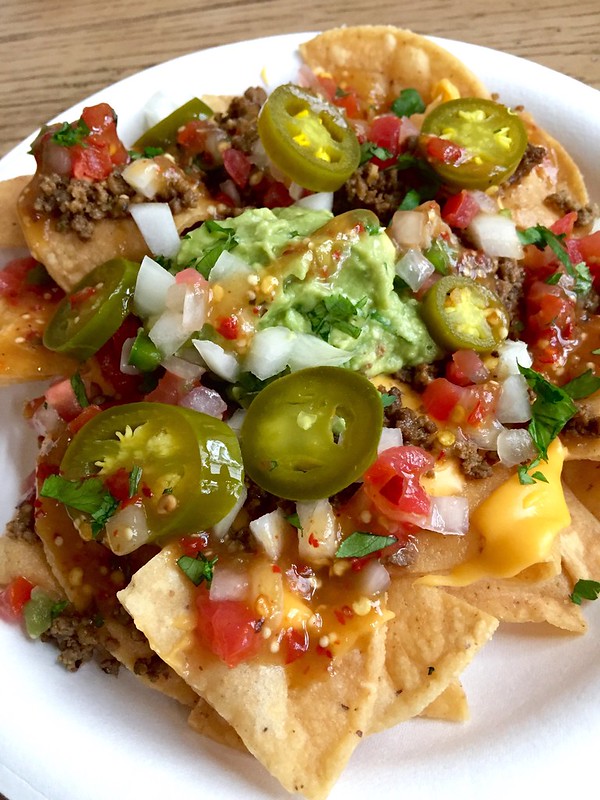
Brother and Seester N tag teamed to get the components together for Loaded Beef Nachos using tortilla chips that I freshly fried. I know it sounds laborious but fresh fried chips make a huge difference!

IMG_7314.JPG

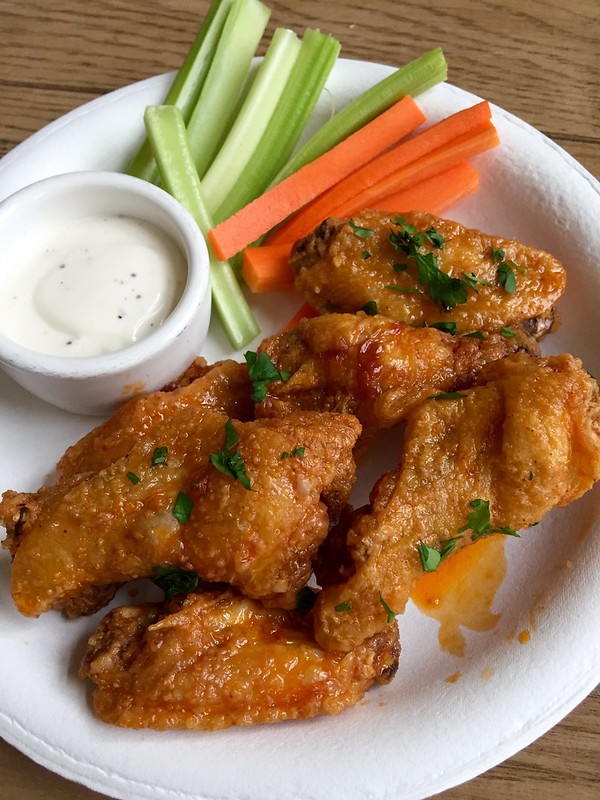
As for me, I was in charge of the Chicken Wings because hot damn–we love us some wangzzzz’!  When in doubt–wing it out!!

I ended up brining the wings overnight in a solution of water, salt, sugar, hot sauce and some other aromatics. I don’t always have the time to do this, so if you don’t–skip it. But I do think it’s worth this extra step as it infuses in an oompf of flavor. Obvi.

I also despise rubbery chicken wings. You know what I’m talking about– wings that haven’t been crisped enough or opt not to use a flour coating. Don’t get me wrong, other than K.F.C. (and I mean Korean Fried Chicken), I generally don’t like a thick breading on my wings–the meat to coating ratio just doesn’t work out well.  But I do like how a light toss in a mixture of AP flour and rice flour (or cornstarch) helps with the crispiness factor.

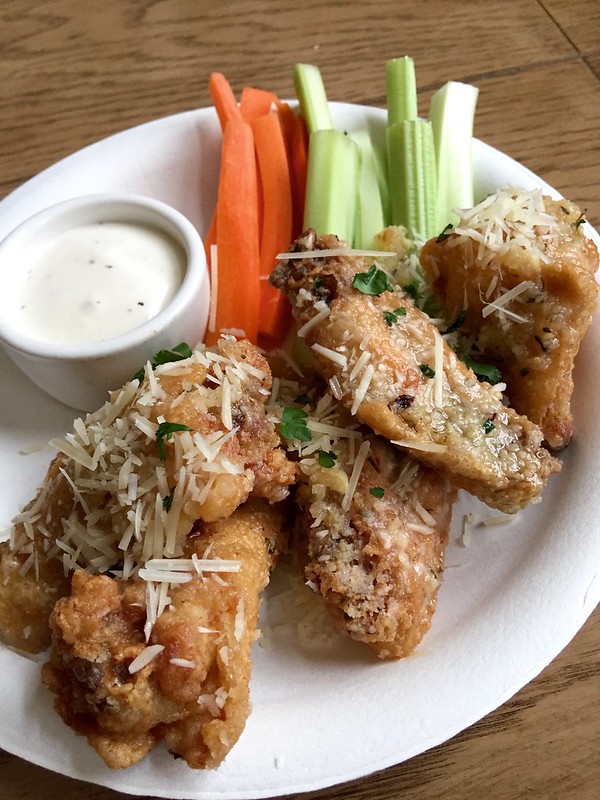
I ended making two types that day – my standard Buffalo Wings and per my niece Nina’s request, these Garlicky-Parmesan Chicken Wings. Super garlicky, super cheesy, super crispy….definitely not diet food.

FullSizeRender.jpg

As for the game….I WAS STRESSED!!!

I won’t lie, I was the hottest mess in all the land.

There was some ridiculously high moments and some terribly low ones when the fam was terrified of what my wrath would be if it didn’t end well for the Trojans. But in the last second, my boys pulled the big W and we (more like I) LOST OUR MINDS!! The joy–OH THE JOY!

So although I don’t have much at stake in the game tomorrow….I can 100% empathize with those who do.

For the love of football, make it a great game tomorrow Pats’ and Falcons……..and as for y’all—please make my Garlicky-Parmesan Chicken Wings ❤

__________________________________________
Garlicky-Parmesan Chicken Wings
Serves approximately 4

Ingredients:

8 cups warm water
1/3 cup kosher salt
1/3 cup sugar
1/3 cup hot sauce, I like Frank’s
8-10 sprigs fresh thyme
8-10 sprigs fresh parsley
1 head of garlic, cut in half
1 lemon, cut in half
1 tablespoon black peppercorns
2 bay leaves
2 pounds chicken wings, separate wings at the joint with tips removed
vegetable oil
2 cups all purpose flour
½ cup rice flour or cornstarch
1 tablespoon onion power
2 tablespoons garlic powder, divided
1 teaspoon cayenne power
1 cup unsalted butter
½ cup olive oil
2 tablespoons finely minced garlic
¼ teaspoon red pepper flakes
1 cup finely grated Parmesan cheese
1/3 cup shredded Parmesan cheese*
½ cup chopped fresh parsley

In a large container, whisk the warm water with salt, sugar, and hot sauce until everything has dissolved. Add the thyme, parsley sprigs, garlic, lemon, peppercorns and bay leaves. Add the chicken wings and push down to ensure that all pieces are submerged. Cover the container and refrigerate overnight or about 8 hours.

Drain the chicken and pat dry with paper towels.

In a large, heavy bottom pot, fill 2-3 inches of oil. Heat until temperature reaches 350 degrees F.

While the oil heats, combine the flour, cornstarch, onion powder, 1 tablespoon garlic power, and cayenne power in a large resealable bag. Close the bag and gently toss until the ingredients have combined. In batches, toss the chicken wings in the dried mixture until well coated and shake off any excess. Place the coated wings on a rack fitted over a baking sheet. This will help set the crust.

Begin making the garlic butter sauce by adding the butter, olive oil, remaining garlic powder, minced garlic and pepper flakes in a small saucepan. Over low heat, cook for 10-15 minutes–be careful not to burn the garlic.

Once the frying oil reaches 350 degrees F, begin frying the wings in batches, turning occasionally. Fry the wings for about 10 minutes each batch until they have turned golden brown. Transfer the fried wings to a clean rack fitted over a baking sheet and keep warm in a low temperature oven. Repeat until all the wings have been fried.

Place all the wings in a large bowl. Add several spoonfuls of garlic butter sauce and grated Parmesan cheese. Toss well until all the wings have been coated—adding more garlic butter sauce as needed. Plate the wings and sprinkle the tops with the shredded Parmesan cheese and parsley. Serve immediately with blue cheese dressing, ranch dressing, carrots and celery sticks.

*I like the different textures that come from using both grated and shredded Parmesan. But if you want to use one over the other–knock yourself out!

Beef

Celebrating Mom’s Birthday with a Rosemary Garlic Ribeye Steak!

sc012fbeaa01

Today we celebrate the birth of a 4’9″ firecracker of a Vietnamese woman who was fiercely loyal, an original hustler, an extraordinary cook, a diehard fashionista, was wholeheartedly stubborn, and a true “Jill of all trades”--our Mom. ❤

sc012f9acd
It’s always a bittersweet time of year for us as Mother’s Day always falls so close to Mom’s birthday. Our emotions vacillate between sadness to laughter, from deep remembrance to joy, mourning to celebration—and of course, love.

This December will mark the tenth year since since her spirit departed for her next adventure. And although it’s hard to believe that the years have passed so quickly, my siblings and I can attest that she is still so greatly missed.

sc012f446301
There are so many things I wished I asked her, so many stories I wished I had recorded her telling, so many things I wished she would have taught me—and good grief, I miss that woman’s cooking to no end.

So I talk to her all the time–and I believe a few of my siblings do, too. Especially when I’m in the kitchen–bustling around like she did so many times during her life. I have a large portrait of her hanging in my kitchen and I’ll jibber-jabber about everything and anything. Because Mom was a total Chatty-Cathy, a trait that my seester T and I definitely inherited –and I am certain she would be amused by our ramblings.

sc012fa829
When Mom was still with us, we all cooked and prepped with her in the kitchen. But, I for one, definitely deferred to her and leaned more towards on the baking side of the house. But when she passed, cooking became our way of keeping her spirit with us. And since she was the original Foodie, I think we all deep down inside, aim to excel in the kitchen to create elaborate things that we know she would have loved.

You can best believe that I often imagine her scolding us if she saw half the stuff we did in the kitchen. We probably weren’t cutting things right, adding too much salt and likely drinking too much wine/cocktails while cooking. Ok…maybe the latter would be focused at some of us more than others. And yes, those “some” would likely be T and I.

Mama 2
With that said, it’s no wonder that my rituals for Mom’s birthday all surround food. Like every year, I started this morning off with an early brekkie at Panera Bread inhaling her favorite Spinach and Bacon Egg Souffle. It’s like a rich quiche but with a puff pastry/croissant-like crust. So sinfully caloric to start a day off with but hey–it’s Mom’s Birthday!

And if you’ve read my previous birthday posts for Mom, you know that this little woman loved her some steaks!!! Filet Mignons and Ribeyes all day, everyday! Ok, maybe not everyday—but she would have wanted to at least. In years past, I’ve celebrate her birthday with:

Mama 3
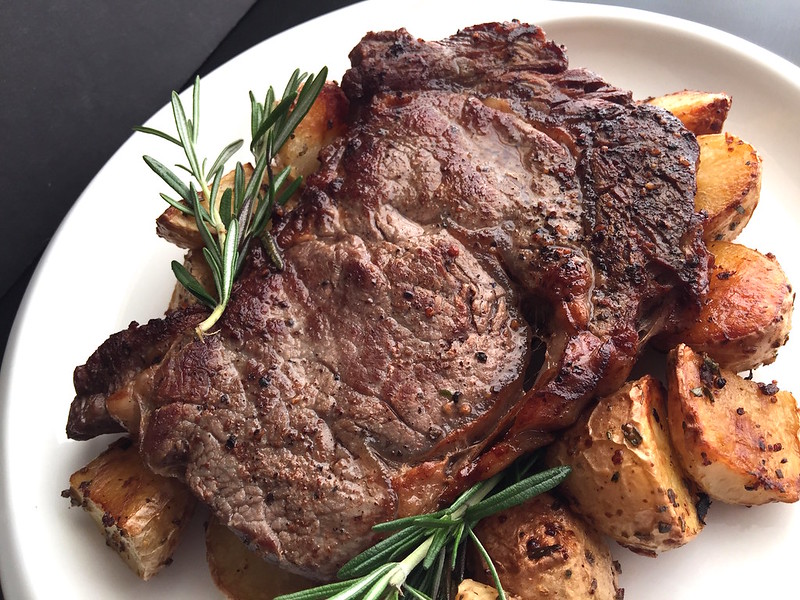
The filet mignon cuts weren’t looking that great when I was at the market but the ribeyes were gorgeous! So for this year, I’m honoring Mom’s birthday with this Rosemary-Garlic Ribeye Steak. I mean, take a gander at this beauty!!!

Rosemary Steak3
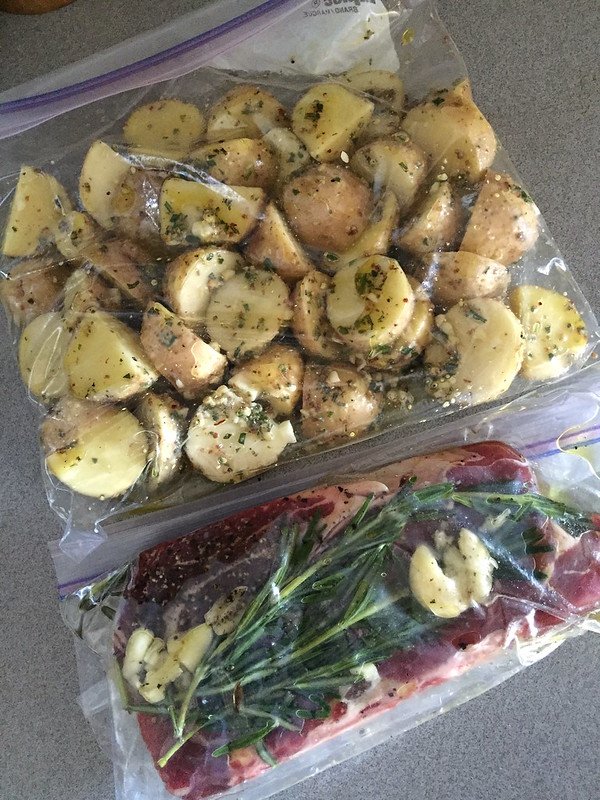
I took the steak, seasoned it with some S&P, and threw it in a resealable bag with some rosemary springs, crushed garlic, and olive oil. It hung out in my fridge for several hours for the flavors to infuse the beef.

Rosemary Steak2
Next came the decision to either grill the steak or cast iron that baby.

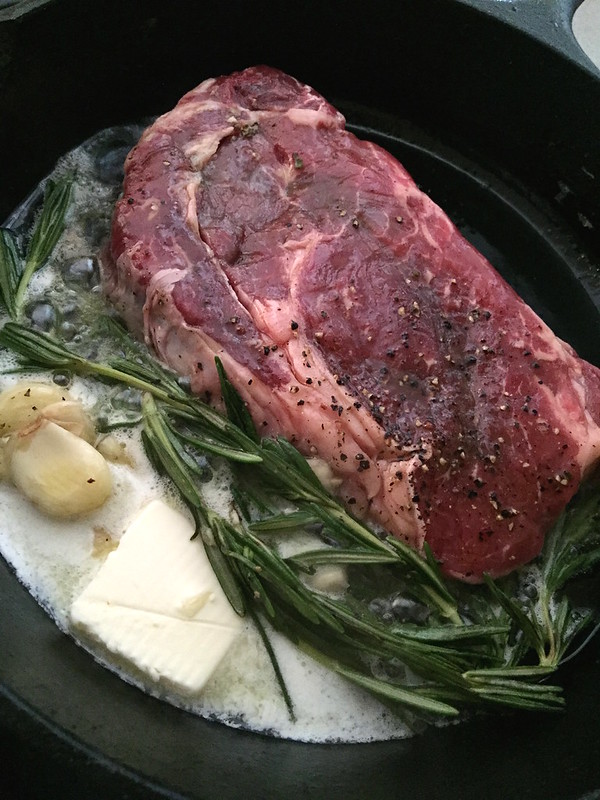
I chose the cast iron method because I LOVE how the beef beautifully sears and crusts in the skillet and it gave me the opportunity to bathe the steak in butter while it seared.

Aaaaand…..I also live in a condo where I’d have to hike downstairs to the common area to use the grill.

So that settled that debate.

Aaaaand…..let’s not talk about how that “hike” is actually a 2 minute walk from my front door.

Steak and Potatoes
Did I mention that the steak gets repeatedly spooned over with infused herb butter/oil? Bathed, I tell ya – BATHED!

Now that’s the way to go…..

Grilled Steak
After a quick sear (and bath) on the stove, I threw the entire thing in the oven for a few minutes to finish it off. Depending on the thickness of your cut, as well as desired cook on your steak, you may need to adjust the timing by a few minutes. But a meat thermometer should do the trick.

And if you’re feeling real naughty, after the steaks rest, you can drizzle the leftover infused butter/oil from the skillet over the beef.

HELLO!!!

Rosemary Steak4

I’m quite certain Mom would have loved this steak—because she loved them ALL! But really, I think she would have just loved that I made it for her and she needn’t lift a finger.

Mama
Happy Birthday Mama!

Wherever you are, I hope you’re enjoying a big ol’ steak today!

We love and miss you!

____________________________________________

Rosemary Garlic Ribeye Steak
Serves 2

Ingredients:

1 16-18 ounce ribeye beef steak or two 8-9 ounce ribeye beef steaks
kosher salt
fresh cracked black pepper
3 large garlic cloves, smashed
4-5 sprigs fresh rosemary
¼ cup olive oil
2 tablespoons unsalted butter
1 tablespoon vegetable oil
flaked sea salt, optional

Season the steak with kosher salt and black pepper. In a resealable plastic bag, add the garlic, rosemary sprigs, olive oil and steak. Rub the marinade all over the beef. Squeeze out as much air as possible and then seal the bag. Refrigerate for at least 4-5 hours. Halfway through the time, take the bag out of the fridge and massage the marinade into the beef.


Remove the steak from the plastic bag. Use paper towels to dry off some of the marinade—do not discard the rosemary or garlic. Allow the steak to sit out at room temperature for 30 minutes.


Place a cast iron skillet on the middle rack of the oven and preheat to 400 degrees F. After the cast iron skillet has heated in the oven for 15-20 minutes and the steak has come to room temperature, carefully remove the skillet and place on a burner over medium-high heat.


Add the butter, oil and allow it to melt together before carefully placing the steak in. Add the sprigs of rosemary and crushed garlic from the marinade bag. Sear the ribeye for 1-2 minutes on each side. While the beef sears, repeatedly spoon the butter/oil over the tops of the meat to baste. Once both sides have seared, transfer the skillet with the steak back into the oven.


Roast the ribeye at 400 degrees F for 3-4 minutes or until the internal temperature

reaches 135 degrees F for medium-rare. Allow the steak to rest for 5-10 minutes and sprinkle the tops with sea salt to finish (optional). You can also drizzle a few spoonfuls of the herb infused oil/butter from the skillet over the steak as there is a TON of flavor it in it. Serve warm with roasted potatoes, veggies or sides of your choice.

Pastas/Noodles · Seafood

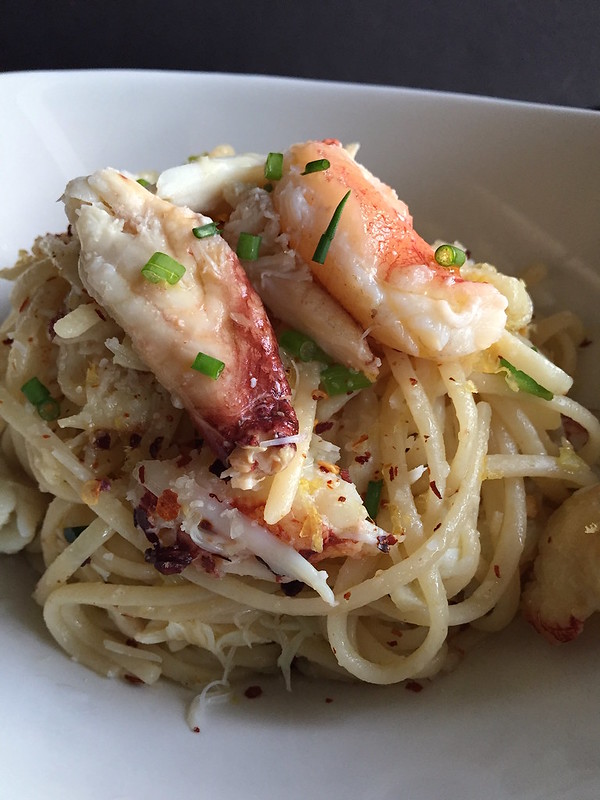
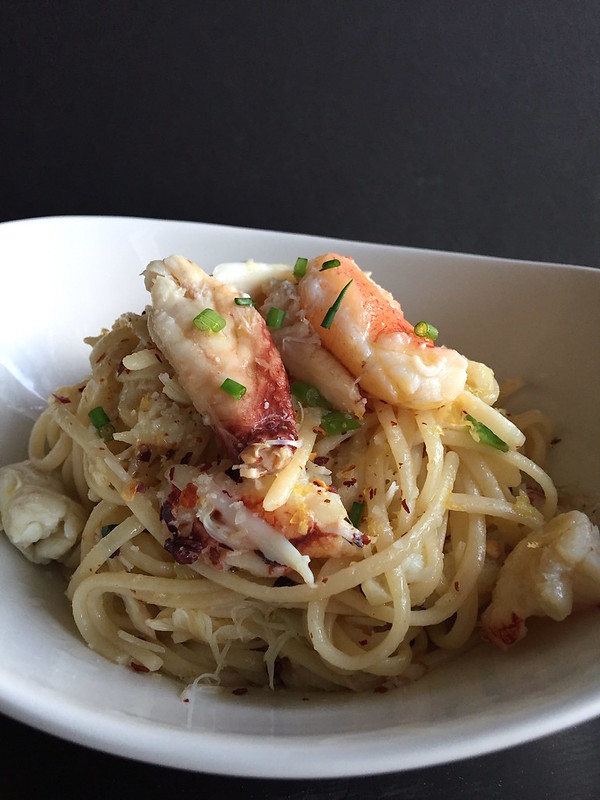
Spaghetti Aglio e Olio with Dungeness Crab

Spaghetti Aglio e Olio with Dungeness Crab
More times than not, you’ll find me rummaging around my pantry and fridge without a plan in mind of what to cook.

Odd for a food blogger?

Well friends, if you’ve been with me for awhile—my quirkiness must have seeped through the screen by now. So there’s really no hiding my “offbeat” approach to things.

Flashback to yesterday night when I was on the verge of turning into a gremlin from hunger. A full blown GREMLIN I tell ya! And I knew I only have a few minutes to pull something together before I passed out on the kitchen floor.

I needed a quick pasta — STAT!!!

Spaghetti Aglio e Olio with Dungeness Crab 2
In dire moments when I’m short on time (or just lazy), pasta aglio e olio is heaven sent! It’s a staple pasta dish from Naples where you infuse good quality olive oil with tons and I mean TONS of garlic and a bit of red pepper flakes. After your pasta is cooked, you toss it in the infused oil and add some herbs and maybe some grated cheese. I do versions of pasta aglio e olio all of the time –sometimes adding a bit of anchovy paste or capers or even a bit of chorizo.

But imagine my utter glee when I remembered that I had some leftover Dungeness crab from the weekend. I seriously squealed “YAYYYYY!” when I saw it in the fridge and did a little dance…… yeah, it doesn’t take much to get a happy dance out of this gal.

Spaghetti Aglio e Olio with Dungeness Crab 3
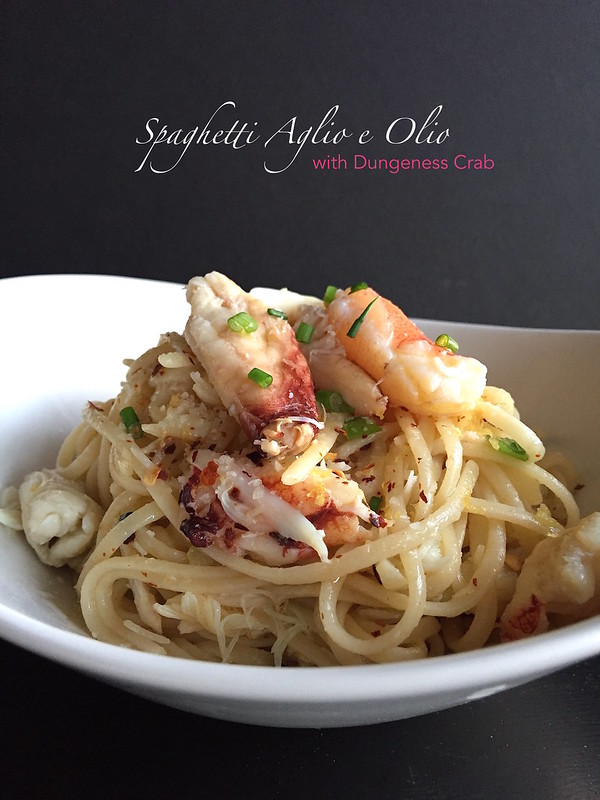
I proceeded with my standard steps for pasta aglio e olio and at the end, tossed in some of the sweet crab meat and just a few pinches of grated parm. I piled a huge mound on the plate, sprinkled some more pepper flakes on top, fresh lemon zest, chives and to add that extra level of decadence for a Monday night–a drizzle of white truffle oil.

HUMINAH! HUMINAH! HUMINAH!!!!!!

It was fantastic! The wonderful sweet and sea flavor from the beautiful Dungeness crab mixed with the garlic punch and bright freshness from the lemon zest—along with the earthy oil. It was all somehow hearty and light at the same time.

Considering I was on the verge of turning into a ravenous monster before/during the cooking process, I hadn’t bothered to take step by step photos to blog about it. But once done, it looked, well–damn sexy! So I took about 37 seconds to snap a couple of pics before inhaling it.

Not only did I manage to suppress the gremlin from emerging but I rocked out a pretty awesome dish in about 15 minutes. That’s a rather successful Monday in this gal’s book.

________________________________________

Spaghetti Aglio e Olio with Dungeness Crab
Servings: 2

Ingredients:

kosher salt, divided
5 ounces dried spaghetti noodles, or other long strand pasta
3 tablespoons quality extra virgin olive oil
1 heaping tablespoon minced garlic
¼ teaspoon red pepper flakes, more to garnish
½ tablespoon grated parmesan or pecorino cheese
4-5 ounces cooked Dungeness crab meat
1 teaspoon fresh lemon zest
1 teaspoon fresh chopped chives
white truffle oil to finish*

Bring a pot of salted water to boil. Add the spaghetti noodles and boil for 8-9 minutes or until al dente. Drain the pasta and reserve ¼ cup of the starchy water that the pasta was cooked in.

While the pasta boils, heat the olive oil over medium-low heat in a large skillet. Add the garlic and cook for 2-3 minutes to infuse the oil. Swirl the skillet often to ensure that the garlic does not burn. Add the red pepper flakes and infuse for another minute. Carefully pour in the reserved starchy pasta water, turn the heat to medium-high and bring it to a boil. Whisk the items together and then toss in the pasta. Stir and toss for about a minute and sprinkle in the cheese and 2-3 generous pinches of salt.

Remove the skillet from the heat and gently fold in the crab. Plate the pasta between two dishes. Sprinkle the tops of each serving with lemon zest, chives and drizzle with white truffle oil. If you do not have truffle oil, drizzle with some additional quality extra virgin olive oil.

Enjoy!


Breads · Side Dish

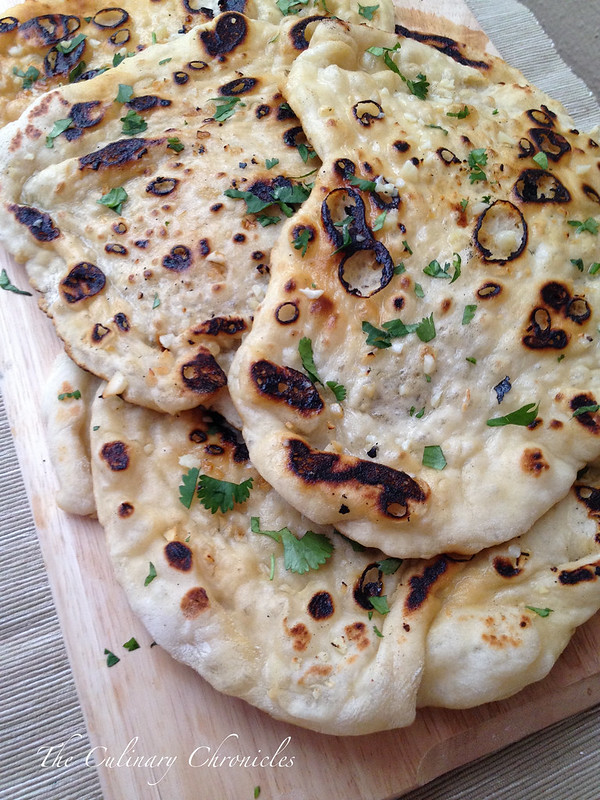
{Cast Iron} Garlic Naan

Garlic Naan

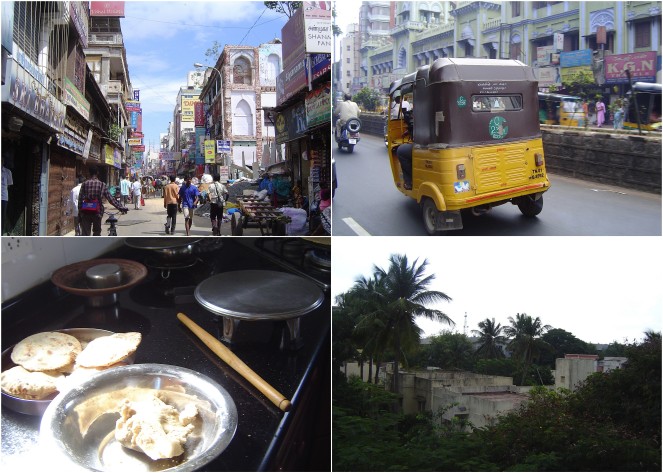
Several years ago I got to spend a little bit of time in India—Chennai to be exact. And as luck would have it, I happened to have visited at the beginning of Diwali – the Hindu festival of lights. Nothing I had read or heard could have prepared me for the country. It’s vivid colors, intense – and I’m talking INTENSE heat, and sounds still replay in my mind as if I was just there. And although I only had a brief 5 days there, the city will forever be imprinted in my heart.

Good thing too because I had such a junky camera at that time — my photos were terrible! 🙂

Anywhoo….

Naan1

Since I only had a short time, I didn’t get to travel around the country too much and stayed primarily in Chennai. I did, however, manage to squeeze in a memorable home stay with a wonderful family –the Bhatts. They welcomed us into their homes, guided us through Chennai and gave us a glimpse of their culture.

Garlic Naan

Over those days, we meandered through the city in and out of markets, braved tuk-tuk rides, and ate—like SERIOUSLY ate. I came to find that Southern Indian food is often vegetarian and was so wonderfully spiced and fulfilling that this carnivore-lovin’ gal didn’t miss the meat. It was also the first time I had ever tried dosas– which I now LOVE.

Dosas are thin “crepes” served with a variety of chutneys. They can be filled or left plain. However, my favorite are the giant paper dosas that are extremely thin and crisp and rolled into a large cylinder. There’s something totally satisfying about breaking off a piece of paper dosa with your fingers and then dunking it into a masala or chutney.

Chicken Aloo Tikka Masala & Garlic Naan

Our home stay mom, Mrs. Bhatt, also did a good amount of cooking during our brief visit. And when she did, I hung around the kitchen trying to make mental notes of how she prepared things. I really wish I would have recorded her rolling out the dough for the parathas because she did it with such lightning speed!

Since my trip, I’ve tried to recreate the flavors I tasted in India –some attempts were definitely more successful than others. Channa Masala and Tikka Masala are on my usual rotation. But I always seemed to have had an issue with making a good naan–which in my opinion, is crucial when I’m devouring the aforementioned dishes. Some recipes turned out too dry or not tender….and others just didn’t taste well.

Garlic Naan

Until I stumbled upon Aarti Sequeira’s recipe–and my search was over. Her recipe uses a combination of both yeast and baking powder which gives it the perfect texture and lightness. I adapted her recipe a bit to make my favorite garlic naan and now there’s no going back.

But here’s the thing. Others will disagree with me but unless you have a tandoori oven (or maybe an outdoor brick pizza oven?), you must–and I mean MUST, use a cast iron skillet. There’s no replacing it. I’ve tried baking naan in a regular oven, in a standard skillet, in an easy-bake oven (PSYCH!) and nothing compares to a cast iron. Just add it to another reason why I adore cast iron skillets so much.

Oh- you better be sure that the next time I manage to get to India, I’ll pack two cameras just in case to capture everything. And although it’s been years, much love and thanks to the Bhatt family for their generous hospitality. ❤

_____________________________________

{Cast Iron} Garlic Naan
Makes 6

Ingredients:

1 teaspoon active dry yeast
2 teaspoons sugar, divided
¾ cup warm water
3 tablespoons plain yogurt
2 tablespoons extra-virgin olive oil
2 cups all-purpose flour, plus more for rolling
1 teaspoon kosher salt, more for finishing
1/8 teaspoon baking powder
2 tablespoons unsalted butter (or melted ghee)
1 heaping tablespoon minced fresh garlic, divided
1 teaspoon garlic powder
sea salt
2 tablespoons chopped cilantro

In a small bowl, stir together the yeast, 1 teaspoon sugar and water. Allow the mixture to sit for about 10 minutes until it becomes bubbly. Whisk in the yogurt and olive oil.

In a large bowl, whisk together the flour, kosher salt, remaining sugar, and baking powder. Pour in the yogurt mixture and use your hands to mix the ingredients all together. The dough will be very wet and sticky at first but continue to mix/knead until it becomes rather soft and pliable. Once it comes together, cover the bowl with plastic wrap and place it in a draft free place for 3-4 hours until it nearly doubles in size.

Place the butter and 1 tablespoon garlic in a small, microwave proof bowl. Heat in the microwave until the butter has melted.

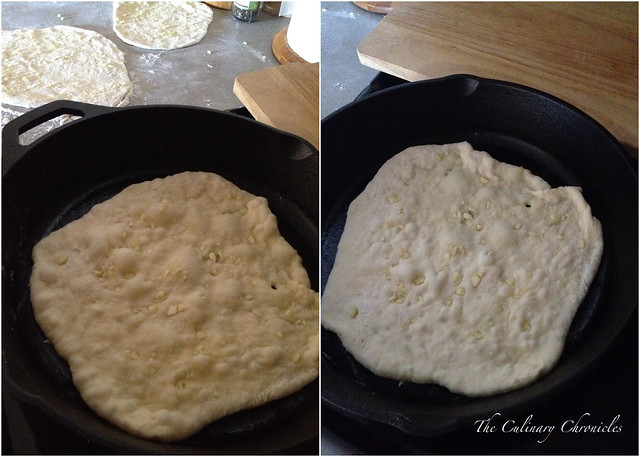
Dust your counter (or other work place) with flour and place your naan dough onto it. Using a pastry cutter or sharp knife, divide the dough into 6 even portions. Lightly roll each of the dough balls into the flour to help them from sticking. Using a floured rolling pin, roll one of the dough portions into a circle about ¼ inch thick –it’s completely okay if it’s an imperfect circle. Sprinkle the top side with a bit of the garlic powder and remaining minced garlic. Use your fingers to press it into the dough and then pass the rolling pin over the top of it to ensure it’s secured. Repeat this method with the remaining dough.

Warm a large cast-iron skillet over medium-high heat until it’s nearly smoking. Be sure to have a lid large enough to fit the skillet and have the bowl of garlic butter with pastry brush nearby.

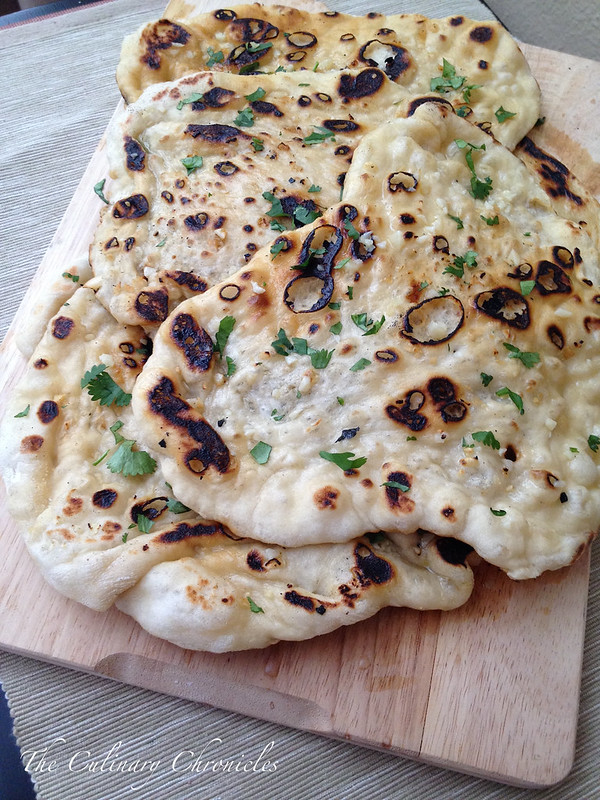
Carefully pick up one of the rolled out naan and gently lay it in the skillet, garlic side up, and cook for about one minute. The dough should start to bubble. After the minute, use tongs/spatula to flip the naan and cook for another 30 seconds to 1 minute. Flip it over again and cover the skillet for about an additional 30 seconds to 1 minute. The bread will look blistered and have blackened in a few spots.

Remove the naan from the skillet and generously brush the top with the garlic butter. Sprinkle the tops with a few pinches of sea salt and chopped cilantro. Repeat with the remaining 5 naan. Serve warm.

Slightly adapted from Aarti Sequeira

Pastas/Noodles · Side Dish · Vegetables/Vegetarian · Vietnamese

“You Know Whose” Copycat Asian Garlic Noodles

Garlic Noodles

You know who I’m talking about right?

The one who I probably shouldn’t name.

No, not Volde–DOH!  Man…that was a close one!

Oh to heck with it…… I’m talking about the An family. You know…the gatekeepers of the Thanh Long, Crustacean, ANQI (and more!) Dynasty!

Garlic Noodles

Oh how I love their butter dripping, garlic staggering roasted Dungeness crab and noodles. Many places have developed their own riff off of Mama An’s famed crab and noodles (including yours truly) but I’ll always have a soft spot for the old nostalgic and original Thanh Long in the Outer Sunset of SF. It’s where my seester first brought the family over 20+ years ago when the restaurant looked like a small mom and pop joint with mismatched plates and peeled painted walls.

Aromatic garlic perfumed the small restaurant with the constant sounds of cracking crab. But a lot has changed since then…..a boom of high-end sister restaurants and the creation of an empire.

But one thing remains the same…..those DAMN GARLIC NOODLES!!!!!!!!!!

Buttery, garlicky, decadent…..SOOO GOOD!

Garlic Noodles

So good that although I’ve posted my knock off recipe nearly 4 years ago, I believe they deserve a re-post. Especially with better pictures! Ugh…I cringe at how bad those earlier photos were.

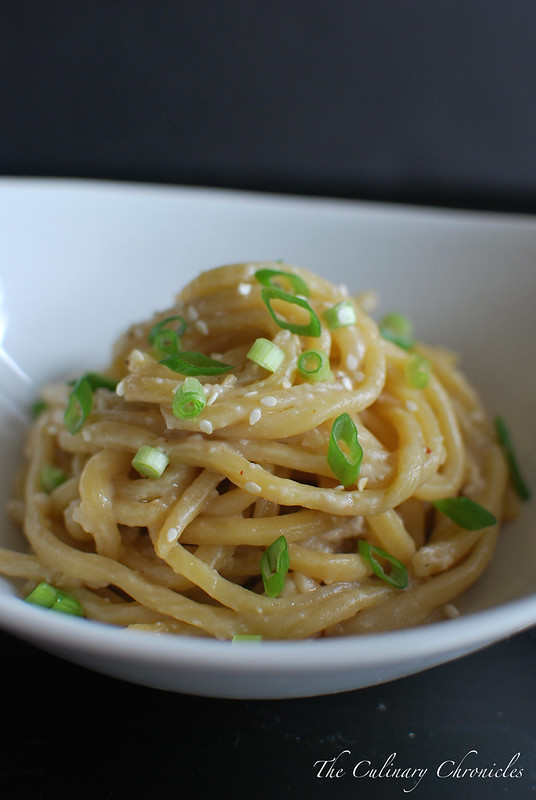
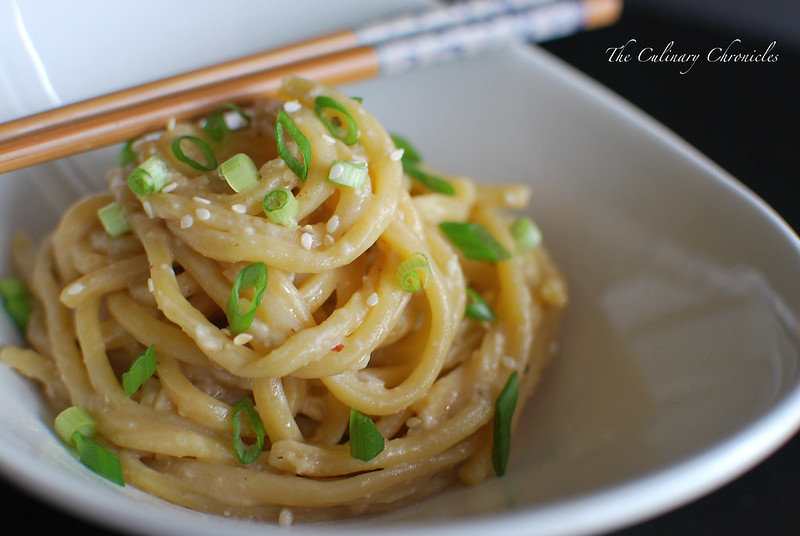
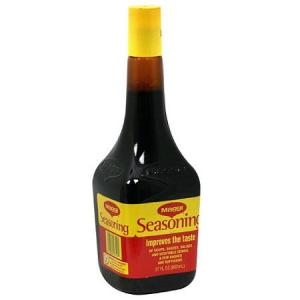
These garlic noodles are so darn easy to make and are the PERFECT accompaniment to seafood—particularly shellfish. But like I said before, you cannot skip out on the magic ingredient – Maggi Seasoning Sauce. Don’t let anyone else lie to you…there’s really no substitute. It’s a couple of bucks and can be found in any Asian grocery store. It lasts a gazillion years so just pick up a bottle and keep it in your cupboard. Just trust me on this.

k2-_7811589a-cadb-480d-98d4-6f9d0287da02.v1

I whipped up these noodles the other week to accompany a quick Asian-style shrimp scampi. The meal was pretty much a BUTTER FEST so obviously it was a hit. But if you want to go vegetarian, sear up some tofu and throw them on a mound of these noodles. You’ll love them just the same.

Now back to trying to scheme–I mean “build” my own empire……

_______________________________

“You Know Whose” Copycat Asian Garlic Noodles
Serves Approximately 4

Ingredients:

1 pound chow mein noodles (fresh if possible)
2 tablespoons olive oil
¼ cup unsalted butter
3 tablespoons minced garlic
¼ teaspoon red pepper flakes
½ tablespoon light brown sugar
1 tablespoon Maggi Seasoning
¼ teaspoon freshly cracked black pepper
¼ cup grated Parmesan cheese
1 scallion, chopped
2-3 pinches toasted sesame seeds

Cook the chow mein noodles according to the direction on the package. Drain the noodles, reserving a few tablespoons of the starchy water.

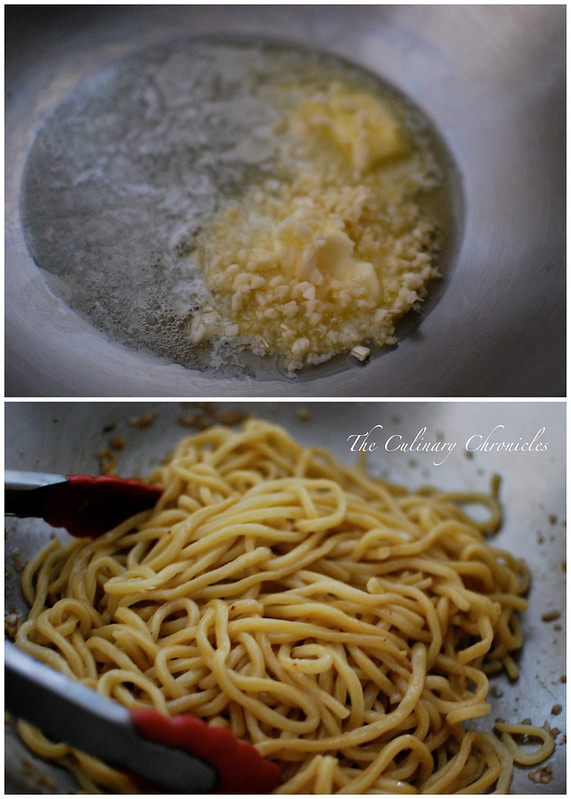
In a wok or large sauté pan, melt the butter and olive oil over medium heat. Add the garlic and sauté until aromatic but not browned, approximately 1-2 minutes. Add the red pepper flakes, sugar and Maggi. Stir until the sugar is dissolved.

Remove the wok from the heat and quickly toss the noodles into the mixture. Sprinkle in the black pepper and cheese. Toss the noodles ensuring that it is thoroughly covered. You may add a tablespoon of the pasta water as needed to loosen the pasta.

Transfer to a serving dish and garnish with the scallions and sesame seeds. Serve immediately.

Pastas/Noodles · Seafood

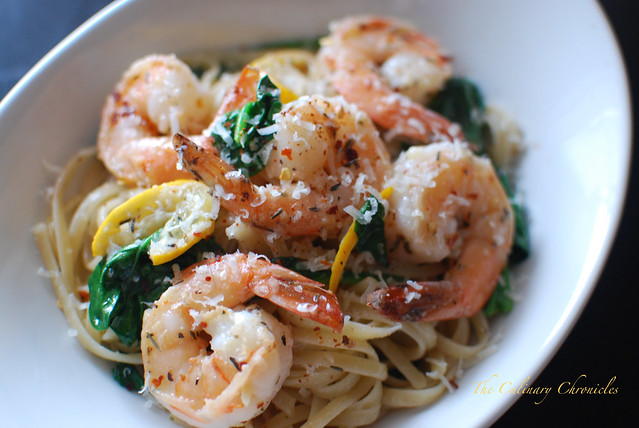
20-Minute Garlicky Shrimp Scampi with Spinach

Untitled

When I was in the elevator at work yesterday, I overheard someone saying how they made their grandma’s famous linguine alle vongole for Easter Dinner.

And then it was over.

I craved pasta all day long.

Preferably a pasta that someone’s grandma made but beggers can’t be choosers–I had to settle for something I could wrangle up.

20-Minute Garlicky Shrimp Scampi with Spinach

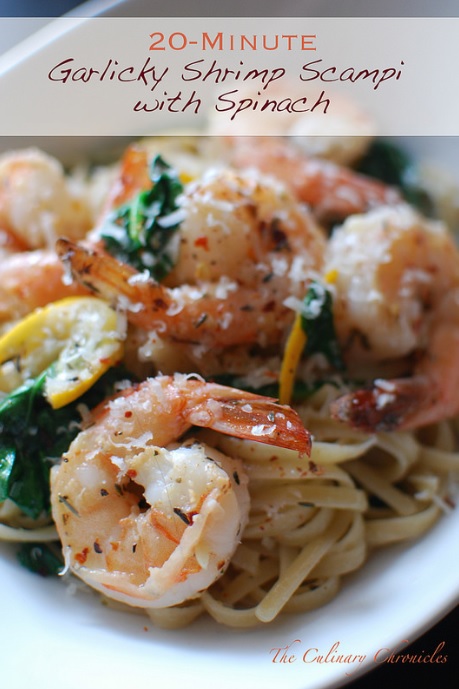
So as I drove home I did a quick inventory of what I had in the fridge/freezer and decided upon a quick shrimp scampi. I have a delish recipe for Shrimp Scampi on the blog already but I wanted to change it up a bit.

I opted to throw in some fresh spinach leaves at the end for a bit of greens. I had originally played around with the idea of adding peas but went for the spee-natch instead. But who knows, I may throw some peas in next time for some oohs and ahhs.

Peas and thank you!

20-Minute Garlicky Shrimp Scampi with Spinach

The pasta was bright, citrus-y, uber garlicky (vampires beware) and totally satisfying. And the best thing? Despite me calling this a 20-Minute Garlicky Shrimp Scampi with Spinach, you can probably have it done in 15. But why not pour yourself a glass of wine during the process and take the few extra minutes?

Cheers!

_______________________________________________

20-Minute Garlicky Shrimp Scampi with Spinach
Serves 2

Ingredients:

kosher salt
4 ounces dry linguine or spaghetti pasta
½ pound shrimp, cleaned and deveined
1½ tablespoons minced garlic
½ teaspoon red pepper flakes, more to garnish
1/8 teaspoon dried thyme
½ teaspoon garlic salt
2 tablespoons olive oil
4-5 thin slices lemon
½ cup white wine
1 tablespoon fresh lemon juice
2 tablespoons unsalted butter
black pepper
2 handfuls (about 2 cups) spinach leaves
fresh grated parmesan cheese

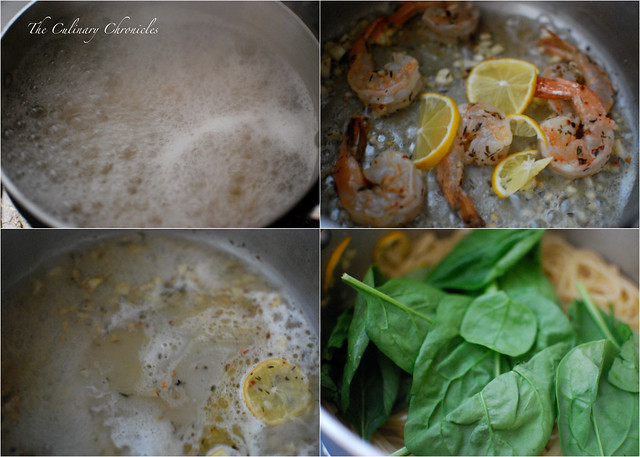
Boil the pasta for approximately 8-10 minutes in heavily salted water until al dente. Drain the pasta and reserve ¼ cup of the starchy water that the pasta was cooked in.

While the pasta boils, mix the shrimp, garlic, red pepper flakes, thyme, and garlic salt together in a bowl. In a large skillet, heat the oil to medium heat. Add the shrimp (with all the garlic and herbs) and lemon slices* to the skillet. Cook the shrimp on both sides until they turn pink—approximately a minute on each side. Remove the shrimp to a clean bowl/plate.

Turn the heat to high and pour the the wine into the skillet. Use a wooden spoon and scrape the bottom of the skillet to release all the brown bits. Allow the wine to come to a boil and add the lemon juice. Reduce the liquid for 2-3 minutes on the high heat. Add the butter and whisk/melt it into the reduced wine.

Turn the heat to medium-low and toss in the cooked/drained pasta. Vigorously toss the pasta with the sauce, adding a tablespoon at a time of the pasta water until you reach your desired consistency. Season the pasta with additional kosher salt and black pepper as needed. Toss in the spinach and plate the pasta with the light sauce.

Top each dish with the cooked shrimp. Sprinkle the top with additional red pepper flakes and parmesan cheese. Serve immediately.

*While plating the pasta, you can remove the cooked lemon slices. Some do not enjoy the slight bitter taste of biting into cooked lemons but I’m all about it.

Side Dish · Vegetables/Vegetarian

Roasted Garlic Mashed Cauliflower

Roasted Garlic Mashed Cauliflower

It’s June in San Diego and I’m about 3 months late on starting my beach-bod workout regiment.

What can I say? Siri forgot to add it to my calendar.

So I’ve been doing what I can, a little bit at a time to make up for it. Cutting out caffeine (which explains my Dr. Jekyll/Mr.Hyde personality in the AM), taking the stairs instead of the elevator, cutting back on starches & sweets, doing quick jogs instead of trying to motivate for several mile-runs, and supplementing my produce intake with daily juicing or fresh green smoothies.

Roasted Garlic Mashed Cauliflower

But you know what my achilles is?

Bread and potatoes.

I could inhale bread and potatoes 24/7. Fine if I was some hardcore athlete but the last time I checked, Instagramming hadn’t been deemed a sport yet.

It’s particularly tough when I’m grilling up some goodness and all that’s missing is a huge pile of mashed potatoes.

Drools…..

Roasted Garlic Mashed Cauliflower

In an attempt to fool my mind while trying to create something lighter that still tastes yummy, I started roasting cauliflower and mashing it up with roasted garlic. Cauliflower is considered a “non-starchy” vegetable but when cooked and mashed (or pureed) it can take on a lot of similar textures as my beloved spud.

Roasted Garlic Mashed Cauliflower

And you know what?

It’s delicious-really! The cauliflower starts to caramelize when you roast it and when you add the rich and almost sweet flavor from the roasted garlic—you’re in for it!

This hearty Roasted Garlic Mashed Cauliflower will never fully replace my taters, but it’s a darn good stand in until I go P90X on y’all.

_____________________________________________

Roasted Garlic Mashed Cauliflower
Serves 4

Ingredients:

1 large cauliflower head, cut into florets
12-15 garlic cloves, peeled
olive oil
kosher salt
1/2 teaspoon garlic powder
1/4 teaspoon black pepper
1 teaspoon chopped chives

Preheat oven to 400 degrees F.

On a baking sheet, toss the cauliflower and garlic cloves with 2-3 tablespoons of olive oil. Season with kosher salt and roast for 20-25 minutes until tender and golden brown. Stir and turn every 5-10 minutes.

Transfer the roasted cauliflower and garlic to a large bowl. Add an additional 1 tablespoon olive oil (or 1 tablespoon butter, if you prefer) and garlic powder. Using a potato masher or ricer, mash the cauliflower until it reaches an even consistency.

Season with additional salt and pepper as needed. Stir in chives (0ptional). Serve warm.

*If you’re looking for a gluten free method, be sure to use gluten free marked garlic powder and butter.

Lamb · Sunday Family Dinner

Rosemary-Garlic Lamb Rib Chops

Rosemary-Garlic Lamb Rib Chops

I’ve been rather bad about reporting on our Family Dinners over the past few months. And not because our menus weren’t delish but somehow amongst the endless events, time slipped by.

December’s dinner menu featured Mexican-inspired fare. We had a variety of fresh salsas, chicharrón, ceviche, salmon-dill tacos, rice, and beans. I whipped up some mango margaritas and my beer braised carnitas. And although it may not have been Latin, our sis, P, made a ridiculously amazing chocolate bread pudding. The icing on the cake? It was our adorable nephew, Leonidas’ 1st birthday!

February Family Dinner

For January, we let my seester, T, and our niece pick the theme as they’re Jan-Babies. So we were off to the islands for mouthwatering, ono grindz! Our spread included mai tais and my take on hamachi-ponzu shooters. Our eldest seester created a wonderfully light yet fulfilling banana leaf-wrapped monk fish with a curry sauce. And for dessert? Big seester made molten lava chocolate cakes and paired them with my toasted coconut ice cream and guava ice cream.

With island music playing throughout dinner, it was almost—almost like we were in Hawai’i. <le sigh….>

Rosemary-Garlic Lamb Rib Chops

For this month, we revisited Italia. Big seester got me a ravioli mold for Christmas and we were eager to give them a try. For our entrées, we had raviolis three ways: butternut squash with brown butter sage sauce, spicy sausage with a marinara sauce, and lump crab with a pesto sauce. They were quite the success considering it was our first time making raviolis. And because I learned from October’s Family Dinner, I invested in a hand crank pasta machine. Best…idea…ever.

Since I knew it was going to take us some time to get the raviolis to the dinner table, I wanted to make a heartier-than-usual appetizer. We’re a big fan of lamb chops so I turned to my trusted recipe using a ton of rosemary and garlic. By slicing the racks into rib chops while giving them ample time to marinate, the lamb is able to seep in a ton of great flavor. And because my fam loves condiments, I made a quick and herbaceous gremolata to pair with the lamb to help brighten the gamey flavor.

We also found that a light sprinkle of sea salt over the rib chops not only added the perfect seasoning but it also added some great texture. My fam gobbled these appetizers up in no time flat but they can also be served as a mouthwatering entrée.

Can’t wait until next month’s Fam-Din!

______________________________________

Rosemary-Garlic Lamb Rib Chops
Serves 4-6

Ingredients:

Lamb
½ cup chopped rosemary
2 heaping tablespoons minced garlic
zest of 1 lemon
1 teaspoon red chili flakes
¼ cup extra virgin olive oil
16 lamb rib chops, Frenched and trimmed (approximately 2 Frenched racks)
kosher salt and black pepper

Gremolata
1 cup chopped Italian parsley
¼ cup fresh basil
2 garlic cloves, chopped
2 tablespoons lemon juice
¼ teaspoon red chili flakes
½ cup extra virgin olive oil
kosher salt and black pepper

Optional
sea salt

In a small bowl, mix together the rosemary, garlic, lemon zest, red chili flakes and olive oil. Place the lamb rib chops in a large shallow dish or gallon sized resealable bags. Season the lamb well with kosher salt and black pepper. Pour the herb mixture over the lamb and turn the chops around to coat well. Cover and refrigerate for 6-8 hours (I like mine to marinate overnight).

Prepare gremolata by adding parsley, basil, garlic, lemon juice, and red pepper flakes into a food processor. Pulse to combine. On low, stream in the olive oil until you reach a smooth consistency. Season with salt and pepper.

Remove the lamb 15 minutes before cooking. Preheat grill to medium high. Grill the chops on each side for 2-3 minutes until the internal temperature reaches 130 degrees F for rare or 135-140 degrees F for medium. Allow the lamb to rest for 5 minutes before serving.

Serve the lamb rib chops with a sprinkle of sea salt over the top (optional) and gremolata.

Breads · Pizzas

Whole Wheat Pizza with White Garlic Sauce

Whole Wheat Pizza with White Garlic Sauce

You’ll never hear me saying that I’m a “healthy eater“.

But I do like to believe that I’m a “balanced eater“.

Need some clarification?

Well, let’s say I stop by Fatburger for lunch (which, incidentally, is one of my FAVES!) and inhale a Baby Fat Burger with Bacon and an Egg. I’ll enjoy every bite and morsel without guilt because I know that night, I’ll fix up some type of grilled fish and veggies for dinner.

Balanced Eating.

Well, in my book at least.

And that’s how I see this pizza. I made a rich, creamy white sauce packed with roasted garlic and smothered it on top of a whole wheat pizza dough.

Balanced.

Or Delusional. Same difference, really. 🙂

_______________________________________________

Whole Wheat Pizza with White Garlic Sauce
Serves 4

Ingredients:

Dough (From Cooking Thin with Chef Kathleen):
2 1/2 cups whole wheat flour
1 cup unbleached all-purpose flour
2 packages dry active yeast
1 teaspoon salt
1/2 teaspoon sugar
1 1/2 lukewarm water from the tap
1/2 teaspoon olive oil
Flour for the work surface
Sprinkling of  cornmeal

White Garlic Sauce:
1/2 cup roasted garlic
3/4 cup milk, warmed
1 1/2 tablespoon flour
1 tablespoon olive oil
1 tablespoon unsalted butter
1 tablespoon parmesan cheese, finely grated
2 pinches dried oregano
2-3 pinches cayenne pepper, to preference
kosher salt

Toppings:
1/2 cup fresh mozzarella cheese, sliced
1/2 cup caramelized onions
2 tablespoons fresh basil, chiffonade
whole basil leaves
parmesan cheese
red Chili Flakes

Prepare pizza dough. Place flour, yeast, salt and sugar in a mixer fitted with a dough hook. While mixer is running, gradually add water and knead on low speed until dough is firm and smooth, about ten minutes. Turn machine off. Pour oil down inside of bowl. Turn on low once more for 15 seconds to coat inside of bowl and all surfaces of dough with the oil. Cover bowl with plastic wrap. Let rise in warm spot until doubled in bulk, about two hours.

Preheat your oven to highest setting, 500° or 550°F. If using a pizza stone, place stone in oven on bottom rack, preheat oven one hour ahead.

When dough is nearly risen, begin making the sauce. In a pan, melt the butter into the olive oil over medium heat. Sprinkle in the flour—combine and cook for a 1-2 minutes. Whisk in the heated milk, careful to not let any lumps form. Continue cooking and whisking for a few minutes until the sauce has thickened to desire consistency. Remove from heat and stir in oregano, cayenne, parmesan cheese, and roasted garlic. Taste and add salt as needed. Set sauce aside.

Punch pizza dough down, cut in half. On generously floured work surface, place one half of dough. By hand, form dough loosely into a ball, stretch into a circle or desired shape. Once the oven reaches its temperature, pull the baking stone/baking sheet out of the oven, and sprinkle cornmeal on the surface. Carefully slide the formed dough on top and bake for 5 to 10 minutes until the dough is lightly golden. Remove the crust from the oven and spread the sauce evenly over the dough, leaving a ½ -inch border around the perimeter. Top with the caramelized onions, sliced mozzarella and the chiffonade of basil. Return the pizza back to the oven and bake for an additional 10-15 minutes until all the cheese has melted and pizza is golden brown. Serve the pizza with additional fresh basil leaves, parmesan cheese and red chili flakes.